Pgm: PYEMPHISTIMP – Import Employee History; standard Treeview path: US Payroll > Utilities > Employee History Import
This screen allows users to upload a CSV file containing details of an employee's employment history.
Import File
Press the [Import File: Step 1] button to begin the import process. This will launch the Upload Documents pop-up, which allows users to select files or to paste data from a CSV file. A message will appear to indicate that the records were imported successfully. A CSV template is also available for download.
Below is an example of how the CSV file should be laid out. Data should be entered in the following columns: Employee ID, first name, last name, effective employment date, reason for leaving, hourly rate, charge out rate, billing rate.

Once the correct CSV file has been imported successfully, close the Upload Documents pop-screen. Then, press [Import File: Step 2] to save the imported record.
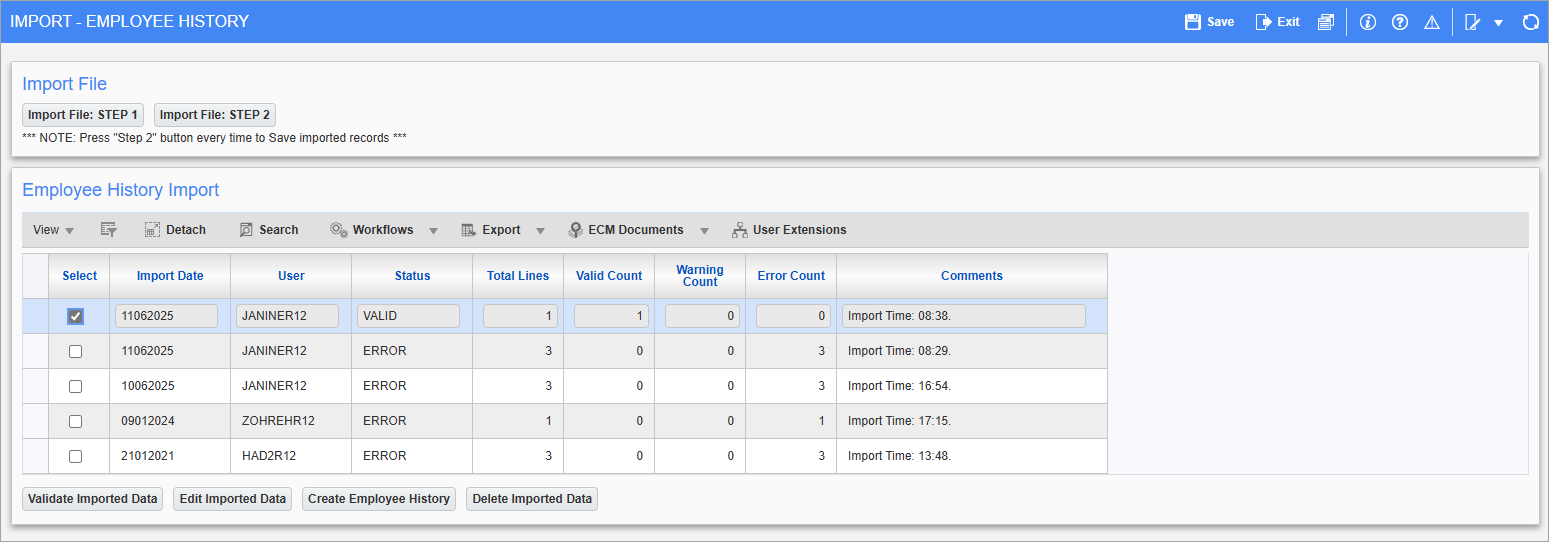
Employee History Import
The imported data will then appear in the Employee History Import section. From here, correct any invalid records by pressing the [Edit Imported Data] button. Once all imported data has been validated, select the data lines to transfer to the employee and press the [Create Employee History] button.
Select – Checkbox
Check this box to select the imported record. Only one record can be selected at a time.
[Validate Imported Data] – Button
Press this button to validate the selected records. If any updates are subsequently made to the imported records, then this button is used to re-validate those changes. A message will indicate the number of valid or invalid records, and the Status field will update to either "Valid" or "Error". The Total Lines, Valid Count, Warning Count, and Error Count fields will be updated accordingly.
[Edit Imported Data] – Button

Press this button to launch the Edit Imported Data screen, which allows users to view the selected record's errors/warnings and to edit and re-validate the data as required.
[Create Employee History] – Button
Press this button to transfer the selected data lines to the employee(s). Once the Employee History record is successfully created, the import will be removed from the screen. Changes can be viewed in the Employee History screen and modifications can be tracked in the Employment History Adjustment screen for each employee.
[Delete Imported Data] – Button
Press this button to remove incorrect data, such as non-valid rows with "Error" in the Status field. Once the invalid data is removed, users can correct the data and restart the import process.