
Pgm: PYEMPMAC_IMP – Employee Direct Deposit and Check Accounts Import; standard Treeview path: US Payroll > Imports > Import Employee Direct Deposit and Check Accounts
The Employee Direct Deposit And Check Accounts Import screen is used to import employee bank accounts. Employee records must be set up in the Employee Profile screen in order to use this screen.
NOTE: This screen is also available in the International Payroll module (standard Treeview path: International Payroll > Utilities > Import Employee Direct Deposit and Check Accounts).
Employee bank accounts can be viewed in the US Payroll - Direct Deposit and Check Accounts screen (standard Treeview path: US Payroll > Setup > Employees > Direct Deposit and Check Accounts).
Importing New Records
Users must import a complete data set to insert a new record. If validated, the data can be inserted as a new record.
A CSV template is available to download after clicking the [Import File] button.
The following information is included:
-
Company Code
-
Employee Code
-
Salary Split Type
-
Split Number
-
Split Method
-
Transaction Type
-
Transaction Code
-
Split Percent
-
Split Type
-
Bank Code
-
Branch Code
-
Normal Transaction Code
-
ACH Transaction Code
-
Bank Account Number
For more information on these fields, please refer to US Payroll - Direct Deposit and Check Accounts.
Import Process
Step 1: Import File
![Screenshot of File Upload and Import pop-up launched from [Import File] button](../../../../Resources/Images/PYU_12c_for_import/PYU_ImportEmployeeDirectDeposit_2.png)
File Upload and Import pop-up launched from [Import File] button
Click the [Import File] to begin the import process. The [Import File] button will launch the File Upload and Import pop-up window. Either use the “Drag and drop a file or click to select” option, or copy data from an Excel spreadsheet and paste it in the "Paste From Excel" option. For convenience, the [Download CSV Template] button is available to download a copy of the import CSV template.
Press the [Refresh] button to see the data displayed in the Import Direct Deposit and Check Accounts section of the screen. The Status field displays “NEW” when data is initially uploaded.
Step 2: Validate Imported Data
![Screenshot of Employee Direct Deposit And Check Accounts Import with [Validate Imported Data] button highlighted](../../../../Resources/Images/PYU_12c_for_import/PYU_ImportEmployeeDirectDeposit_3.png)
Validating imported data
Click the [Validate Imported Data] button to validate the imported data. A message will indicate the number of valid or invalid records, and the Status field will update to either "Valid" or "Error". The Total Lines, Valid Count, and Error Count fields will be updated accordingly.
Step 3: Show Errors
![Screenshot of Errors pop-up launched from [Show Errors] button](../../../../Resources/Images/PYU_12c_for_import/PYU_ImportEmployeeDirectDeposit_4.png)
Errors pop-up launched from [Show Errors] button
If there is an error with the imported file, the Status field will display "Error" and the [Show Errors] button will be enabled. Press the [Show Errors] button to launch the Errors pop-up window where the error can be reviewed. Once corrected, users can delete the record containing the error and re-import the file.
Step 4: Process Import
![Screenshot of Employee Direct Deposit And Check Accounts Import with [Process Import] button highlighted](../../../../Resources/Images/PYU_12c_for_import/PYU_ImportEmployeeDirectDeposit_5.png)
Processing imported data
If there are no errors, the Status field will display "Valid" and the [Process Import] button will be enabled. Press the [Process Import] button to process the import. The Status field will display "Processed" if the file has been processed successfully, as shown in the screenshot below.
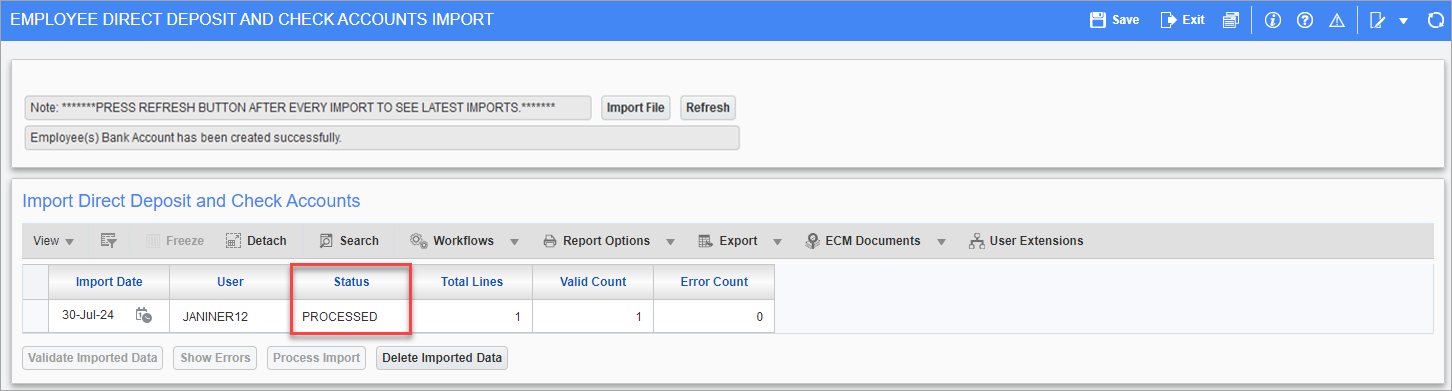
Example of processed import data
Step 5: Delete Imported Data
![Screenshot of confirmation pop-up launched from [Delete Imported Data] button](../../../../Resources/Images/PYU_12c_for_import/PYU_ImportEmployeeDirectDeposit_7.png)
Confirmation pop-up launched from [Delete Imported Data] button
To delete imported data (e.g., to remove imported data with errors), press the [Delete Imported Data] button and press [Yes] in the confirmation pop-up.