Why is it Useful?
CMiC has added a mass update feature to the Issues log, RFIs log, and Punch List Item log in Construct PM web deployment to allow users to perform a batch edit by selecting multiple records and updating them simultaneously. The Batch Edit option is a time-saving feature since now instead of manually editing each record separately, updates can be applied to a selection of records in a single action.
NOTE: This feature was released in Patch 19.
How Does it Work?
Issues Log (Web)
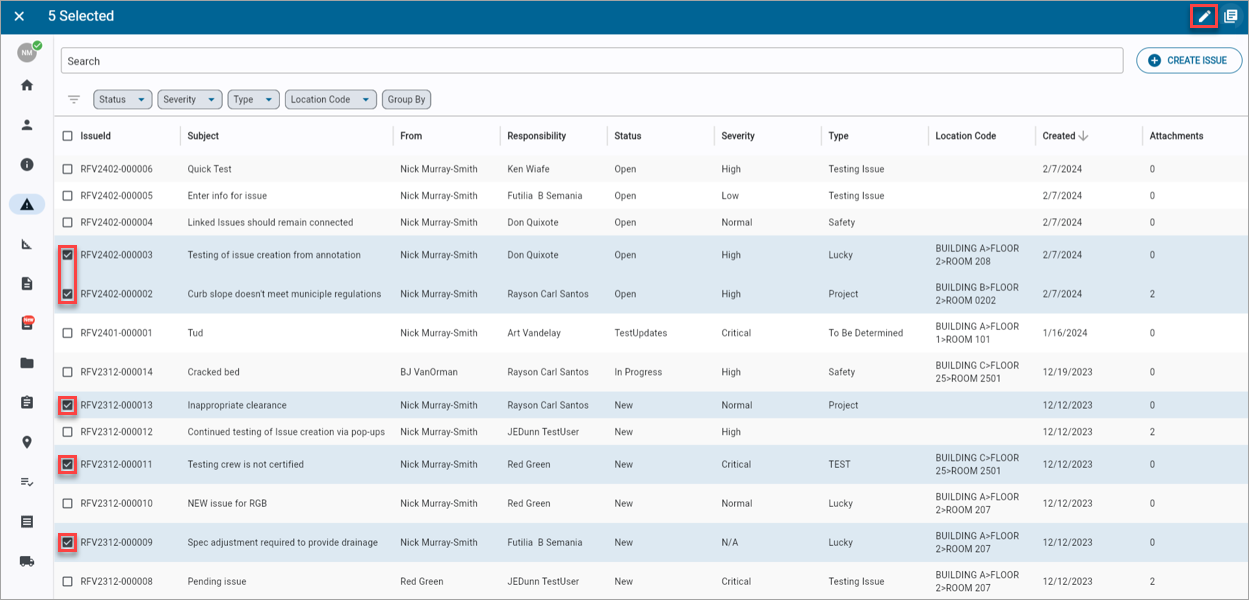
Issues; standard Treeview path: CMiC Field > Communication Management > Issues
Navigate to the Issues log and select records. Press the Edit icon ( ) to launch the Batch Edit Issue Records pop-up window.
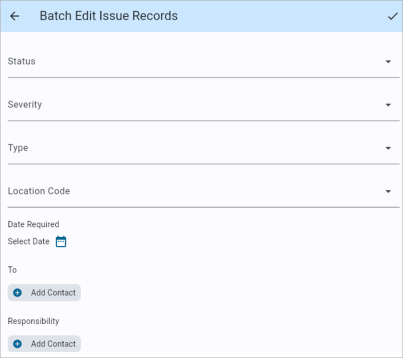
In the pop-up window, select new desired values for the available fields (e.g., Status, Severity, Type, Location, Due Date, To (Contact), and Responsible (Contact)). When finished, press the Save icon ( ) to apply the updates to the selected Issue records.
RFIs Log (Web)
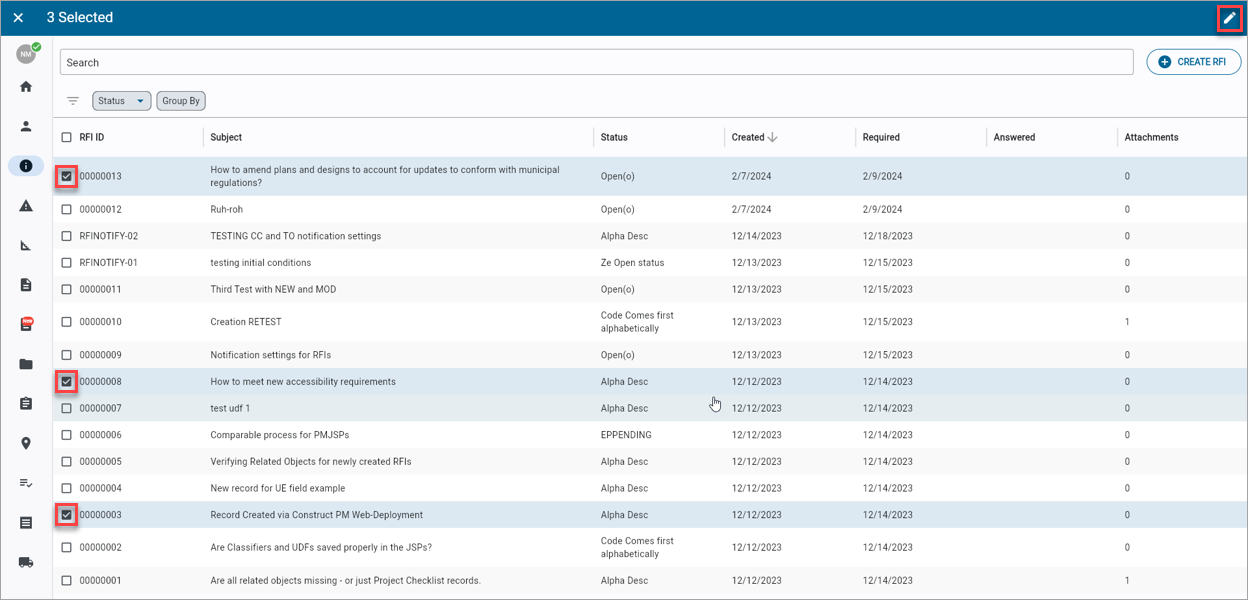
Request For Information; standard Treeview path: CMiC Field > Communication Management > RFIs
Navigate to the RFIs log and select records. Press the Edit icon () to launch the Batch Edit RFI Records pop-up window.
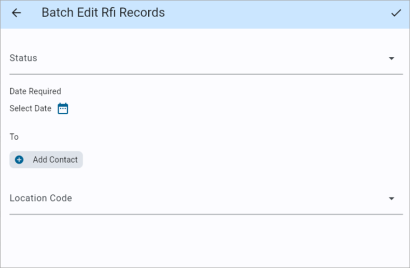
In the pop-up window, select new desired values for the available fields (e.g., Status, Date Required, To (Contact), and Location Code). When finished, press the Save icon () to apply the updates to the selected RFI records.
Punch List Log (Web)
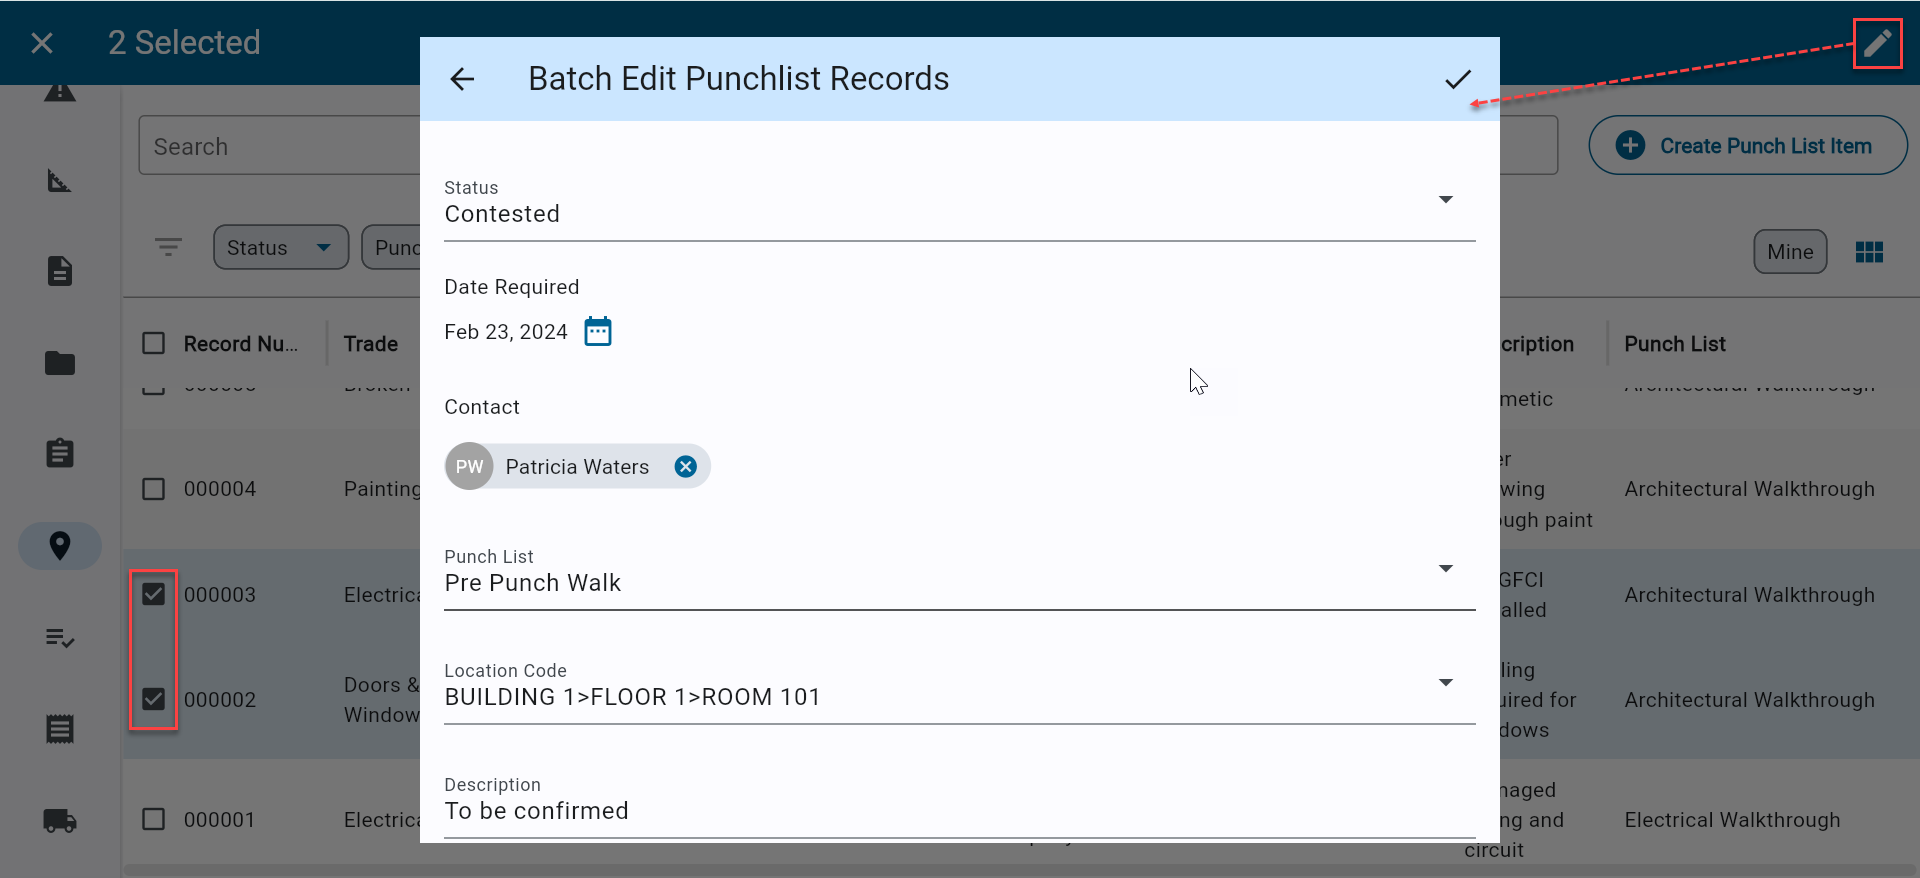
Navigate to the Punch List Items log and select records. Press the Edit icon () to launch the Batch Edit Punchlist Records pop-up window. In the pop-up window, select new desired values for the available fields (e.g., Status, Date Required, Contact (Responsible), Punch List, Location Code, and Description)). When finished, press the Save icon () to apply the updates to the selected Punch List Item records.
NOTE: The Date Required field corresponds to the Due Date field in the punch list item.
To learn more about some of the latest features released in this patch, return to Patch 19 Highlights.