
Pgm: JC0000 – User Defined Reports; standard Treeview path: Job Costing > Reports > User Defined Reports
The User Defined Reports screen is used to create user-defined reports.
Selection Criteria
Report Code
If selecting an existing report, select it from this fields LOV; if a new report is being created, enter its code in this field.
Report Name
If an existing report was selected via the Report Code field, this field displays its name; if a new report is being created, enter its name in this field.
Report Columns
This section is used to specify the columns of data for the report. Up to six columns of data can be specified.
Click this section’s [Insert] button to create a new row, and its [Delete] button to delete a column.
Position
Position of column on report.
Report Columns
Enter/select data for column being defined.
Column Titles
Enter the title of the column.
Hidden – Checkbox
If checked, this specifies if the field is visible or hidden on the user defined report.
Generate Report
Once the report's columns and their data have been specified, click [Continue] to progress to the Printing Options pop-up window.
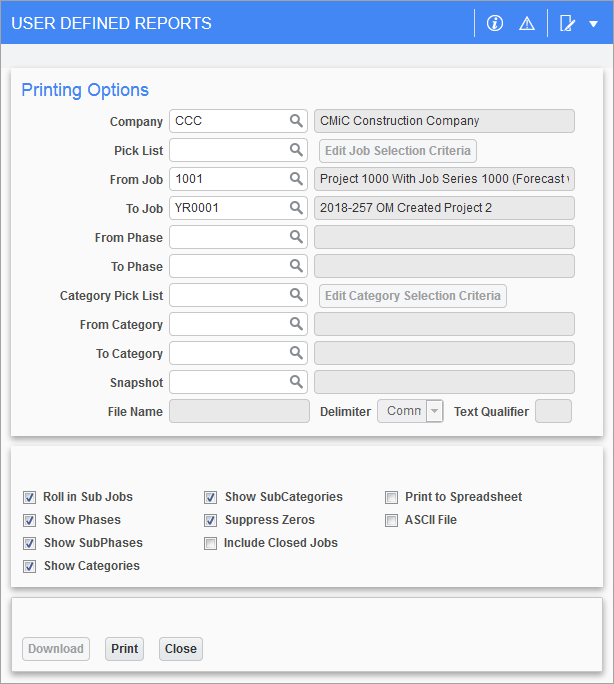
To run the report, select the desired report parameters via the Printing Options pop-up window, as shown above, and click [Print].
Company
Enter/select a relevant company.
Pick List
Enter/select jobs to consider in the report via a job pick list.
From Job, To Job
Enter/select a range of jobs to consider in the report. If the From Job field is left blank, it is taken to be the first job, by code. If the To Job field is left blank, it is taken to be the last job, by code.
From Phase, To Phase
Enter/select a range of phases (cost codes) to consider in report. If the From Phase field is left blank, it is taken to be the first phase, by code. If the To Phase field is left blank, it is taken to be the last phase, by code.
Category Pick List
Enter/select categories to consider in the report via a category pick list.
From Category, To Category
Enter/select a range of categories to consider in the report. If the From Category field is left blank, it is taken to be the first category, by code. If the To Category field is left blank, it is taken to be the last category, by code.
Snapshot
Enter/select a snapshot. For more information about snapshots, please refer to the Job Costing - Snapshot subsection.
File Name
If the 'Print to Spreadsheet' box is checked, this field displays the spreadsheet's filename. If the 'ASCII File' box is checked, this field is editable, and it can be used to change the default file name.
To download the file, click the [Download] button.
Delimiter
If the 'ASCII' File box is checked, this field is enabled to select the delimiter: “Comma” or “Semicolon”.
Roll In Sub Jobs – Checkbox
Check this box to include sub-jobs in the report.
Show Phases – Checkbox
Check this box to show phases (cost codes) in the report.
Show SubPhases – Checkbox
Check this box to show sub-phases in the report.
Show Categories – Checkbox
Check this box to show categories in the report.
Show SubCategories – Checkbox
Check this box to show sub-categories in the report.
Suppress Zeros – Checkbox
When this box is unchecked, all the jobs in the range will appear in the report including the zero lines.
When checked, all zero jobs will not be shown on the report except if the 'Include Sub-Jobs' box is checked and the sum of the transactions of the sub-jobs is greater than zero, then the zero lines for the control job will also be shown. The JC7001 Cash Flow Report is an example of a report that can suppress zeros.
Include Closed Jobs – Checkbox
Check this box to include closed jobs in the report.
Print to Spreadsheet – Checkbox
Check this box to print the report to a spreadsheet. The File Name field displays the spreadsheet’s name. Click [Download] to download the spreadsheet.
ASCII File – Checkbox
Check this box to print the report to an ASCII file. The File Name field displays the file’s editable name. Click [Download] to download the ASCII file.