Sending I/O from within Collaboration
Currently there are three application pages within Collaboration that have the ability to send CMiC I/O emails, these pages correspond to the objects that use CMiC I/O. They are Issues, RFIs, and Communications.
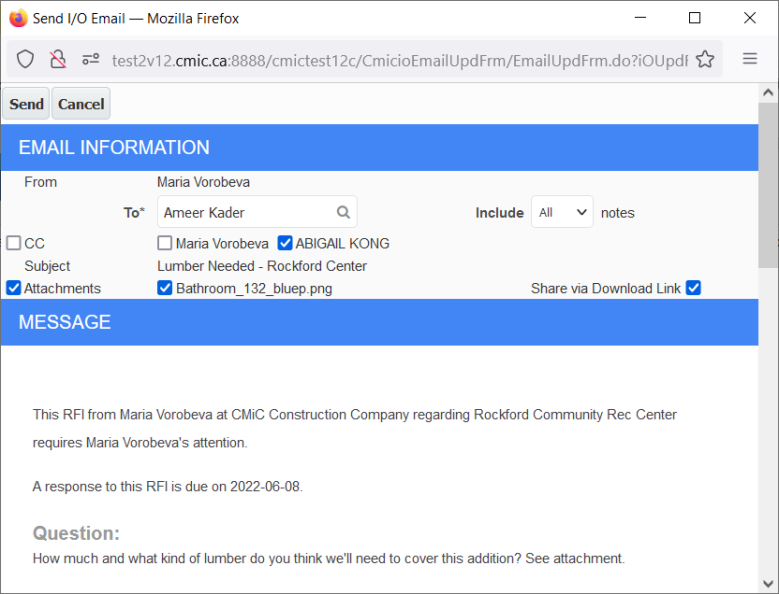
This feature allows the user to enter a note or attachment against an object, and then create a CMiC I/O email. Within these pages there is a [Send I/O Email] button. This button opens a window that will be similar to above.
This window allows the user to indicate if CCs, notes, and/or attachments are to be included in the email.
Include Notes
The user has the choice of all notes, no notes, or last. If “Last” is selected, the user can enter the number of last notes to be included. For example, the user may want to include the last three notes. As the number of notes changes so does the message area of the email. This area includes the text of the notes selected.
Attachments
All attachments on the object are shown under the subject line of the email. The user may select to include all attachments by using the ‘Attachments’ checkbox or they may individually select which attachment to include in the email. The maximum allowed size of the email, including all attachments, is 50 MB.
Share via Download Link – Checkbox
The user may also choose whether to attach the selected files to the email or send a download link for the attachments by checking the ‘Share via Download Link’ checkbox.
The file path generated for the download link is based on a default setup, located in the General tab of the System Options screen in the System Data module.
By default, the URL entered in the External Context Root (Collaboration) field is used to form the base of the download link. If this field is null, then the URL which includes context "SdMenu" entered in the Login Info pop-up window launched from the [Login Info] button will be used. Basically, the base URL is detected from these entries, any unnecessary bits are trimmed from the end, and the required context which is necessary to download the files is appended.
For example:
If the External Context Root (Collaboration) field on the System Options screen is null, and the Login Info pop-up has the following entry:
http://dev6v12.cmic.ca:8888/cmicdevv12/SdMenu/
Then the final URL will be:
http://dev6v12.cmic.ca:8888/cmicdevv12/CmicDownload/documentDownload?secKey=
NOTE: An expiration time must be assigned to the download link in CMiC Field, otherwise an error message will be triggered. Download link expiration is set in the Maximum Download Link Expiration (days) field, which is located on the General tab of the Project System Options screen in CMiC Field. The value in this field must be greater than or equal to "1". If this field is "0" or left blank, the download link received by a user will result in an error message when the user attempts to open the link.
CCs
All CCs that are on the object who have been setup for CMiC I/O will be shown in a fashion similar to attachments. The user may select to include all CCs by using the ‘CC’ checkbox or they may individually select who to include in the email.
CMiC I/O for Punch Lists
CMiC I/O emails can now be sent from the punch list. The user can use the CMiC I/O email to populate the Detail section of an existing punch list. To do this, while in view mode of the punch list, use the [Send I/O Email] button to send an email to the person who will be submitting the punch list details. If the punch list was unsubmitted, once the user selects the [Send I/O Email] button, the status will change to “Submitted”. The CMiC I/O pop-up window includes instructions on what to do.
There are some requirements for the way in which the details should be entered by the person who will respond to the email that was originally sent by CMiC I/O:
-
The only fields that can be returned to CMiC I/O are the mandatory description and up to four optional location fields (representing the Area fields for punch list details).
-
Each punch list item is delimited by “<>”
-
Area fields are prefixed by the word “Location:” (upper or lower case, colon included) and are separated by a comma, for example,
Location: Building A, 15th Floor, Unit 1509, Kitchen
Thus Area 1 = “Building A”
Area 2 = “15th Floor”
Area 3 = “Unit 1509”
Area 4 = “Kitchen”
The location is optional, so it is possible to simply enter a description with no special prompts.
If the user wants to send several items at once the response will look something like the following:
|
Fix the hole in the wall. Location: Building A, 15th floor, Unit 1509, Kitchen Check that all electrical outlets have plates on them. Repaint. Location: Building B, ground floor, Unit 15 |
The following fields will be populated automatically when the item is created:
-
Item # will be the next sequential number.
-
Status will be “open”;
-
“Received On” will be the current date.
To keep adding additional punch list items to the same punch list via CMiC I/O, responses will have to be made each time to the original CMiC email that was received. Similarly, attachments can also be made, by attaching documents to the reply email.