Query Mode
Within the Imaging Manager module, it is possible to search for documents using Query By Example in the flysheets. This can be done in two ways:
-
Using the [Query Mode] button in the Flysheet pane
-
Using the [Query Mode] button in the Navigator pane
Flysheet Query
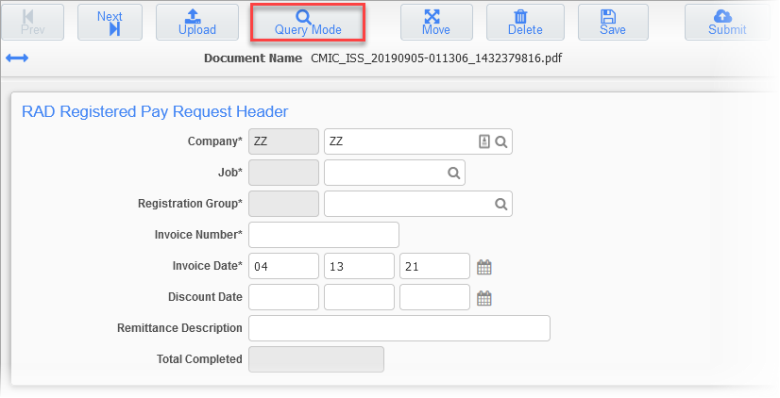
While displaying a flysheet (populated or empty) of the desired document type, click on the [Query Mode] button.
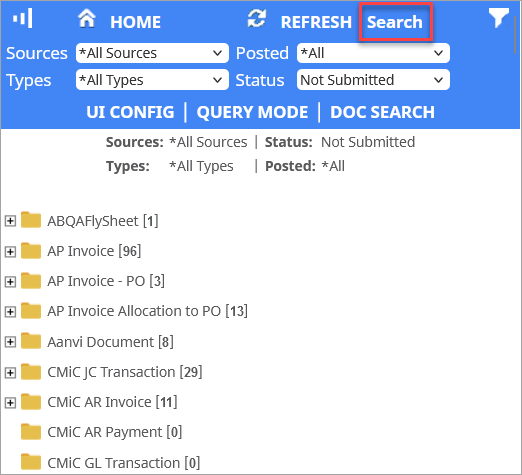
Navigator Query
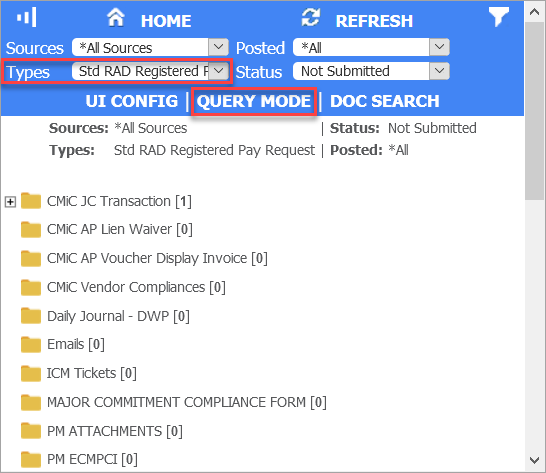
Select the desired document type and then click on the [Query Mode] button. The search can also be refined by selecting a specific source, status, or posting status. These refinements can also affect flysheet query.
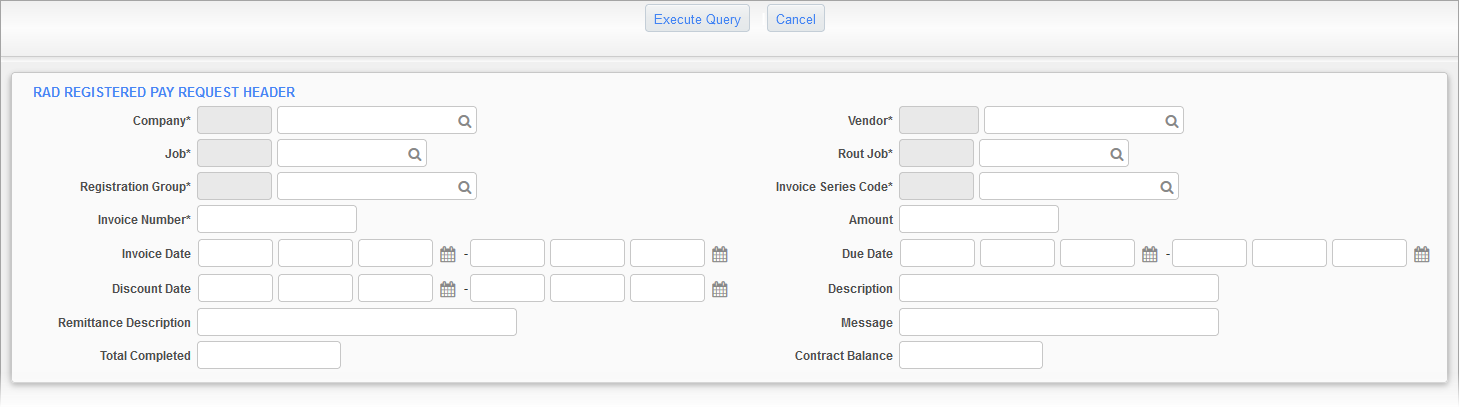
Whichever option is chosen, the next step is the same. The flysheet pane is displayed with blank fields that can be used to enter the search criteria. For date fields, enter two values to specify a date range. Enter the criteria in any flysheet, but only one at a time.
After entering the search criteria, click the [Execute Query] button to perform the search. Use the [Cancel] button to cancel the search.
If the search results show exactly one matching record, it will be displayed in the normal manner. However, if more than one record is found, the Image Manager will display a log showing all matching records. The navigator will also show only files for the matching records.
From the log it's possible to do several things:
-
Click on a document name to display that single record. From there, use the [Next] and [Previous] buttons to get to other records in the log, or click on the [Back to Log] button to return to the log.
-
Sort by any column by clicking on the right end of the column heading.
-
Click on the [Export to Excel] button to send the log information to a spreadsheet. It's always possible to export the header information. It is sometimes possible to export a detail flysheet instead.
-
Click on the [Query Mode] button to enter a new query.
-
Click on the [Query Log] button to reveal an empty row at the top of the log where it's possible to enter additional search criteria to further refine the query.

[Unsubmit] Button
The [Unsubmit] button allows you to pull back documents that were previously submitted if a problem is later found with them. It is visible only under specific conditions.
-
It must be enabled separately for each document type. How this is done is explained under the Defining the Document Types
-
If the document type is any kind of invoice, the invoice cannot have been posted.
-
If the document is a registered invoice or registered RFP, there cannot be an unposted voucher for that invoice. If a voucher exists, it must be deleted to expose the [Unsubmit] button. Voiding the voucher will not reveal the [Unsubmit] button.
When a document is unsubmitted, its workflow status is changed to "Rejected" and, for invoices, internal status values revert to their unsubmitted state.
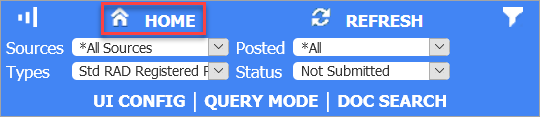
[Home] Button
The [Home] button is located at the top of the Navigator pane. Use it to revert the Image Manager to its start up configuration, but with a few differences. If the 'Save Filter Options' box in Image Controls is checked, the filter options in effect before clicking on the button will stay in effect. This checkbox is a global setting affecting all Imaging users.
Home Button in the Navigator Pane

Save Filter Options Check Box in Imaging Controls
[Image Export] Button

Image Export button in Query Mode
The [Image Export] button will appear after a query is run, either in Image Manager directly using the Flysheet or Navigator Query, or from a search elsewhere in the system that launches Image Manager. After executing a query and returning to the flysheet, the [Image Export] button is enabled. Clicking this button opens a pop-up window with all the files to export to a ZIP file and a checkbox next to each record. The checks are automatically enabled for each document. This allows the user to uncheck any files they do not want included in the export. This process also includes the addendums to each record. Users must enter a value in the Archive Name field in order to start the export. This will be the file name of the ZIP file that will be created.
Image Search – Screen
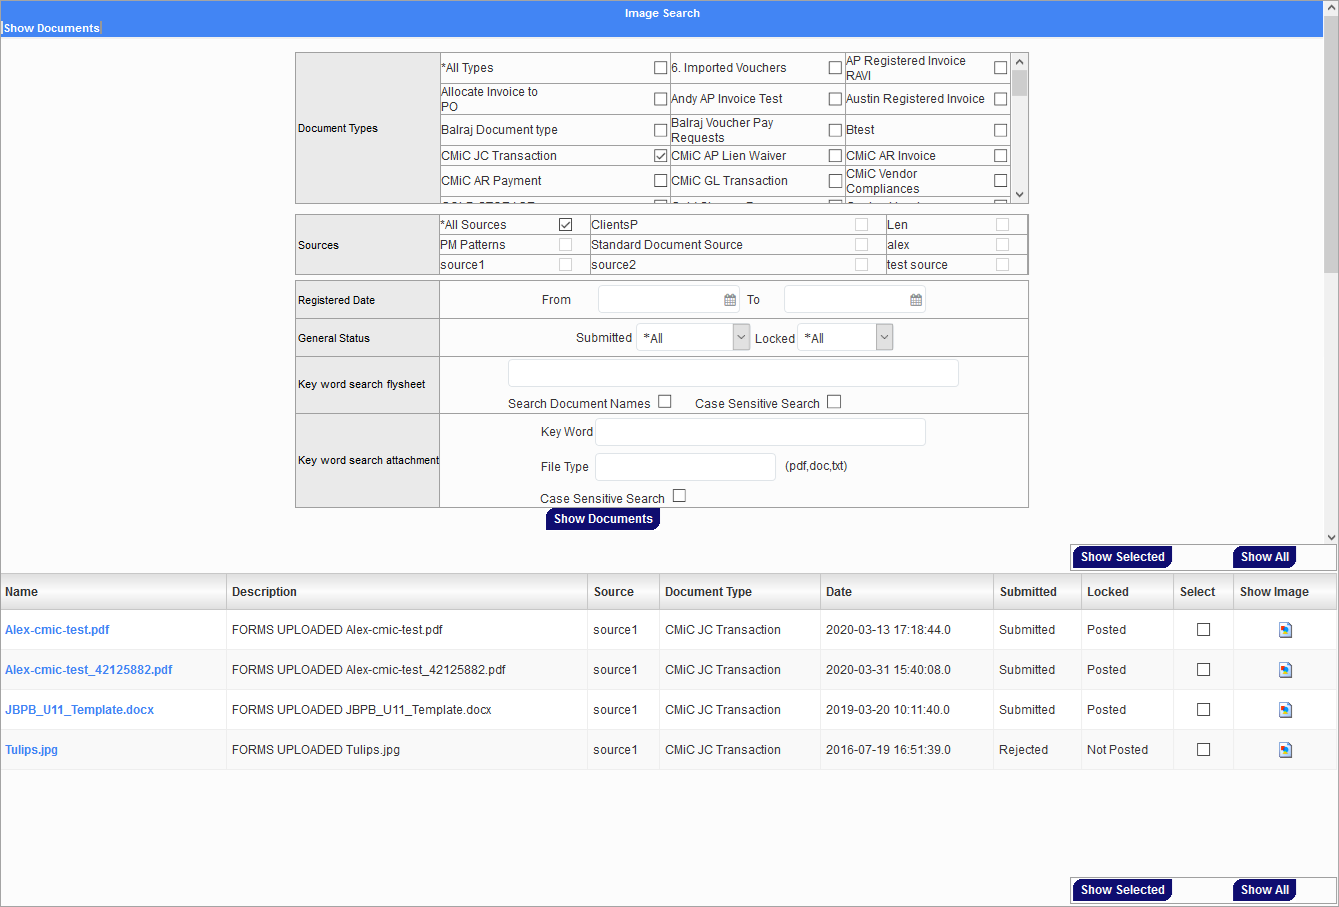
Image Search; standard Treeview path: Imaging > Image Search
This is a separate screen under the Imaging menu on the Treeview that allows for more comprehensive searching than is possible within the Image Manager.
NOTE: To access this screen directly from the Image Manager (shown in the screenshot below), the 'Enable Table Search' checkbox needs to be checked in the Imaging Control screen.
The module allows searching for images by type, source, and key word. This search will return all images that match the criteria entered and allow the user to review the image or select the image to see the flysheet detail, as well as the image.
-
From the Imaging Treeview, select Image Search to open a new search screen.
-
The Document Type and Source fields will default to "All Types" and "All Sources". To change these values, uncheck the field and check any other types and sources as required.
-
The Key Word Search field will search any numeric or text field, flysheet fields, and the actual image, if the image is a text type of document.
Any images that match will be displayed in a list below the search criteria. To view the image only, use the Show Image icon. This will open a new window displaying the image. If one or more of the records returned are to be viewed or edited in full then use the ‘Select’ checkbox to mark all the required records and, when complete, use the [Show Selected] button to view the records via the Image Manager screen. If all records returned are to be selected, there is a [Show All] button.