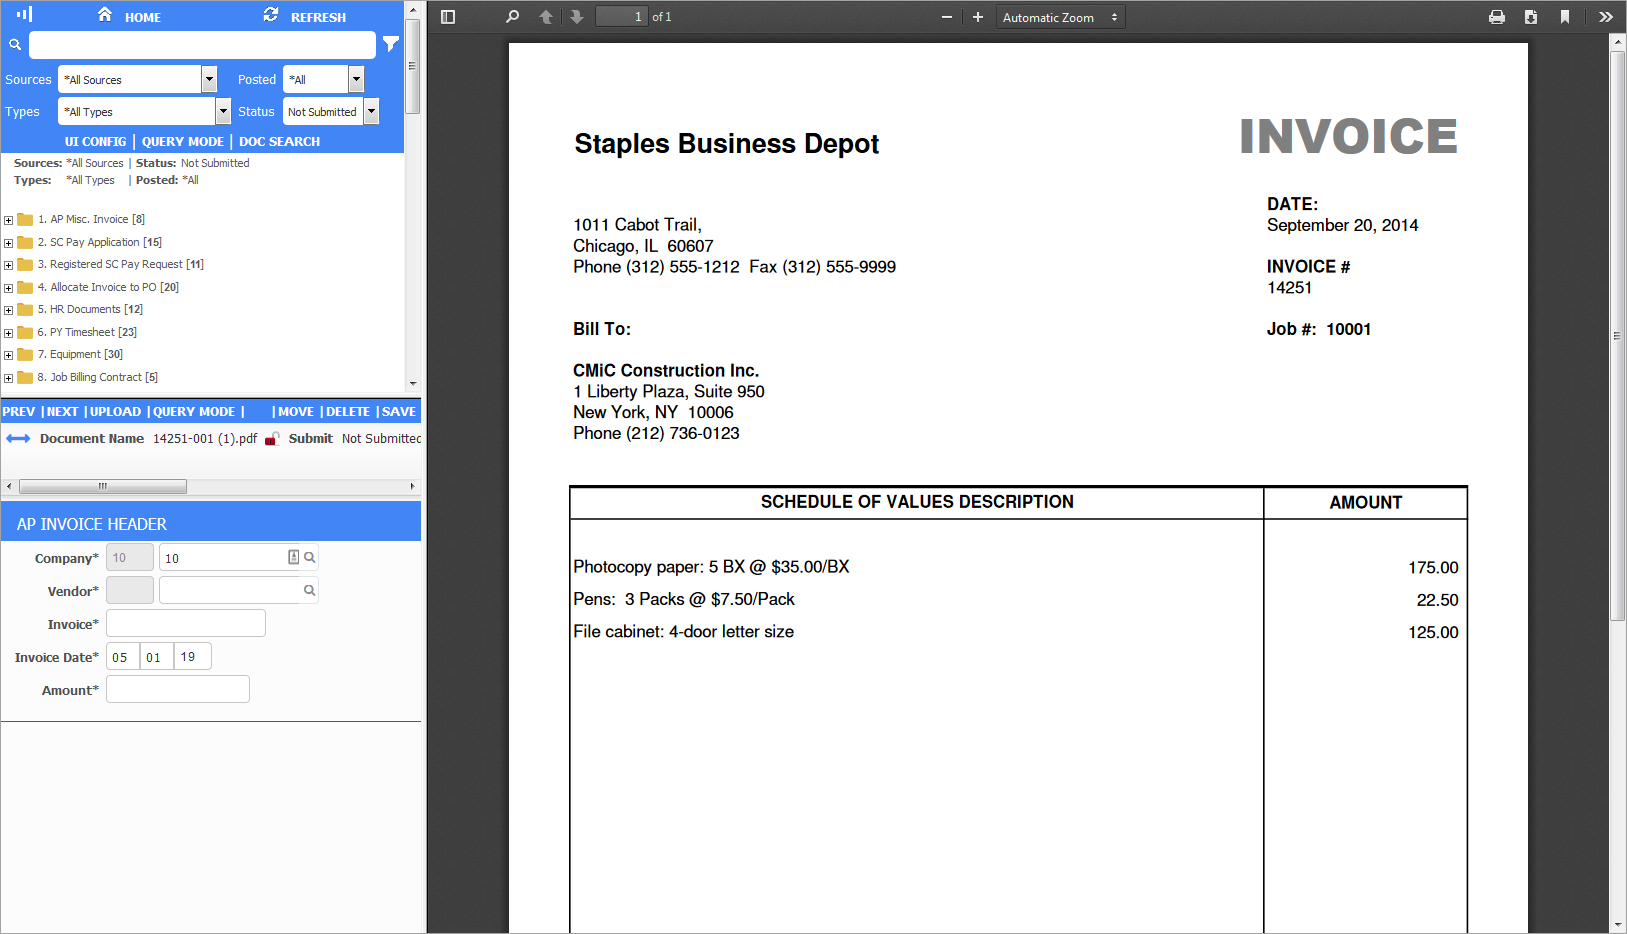
Image Manager; standard Treeview path: Imaging > Image Manager
The Image Manager screen is divided into three windows, the Image Manager Treeview, the Flysheet(s) window, and the Image Preview window. The Flysheet(s) window and the Image Preview window are synchronized with the Image Manager Treeview so that as an image is selected from the Treeview, both the Flysheet and Image Preview windows will display the related information. Each flysheet defined for the document type will be listed in the Flysheet window. To open the required flysheet, click the icon to the right of the title.
NOTE: If users would prefer to use the classic version of Image Manager, please see Imaging - Running the Classic Version of Image Manager.
Image Manager Treeview
When the Image Manager screen first opens, only the image nodes that have any data will show. The Image Manager Treeview is used to navigate and select images to work with. The image tree is built from the document types the user has access to. Each node of the tree shows a count of how many images exist in each document type.
In order to limit the data being viewed, the user can elect to restrict the Source and Type fields by selecting the required values from the list of values. These fields automatically default to "All Sources" and "All Types".
Type refers to the generic type of the document, for example "SC Pay Requests", "Std. Invoices", etc. While source most often refers to the location the document was scanned from, such as "Head Office", "Atlanta Branch", etc.
Flysheet Window
The Flysheet window displays a list of the available flysheets for the document type. If there is no flysheet assigned to the image type, then a message indicating that there are not any associated flysheets will display in the window.
A flysheet is a data entry screen designed to capture relevant information about the image. There may be one or more flysheets associated with an image. To open the required flysheet, click on the icon beside the flysheet name. In some cases, the fields may be mandatory and these are marked by a blue triangle next to the field. Date fields will always display a calendar icon next to the field and fields that have lookup values associated will have an arrow next to the field.
If the flysheet being entered is quite large, the Image Preview and Flysheet windows can be flipped by using the double arrows to the left of the Document Name field.
Image Preview Window
The Image Preview window will display the image in the viewer associated with the image type, for example an image may be a PDF file, a Word document, or a scanned image such as a JPEG or BMP file. Depending on the type of image and the viewer, the document may be modified and saved.
The Image Preview window can be configured by clicking on the [UI Config] button and setting the default of "Embedded" to "Separate Window". In the Select a UI Configuration section, scroll down to the configuration required, and select the radio button beside the image that matches the mode needed, then use the [Apply] button to save this configuration. This setting is unique by user.