Accrual Processing Procedure
Step 1: Enter Accrual Transaction & Post
Enter an accrual transaction through the Enter Transactions screen by entering a standard transaction and checking the ‘Accrual’ box in the Transaction section. Then, post the batch as per normal. This will setup the accrual for the next step.
Step 2: Select Accruals to be Reversed
The Accrual Selection screen in General Ledger > Transactions > Reverse Accruals allows the user to select the accrual transactions to post. All accrual transactions are listed as available for reversal.
Step 3: Post Batch of Reversals
Post the accrual reversals using the Post Accrual Reversals screen in the process train.
Accrual Transaction Entry & Posting
To enter an accrual transaction, enter a standard transaction via the Enter Transactions screen and check the ‘Accrual’ box in the Transaction section. Once all accrual transactions have been entered, post them through the standard posting procedure, as explained in Post Batches .
If the accrual is to be automatically posted with the batch, make sure the ‘Automatic Accrual Reversal’ checkbox is checked during posting. If it is checked, then none of the following steps need to be completed, as the reversal will have been posted to the start date of the next period.
Manually Select Accrual Transactions to be Posted

Pgm: GLACRSEL – Select Accruals To Be Reversed; standard Treeview path: General Ledger > Transactions > Reverse Accruals
This screen displays each accrual to be reversed (entered via Enter Transactions screen), which has "Y" (active accrual) set for the Accrual field. When this screen is accessed, the cursor will appear on the first accrual transaction in the screen (displayed in order of batch and transaction number). The bottom Distribution section will display the corresponding transactions for the selected batch in the Accrual Batches section.
If all transactions are to be reversed, click [Save], and proceed to the posting of the accruals as explained in the next section.
Removing or Deferring Accruals
-
Select "N" for the Accrual field in the Accrual Batches section to uncheck the ‘Accrual’ checkbox for the transaction. This will prevent the transaction from ever being reversed using the accrual reversal procedure. Set the field to "N" if a mistake was made during regular transaction entry, and the accrual transaction will disappear from the system.
-
Select "D" for the Accrual field in the Accrual Batches section to defer the accrual transaction to a future posting (not during this posting). Save the changes.
Manually Posting Accrual Reversals
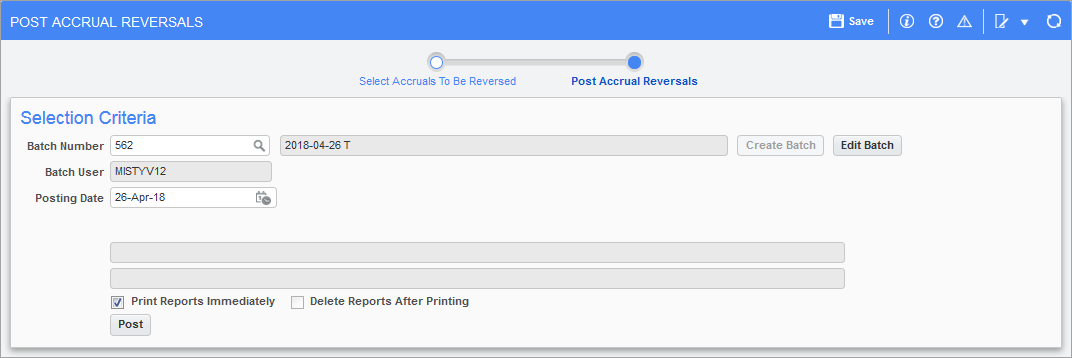
Pgm: GLACRPOS – Post Accrual Reversal; standard Treeview path: General Ledger > Transactions > Reverse Accruals – Post Accrual Reversals
Use the Post Accrual Reversals screen to process the debits and credits for the accruals being reversed. For each accrual disposition, an equal and opposite disposition will be created in the posting batch.
The required posting date will also be entered when this screen is used. The posting date determines the period that the accrual reversals are associated with. If the accruals are normally entered on the last day of a period and they’re reversed on the first day of the next period, be sure to enter the first day of the new period on this screen.
NOTE: If the General Ledger Control File Options screen is to automatically post accrual transactions, this process is not required.
Batch Number
Use the [Create Batch] button to create the batch that the reversals will be associated with. The batch type will be set to “T”.
Batch User
This field will display the username of the user who created the batch.
Posting Date
Enter the required posting date for the batch of accrual transactions being created. All accruals that were marked “Y” will be posted using this date.
Print Reports Immediately – Checkbox
Check this box to print the posting report immediately after posting. If left unchecked, the posting report will not print during the posting process but can be printed later using the posting utility.
Delete Reports After Printing – Checkbox
Check this box to delete this posting report at the end of the posting process. Once deleted, the report cannot be reprinted later. If left unchecked, the posting report can be reprinted later. This field cannot be activated unless the ‘Print Reports Immediately’ checkbox has been checked.
When complete, use the [Post] button to start the process.