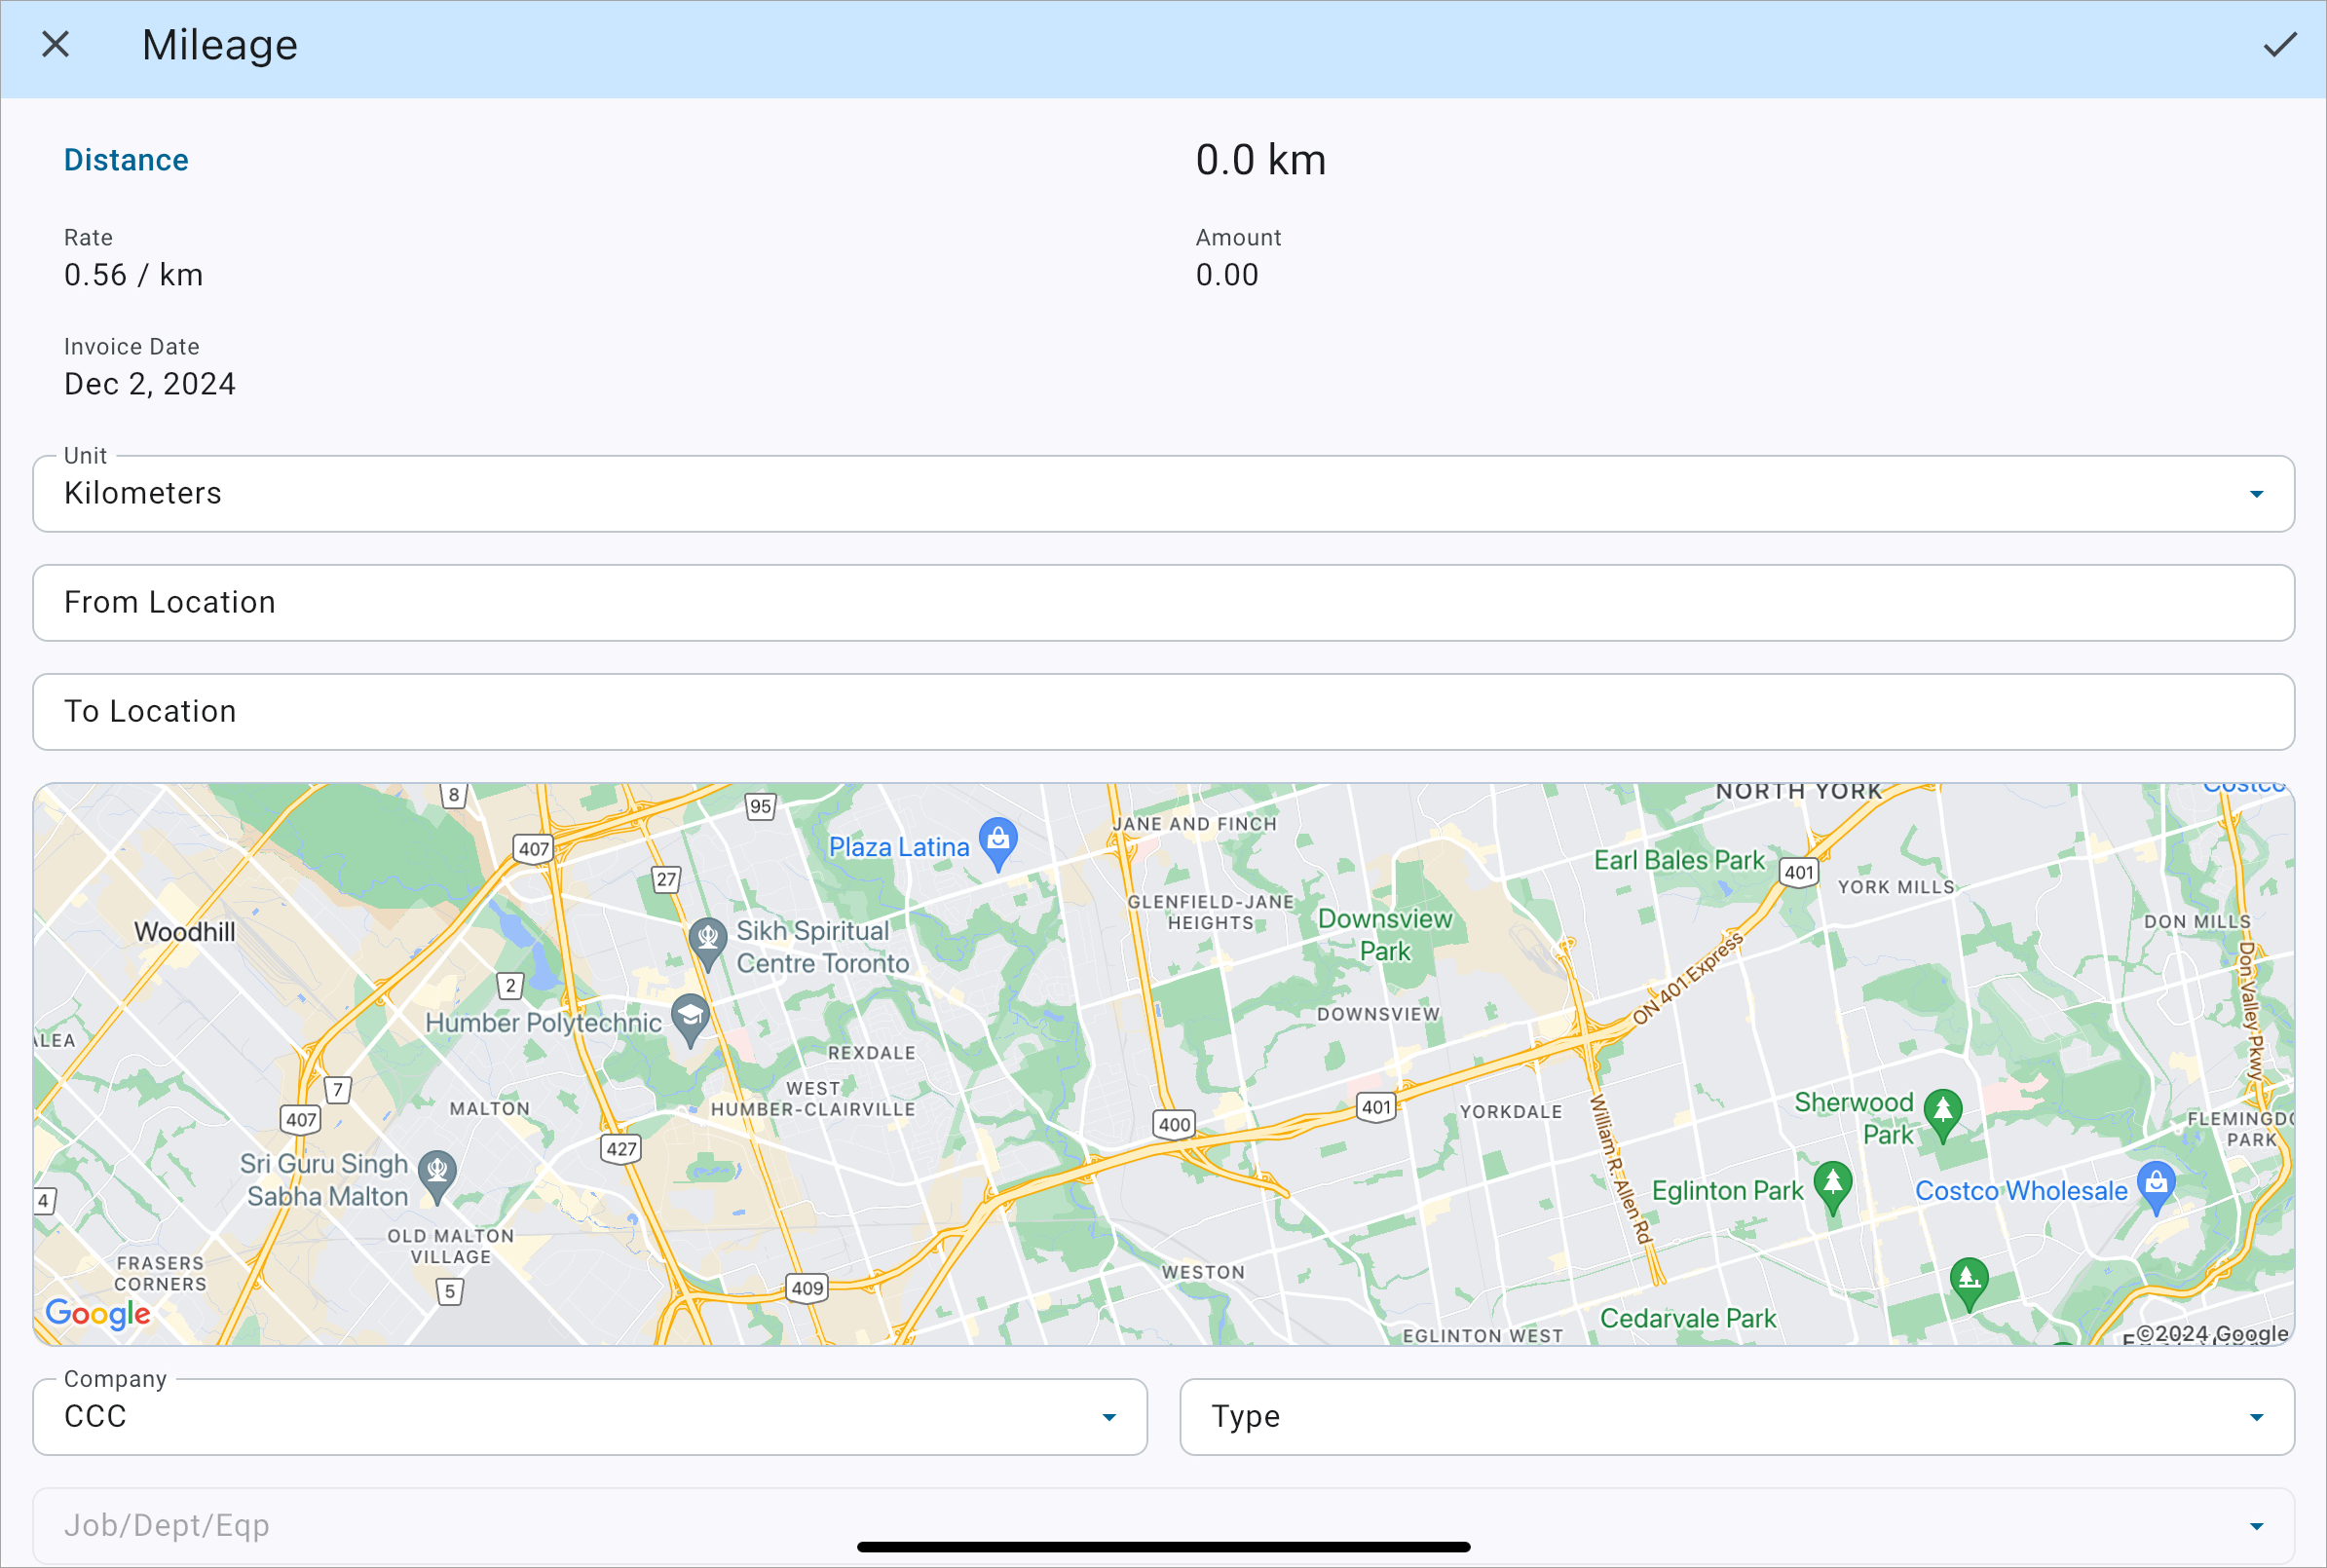
The Mileage screen opens when the user selects the "Mileage" option after tapping the Add New ( ) icon on the bottom-right corner of the Main Screen. From here, users can enter their From and To Locations to auto-calculate their total distance and amount. The mileage rate auto-fills from the AP Control File screen and proper setup is required for the distance and amount to be calculated. More information can be found in Construct ESS - Expenses - Setup.
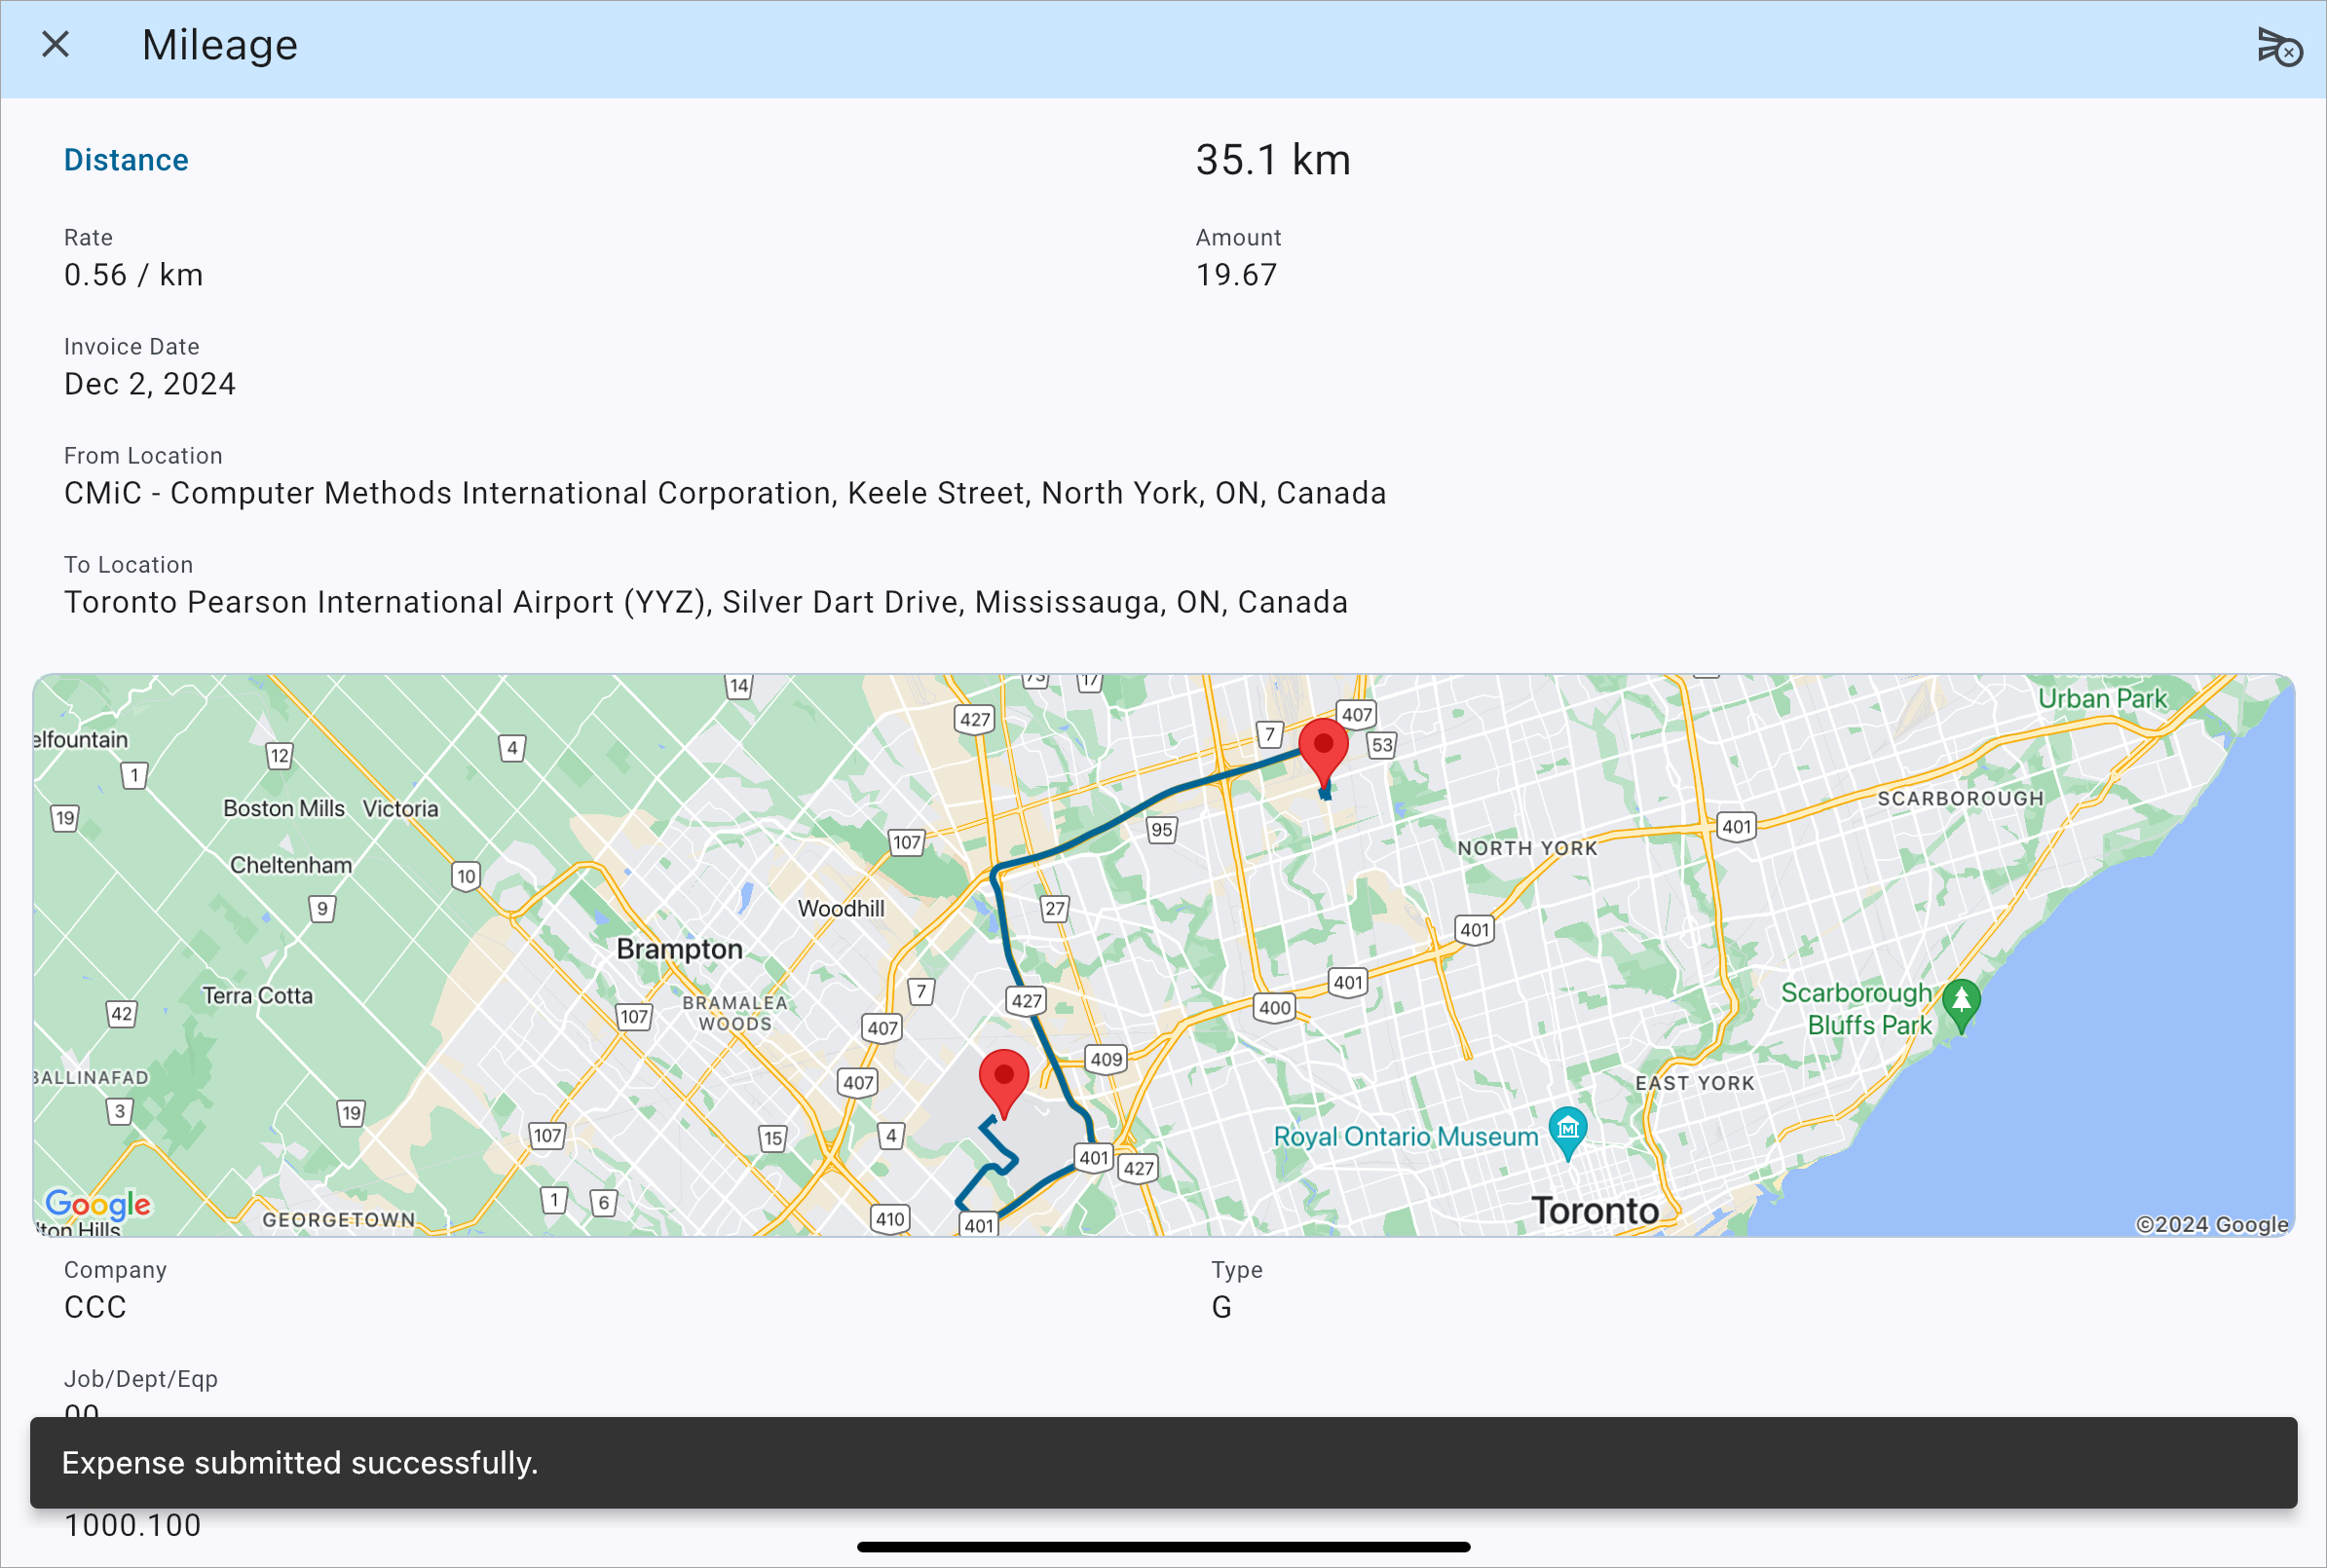
Once the company and job/department/equipment details are entered, users can either cancel by clicking the X ( ) icon or submit the expense using the Submit (
 ) icon found on the top-right corner of the screen. A message will notify the user that the expense was submitted successfully, as shown in the screenshot below.
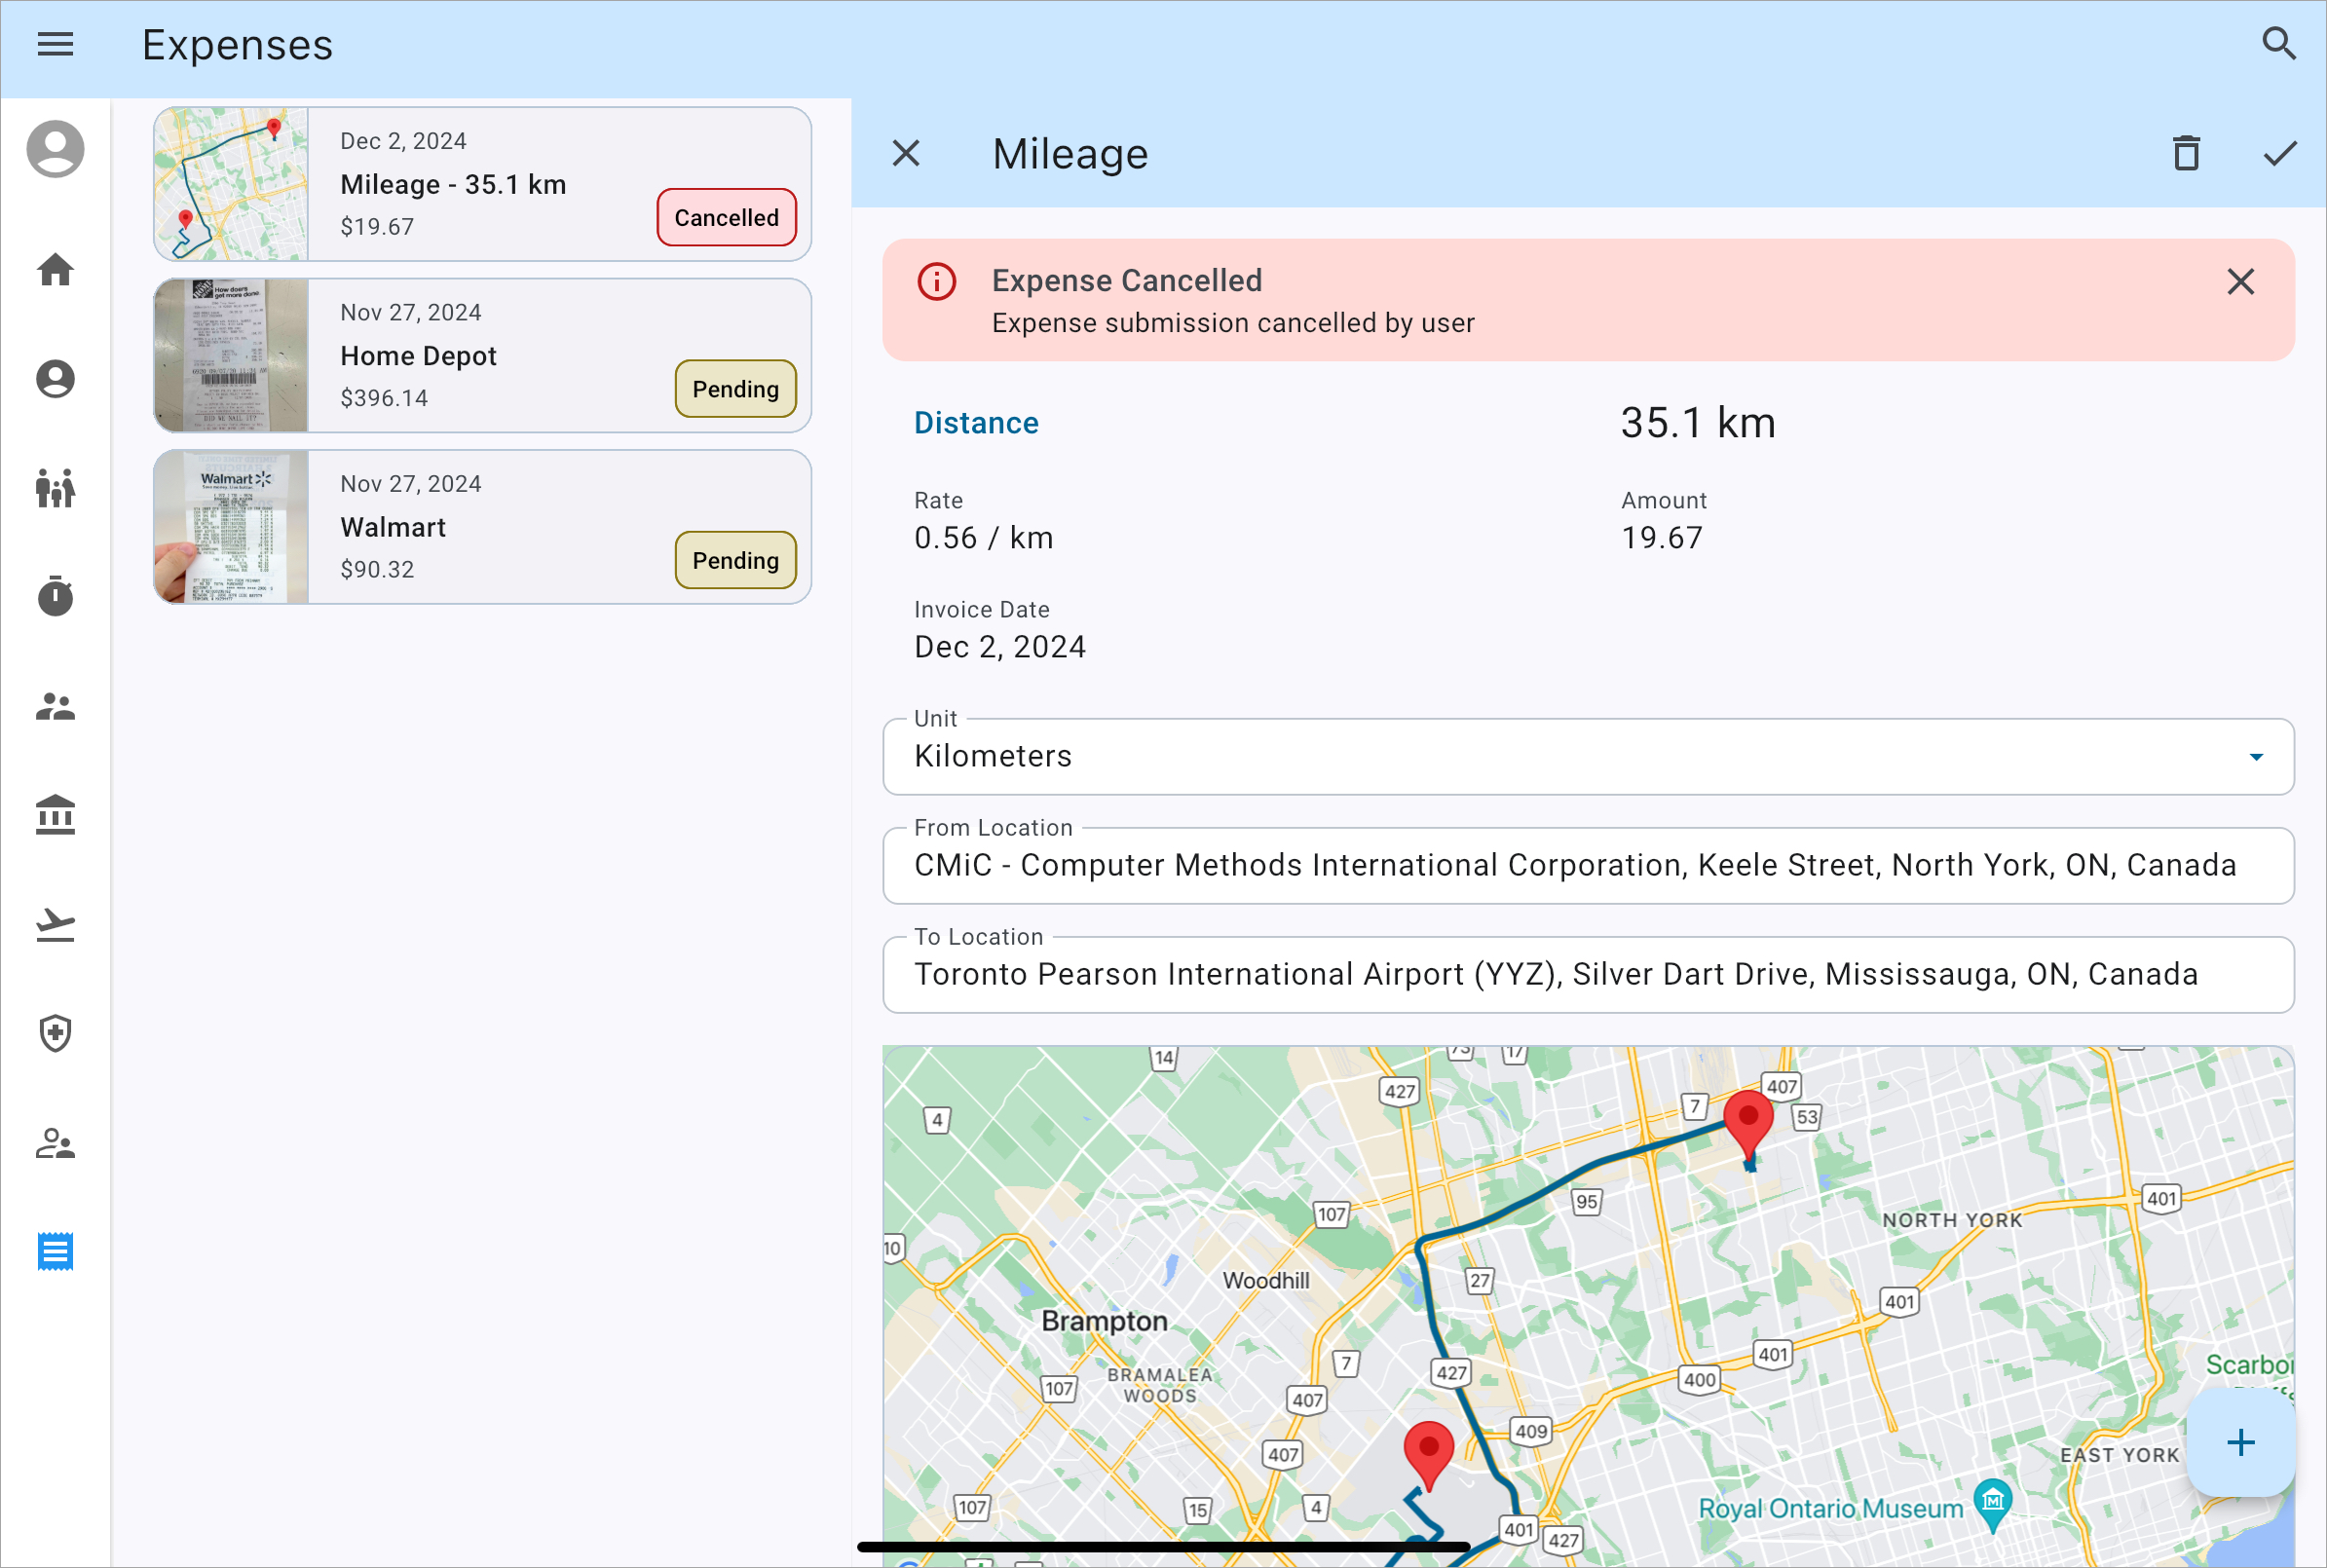
After submitting the expense, users only have the option to cancel the expense by clicking on the Cancel Submission ( ) icon on the top-right corner of the screen. Once cancelled, the status of the expense will change from "Pending" to "Cancelled" and users can tap on the details to either edit and resubmit the expense, or delete the expense using the Delete (
 ) icon, as shown in the screenshot below.