Before the Expenses screen can be used, the user must have their profile correctly set up in Enterprise, as described in the steps below.
-
Find the employee number on the Employee Profile screen. On the Address tab, ensure that the Business Partner Code field is assigned a code.
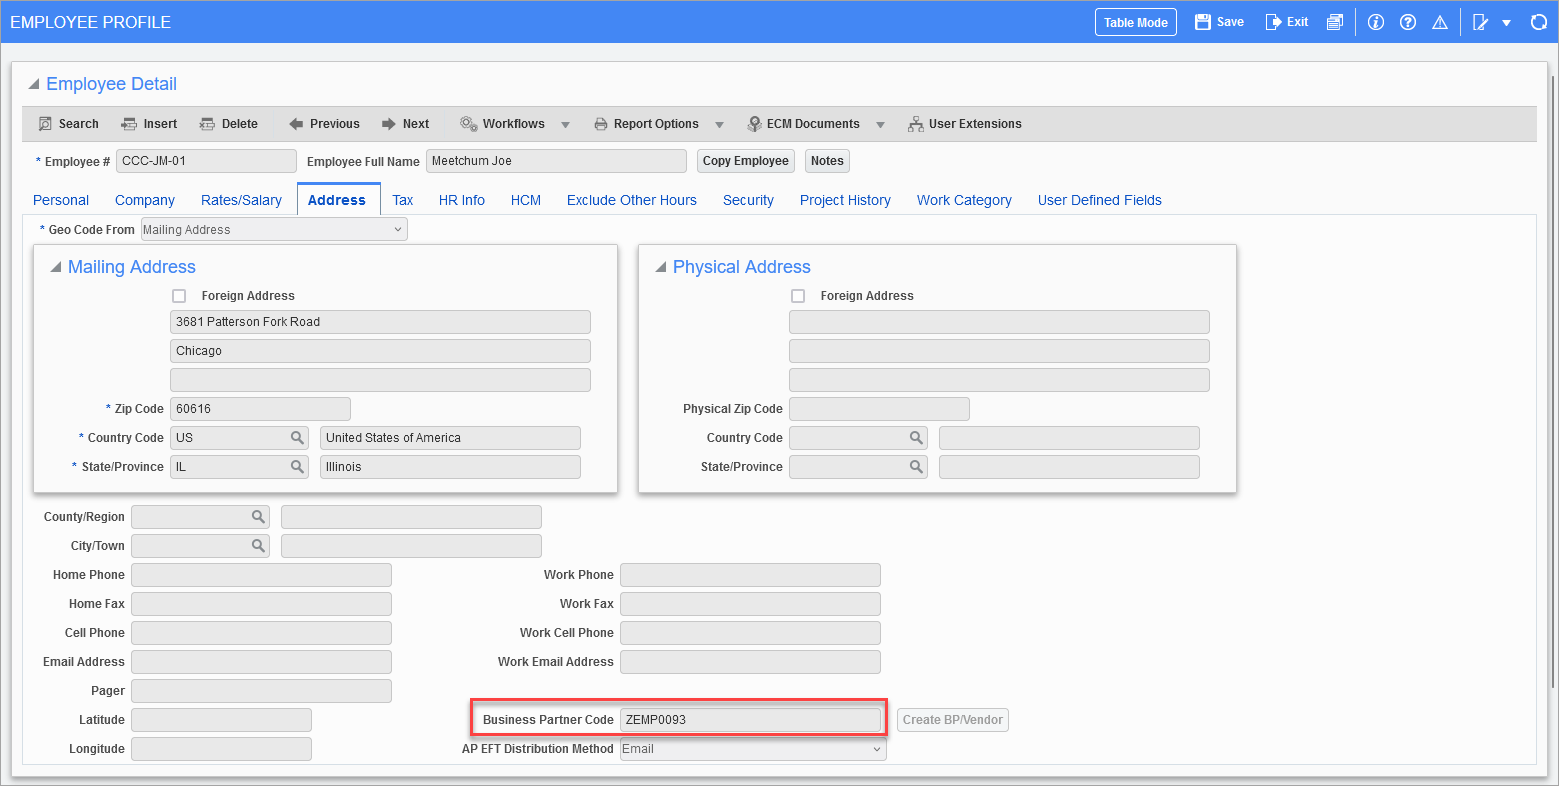
Pgm: PYEMPLOY - Employee Profile; standard Treeview path: Human Resources > Personnel > Employee Profile
-
Users should ensure that their username has been assigned an employee number in the General tab of the User Maintenance screen.
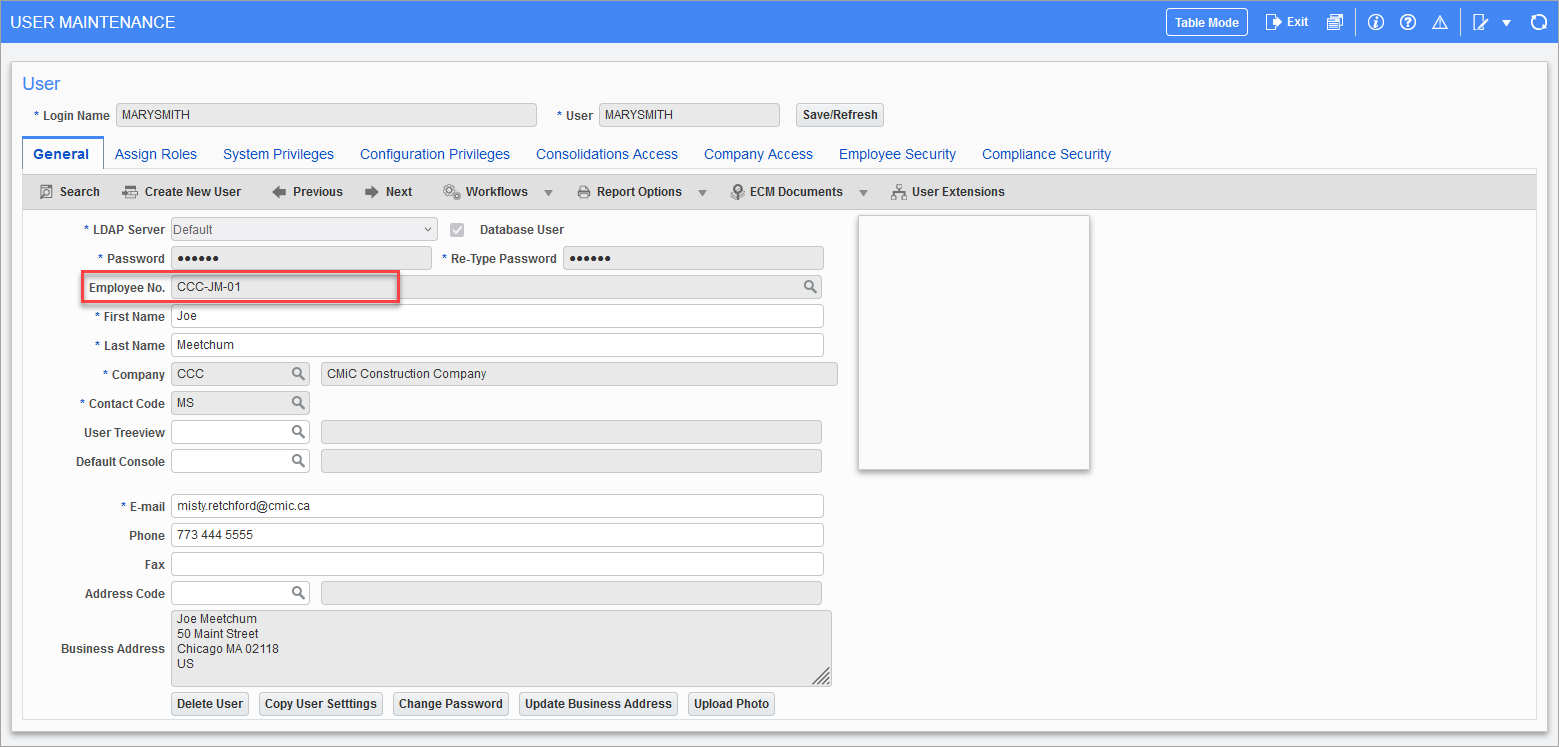
Pgm: SDUSRMNT - User Maintenance; standard Treeview path: System Data > Security > Users > User Maintenance
-
Navigate to the Employee Dashboard screen on the Human Resources module to grant or modify employee access to the ESS/E-time license.
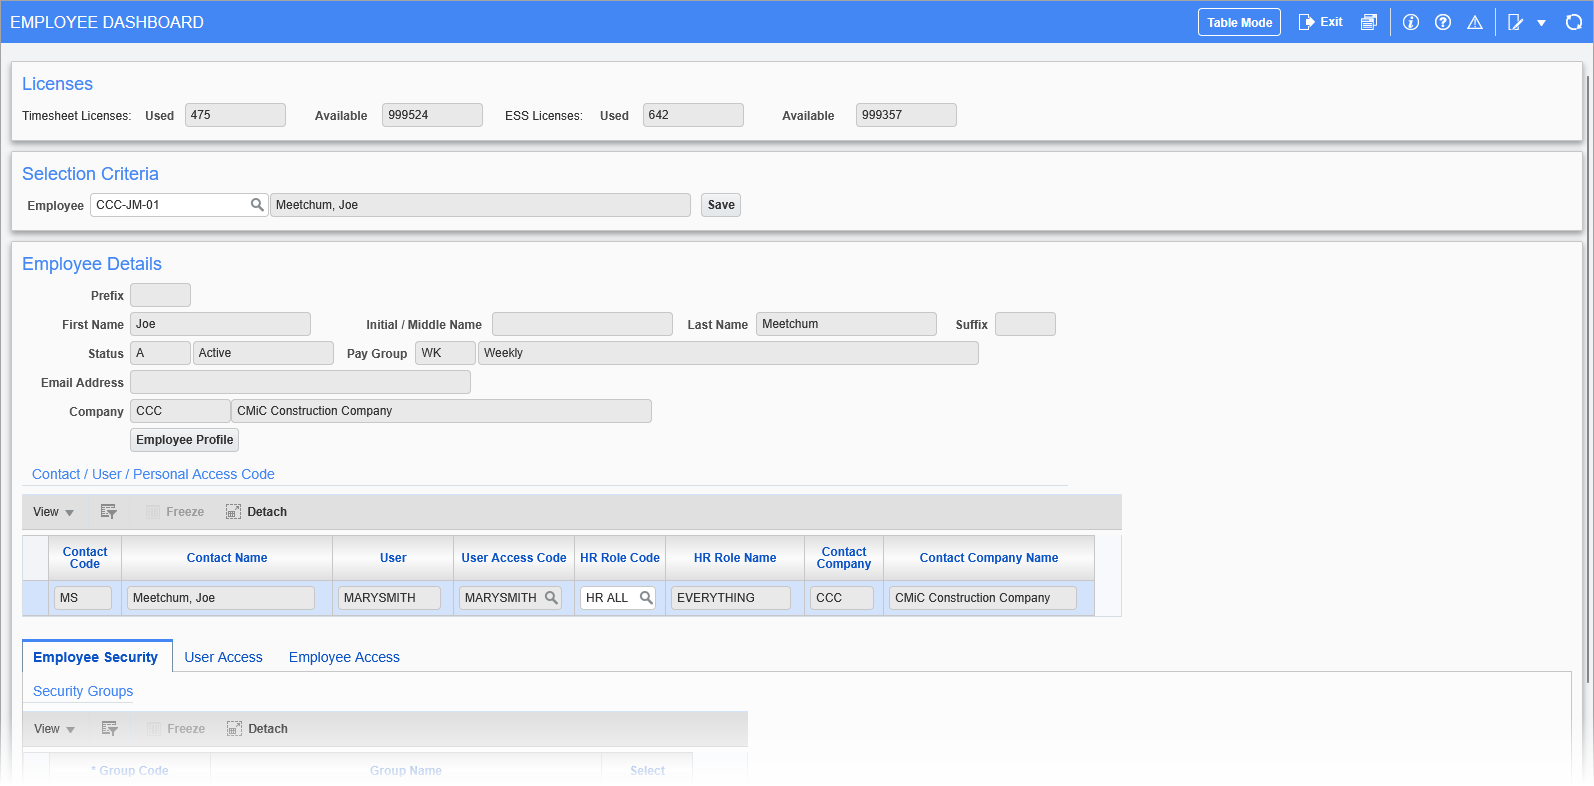
Pgm: HREMPLOYEEDASHBOARD – Employee Dashboard; standard Treeview path: Human Resources > Personnel > Employee Dashboard
-
The user needs to be added to a security group. If they are not, the user will get an error message in the Construct ESS app after logging in and clicking on the Expense icon. Navigate to Imaging > Utilities > Security > Groups, select a security group from the table, then click on the [Users] button to open the Users on Security Groups pop-up window to add a user.
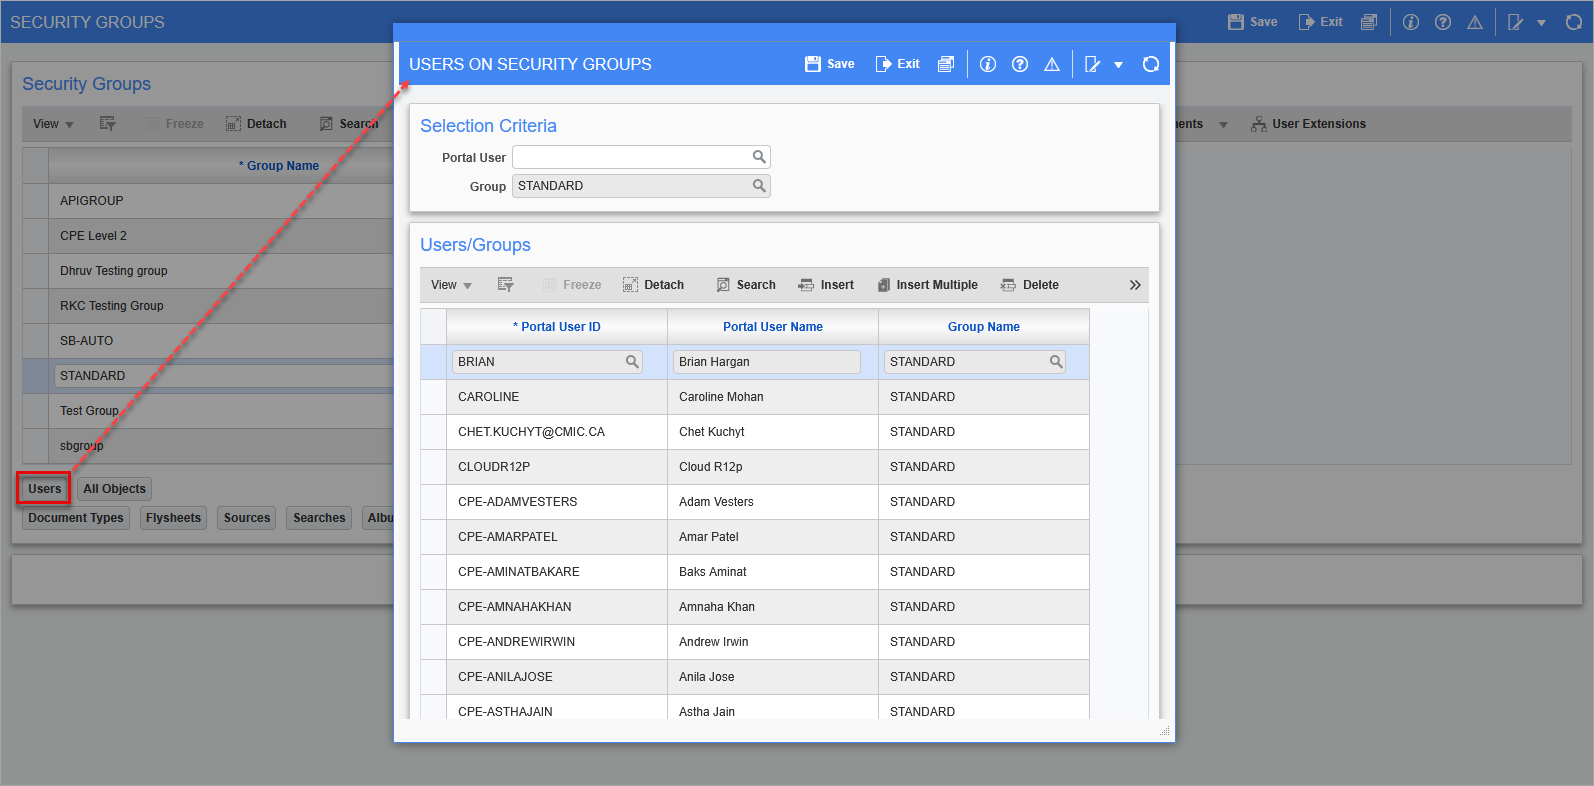
Pgm: IMGGRP - Security Groups; standard Treeview path: Imaging > Utilities > Security > Groups
-
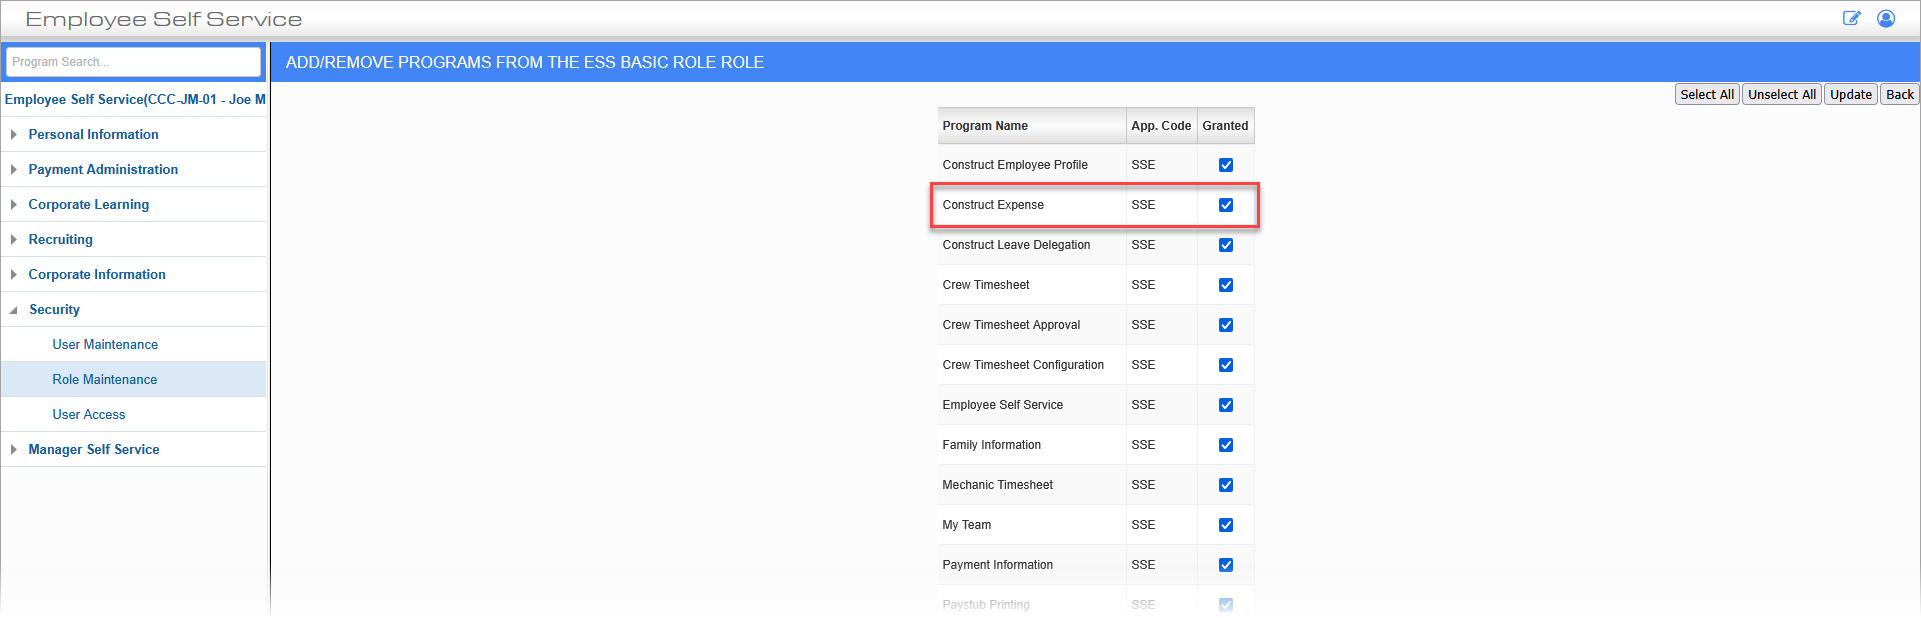
Users must have the Construct Expense program assigned to their ESS role to access expenses within the mobile app. Navigate to: ESS > Security > Role Maintenance > Role > Assign Program and check the Granted box associated to Construct Expense, as shown in the screenshot below.
-
Under the Image Manager section of the Imaging Control screen, the Program Type field is set to "Expense" and the Expense Document Type and Source fields should be set to the appropriate document type and source. This setting in the Imaging Control screen is system-wide so you just need to ensure that the user belongs to an Imaging security group that has access to the AP Expense document type and source.

Imaging Controls; standard Treeview path: Imaging > Setup > Imaging Control
-
Navigate to the Document Types screen of the Imaging module and ensure that the AP Expense document type is linked to the appropriate workflow (e.g. AP Registered Workflow).
NOTE: For Cloud customers, see Construct ESS - Activate the CMiC AP Expense Document Type for Cloud Customers.
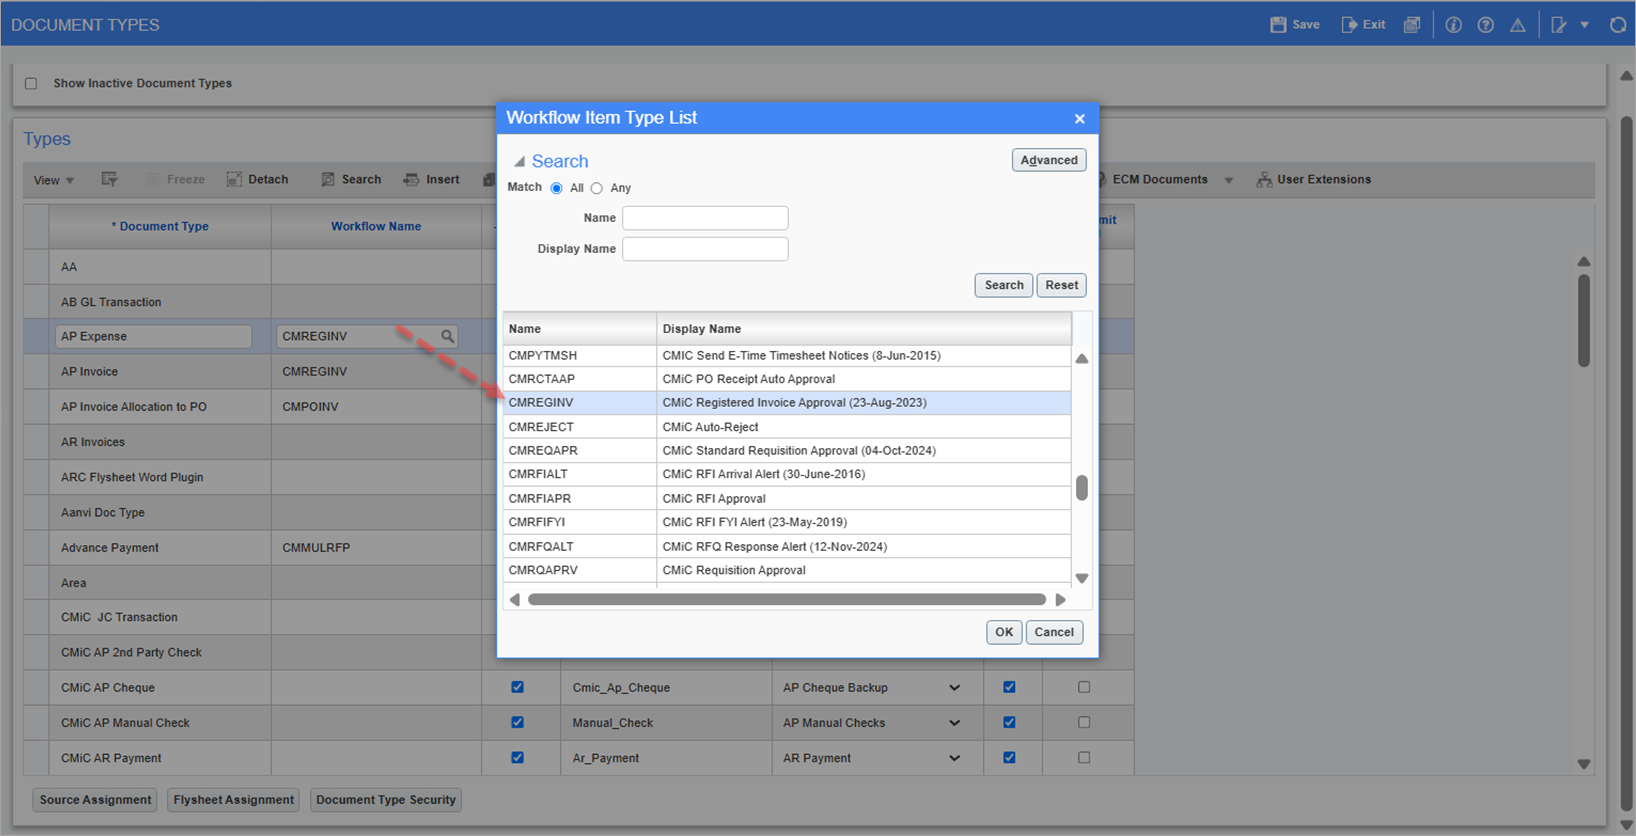
Pgm: IMGDOCTP – Document Types; standard Treeview path: Imaging > Setup > Document Types
-
In the Self Service tab of the System Options screen, set the Expense Workflow in Construct ESS field to "Account Payable".
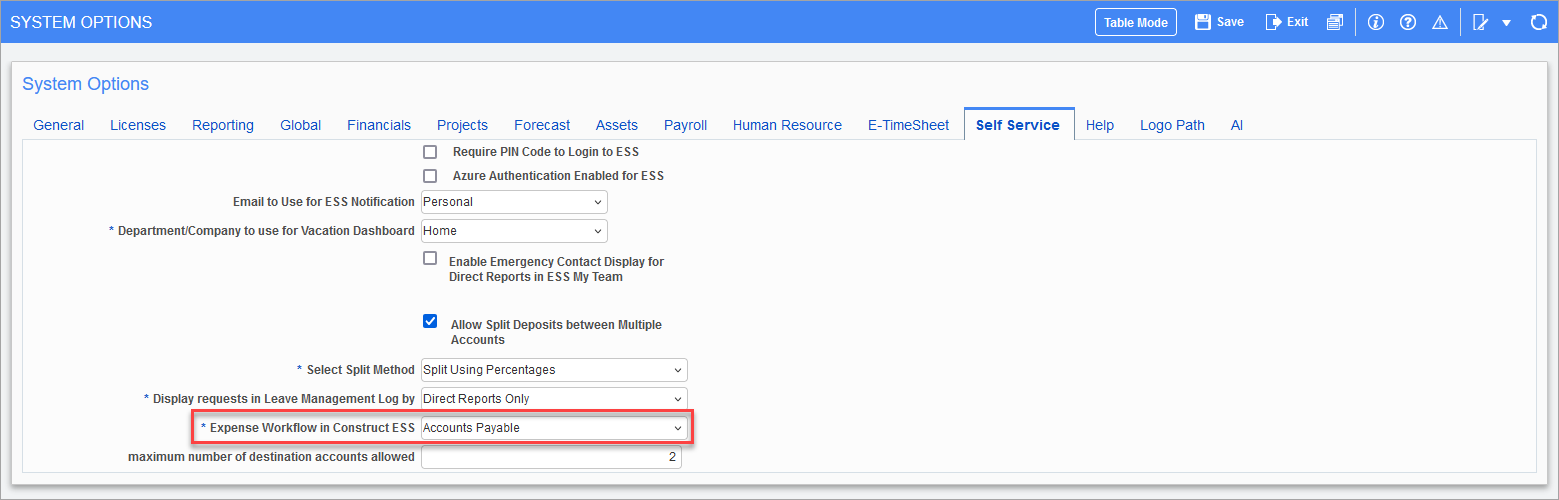
Pgm: SYSOPT - System Options; standard Treeview path: System Data > Setup > System Options
-
In the Voucher tab of the AP Control File screen, enter a rate in the Mileage Rate field, as shown in the screenshot below.
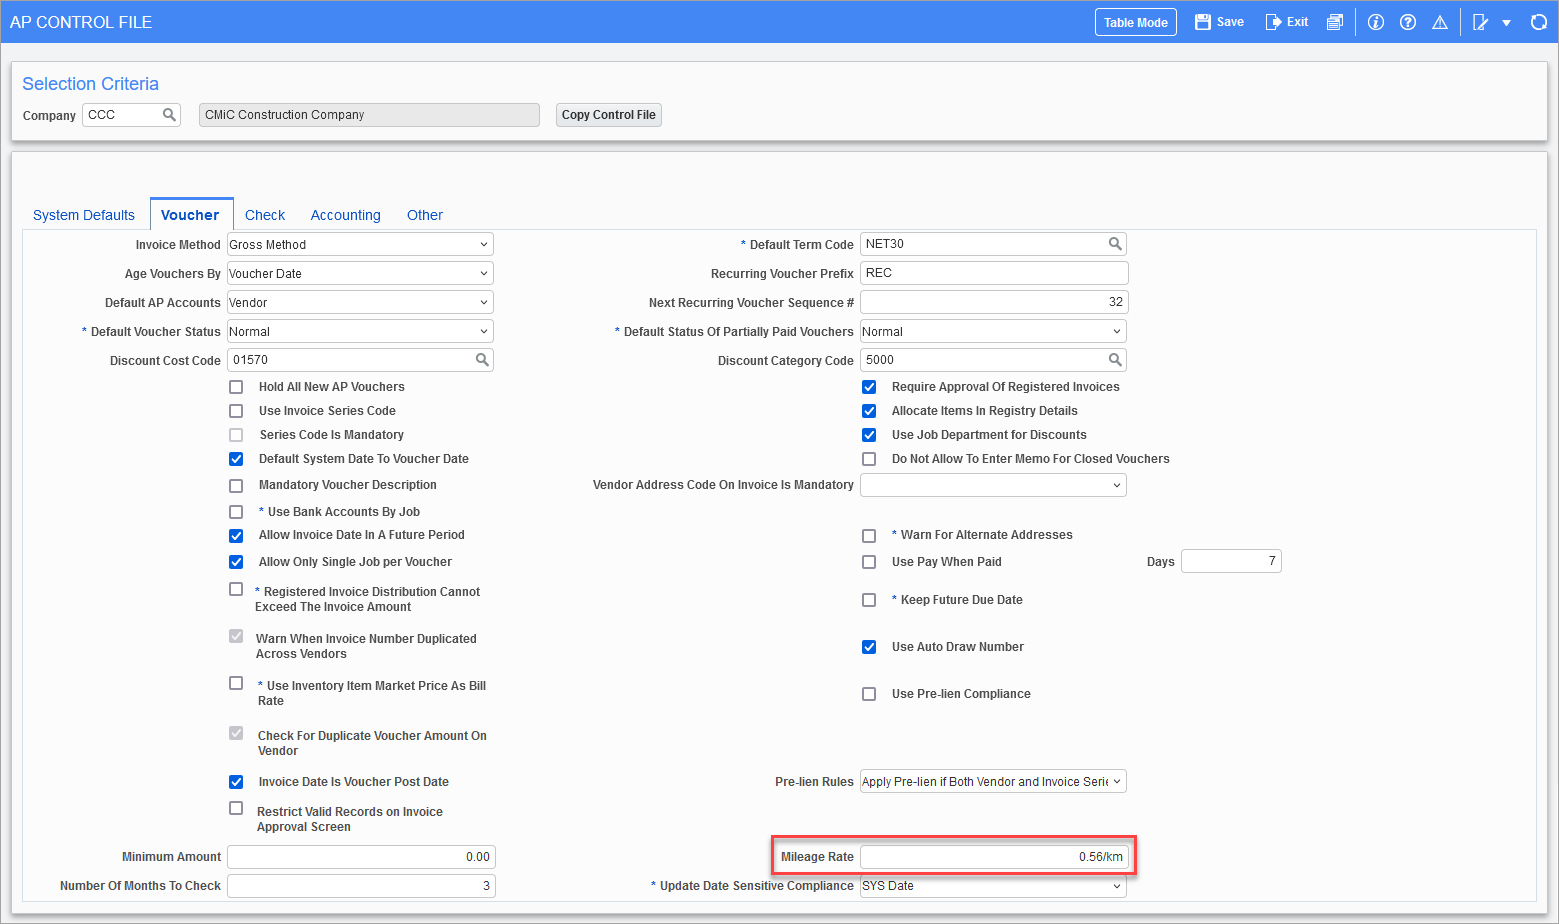
Pgm: APCTRLFM - AP Control File; standard Treeview path: Accounts Payable > Setup > Local Tables > Control File Options