NOTE: This tool is deprecated and no longer being supported by CMiC. We recommend using our Drawing and Specs Upload and Extraction Tool which is more convenient to use and has all of our latest features. For more information, see CMiC Field - Drawing and Specs Upload and Extraction Tool.
This functionality selects the documents (according to settings), extracts them from the server, and stores them at the destination – on the local machine or cloud storage.
It can be accessed via the project context menu or remote menu. Upon clicking the Project Close-Out icon ( ) the pop-up window opens, where the user can select files to be extracted.

It consists of two sections: "Select Files For Export" which contains the filters to be applied for document selection and "Save As" with settings for storage location.
Select Files For Export
Download All Documents – Toggle
When enabled, this disables all of the filters and all existing documents in the projects will be extracted.

[Clear Filters] – Button
Clears all of the settings on the Project Close-Out pop-up window.
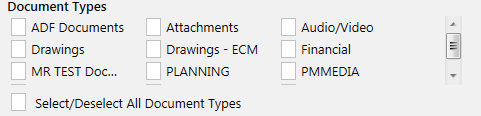
Document Types
Allows user to set the document types to select the project documents within. All checkboxes can be selected/unselected by clicking the 'Select/Deselect All Document Types' checkbox.
PM Objects
Allows user to set the PM object for the documents selection. To select/unselect all checkboxes, click the 'Select/Deselect All PM Objects' checkbox.

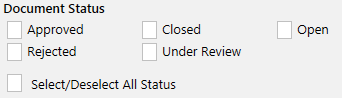
Document Status
The close-out will select the documents according to the status.
From Date, To Date
The user can specify the dates when documents have been created or updated (drop-down menu on the right side).

Only exctract most recent revision – Checkbox
When it is set the closeout selects only the latest revision of the document for extraction.

Created By
The user can choose a particular project contact to select the document created by. Only those will be extracted by the close-out.
Save As
In this section the destination for the extracted files storage can be set. In the drop-down menu, the user can choose the location for files – local computer or cloud storage.
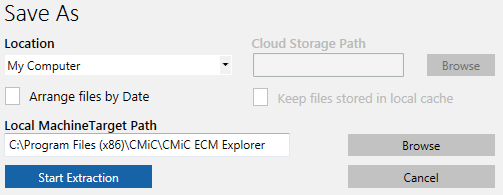
When cloud storage location is selected the storage path should be set using the [Browse] button. If it is not connected, the user will be asked to sign in to the cloud storage server upon clicking on the [Browse] button.
When “My Computer” is selected for the Location field, the Local Machine Target Path field should be set (can be done by using the [Browse] button).
The document extraction starts upon clicking the [Start Extraction] button. The system selects the documents according to filters and then shows the extraction progress.
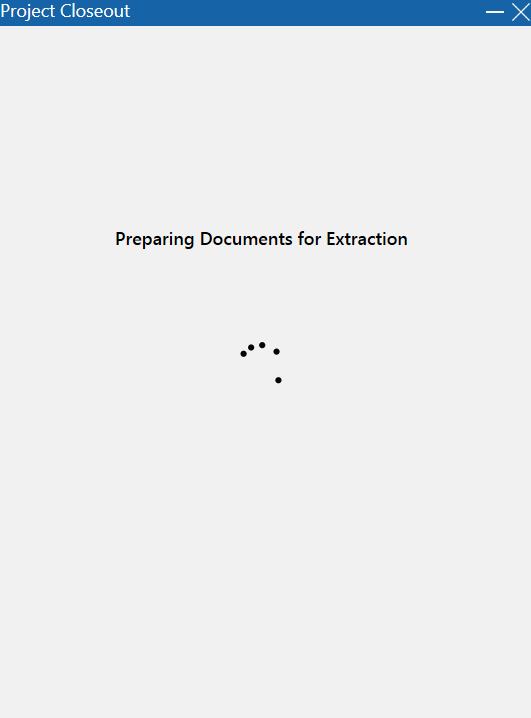
When finished the close-out log can be reviewed in the window or exported to an Excel spreadsheet. Extracted files can be archived in zip files, if required.