Overview – ECM Documents
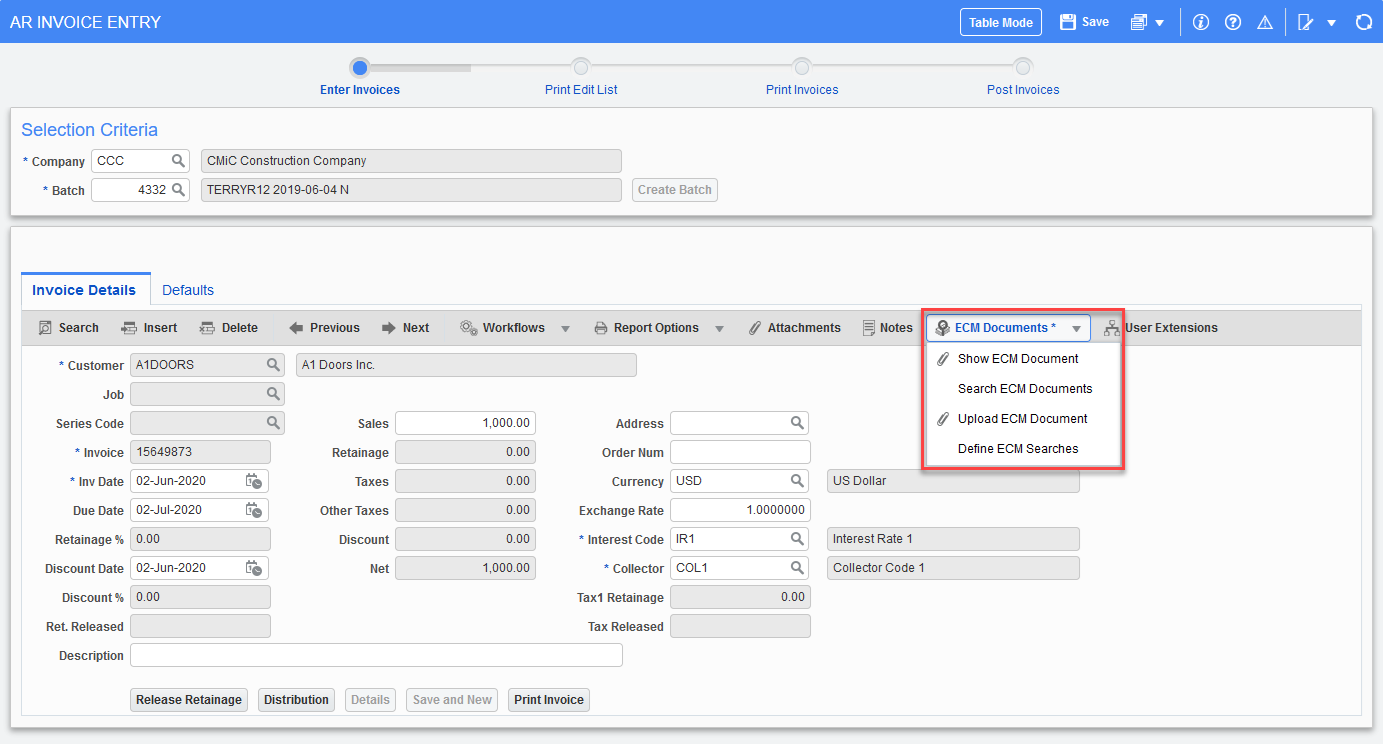
Example of [ECM Documents] button in Block Toolbar of AR Invoice Entry screen (Pgm: ARINVFM – AR Invoice Entry; standard Treeview path: AR > Invoice > Enter Invoices)
The [ECM Documents] button is located on the Block Toolbar of most CMiC Enterprise screens, as shown in the screenshot above. The “Search ECM Documents” option is the default functionality when the [ECM Documents] button is clicked and will open a new window displaying the results of an image search in CMiC’s ECM repository. Clicking on the icon on this button displays up to four menu options in a drop-down menu, depending on the screen. Since any screen within CMiC Enterprise can be given the ability to query and display images according to the current data record, the options “Define ECM Searches” and “Search ECM Documents” always appear in the drop-down menu. Each screen can have multiple searches defined using the “Define ECM Searches” option. Searches are user-defined, allowing for maximum flexibility and customization. When the user is in a screen, for example the AR Invoice Entry screen, they can, if at least one image search has been defined, view the images with a relationship to the current record using the “Search ECM Documents” option.
The “Show ECM Documents” and “Upload ECM Documents” menu options are connected to a document type in Imaging and associated to a flysheet. To allow an upload via ECM documents, information must be entered on the screen and saved. Once a document is uploaded, the information on the screen is then entered into the associated flysheet and the image status is set to submitted. The “Show ECM Documents” and “Upload ECM Documents” menu options are only available in the following screens:
| Program Name | Document Type | Treeview Path |
|---|---|---|
| AP Voucher/Registry List (APVOUINQ) | CMiC AP Voucher Display Invoice | Accounts Payable > Queries > Registry/Invoice Query |
| AR Invoice Entry (ARINVFM) | CMiC AR Invoice | Accounts Receivable > Invoice > Enter Invoices |
| AR Receipt Entry (ARCHQFM) | CMiC AR Payment | Accounts Receivable > Receipt > Enter Receipts |
| GL Transaction Entry (TRANENT) | CMiC GL Transaction | General Ledger > Transactions > Enter Transaction |
| JB Prepare Billing (JBBILL/JBBILL2) | CMiC JB Contract Billing | Job Billing > Billing > Prepare Billing or G/C Prepare Billing |
| JC Transaction Entry (JCTRNENT/JCTRNCOM) | CMiC JC Transaction | Job Costing > Transactions > Enter Cost Transaction or Enter Committed Cost Transaction |
| PO Entry (POENTRYC) | CMiC PO Records | Purchase Order > Process > Enter Purchase Order |
| PO Job Shipment Receiving (POJOBREC/POSHPREC) | CMiC PO Job Shipment | Purchase Order > Receipt > Enter Job Receipt or Enter Warehouse Receipt |
| Vendor Compliance Detail (INSFM) | CMiC Vendor Compliances | Accounts Payable > Setup > Global Tables > Compliance > Vendor Compliance |
| 2nd Party Check (APCHQ2ND) | CMiC AP 2nd Party Check | Accounts Payable > Check > Print Checks > 2nd Party Check |
| CMiC AP Lien Waiver (APPRELNOTE) | CMiC AP Lien Waiver | Accounts Payable > Payment > Process Pre-Liens |
| Manual Checks (APCHQMAN) | CMiC Manual Checks | Accounts Payable > Check > Enter Manual Checks |
For Enterprise customers, check the 'Show Inactive Document Types' box on the Document Types screen and the 'Show Inactive Flysheets' box on the Flysheets screen to view the above document types/flysheets and activate them. The document type needs to be added to a source.
For Cloud customers, click the [Copy Default Document Types] button on the Document Types screen, select the document types you need, and copy them to your system. The flysheet also copies into your system automatically, and the document type will connect to the default source.
The following subsections contain more detailed information on each of the menu options in the [ECM Documents] button.
NOTE: For further details on the storage and retrieval of PO receipt documents, see Imaging - Understanding the 3-Way Match Process in Image Manager.