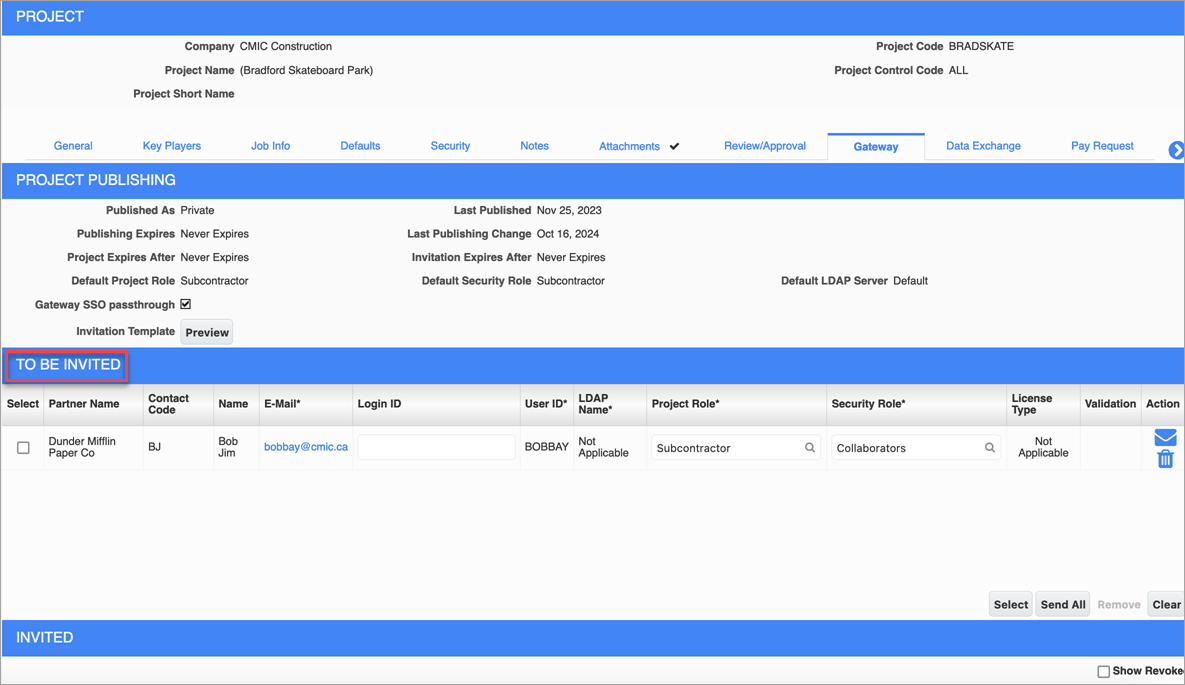
Once a Project has been successfully published to the Project Gateway system, users with the ‘Gateway -Send Contact Invitation’ Project Role privilege, as mentioned in Project Role – Grant Privileges for Project Gateway, can access the contact(s) To Be Invited section on the Gateway tab of the Project Maintenance screen to invite collaborators to work on the Project.
-
To invite collaborators, first use the [Select] button to add them to the To Be Invited section, as shown above.
-
Next, either click [Send All] to send all the listed collaborators an invite, or use the ‘Select’ checkboxes to select the collaborators individually and then use the [Send] button.
-
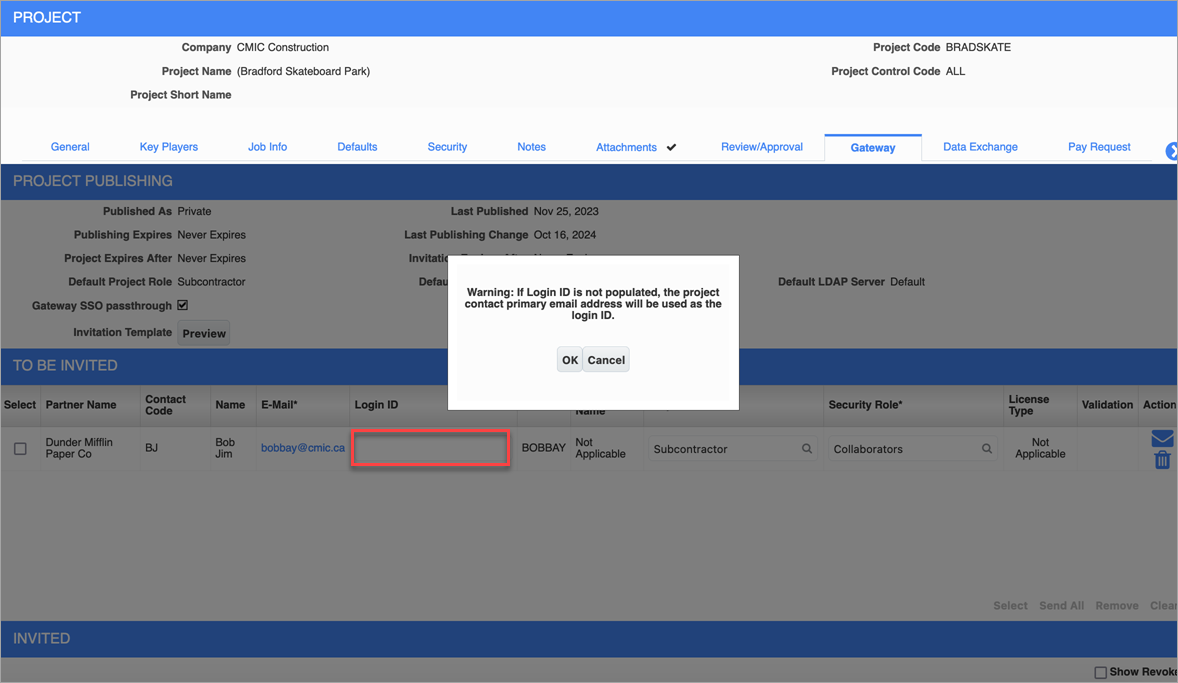
If the Login ID field is not populated, a warning message will be issued to indicate that the project contact's primary email address will be used as the login ID.

Warning message issued if Login ID field is not populated
-
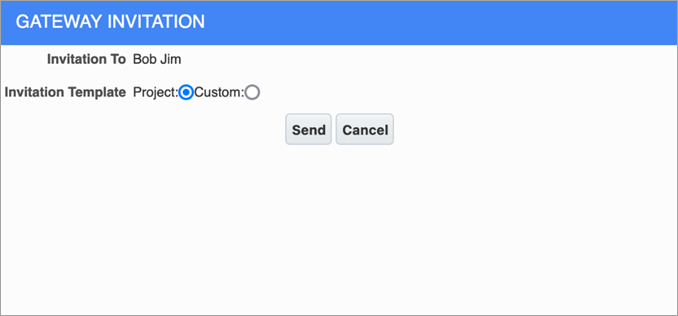
When the following pop-up appears to select the invitation template, select the 'Project' radio button to use the template set up for the Project in the Project Publishing section of the Gateway tab (shown in above screenshot), or the 'Custom' radio button to edit the invitation template via an HTML editor. When finished, click [Send].

Choosing a template to be used for the selected contact's invitation
-
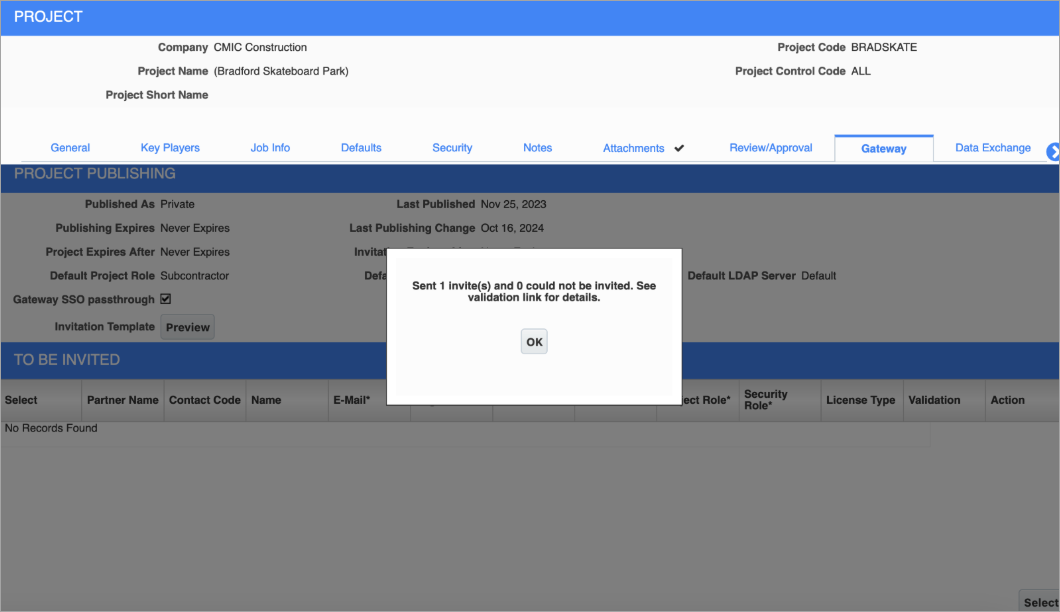
The system will then provide a message stating whether the invitation(s)were successfully sent.

Message indicating how many invitations were sent
-
After an invitation is sent, it is moved to the Invited contacts section.

To Be Invited – Section (Gateway Tab)

Select – Checkbox
Used to select one or more invitations to send or remove, using the [Send] or [Remove] buttons respectively.
Partner Name
Organization to which collaborator belongs.
Contact Code
Collaborator’s contact code.
Name
Collaborator’s name.
Collaborator’s email, to which invitation is sent.
Login ID
Collaborator’s login ID to sign in to CMiC Collaborate.
This field is used by administrators to specify the email address that a collaborator will use to log into Collaborate Gateway. If an email address is not entered in this field, a warning message will be issued to indicate that the project contact's primary email address will be used as the login ID.
User ID
Collaborator’s user ID to sign in to CMiC Collaborate.
LDAP Name
LDAP server in which collaborator’s user ID is set up. The LDAP Name column is visible when the ‘Collaborate – Gateway SSO passthrough’ option is set on the General tab of the Project System Options screen.
Project Role
Collaborator’s project role (PM role).
Security Role
Collaborator’s JSP security role.
License Type
The value in this field depends on the licenses held by the client.
Validation
If validation errors are detected with the invite, this field displays “Error” in red text, which can be clicked to view the validation error(s).
Action
Click the Message icon to send the invitation, or the Delete icon to delete it.