Requirements
In order to use Project Gateway, you will need to ensure that the following three requirements on the Gateway tab of the Project Maintenance screen are met (standard path: CMiC Field> File Maintenance > Project Maintenance – Gateway tab):
-
Site needs to be registered. Currently, only CMiC can perform the registration.
-
RTI link needs to be set up.
-
Collaborate Server is required. An external server access point will be needed.
If any of these requirements are not met, you will see one or more of the following messages, as shown in the screenshot below:

Setting Up Collaboration Administrators
Project Role – Grant Privileges for Project Gateway
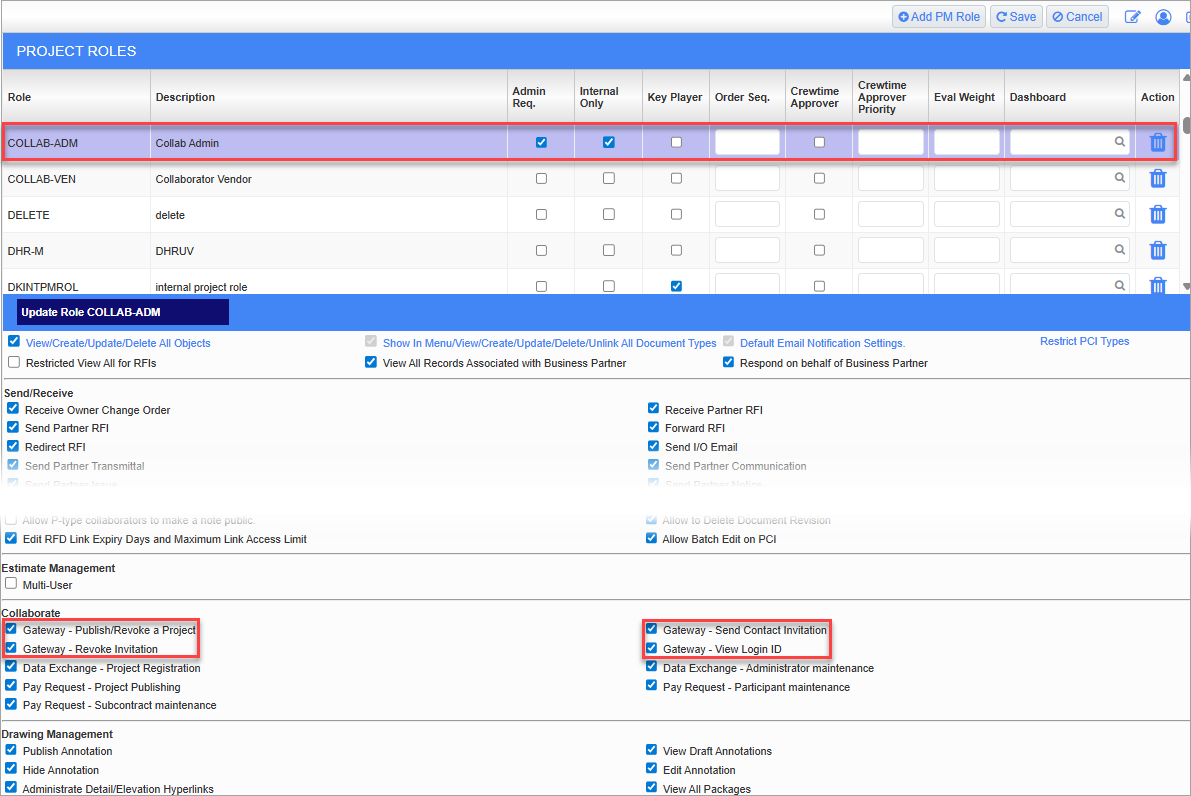
Sample of Project Roles screen, with Project Role Privilege relevant to Project Gateway framed in red
The Project Roles screen (standard path: CMiC Field> Security > Project Roles) is used to grant the following project role privileges to CMiC Field users responsible for administrating collaboration. The privileges relevant to Project Gateway are found under the Collaborate section (framed above), near the bottom of the screen.
The project roles assigned to CMiC Field users are found in their Contact records.
Gateway - Publish/Revoke a Project – Checkbox
If granted, for the projects to which the CMiC Field user has rights, the user can publish projects to and revoke projects from the Project Gateway system.
Projects published to Project Gateway can have collaborators invited to collaborate on them.
After this privilege is granted to a CMiC Field user, the [Edit Publishing] button on the Gateway tab of the Project Maintenance screen becomes available to the user:

Gateway - Send Contact Invitation – Checkbox
If granted, the CMiC Field user can send collaborators invitations to collaborate on published projects to which they have rights, using details from the collaborators’ Contact records.
In CMiC Field, Contact records are maintained using the Contacts screen (CMiC Field> Security > Contacts), and they are assigned to a project using the Project Contact Directory screen (CMiC Field> Communication Management > Project Contact Directory).
Gateway - Revoke Invitation – Checkbox
If granted, the CMiC Field user can revoke invitations to collaborators.
Gateway - Login ID – Checkbox
If granted, the Login ID field becomes visible in the Project Maintenance screen under Gateway tab for the CMiC Field user. If this privilege is unchecked, the Login ID field will be hidden.
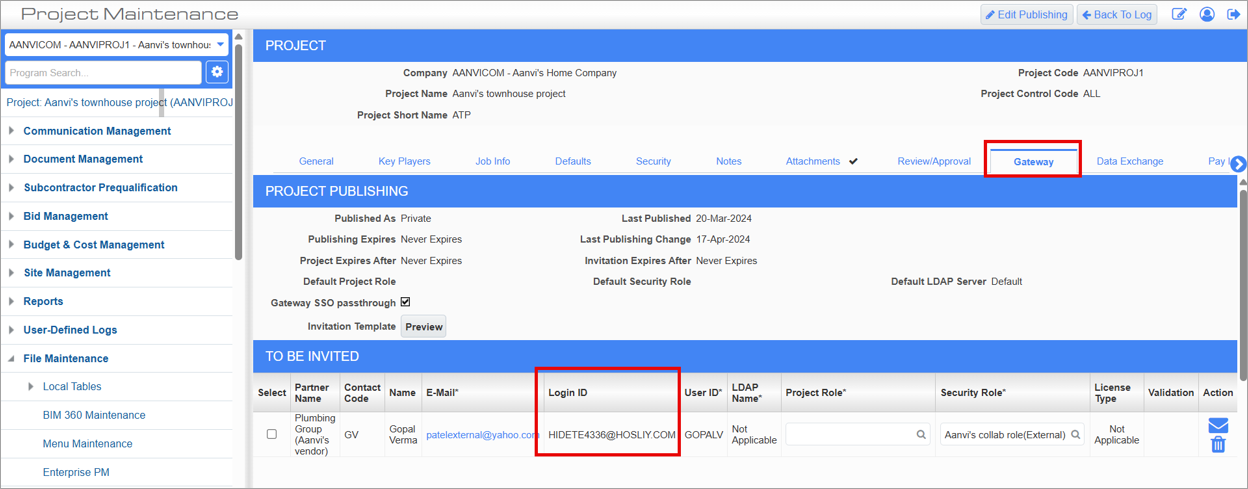
Standard Treeview path: CMiC Field > File Maintenance > Project Maintenance – Gateway tab
Setting Up Collaborators
Project Roles – Create & Configure Project Roles for Collaborators

Sample of Project Roles screen
Use the Project Roles screen (standard path: CMiC Field> Security > Project Roles) to create Project Roles (PM Roles) for the various types of collaborators with which your company works, and to grant the roles the relevant Project Role privileges for the Project Gateway system.
When publishing a Project to the Project Gateway system, via the Gateway tab of the Project Maintenance screen, you can select the Default Project Role to assign to invited collaborators that do not have an assigned Project Role, as shown below:

Sample of Gateway tab in Project Maintenance screen, with the Default Project Role field framed in red
JSP Security Roles – Create & Configure Security Roles for Collaborators
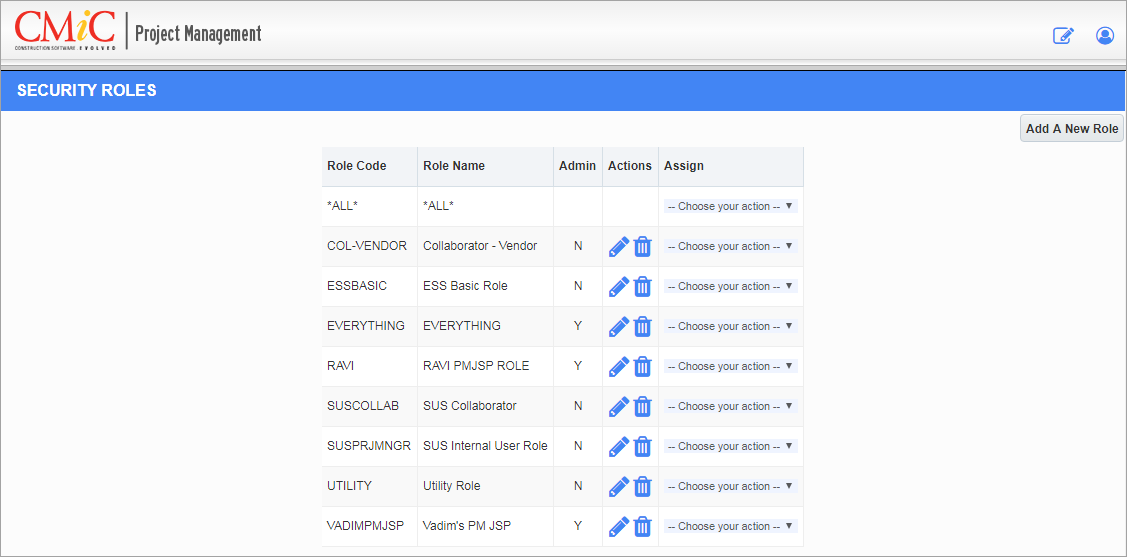
Sample of Role Maintenance screen for JSP Security Roles
Use the Role Maintenance screen (standard path: CMiC Field> Security > Role Maintenance) to create PM Security Roles for the various types of collaborators with which your company works, and to grant the roles the relevant Programs, Menu Items, Privileges and Field Security for the Project Gateway system.
When publishing a Project to the Gateway system, via the Gateway tab of the Project Maintenance screen, you can select the Default Security Role to assign to invited collaborators that do not have an assigned JSP Security Role, as shown below:

Sample of Gateway tab in Project Maintenance screen, with the Default Security Role field framed in red
Project Contact Directory – Add Collaborators to Project’s Contact Directory
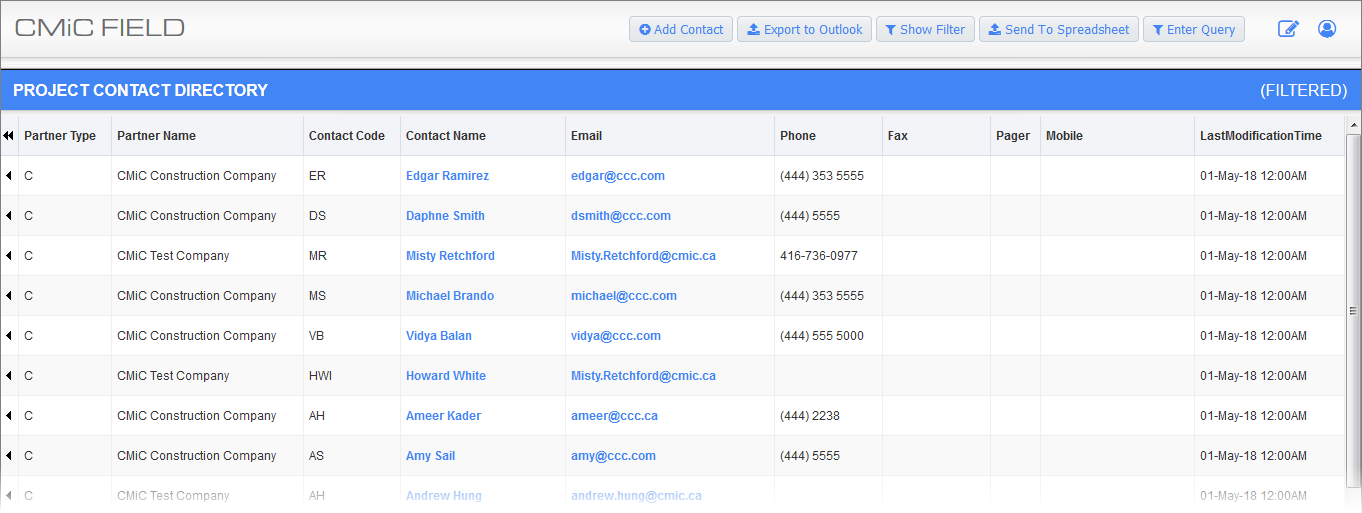
Sample of CMiC Field’s Project Contact Directory Screen
Using CMiC Field’s Project Contact Directory screen, add the collaborator to the Project’s Contact Directory.
Notification Links for Collaborators
In order to have links in notification emails to Gateway users work properly, you must enter the URL to the CMiC Collaborate server appropriate to your environment in the Web Servers pop-up window launched from the System Options screen in the System Data module (standard Treeview path: System Data > Setup > System Options – General tab – [Web Servers] button). If your environment is working with the Test environment of CMiC Collaborate, you must create a record with URL https://cmiccollaborate.com/cmictest/ with the ‘GCS Server’ box checked. If your environment is working with the Prod environment of CMiC Collaborate, you must create a record with URL https://cmiccollaborate.com/cmicprod/ with the ‘GCS Server’ box checked.
Registering with Global Collaboration Services
NOTE: We are excited to announce that we will be updating CMiC Collaborate to use a more modern authentication protocol powered by Microsoft/Azure. This means collaborators will bring their own identity when authenticating to Collaborate to view their projects. A transition date will be announced before rollout. To ensure a smooth transition, we have prepared some information to outline what you can expect after this process has been completed. To learn more, refer to Project Gateway - Collaborate Gateway Registration and Login with Azure. If you have any additional questions, please reach out to your account manager.
Gateway Invitation Process
After a Collaboration Administrator publishes a project to Project Gateway, collaborators are invited to join the project team. The first time a collaborator receives an email invitation to join a project team, they will need to register with Global Collaboration Services by setting up their account (e.g., Single Sign-On Credentials).
The contact may receive and accept invitations from multiple companies that they are doing business with. After initially creating an account, the system will recognize and register the contact in GCS, for subsequent projects, by linking the email address. The dashboard will then show all the projects that the contact was invited to and had accepted.
From the dashboard, the contact can easily access any project they wish by just tapping on it (app), or clicking on it (web) to get the display for the project.
NOTE: After following these setup procedures, if you are unable to successfully log into CMiC Collaborate, please contact CMiC Support.
Setting up Single Sign-On Credentials
To help guide collaborators through the enrollment process, the steps used to register and log into the system are provided below.
Web (Desktop)
-
Click on the [Join Team] button in the invitation email.
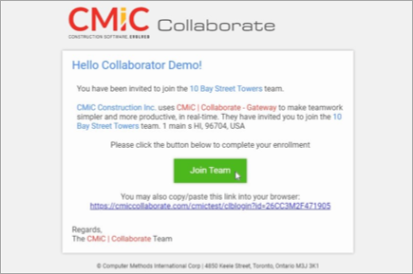
Example of invitation to join project team using CMiC Collaborate
-
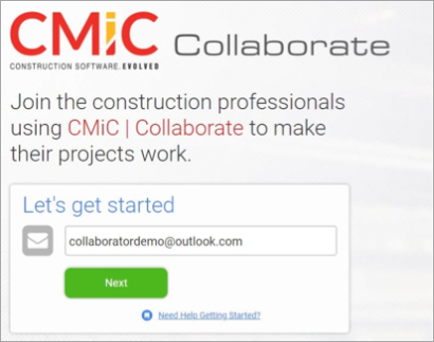
Your email address will default in the Let’s get started section of the window. Click on [Next].
-
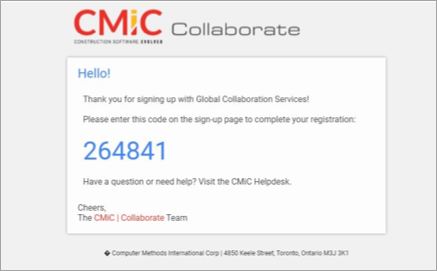
A six-digit confirmation code will be sent to your email address (i.e., the email address indicated in the previous window).
-
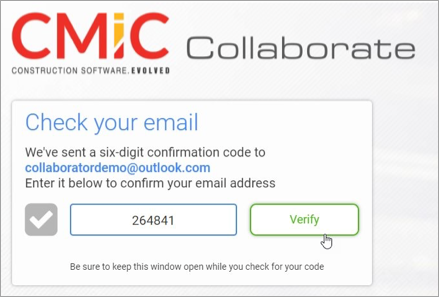
Enter the six-digit code in the window to complete the registration and click [Verify].
-
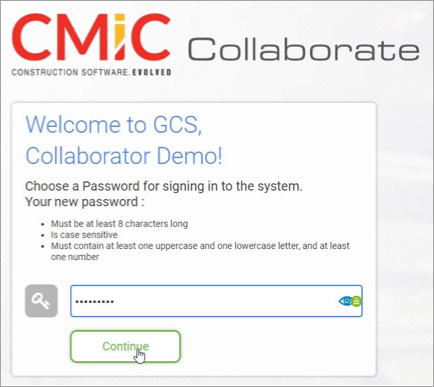
Next you will be prompted to enter a user password for signing in to the Collaborate system. It must be at least six characters in length. Enter your password and click on [Continue].
-
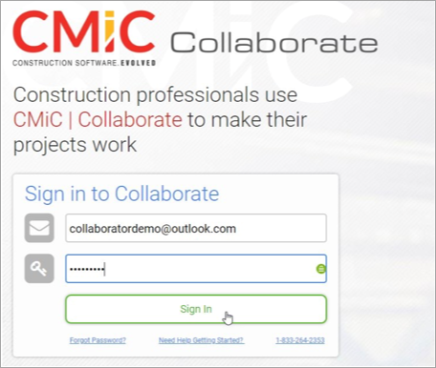
To sign in to Collaborate, enter your email address and password, then [Sign In].
-
You will see the Collaborate dashboard, listing the project you were invited to join.

CMiC Collaborate Gateway on Web (Desktop)
The next time you sign in to Collaborate, whether you are joining a new project team or just logging in to the system to work on your current projects, you will only need to enter your email address and password.
Mobile
Once you have an account set up, as shown in the steps above, you can get started using CMiC Collaborate on your mobile app.
-
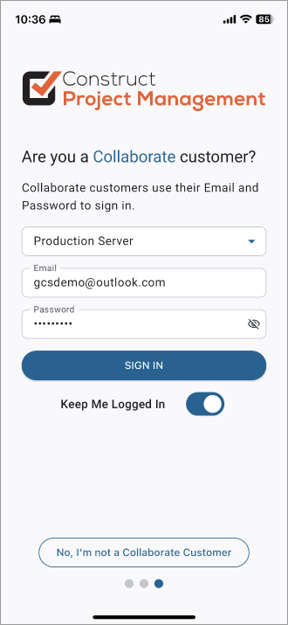
Launch the Construct PM app and enter your Collaborate email and password and press [Sign In].
-
Once logged in, you will see the dashboard showing the project that you have been invited to join.
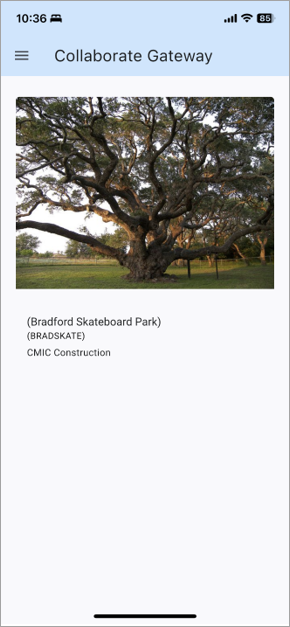
CMiC Collaborate Gateway on Mobile
RTI – Real-Time Integration
Refer to CMiC Collaborate - RTI - Real-Time Integration (for Gateway and Data Exchange) for more information.