Set Up EFT File Format
Pgm: APEFTFM – EFT File Format; standard Treeview path: Accounts Payable > Setup > Global Tables > EFT Formats
Use the EFT File Format screen to set up the Electronic File Transfer (EFT) format for the banks from which EFT payments will be made.
EFT Format
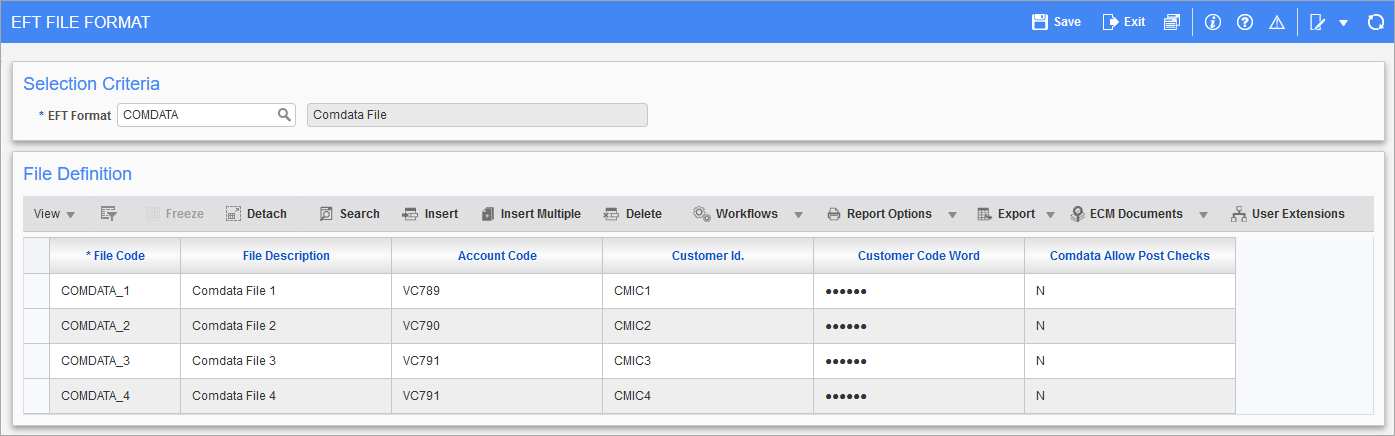
In the Selection Criteria section of the screen, select “COMDATA” in the EFT Format drop-down menu.
File Definition, File Code, File Description
In the File Definition section of the screen, the File Code and File Description fields are used to enter the bank-specific EFT file format details specifying the record layout required by the bank. Enter the codes in the File Code field in numerically ascending order in the pre-defined format. For Example: “COMDATA_1”, “COMDATA_2”, etc. Then provide a user-defined description in the File Description field.
NOTE The File Code field is not a user-defined field and must contain “COMDATA_1” in numerically ascending order.
Account Code, Customer Id, Customer Code
The Account Code, Customer Id, and Customer Code Word fields are used to enter Comdata-specific account details. Entering values other than those provided by Comdata will result in an error.
A single Account Code can have multiple Customer Codes, but one Customer Code must be linked to a single Account Code. For Example: Account Code VC791 is linked to two Customer IDs: CMIC3 and CMIC4.
Comdata Allow Post Checks
By default, the value of the Comdata Allow Post Checks field is "N". This field is used if users want to post Comdata checks immediately after importing the response file (when the card number token is generated) and before importing the Comdata reconciliation file (which confirms if the vendors are actually paid). To use this functionality, the Comdata Allow Post Checks field must be marked as "Y" for all the account codes in “Comdata” EFT format. For more details on how to use this functionality, please refer to the following section: Comdata Allow Posting of Checks After Card Number Token is Generated.
Display [Comdata] Button on Prepare Checks Screen using Lite Editor
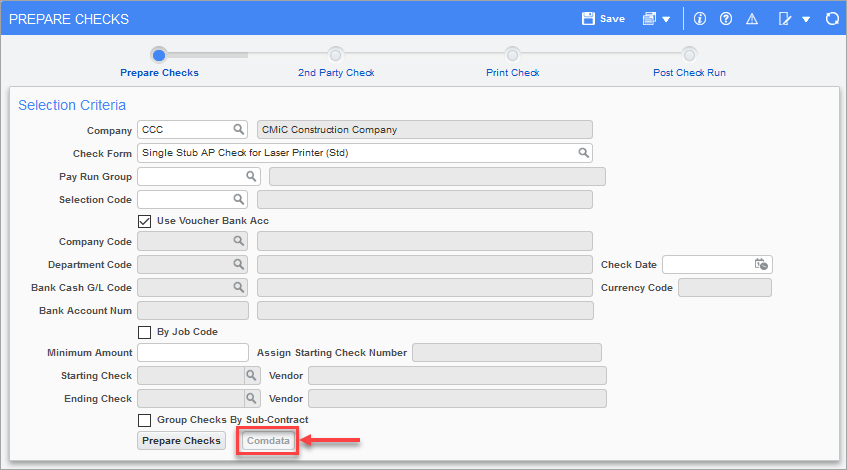
Pgm: APCHQPRE – Prepare Checks; standard Treeview path: Accounts Payable > Check > Print Checks – [Comdata] button
The Comdata button is located on the Prepare Checks screen in the Accounts Payable module and by default it is hidden. This button is made visible using Lite Editor.
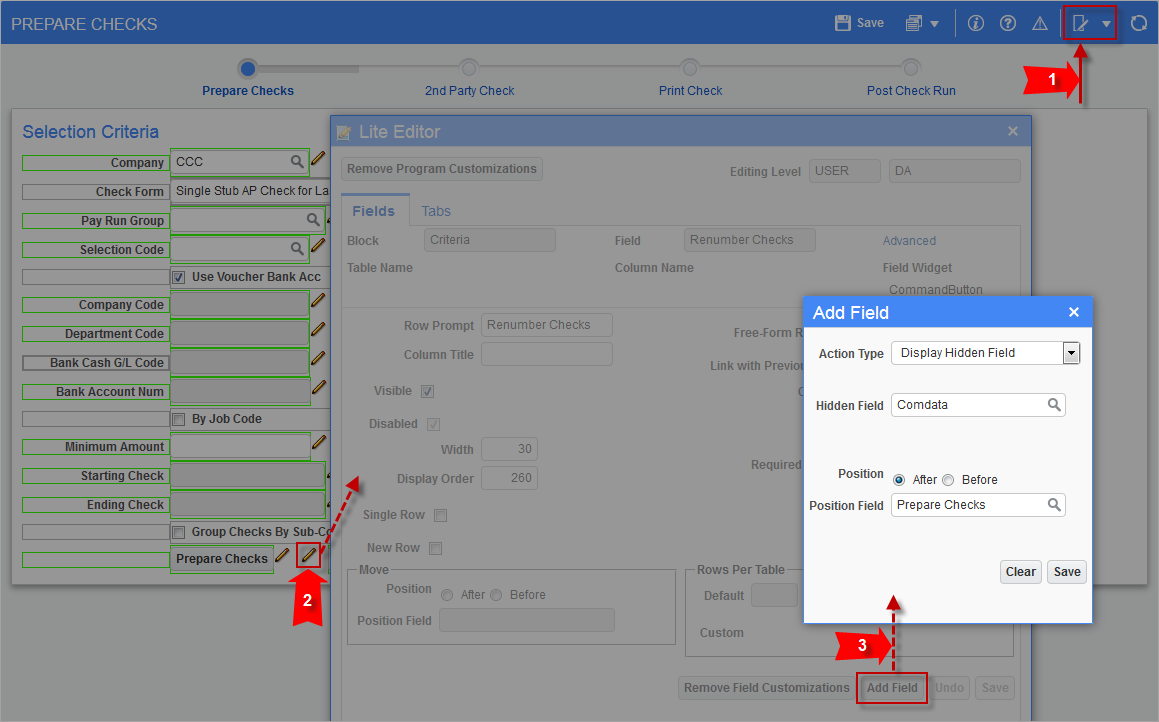
Displaying the [Comdata] button on the Prepare Checks screen using Lite Editor
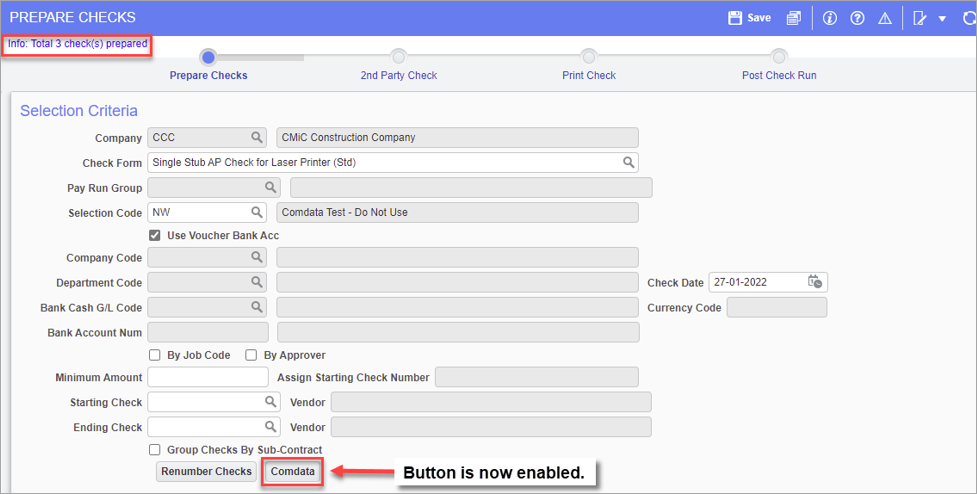
After making the Comdata button visible on the Prepare Checks screen, checks can be prepared for a pay run group or a selection code. Both methods are described in the sections that follow. The main difference between the two methods is the procedure to be followed in Steps 1-2. The rest of the procedure to be followed in Steps 3-7 is basically the same for both methods, except for in Step 5, the Move To New Group/Selection pop-up window varies depending on whether it’s launched for a selection code or pay run group.
The Comdata button becomes enabled once the checks are prepared and the ‘EFT Payments’ radio button is enabled in the Select Payments screen. The ‘EFT Payments’ radio button is discussed in more detail in the next section.
Check Release and Check Reconciliation Feature
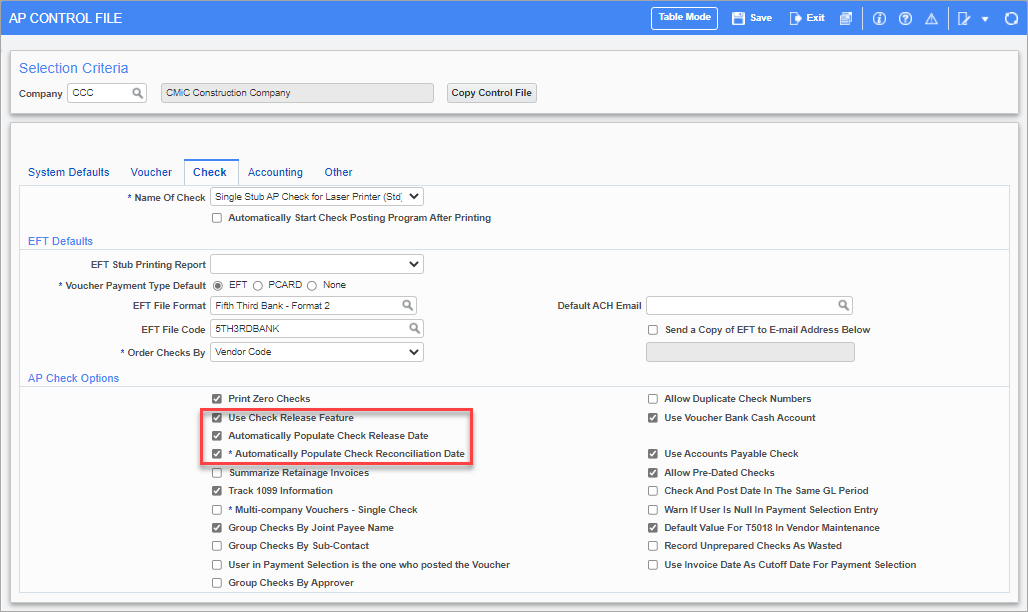
Pgm: APCTRLFM – AP Control File; standard Treeview path: Accounts Payable > Setup > Local Tables > Control File Options – Check tab
If users wish to use the check release and check reconciliation features, they must check the following boxes on the Check tab of the AP Control File screen:
-
Use Check Release Feature
-
Automatically Populate Check Release Date
-
Automatically Populate Check Reconciliation Date
If the ‘Automatically Populate Check Reconciliation Date’ box is unchecked and Comdata checks are posted, Comdata checks can still be reconciled at a later time using the Reconcile Checks screen in the Accounts Payable module (standard Treeview path: Accounts Payable > Checks > Reconcile Checks).
NOTE: With the COMDATA processing when AC28 Reconciliation file is downloaded by the system, it will automatically update the reconciliation date as system date as of patch V12-015-1. In future versions of the software (i.e., V12-015-2), this date will be updated using the date value under column#8 in the AC28 file, which is the actual payment date by COMDATA.