CMiC Field - Checklists (Classic)
NOTE: As of Nexus 01 (January 2026), Checklists (Classic) will be deprecated, meaning it will no longer be supported as soon as a customer installs Nexus 01. CMiC encourages users to use CMiC Field - Project Checklists.
Overview
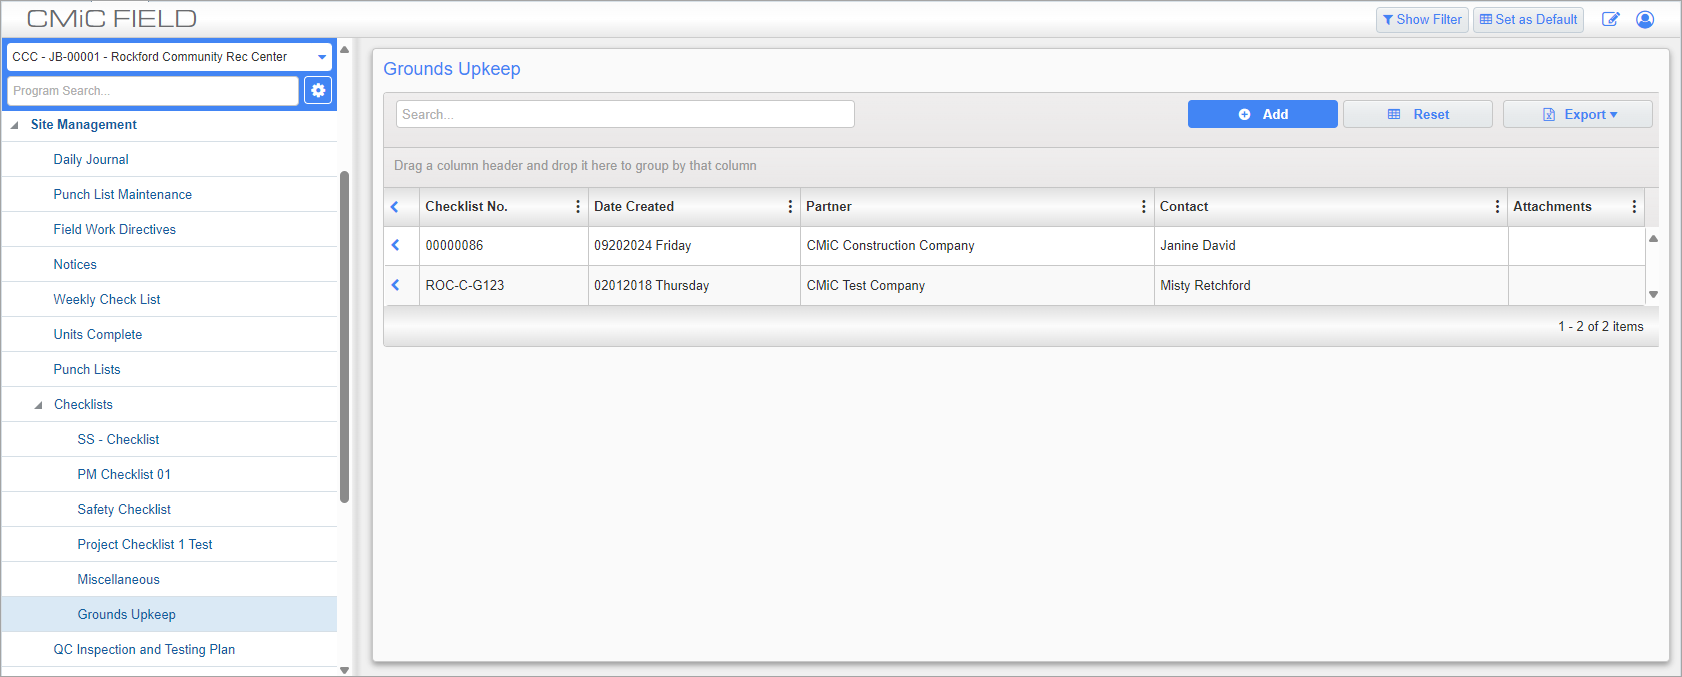
Checklists; standard Treeview path: CMiC Field > Site Management > Checklists
The Checklists log screen appears after the user selects a checklist type from the Checklists menu in the Treeview.
Creating a New Checklist
Sample Checklist
Checklists types are defined and maintained in the Checklist Maintenance screen in Local Tables (standard Treeview path: CMiC Field > File Maintenance > Local Tables > Checklist Maintenance).
Checklists of any of these defined types can then be created.
[Add] – Button
Press this button to create a new checklist of the selected type.
[Edit] – Button
Press this button to edit the checklist.
[Delete] – Button
Press this button to delete the checklist.
[Print Report] – Button
Press this button to print the checklist. The following report types are available for selection from the Report Name field's drop-down list: project checklist, checklist report with images, checklist detail report, and checklist summary report.
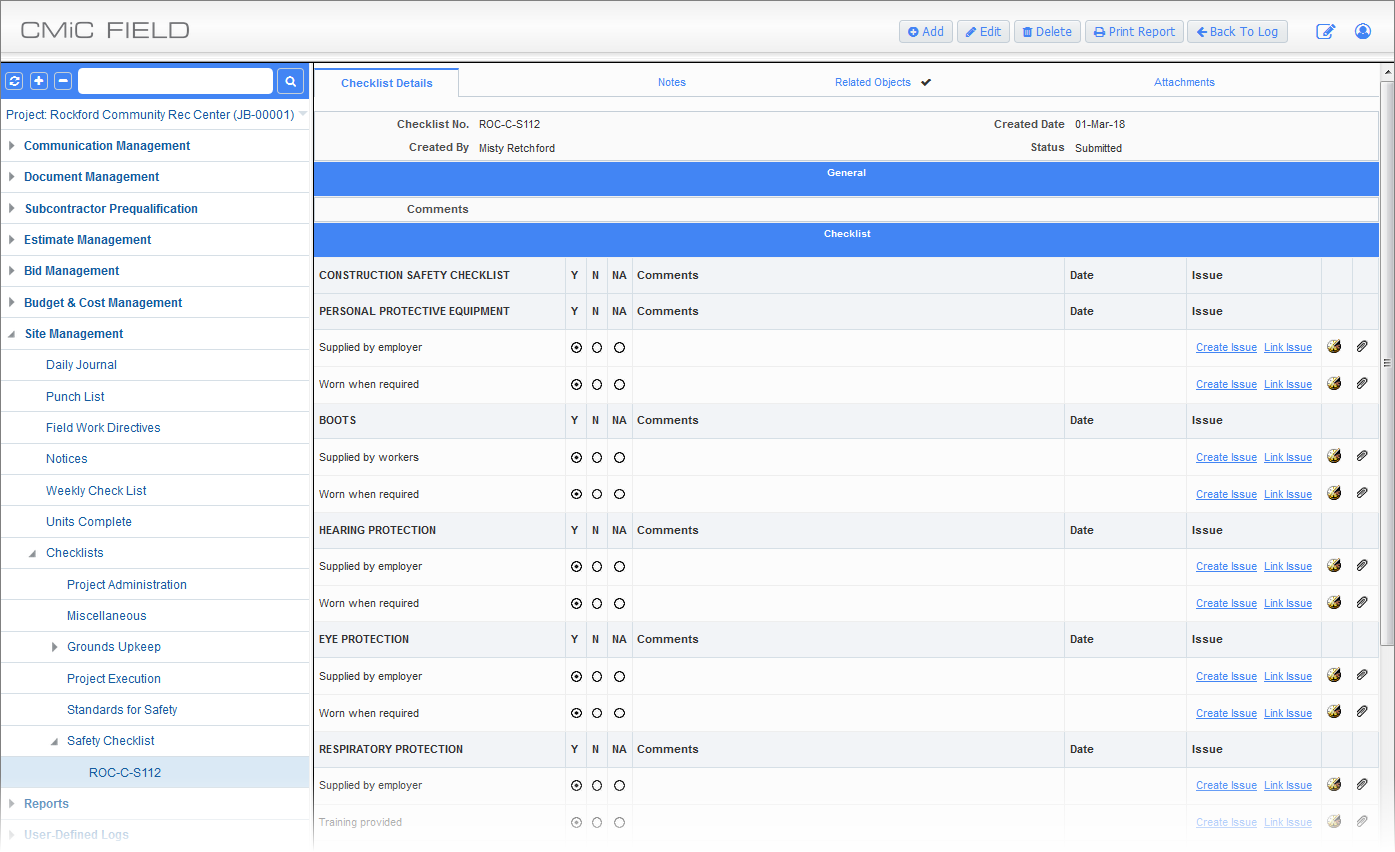
Checklist Details – Tab
Standard Treeview path: CMiC Field > Site Management > Checklists – Checklists Details tab
The header section is used to capture high-level information about the checklist. Here, users can view the checklist status, view the date the record was created and the user who created the record. The Checklist Status bar/status field is used to show un-submitted/submitted checklist.
[Submit] – Button
Press this button to submit a completed checklist. If it is incomplete, validation errors will be highlighted. When a checklist is submitted, the Status changes from "Pending" to "Submitted".
Field security can be applied to the [Submit] button on any defined checklist type.
![Screenshot of Checklists with [Submit] button highlighted](../../../../Resources/Images/9_Site_Management/Checklists_1.png)
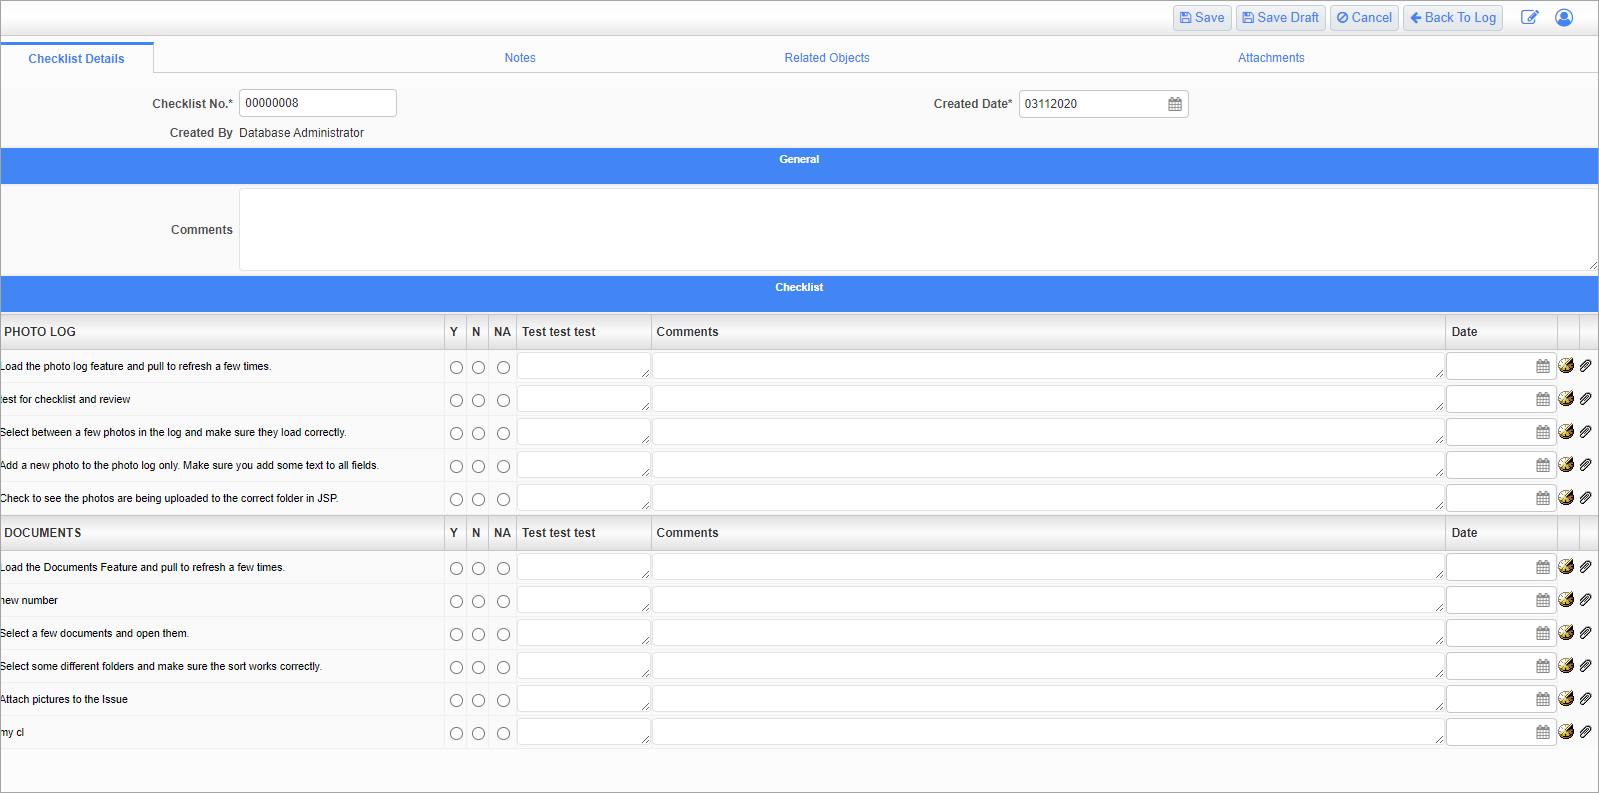
[Save] – Button
This button will only validate the mandatory Date field in the header. The [Save] button will return the checklist in View mode even though it might be incomplete.
[Save Draft] – Button
This button will only validate the mandatory Date field in the header. The [Save Draft ] button will return the record in Edit mode.
Checklist No.
Enter a checklist number. If autonumbering has been set, this number will be system-generated.
Created Date
Enter the date the checklist was created.
Created By
This field is read-only and displays the user who created the checklist. This is the logged-in user by default.
Status
This field is read-only and displays the status of the checklist. This field is only available in View mode.
General
This section is used to add comments to the checklist.
Checklist
This section contains the checklist questions and is used to execute the checklist. Users can also create and link a new issue (or link an existing issue) to the question.
Issue
Users can create/link an issue from/to a checklist item.
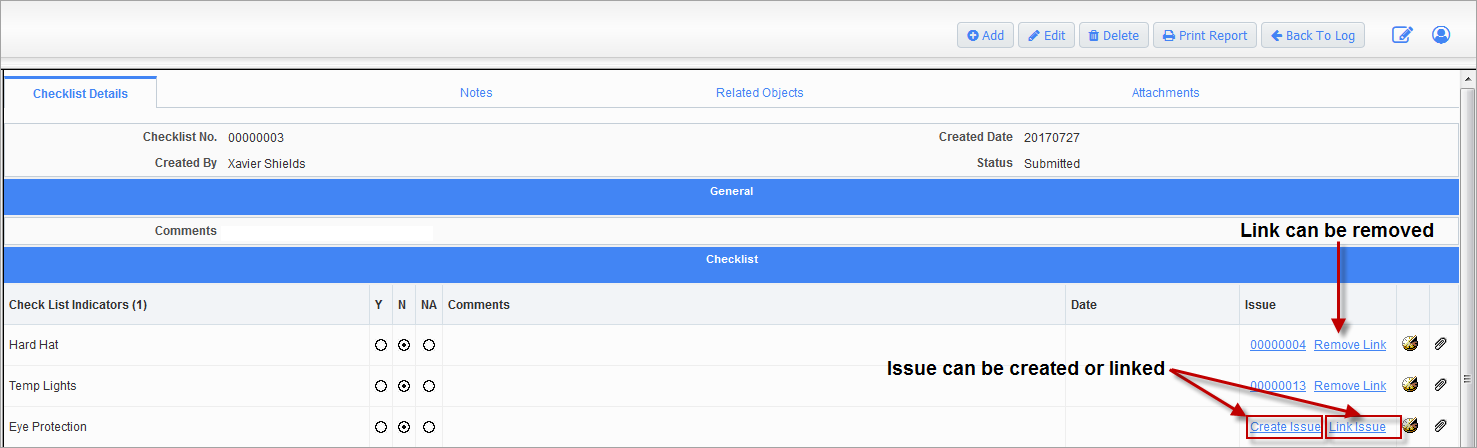
Example of Issues and Links created for Checklist Item
The checklist item is available in the linked issue's Related Objects tab.
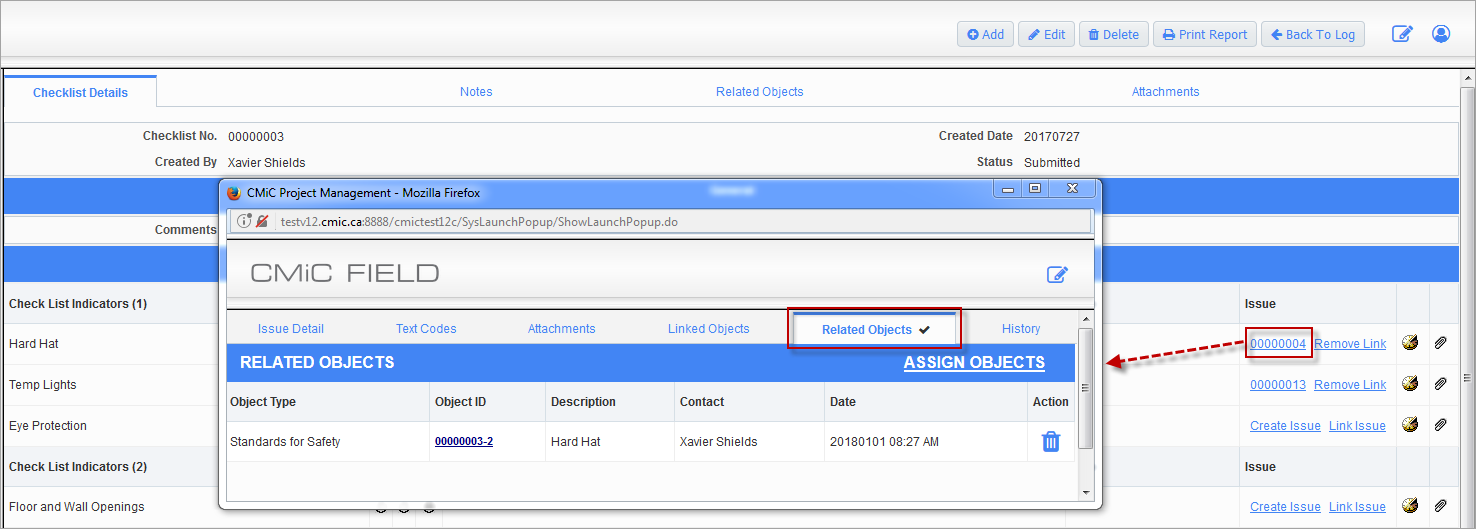
Example of Checklist Item shown in the Related Objects tab of the Issue
Notes and Attachments – Tabs
These tabs are used to add additional notes and/or attachments to the checklist. Please refer to CMiC Field - Notes, Attachments, and Documents for further details.
Related Objects – Tab
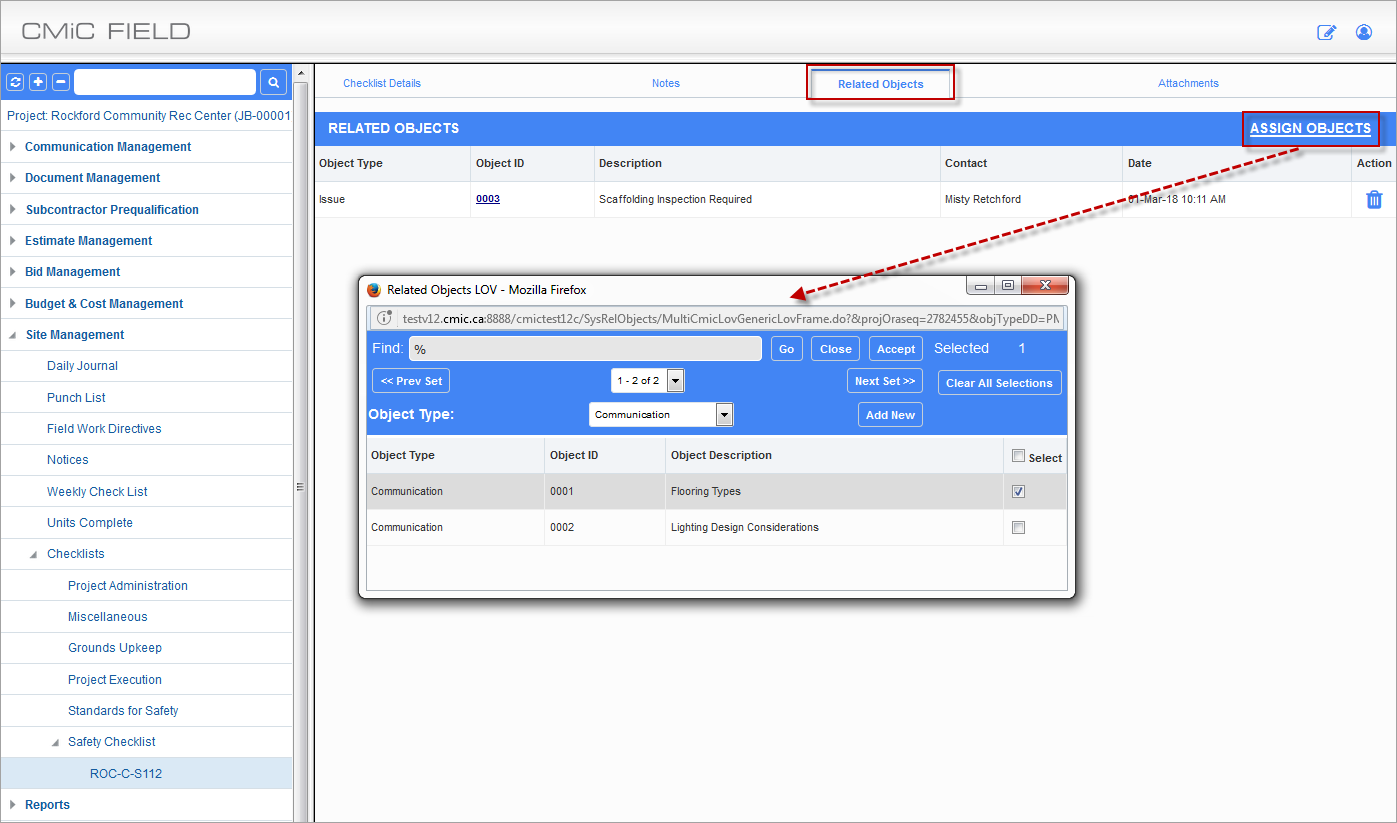
Standard Treeview path: CMiC Field > Site Management > Checklists – Related Objects
Field security can be applied to the Related Objects tab.
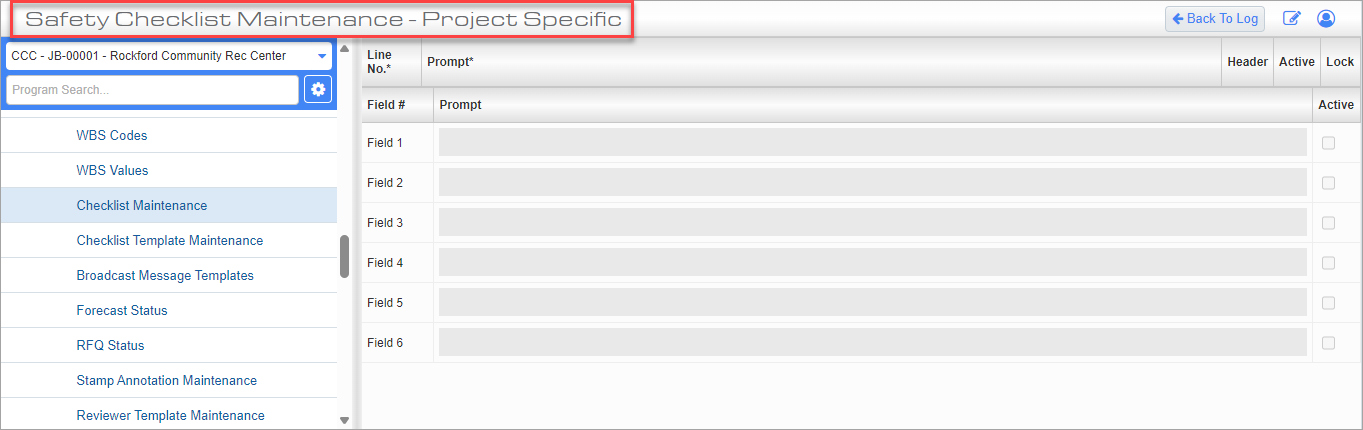
Project-Specific Checklists
Checklists can also be differentiated into system-level and project-specific. This can be achieved by using the ‘Assign to Project’ checkbox in the Checklist Maintenance screen (standard Treeview path: CMiC Field > File Maintenance > Local Tables > Checklist Maintenance):
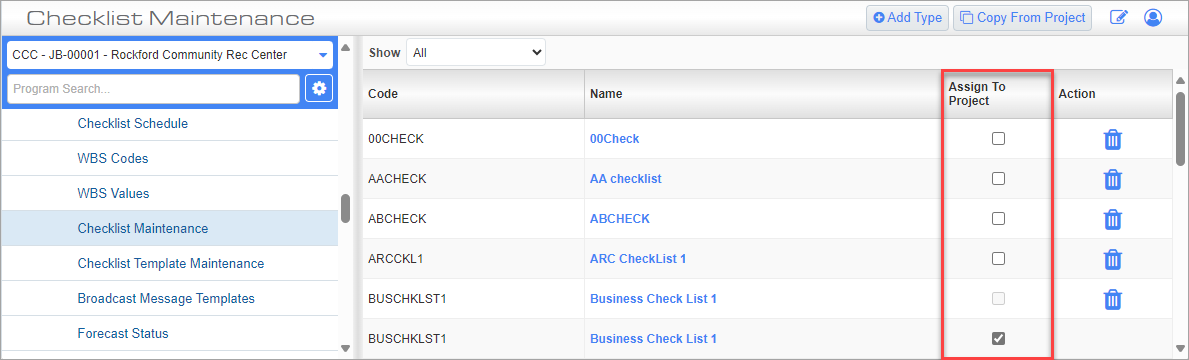
Checklist Maintenance; standard Treeview path: CMiC Field > File Maintenance > Local Tables > Checklist Maintenance
When the checkbox is checked, the following message is displayed:
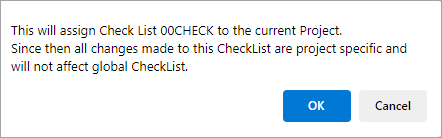
When the assignment is carried out, the words ‘Project-Specific’ are appended to the checklist name:
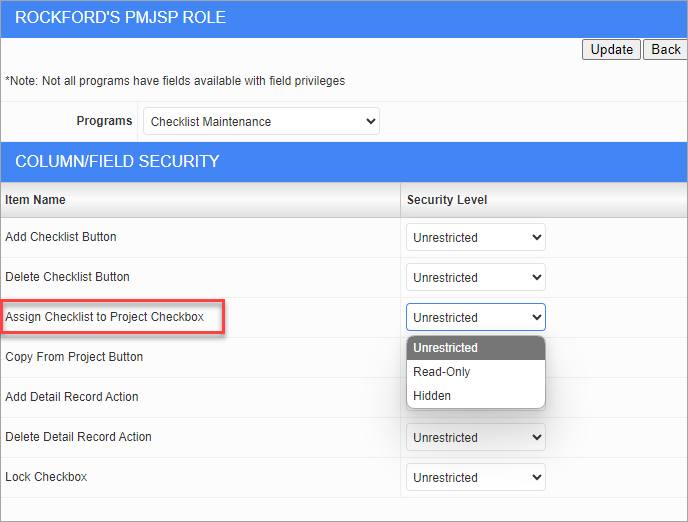
Field Security
Field security can also be applied to the ‘Assign to Project’ checkbox:
Other features of project-specific checklists:
-
Project-specific checklists are based on the same mask ID as the non-project-specific checklists.
-
Project-specific checklists are only available for use on the Treeview menu of the current project.
-
Field security exists for the [Edit] button for each checklist type, to prevent editing by some users, if desired:
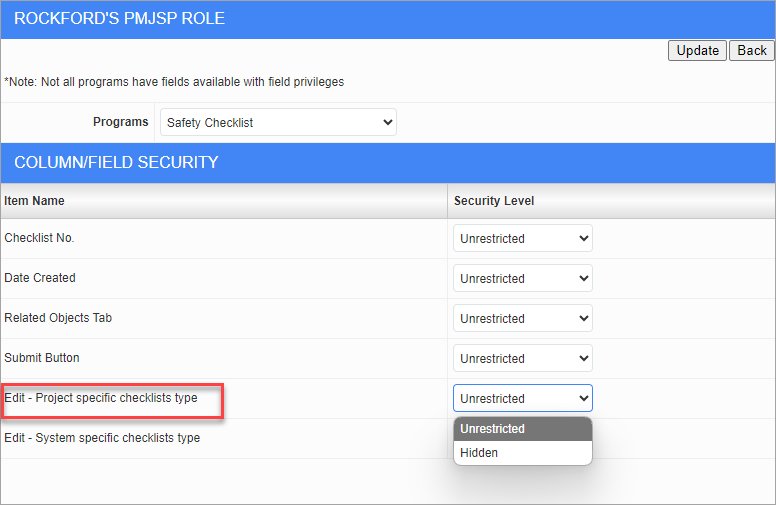
Example:
Defined checklist type = Safety Checklist
Prior to applying field security to the [Edit] button, it is visible:
![Screenshot of Checklist Maintenance with [Edit] button highlighted.](../../../../Resources/Images/CMiC_Field/CMICFIELD_Checklists_Classics8.png)
After applying field security, the [Edit] button is not visible:
![Screenshot of Checklist Maintenance with no [Edit] button.](../../../../Resources/Images/CMiC_Field/CMICFIELD_Checklists_Classics9.png)
Once checklist records are created for a particular checklist type, if the field security on the [Edit] button in the checklist is set to ‘Hidden’, it can’t be changed back to being visible unless all the checklist records under that checklist type are first deleted.
The ‘Assigned to Project’ checkbox is also disabled from update. These precautions prevent any updating of the checklist type layout while records already exist for that type, thereby preventing data inconsistency errors.
Checking the ‘Show Only Project-Specific Checklists’ checkbox in PM System Options allows users to see only project-specific checklists on the Treeview menu:
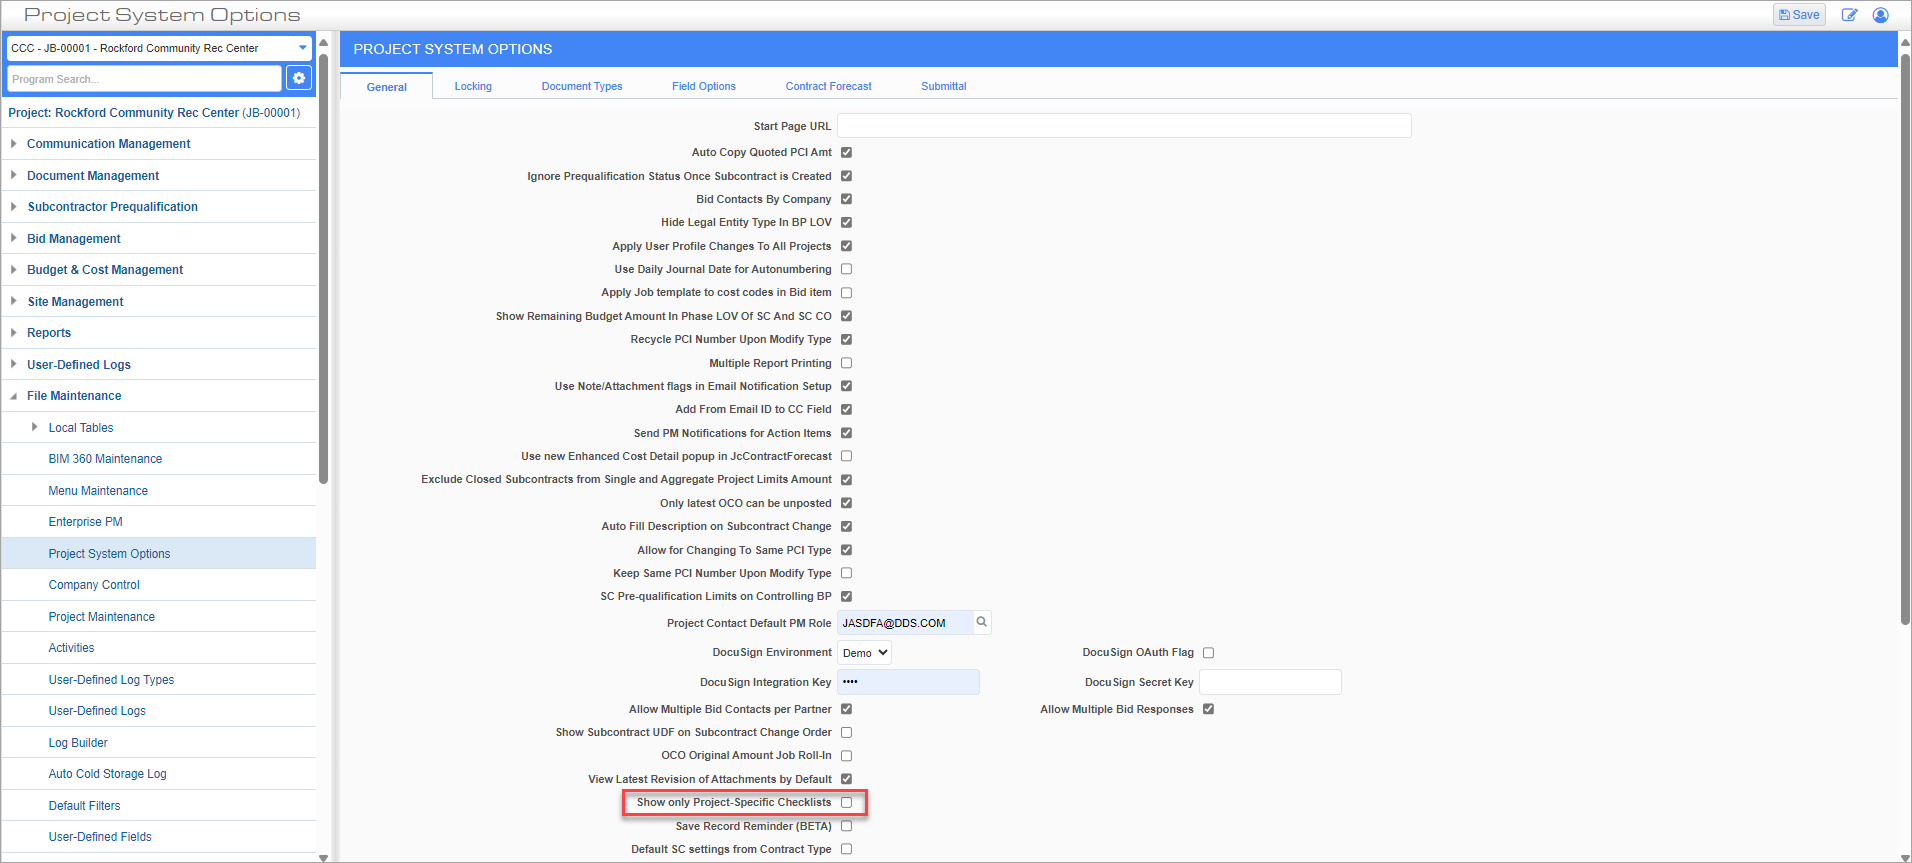
Standard Treeview path: CMiC Field > File Maintenance > Project System Options – General tab
The user should refresh the Treeview menu in order to see changes when assigning/un-assigning Checklists to/from the project.
Locking Checklists
Checklists can be locked in the same way as daily journals. The locking setup is defined in the Locking tab of PM Systems Options:
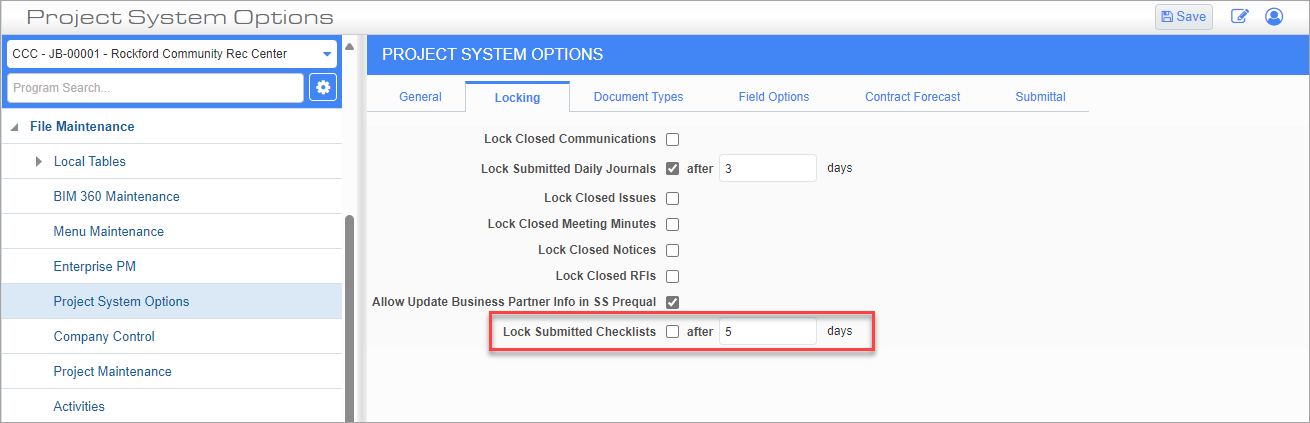
Standard Treeview path: CMiC Field > File Maintenance > Project System Options – Locking tab
Only users with the ‘Admin’ flag checked on their CMiC Field security role (standard Treeview path: CMiC Field > Security > Role Maintenance) can edit a locked checklist.
Rules Governing Checklists
Below is an outline of the rules regarding security and editing of checklists.
-
Users can edit user’s own [pending checklist] or [submitted + not locked] without having 'Edit' privilege.
-
Users with 'Edit' privilege and 'Admin' box checked on user’s role can edit any checklist.
-
Users with 'Edit' privilege and without 'Admin' box checked on user’s role can edit any non-locked checklist.
-
Users can submit checklist if user can edit it (based on previous three rules) and unrestricted Field Security for [Submit] button.