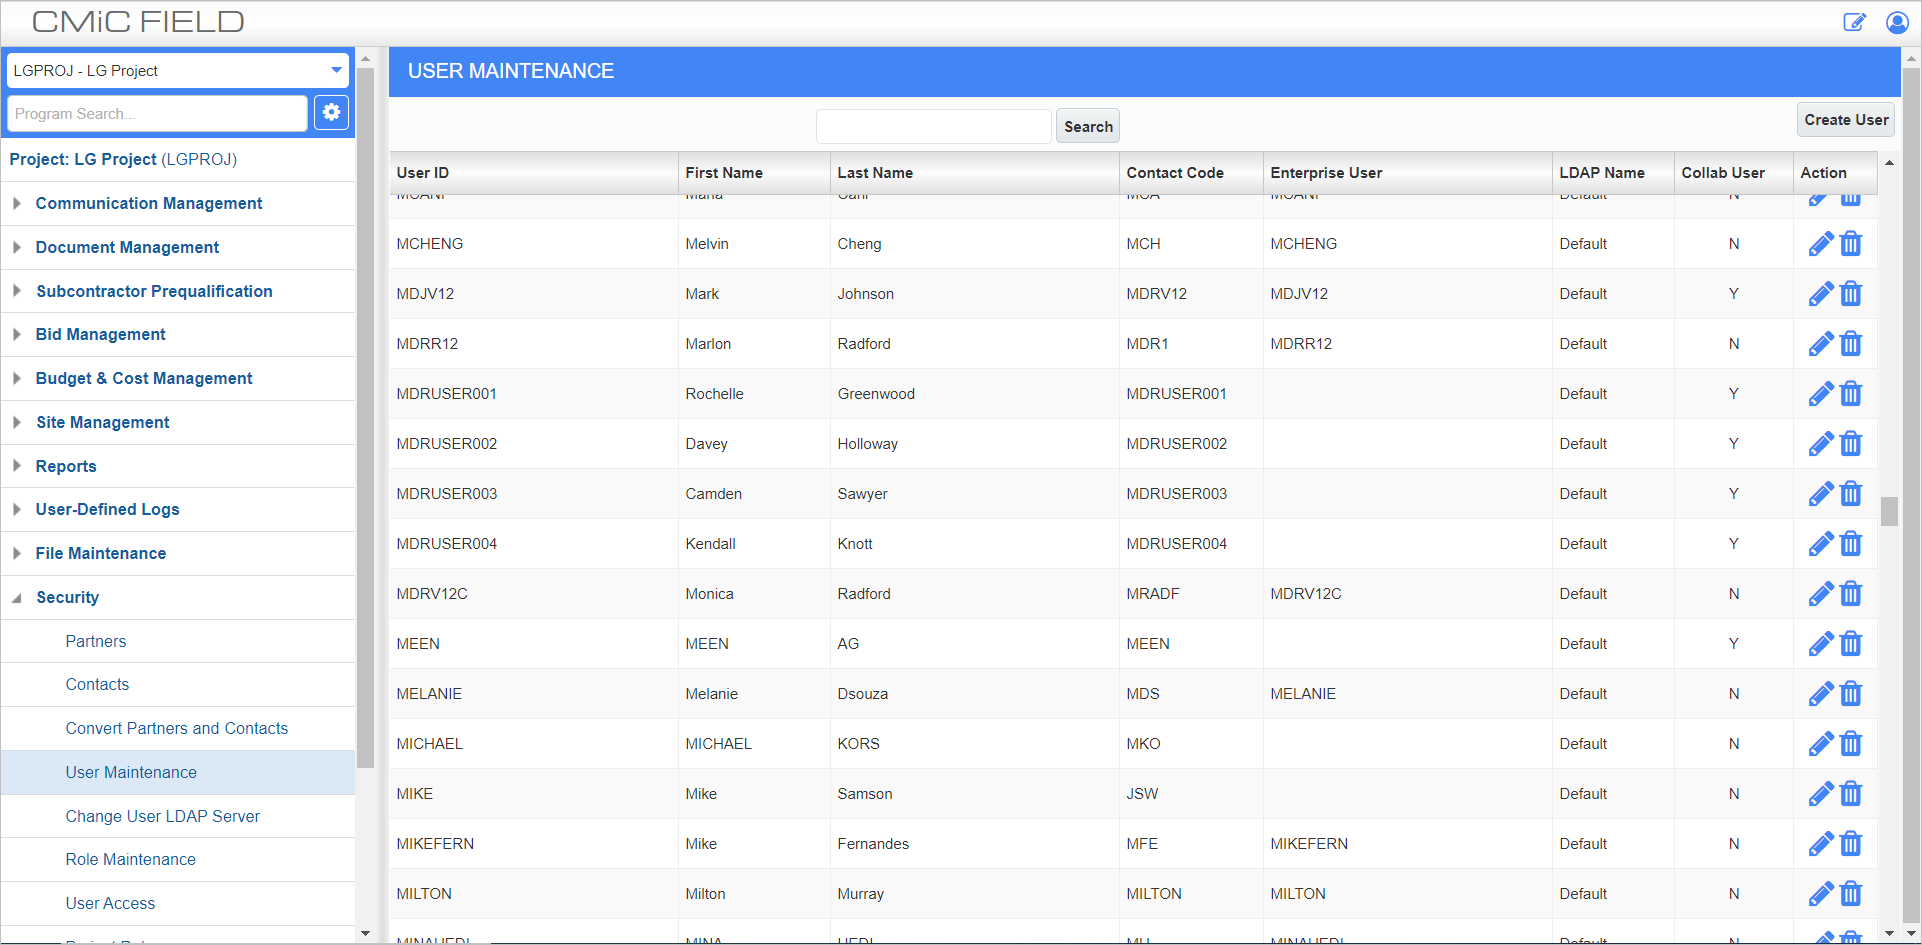
User Maintenance; standard Treeview path: CMiC Field > Security > User Maintenance
Different types of users can be created using CMiC Field:
-
External Project Partners
-
Project Employees
-
Project Employees who are also CMiC Enterprise users
All types can be created using the User Maintenance screen.
This screen opens in a log format, showing all the users currently defined. From here, press the [Create User] button to add a new user to the system.
Search

Use the Search field at the top of the screen to refine the displayed users. The search term can be upper or lower case and may include the wildcard character '%', as shown above.
Create User
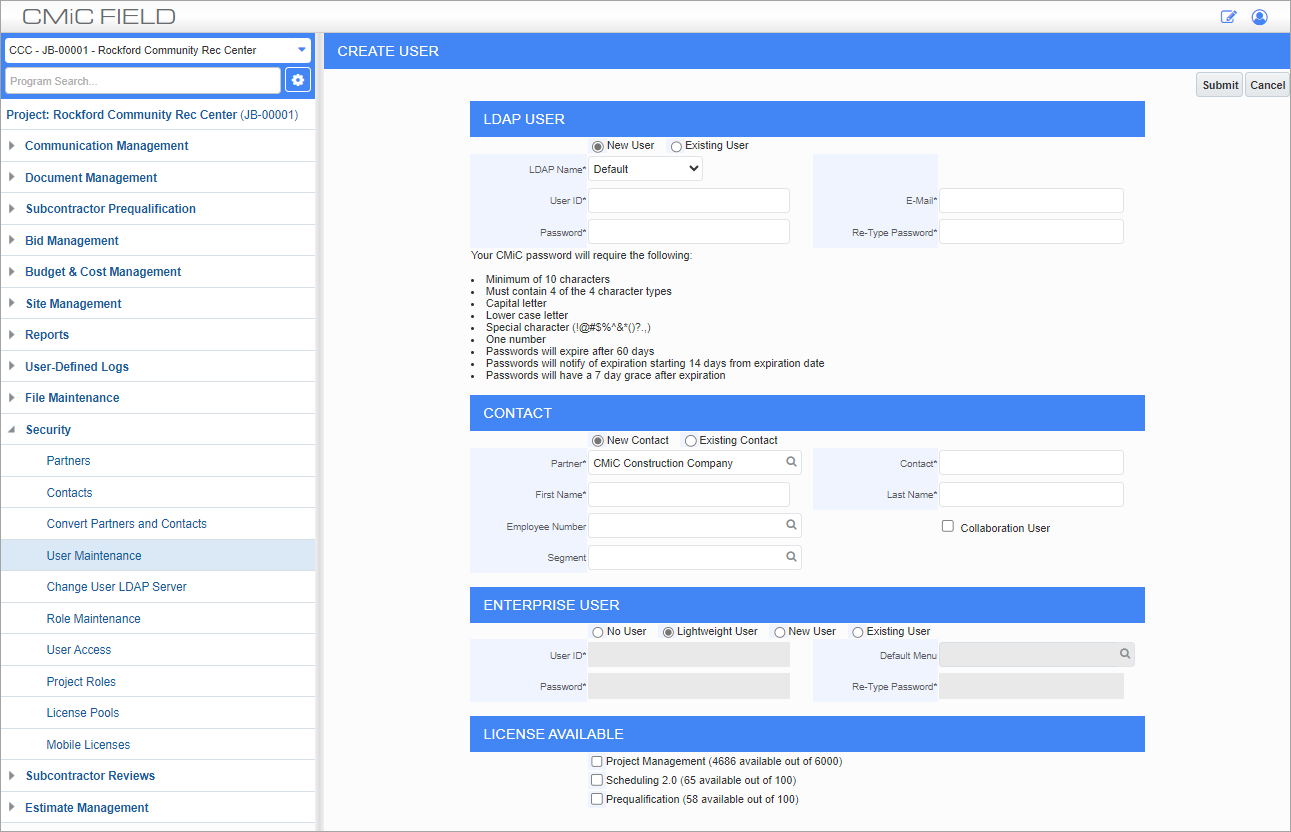
User Maintenance; standard Treeview path: CMiC Field > Security > User Maintenance – [Create User] button
This screen is divided into the following sections: LDAP User, Contact, Enterprise User, and License Available. Details for each of these sections is provided below.
From a technical point of view, the Create User function does the following:
-
Always creates an LDAP user.
-
Always creates a Contact record in the CMiC Enterprise database for the user.
This screen also allows you to map existing LDAP users to either new or existing contacts and to existing database users. Normally, this type of setup is only required when you are upgrading from a pre-2004 version of CMiC software, or for an employee who has changed roles and now needs access to CMiC Field or Enterprise.
LDAP User
New User – Radio Button
To create a new user, make sure the ‘New User’ radio button is selected.
Existing User – Radio Button
Select this button to use an existing LDAP user. The E-mail and Password fields will default to read-only.
User ID, Email
Enter the user ID
Contact
New Contact – Radio Button
Select this button to create a new contact.
Existing Contact – Radio Button
Select this button to enter/select an existing contact from the Contact field.
Partner
Select the partner code. This will either be a business partner or one of your own company codes, depending on if the user is external or internal.
Contact
The contact code will default with the user ID entered but can be changed as required. The contact code is used throughout the system as a quick way for selecting the person.
First Name, Last Name
Enter the first and last name of the contract. If the user being created is an employee, this does not have to be the same as the employee name.
Employee Number, Collaboration User – Checkbox
If the user being created is an employee, match the user to the employee number, and make sure the 'Collaboration User' checkbox is checked.
Segment
The Segment LOV field is used as an interface to an external program called WalkMe. The entries made will allow WalkMe to understand who the user is and their role. Free-form values entered in this field are used to update the LOV on saving.
Enterprise User
If the user is someone who will need to access either the CMiC Enterprise System Discoverer, then Enterprise User information will be required.
License Available
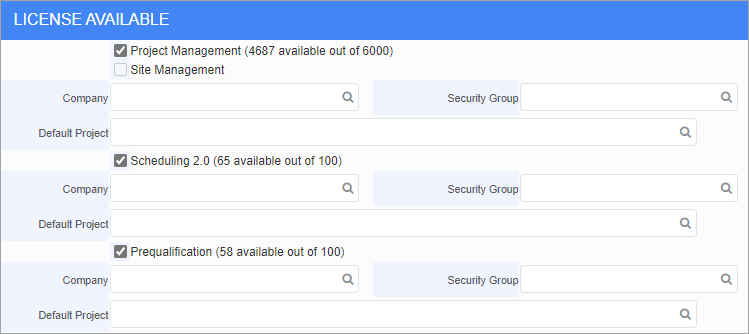
Example of options expanded in License Available section of Create User screen
The License Available section lists the licenses that are available for Project Management,
This section is used to indicate if a user is included for licensing for any of the applications listed. The purchase of the actual license is still required before the user can start using the applications. Additionally, the security for the individual programs in the application must be applied per user role/user as required, in order for the user to use them.
The 'Site Management' checkbox is disabled (read-only) and will be checked/unchecked depending on the license type selected in the License Pools screen (standard Treeview path: System > Security > Maintain License Pools).
For clients on concurrent licensing, the 'Project Management' checkbox is enabled/disabled for the following conditions:
-
Disabled: If a user is assigned to a Site Management license in the License Pools screen, the 'Project Management' box will be unchecked and disabled.
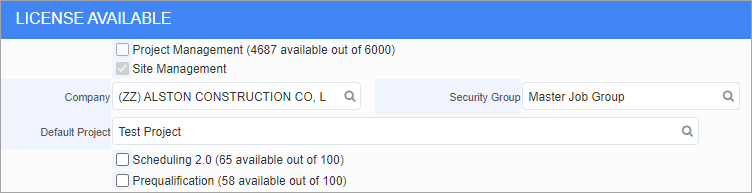
Example of 'Project Management' checkbox unchecked and disabled
-
Enabled: If the user is assigned to both a Site Management and Project Management type license in the License Pools screen, the 'Project Management' box will be unchecked and enabled.

Example of 'Project Management' checkbox unchecked and enabled
-
Enabled: If the user is assigned to Project Management in the License Pools screen, the 'Project Management' box will be checked and enabled.

Example of 'Project Management' checkbox checked and enabled
Completing Setup Process
If the user is for CMiC Field:
-
Assign project access.
NOTE: Project Treeview nodes are disabled for a user when the user is not assigned to a project.
If the user created will be using CMiC Enterprise:
-
Assign roles to the user.
-
Assign access to companies.
-
Assign job and payroll security, as required.
Editing a CMiC Field User
Click the User ID's Edit icon (![]() ) to modify the User ID. For example, to switch the user to a new/existing contact or to add/remove licenses.
) to modify the User ID. For example, to switch the user to a new/existing contact or to add/remove licenses.
NOTE: Contact switching is not allowed for GCS-invited users (i.e., users that have been invited to CMiC Collaborate). To switch the contact of a GCS-invited user, the user must be deregistered first.
Press [Submit] to submit the changes and query the user again to view the changes.
Deleting a CMiC Field User
Use the User Maintenance screen to delete user IDs, which is done by clicking the User ID’s Delete icon ( ).
).
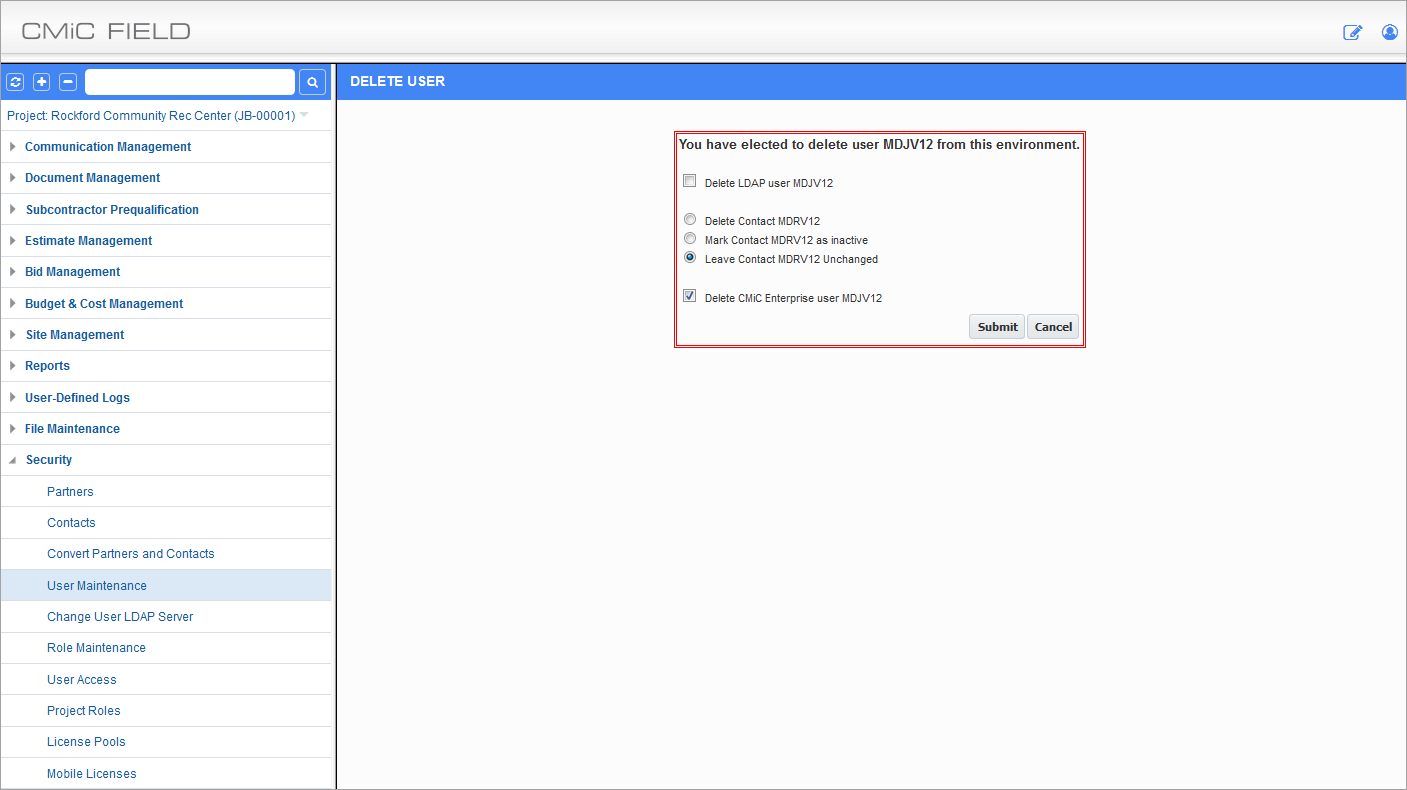
User Maintenance; standard Treeview path: CMiC Field > Security > User Maintenance – Delete User screen
Delete LDAP User – Checkbox
Check this box to delete the user ID from the LDAP directory.
Delete Contact/Mark Contact as Inactive/Leave Contact Unchanged
Select whether the User ID’s corresponding Contact record is to be deleted, made inactive, or left unchanged. It is recommended that the Contact record is made inactive as it may have been linked to other records.
Inactivated contacts are only available in LOVs if the ‘Hide Inactive Contacts’ box on the Global tab of the System Options screen is unchecked (standard Treeview path: System > Setup > System Options – Global tab). However, if the ‘Hide Inactive Contacts’ box is checked, inactive contacts will be available to users with the SHWINACCNT system privilege.
Delete CMiC Enterprise User – Checkbox
Check this box to delete the user ID from the CMiC Enterprise system.