Overview
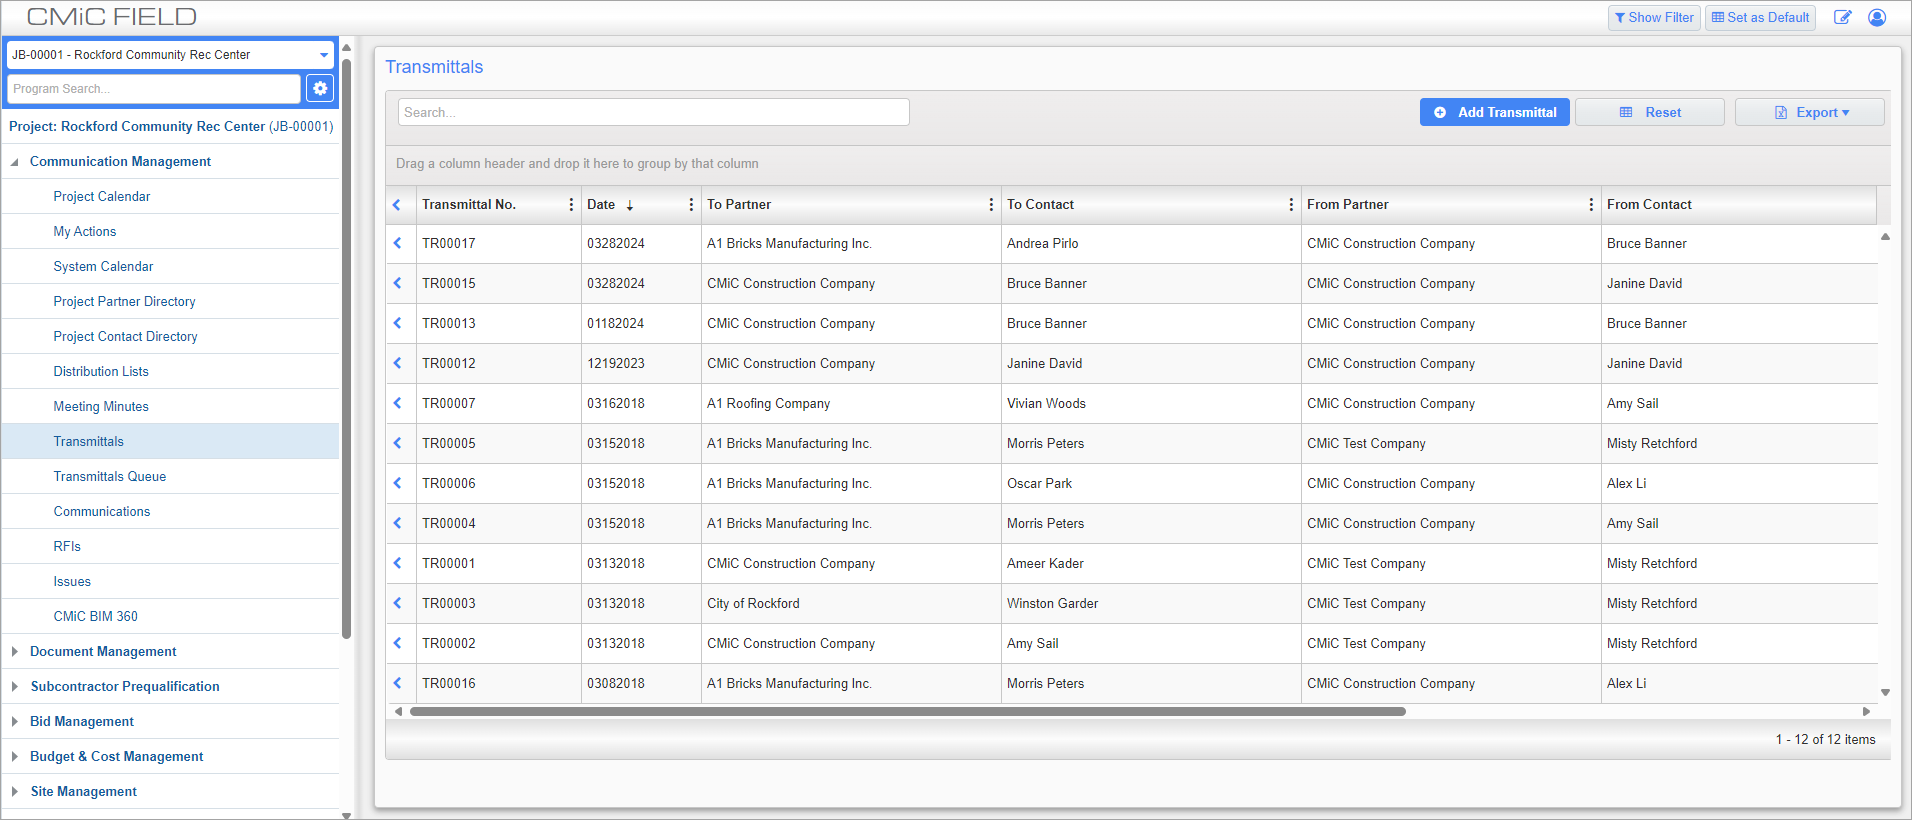
Transmittals; standard Treeview path: CMiC Field > Communication Management > Transmittals
When sending project-related items such as drawings, material samples, or submittals, it is important to record that the items have been sent, as well as when and to whom they were sent. Transmittals provide the mechanism to record this information as they provide a formal source of proof that items were sent and the reason for their transmittal.
In CMiC Field, a transmittal record is automatically made available to the contact entered in the "To" field and everyone that is a "CC" contact on the record can view the details. When the "To" contact opens the transmittal, it is marked as “Received”.
As with most CMiC Field screens, the creator must submit the transmittal before it can be viewed by other contacts. Once submitted, the transmittal cannot be changed. Only the "To" and "CC" contacts can see the transmittal once submitted.
Transmittals can be entered by any project party and viewed by the To and CC parties. Transmittals are a record of the sending of documents or samples.
NOTE: If the user responds to an I/O email regarding a transmittal but they have not yet been assigned a security role, then any response they send will only be received if they are the "To" contact and not if they are the "CC" contact.
Transmittal Details – Tab
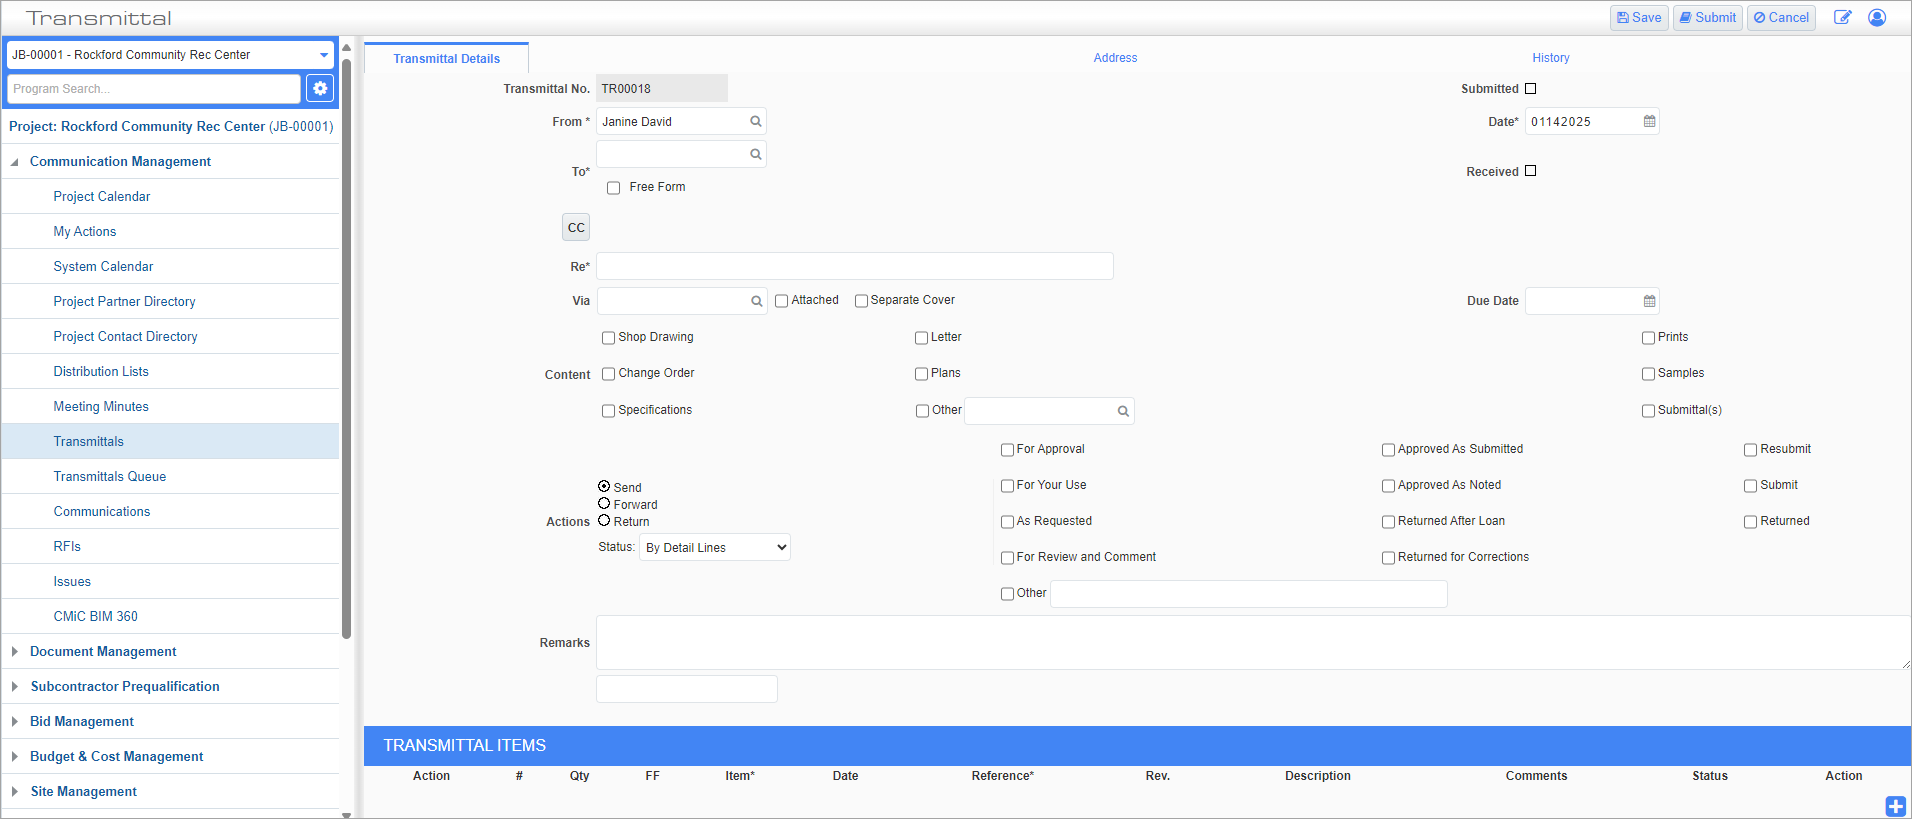
Transmittal; standard Treeview path: CMiC Field > Communication Management > Transmittals –Transmittal Detail tab
Transmittal No.
If using automatic numbering, a transmittal number will default in this field; otherwise, enter a unique transmittal number.
Submitted, Received – Checkboxes
These fields are read-only and will automatically update to checked once the transmittal has been submitted and/or received.
From, Date
The From field will automatically default to the logged-in user and the Date field to the current system date, though these values can be changed if required.
To
Enter/select the person to whom the transmittal will be sent or check the 'Free Form' box and enter a free form name.
[CC] – Button
Press this button to send the transmittal to additional contacts and press the [Ok] button when done. Use the Plus icon ( ) to add new rows if needed.
Re
Enter the reason for the transmittal. This would be the subject field in an e-mail.
Via
Enter/select a shipping method. The Via field can be any value, for example FedEx and Tracking Number. If there is no third-party shipping company involved, we suggest the Via field be set to 'COLL' for CMiC Field. The LOV lists the previously entered values and users may select any one from the list. Also, users can maintain the values with the edit/delete functions.
Due Date
Enter/select a due date for the transmittal.
Content
Check one or more boxes in this section to indicate the type of items being sent, such as a shop drawing, letter, sample, etc.
NOTE: The Contents section will only be displayed when the checkbox ‘Show Transmittal Contents’ is checked on the Defaults tab of the Company Control screen. For more information, please refer to CMiC Field - Company Control.
Actions
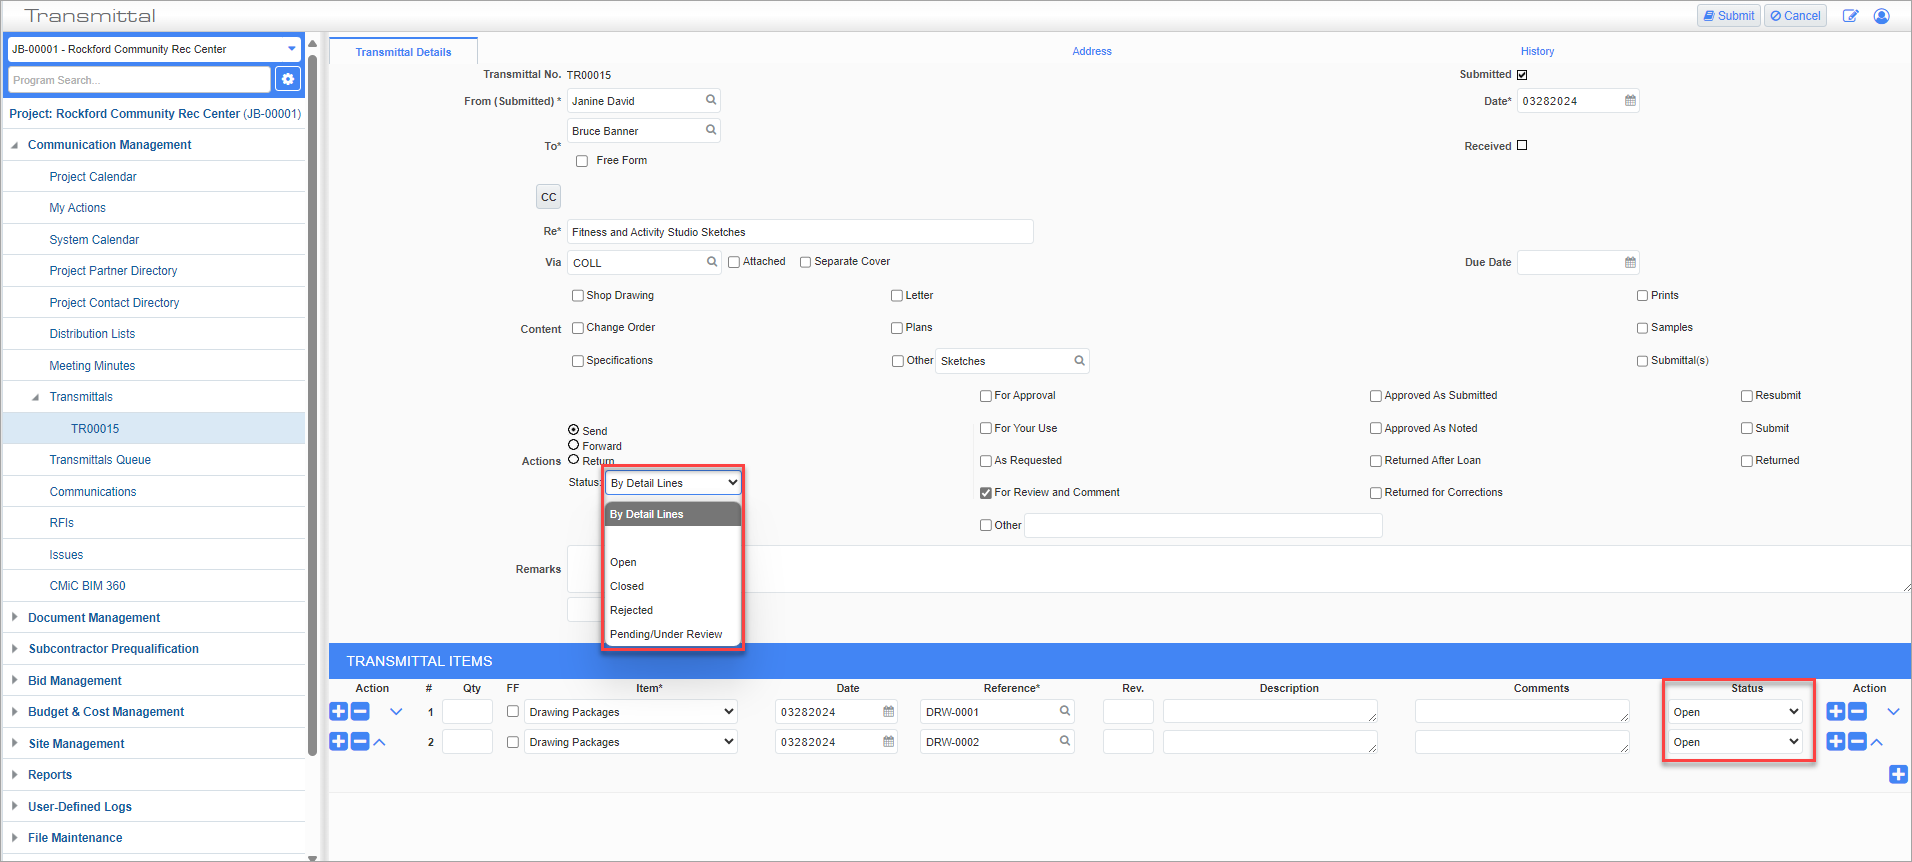
The radio button is set to "Send" and the Status field to "By Detail Lines" by default. Check the fields appropriate for the transmittal and if there are other reasons, check the 'Other' box and enter text to describe the reason.
NOTE: The default value in the Status drop-down ‘By Detail Lines’ is not an actual value, just an indication that the Transmittal Items’ details Status can be set with a default value (e.g. "Under Review", "Approved", "Open", "Closed" or "Rejected") if the PM object being added has a status of Null.
Remarks
Enter a general-purpose comment about the transmittal.
NOTE: It is possible to change the labels on the checkboxes on the Transmittals screen. The changes are done in the Prompt Maintenance screen.
Once the general information is complete, you need to list the items included on this transmittal. Use the Plus icon () in the Transmittal Item section of the screen to open a new row.
Qty
Enter the quantity.
Item
Select an item from the drop-down list or check the 'FF' box and enter a free form item name.
Date
This field is set by default to the current date, and can be changed if desired.
Reference, Rev., Description
Enter/select an actual object, such as a single document, document package, or submittal package. This will then attach a link to the object and auto-populate the Revision field (if required) and the Description field. If an item is entered in the Item field using a free form name, such as a sample, leave the Reference field blank and enter a description in the Description field.
Comments
Enter a general-purpose comment about the item.
Status
Enter/select a status for the transmittal item.
The Status field in the transmittal header can be used to set the default status for PM objects being added to Detail lines of the transmittal if the status of the PM objects being added is “Null”. If the PM object being added already has a status set, then this status will be populated in the detail line.
The Status field is only available in Edit mode and serves no purpose in View mode.
The Status field defaults to “By Detail Lines” when the user enters Edit mode. This allows new PM objects to be entered with their own, unaltered status by default.
Transmittal; standard Treeview path: CMiC Field > Communication Management > Transmittals –Transmittal Detail tab
NOTE: The default value in the Status drop-down at the header level ‘By Detail Lines’ is not an actual value, just an indication that the Transmittal Items’ details Status can be set with a default value (e.g. Under Review, Approved, Open, Closed or Rejected) if the PM object being added has a status of Null.
Address – Tab
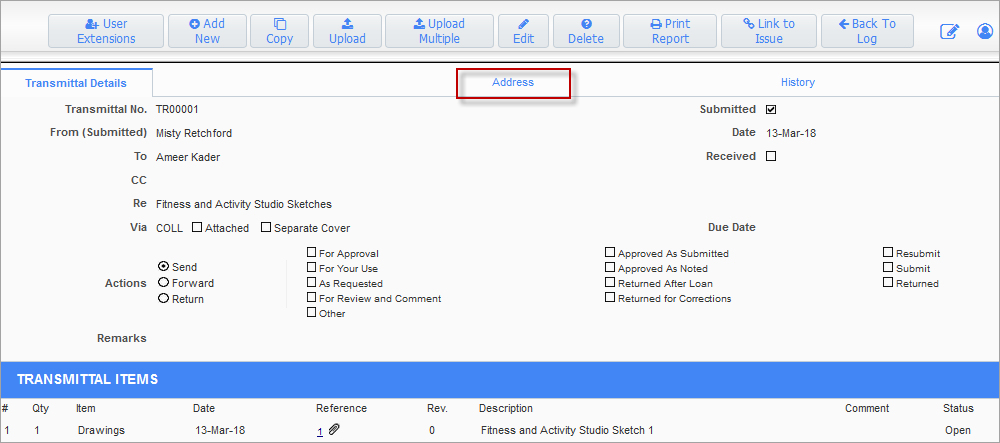
This tab provides the same functionality as in the Transmittal Entry screen in Enterprise.
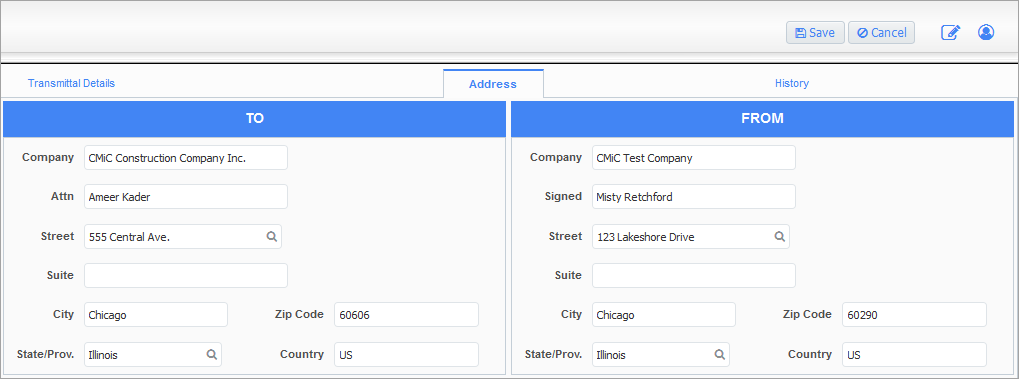
Transmittal; standard Treeview path: CMiC Field > Communication Management > Transmittals – Address tab
The address tab has two sections, one each for To and From addresses. The default addresses of the project partners are populated and displayed. If required, users may override the address details by selecting an address code Street field.
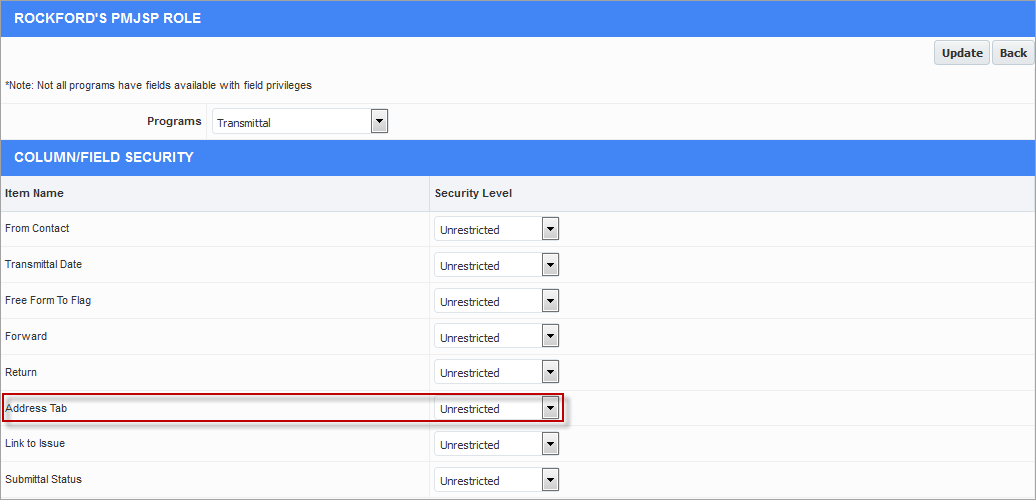
Example of Field Security applied to the Address Tab
Field Security may be applied to the Address tab. The default value is “Unrestricted”. Users may prefer to assign “Hidden” value to specific or “ALL” roles to hide the tab.
History – Tab

Transmittal; standard Treeview path: CMiC Field > Communication Management > Transmittals – History tab
This tab can be used to view all changes and edits made to a transmittals record. This tab is view-only and so changes to the transmittal must be made with the [Edit] button in the Transmittal Details tab.
Copying a Saved Transmittal
A transmittal can be copied to one or more contacts denoted as To contacts, instead of allowing only copying to one contact at a time. A multi-select LOV is presented and once selection is finished, a transmittal is created for each contact that is selected.
Uploading Attachments in Transmittals
In View mode, the [Upload] and [Upload Multiple] buttons are available so that attachments can be uploaded as transmittal detail items. These attachments are created for any of the defined document types selected.
Printing a Transmittal Record
Any transmittal can be printed. Use the transmittal log to open the required transmittal, and then at the top of the screen use the [Print Report] button.
Depending on the type of report selected in the Report Name field, the following options will be available: “Use Corporate Address” or “Use Project Address”. When “Use Corporate Address” is selected, the report pulls the address at the Corporate level (Business Unit/Company). When the “Use Project Address” option is selected, the report pulls the Address at the Project level – the Project Address located on the General tab of the Project Maintenance screen. In both cases, the Logo is the logo of the company to which the project belongs. The ‘blank’ option represents the standard print that was obtained prior to these changes.
Attachments can not be embedded in transmittal reports. By default, the option "None" is selected in the Embed Attachments field. Attachments are instead listed by item in the report. If a user requires information from the attached item(s) in the transmittal report, a custom MIP template can be created to include specific record details, such as from a Submittal record. For more information, please refer to Microsoft® Integration Package - R12.
Select the required parameters, and then press the [Print] button.
For more information on printing, refer to Reports.
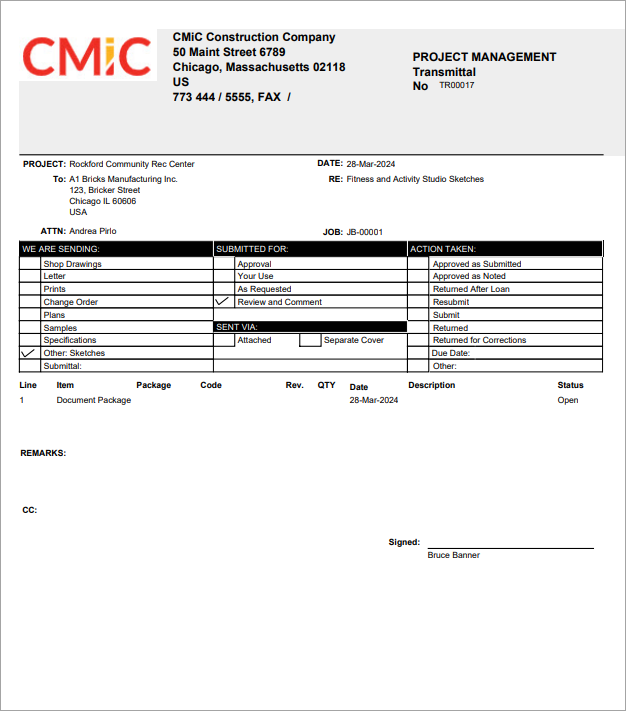
Sample report using standard Transmittal template
Transmittals Queue
Queued transmittals created from submittals or document history can be viewed in the Transmittals Queue. The transmittals are created by first selecting the record and then clicking the [Create Transmittal] button. You can combine transmittals to the same contact or ignore multiple senders when grouping.
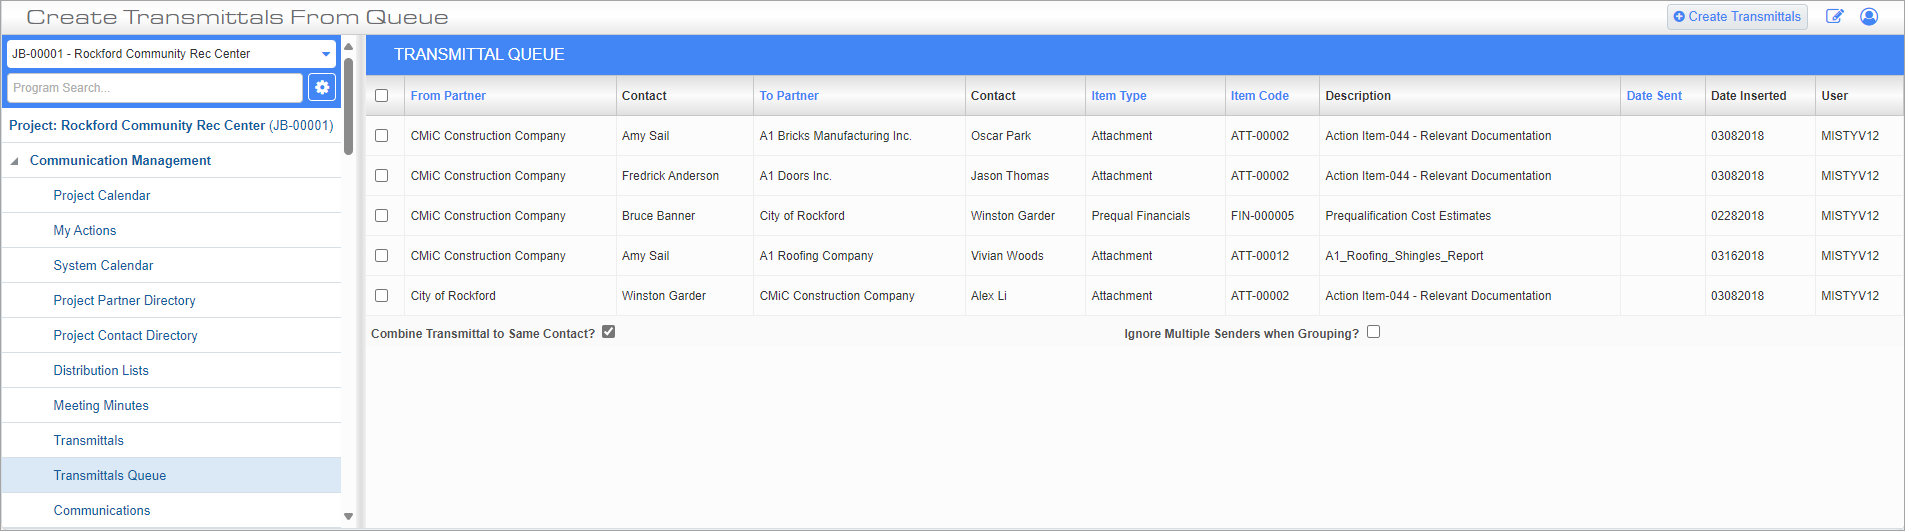
Standard Treeview path: CMiC Field > Communication Management > Transmittals Queue
Log for Transmittals Created from Submittals
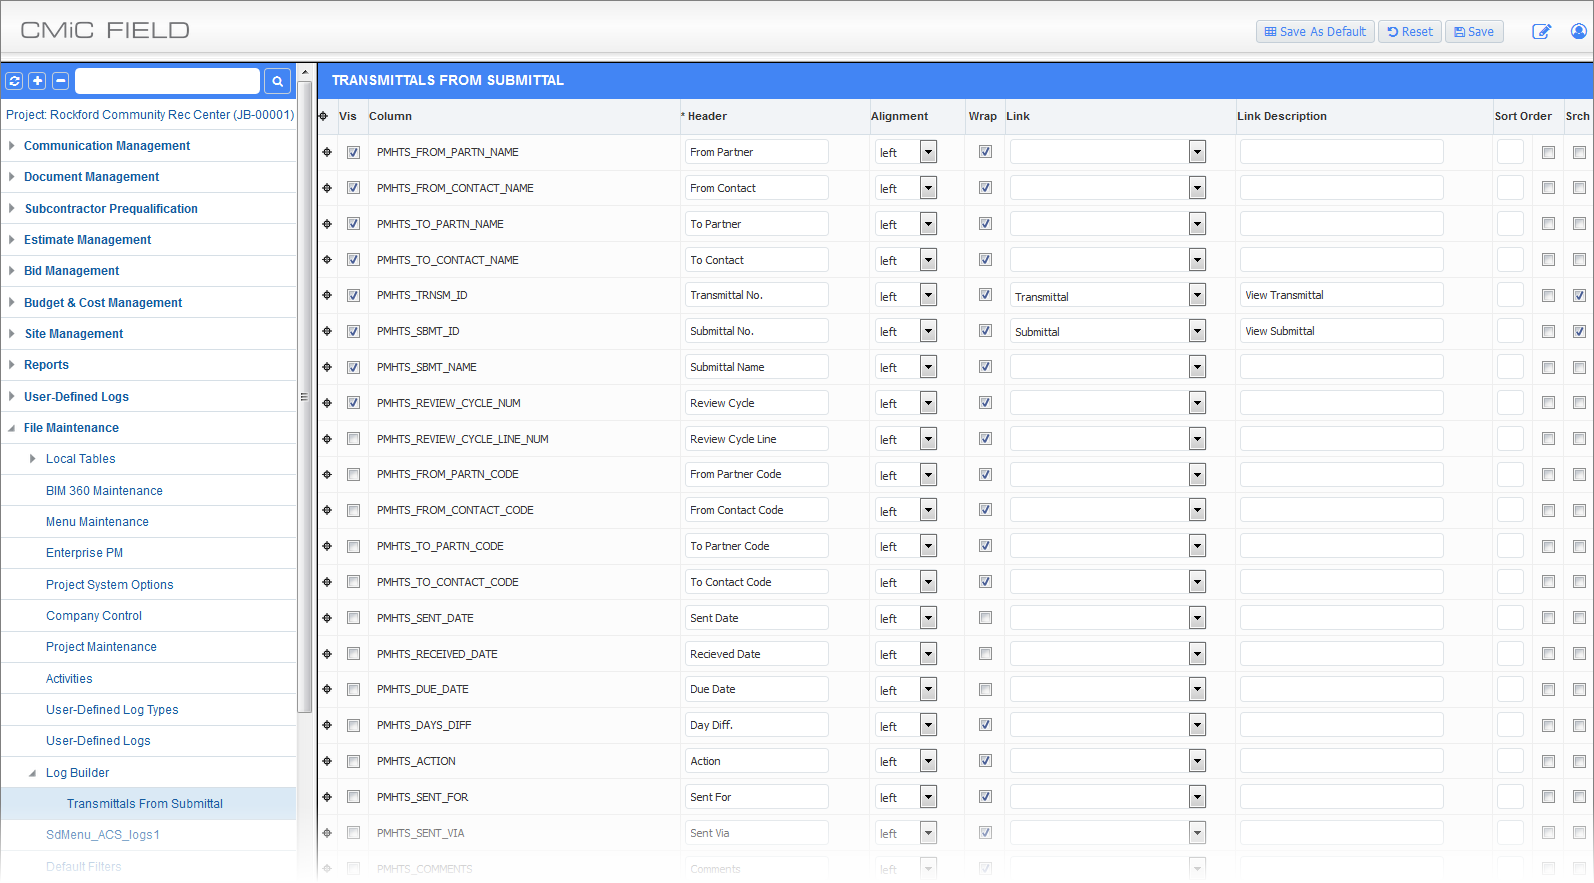
Standard Treeview path: CMiC Field > File Maintenance > Log Builder – Transmittals From Submittal
The Log Builder screen provides a log definition for transmittals created from submittals. User-defined logs can be created based on this log definition.