Setup
Before posted PCIs can be modified users should follow the following steps.
Assign Security Privilege
The ‘Modify Posted PCI’ security privilege is required to modify a posted PCI. This privilege is located on the PM Roles screen.

PM Roles; standard Treeview path: CMiC Field > Security > Project Roles
Reveal Revision Mask
Modifying posted PCIs is an automated process which means that the Field program needs to know how to number any revisions. This is done with the Revision CI Number Mask, found in the Change Management - Control (CM Control File) screen (standard Treeview path: Change Management > Local Tables > Control). This field does not appear by default so users should press the Toggle Edit Mode icon to bring up the Lite Editor. In the Lite Editor press on any Pencil icon to bring up the Lite Editor pop-up, shown below.
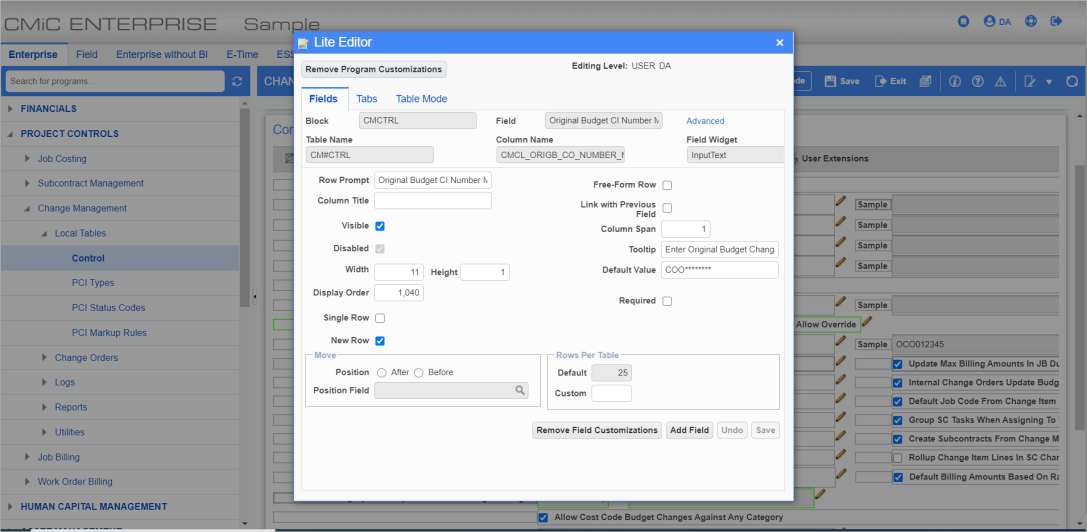
From here, press the [Add Field] button, select Display Hidden Field in the Action field, and select the Rev Chg Ord Number Mask field. Then, press [Save] and press the Refresh icon in the top-right hand corner of the screen to reveal the field.
For more information on the Lite Editor please refer to Lite Editor.
Project Control Settings

Ensure the 'Use PCI Detail Status' box is not checked. If this box is checked then pressing the [Modify PCI] button will result in an error message. This box can be found on the Change Management tab of the Company Control screen (standard Treeview path: CMiC Field > File Maintenance > Company Control).
[Modify PCI] – Button
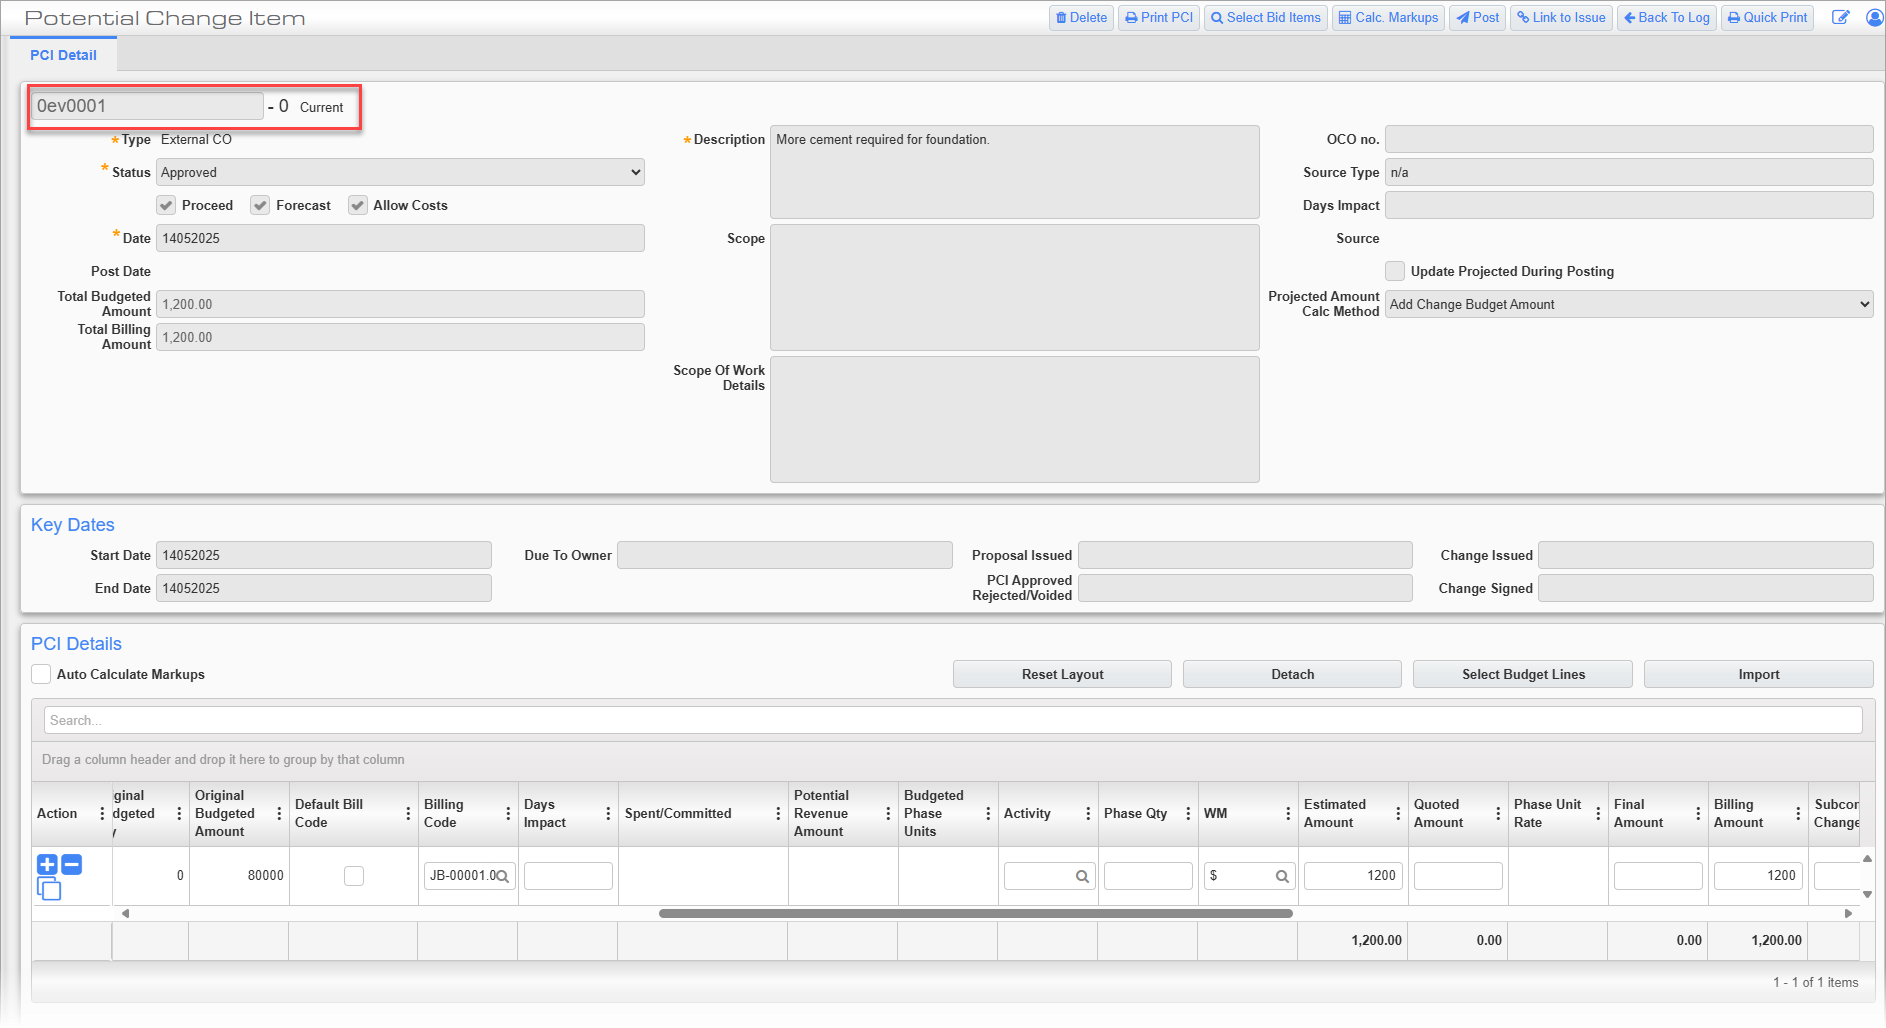
After a PCI has been approved and posted, the [Modify PCI] button is enabled on the PCI screen.
![Screenshot of [Modify PCI] button on posted PCI.](../../../../../Resources/Images/CMiC_Field/CMICFIELD_ModifyPCI_1.png)
The [Modify PCI] button is used to adjust a posted PCI. When pressed, it creates a new revision of the current PCI that is linked to the originally posted PCI.
The user can add new detail lines only. Previously posted lines can be adjusted by creating new lines. There can only be one unposted instance of a previously posted PCI.
NOTE: The [Modify] button is not available in the Type field for a Revision created by the Modify PCI function. Once the new (secondary) PCI is posted, its SOV is shown along with the originally posted PCI. If the originally posted PCI is an external PCI, for example, the user cannot modify the new (secondary) PCI to a different PCI type.

The PCI log shows both posted and unposted revised PCIs. When a revision exists for a PCI, the original PCI number is displayed in the log’s Controlling PCI No. column and the unposted revision is listed separately with a revised PCI number until it is posted. After posting, the revision becomes part of the original controlling PCI.
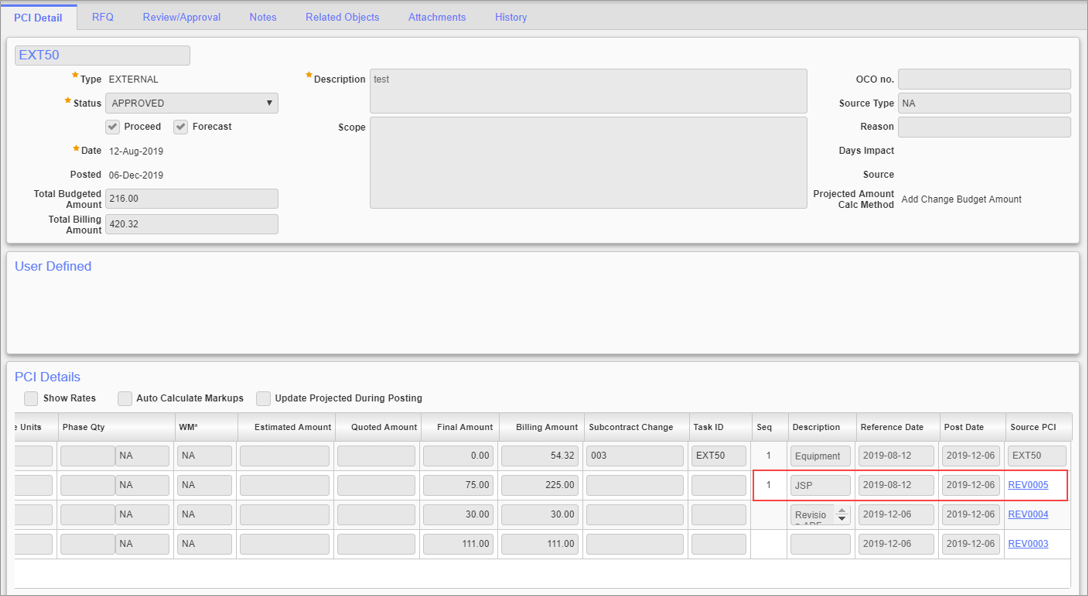
After posting, the revision becomes a part of the original PCI.
[Unlink PCI Detail Line] – Button
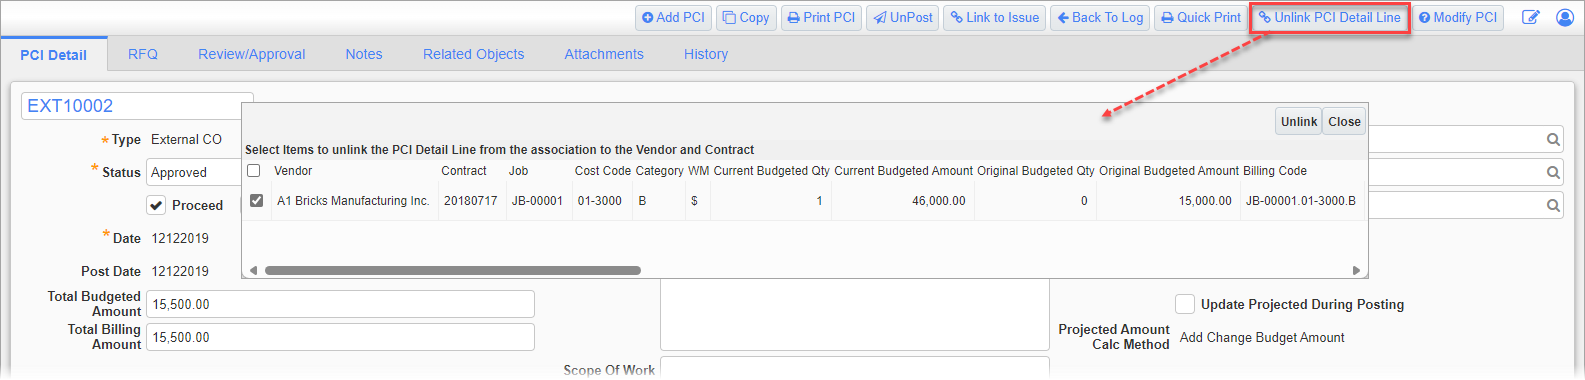
After a PCI has been approved and posted, the [Unlink PCI Detail Line] button is enabled on the PCI screen. Clicking this button will launch a pop-up to unlink qualified PCI detail lines from the associated vendor and contract. Qualified PCI detail lines refer to lines where there are no subcontract change orders issued yet (i.e., both the Subcontract Change Code and Task ID fields are null). Select an item and press the [Unlink] button.