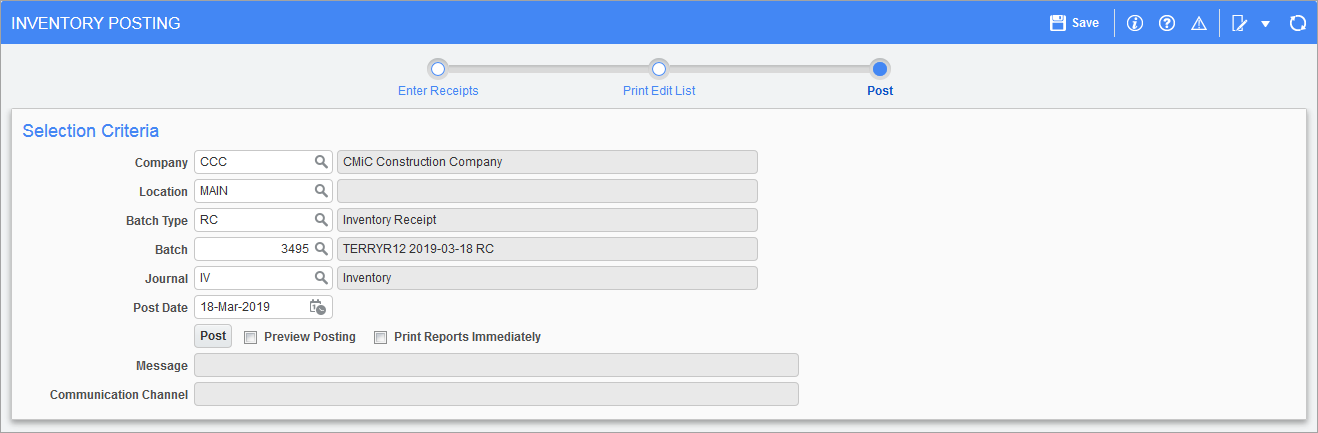
Pgm: CIPST – Inventory Posting; standard Treeview path: Inventory > Receipts – Post step on the processing train
All batch types within the Inventory module, with the exception of the Inventory Sales screen, use the same posting program. This program is located on the Processing menu.
When data is entered, it only updates the on hand quantity. The on book quantity and the associated accounting transactions are not created until the batch is posted. Once a batch has been verified as correct (by reviewing the edit list), it is then ready to post. Posting does many functions: it updates the inventory (CI) sub-ledger on book information, it creates GL transactions, plus it updates the Job Costing and Equipment sub-ledgers if required.
This screen will automatically default to the user’s default company. Verify that the company code matches the company code of the batch being posted.
Location
To restrict the list of batches available for posting, the location code can be entered but it is not a required field. This field will default to the user’s default location code. More informtion on inventory locations can be found in Inventory - Inventory Locations.
Batch Type
The user must select the type of batch being posted. This is a mandatory field and it limits the batches available in the Batch field.
Batch, Post Date
Enter the batch number and the posting date for all the transactions in the batch being posted. The date entered in this field will be the date of record for all the transactions in the batch. The posting date will default to the current date but can be changed as required.
Journal (Code)
The module will default the journal code from the Inventory Control File screen. The journal code is used to group like transactions together so that they can be viewed in the GL under one query. The journal code usually represents the subledger.
Preview Posting – Checkbox
Check the ‘Preview Posting’ checkbox and post to see the posting reports without actually posting. The [Post] button without ‘Preview Posting’ checked will have to be pressed after the reports have been verified for an actual posting to occur.
Print Reports Immediately – Checkbox
Check this box to print the posting report immediately after posting. If left unchecked, the posting report will not print during the posting process but can be printed at a later time using the posting utility.
Press the [Post] button to begin the posting process.