Workflow Builder (Beta) - Getting Started
Main Landing Page
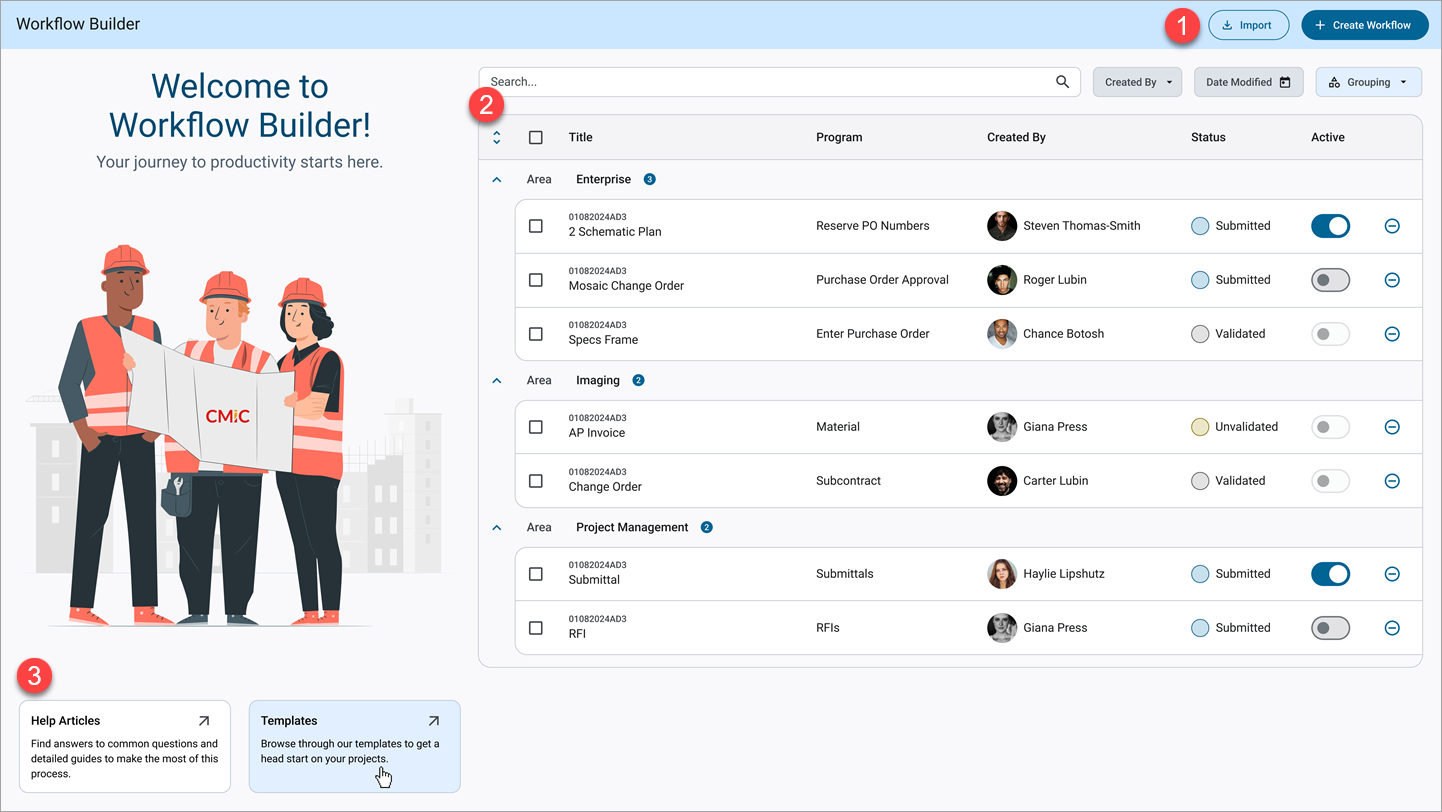
The main landing page of Workflow Builder is organized into three main areas:
-
Buttons
-
Workflow Log
-
Help Articles and Templates
This layout provides easy access to essential functions, allowing you to create, manage, and learn about workflows within CMiC Enterprise.
Buttons
At the top of the screen, you’ll find the following buttons.
[Create Workflow] − Button
This button is used to start a new workflow. You’ll be guided through setup steps, including selecting an object, defining triggers, and adding actions and conditions.
NOTE: Users must have the 'WKF_BUILD – WKF: Allows the user to access Workflow Builder' system privilege enabled. If unchecked, the user will not see any created workflows listed in Workflow Builder. The user can use the [Create Workflow] button and move through the steps, but will be unable to save at the first step.
[Import] − Button
This button lets you bring a pre-built workflow into your current system. You can create and test workflows in a test environment, export them, and then import them into production, where they’ll appear in your main Workflow Log.
Workflow Log
The main log area lists all created workflows, providing at-a-glance details to help you manage and organize them. The following describes each field within the Workflow Log.
Title
The Title column displays the name specified during workflow creation along with the selected code, making it easier to identify each workflow.
Program
The Location column indicates the specific area within CMiC Enterprise where the workflow was created, such as Subcontract, Job Setup, or AP Invoices.
Created By
This displays the creator of the workflow.
Last Updated
This displays the username and date from when the workflow was last updated.
Status
The current status of each workflow:
-
Unvalidated: The workflow needs additional configuration before it can be published.
-
Valid: The workflow is configured and ready to be published.
-
Published: The workflow has been installed in the database and is available for use.
Export ( ) Icon
The Export icon is used to export an existing workflow to facilitate testing or transitioning workflows between environments.
Delete ( ) Icon
This is used to remove workflows from the log as needed.
Help Articles and Templates
The Help Articles and Templates are located in the same area as the Workflow Log. These resources offer additional support and starting points when using workflows.
Help Articles
Access a comprehensive set of guides to assist with Workflow setup, customization, and troubleshooting. These articles cover everything from the basics to advanced configuration options.
Templates
Pre-configured templates provide a foundation for building workflows. These templates are categorized by function and common use cases, making it easy to find relevant workflows to copy and customize for your needs.