This
-
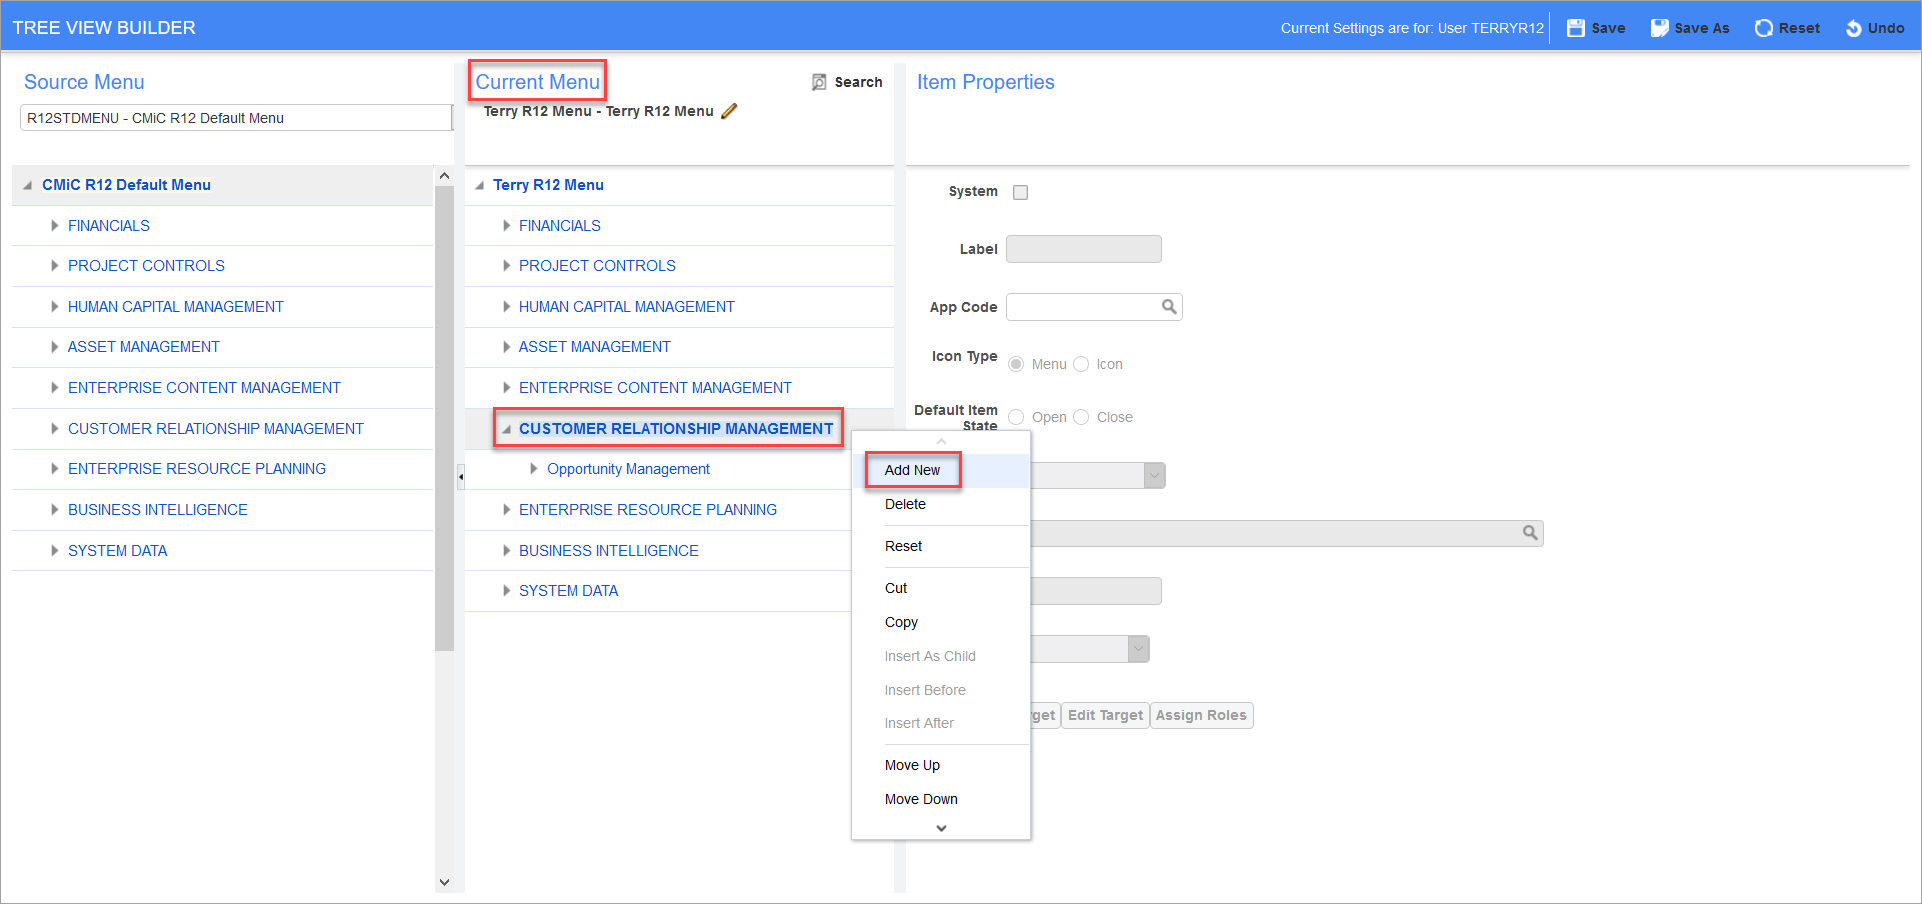
In the Current Menu section of Treeview Builder, highlight the node where the program is to be added, right click, then select "Add New" from the Options menu:
-
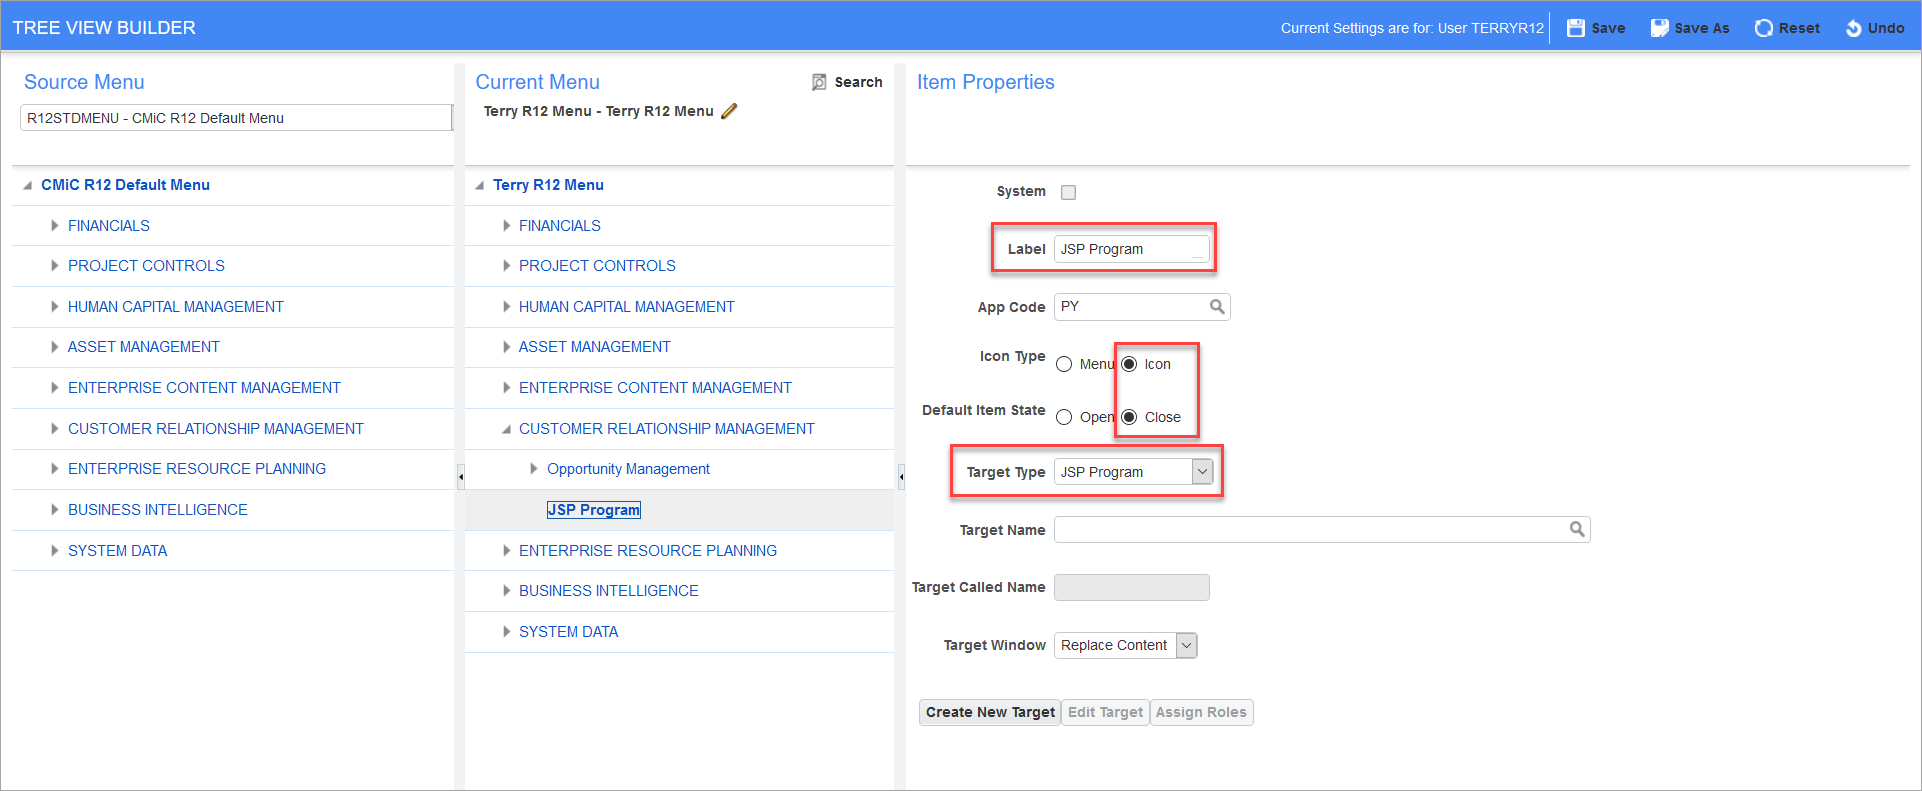
Highlight the "New Item" in the Current Menu section, then move to the Item Properties section of the screen:

-
Enter a name for the item in the Label field and select "Icon" for Icon Type and "Closed" for Default Item State. Move to the Target Type field and select "JSP Program" from the list of values:
-
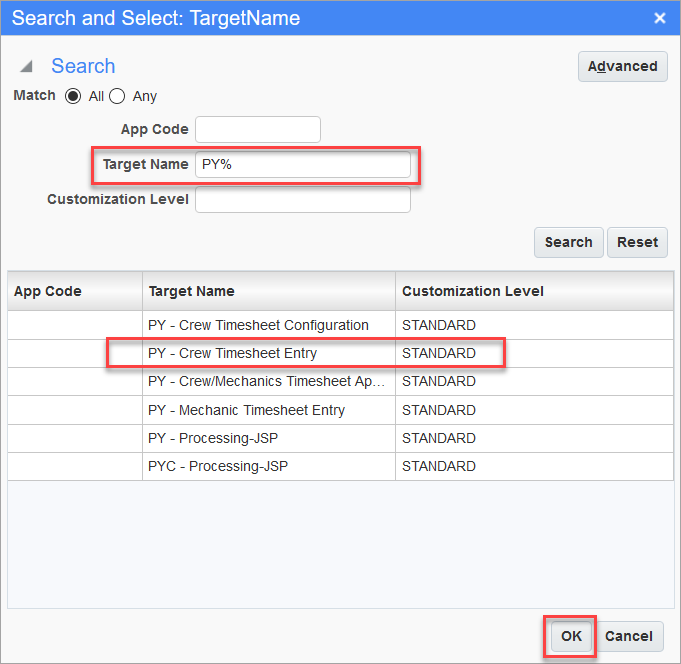
Move to the Target Name field and, using the search fields in the LOV, find the required program, then press [OK] to close the window:
-
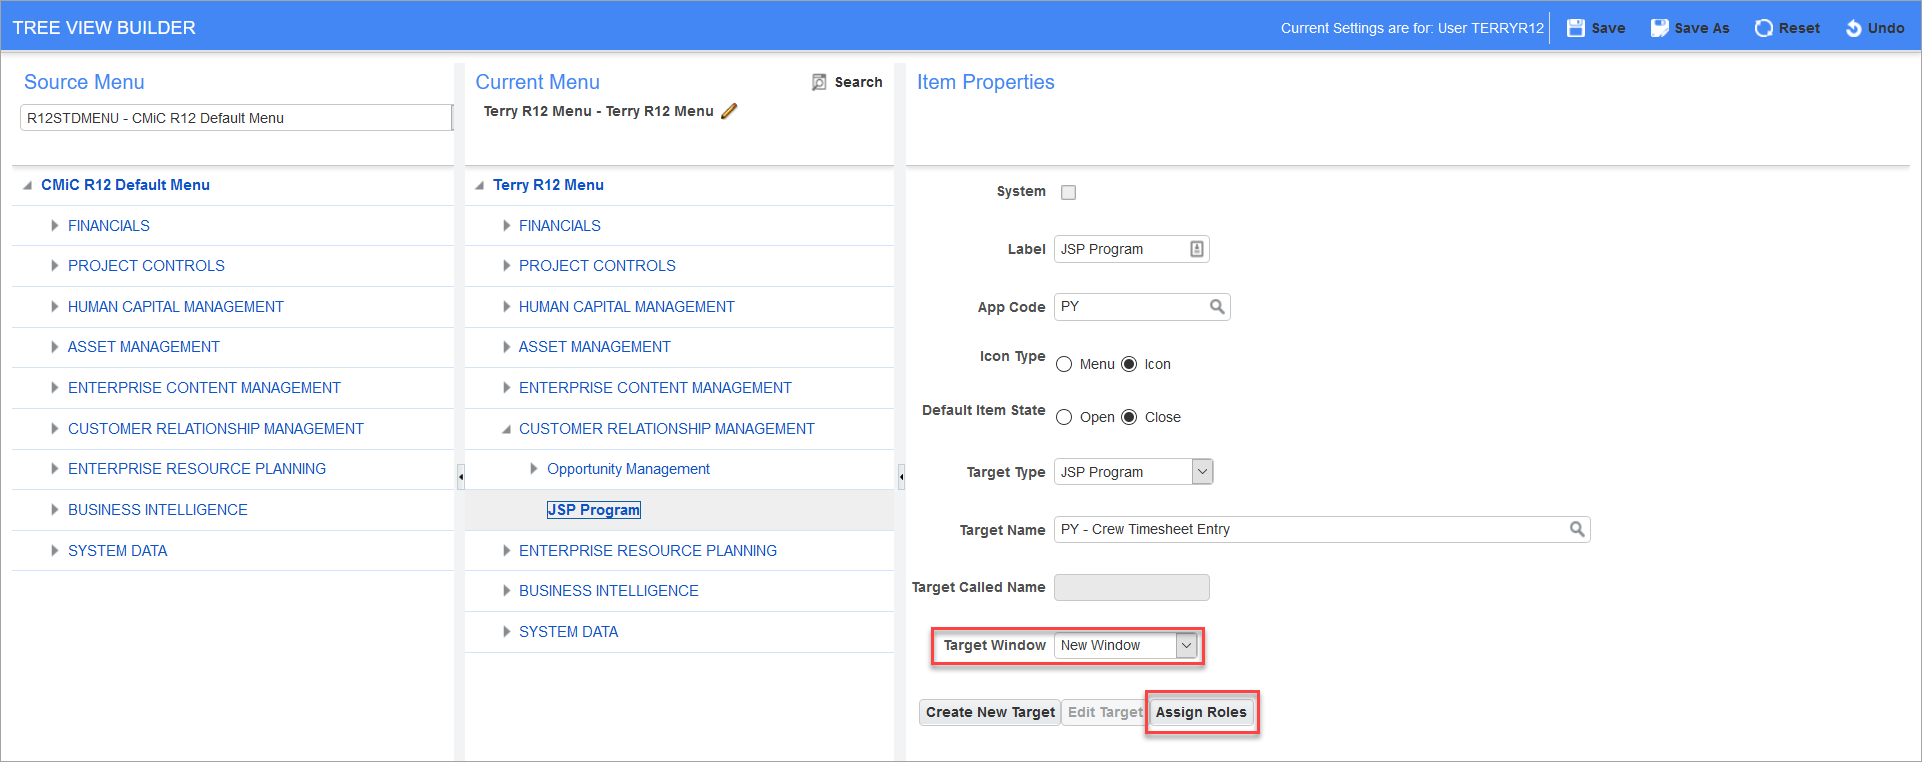
Set the required Target Window field as either "New Window" or "Replace Content", then use the [Assign Roles] button to assign security to this item:
-
The last step is to save this change by using either the [Save] or [Save As] button depending on requirements:
