Define Screen Call
Screen calls are used to launch Enterprise modules or targets (e.g. Logs, Dashboards) to display information associated to a particular object, such as a fixed asset, a job, or an opportunity. They not only specify a module or target, they also pass any parameters required to launch the module or target. After screen calls are created and defined, they become available to the drop-down lists of Link fields.
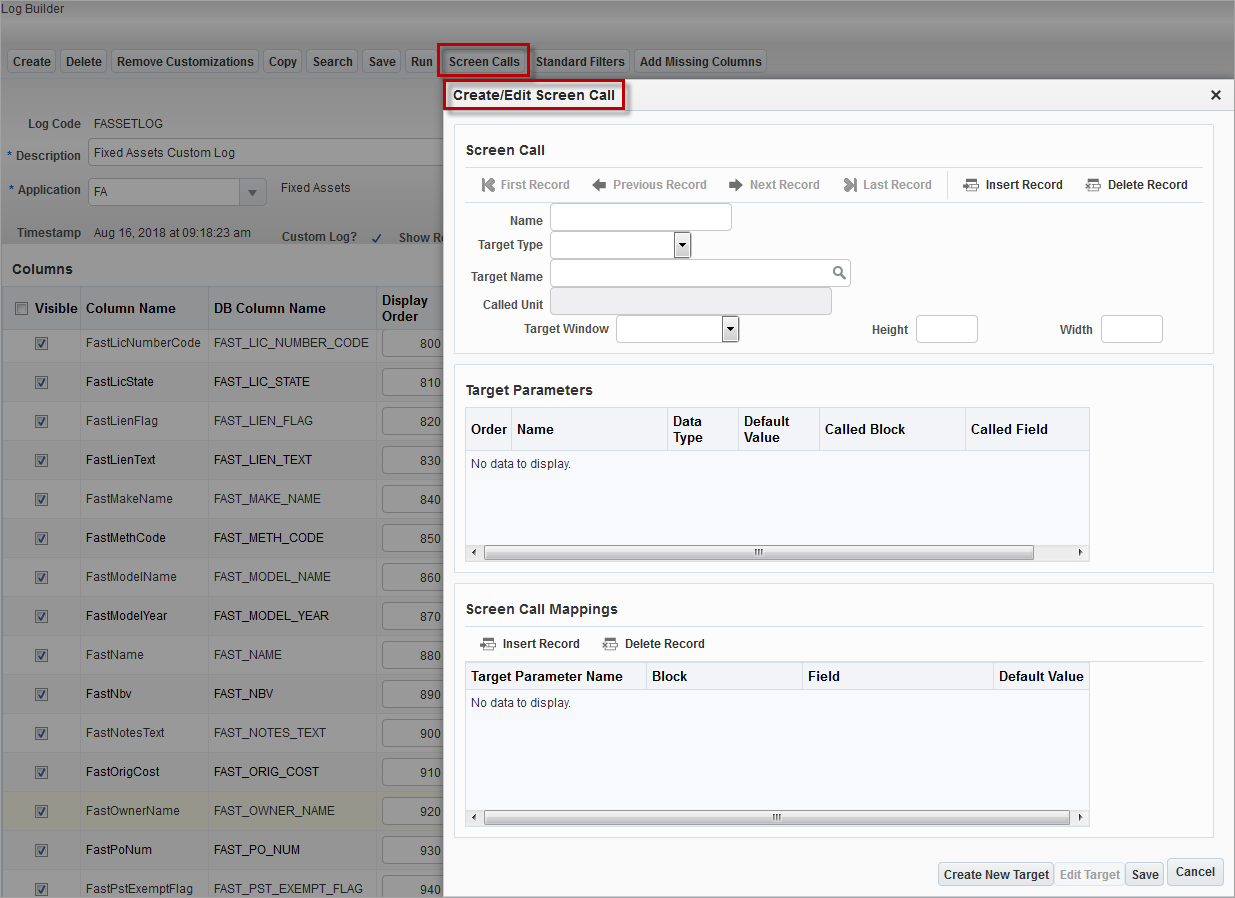
To create and define a new screen call, click the [Screen Calls] button, along the top of the Log Builder screen, to bring up the Create/Edit Screen Call screen, shown in the below screenshot.

Next, proceed to define the new screen call by specifying the values for each of the following fields.
| Field | Description |
|---|---|
|
Name |
Name of screen call, uniquely identifying it. |
|
Target Type |
Target’s type (e.g. JSP Program, UI Runtime Program, UI Log …) |
|
Target Name |
The targets available in this list are instances of the type selected by the Target Type field; this is the name of the target (called unit) that will be used to display information associated to a log column’s entry, which was made into a hyperlink using the Link field (see the preceding Define Link section). If the target has input parameters, required to launch it, they will appear under the Target Parameters section. Refer to the Map Target’s Input Parameters to Column Values section below for further details. |
|
Called Unit |
Read only field that displays the name of the called unit (target), specified by the Target Name field. |
|
Target Window |
Controls how the called target (called unit) is displayed. Values for selection are: Replace Content: target will be displayed using the same browser tab. New Window: target will be displayed using a new browser tab. Popup: target will be displayed using a pop-up window. |
Map Target’s Input Parameters to Column Values

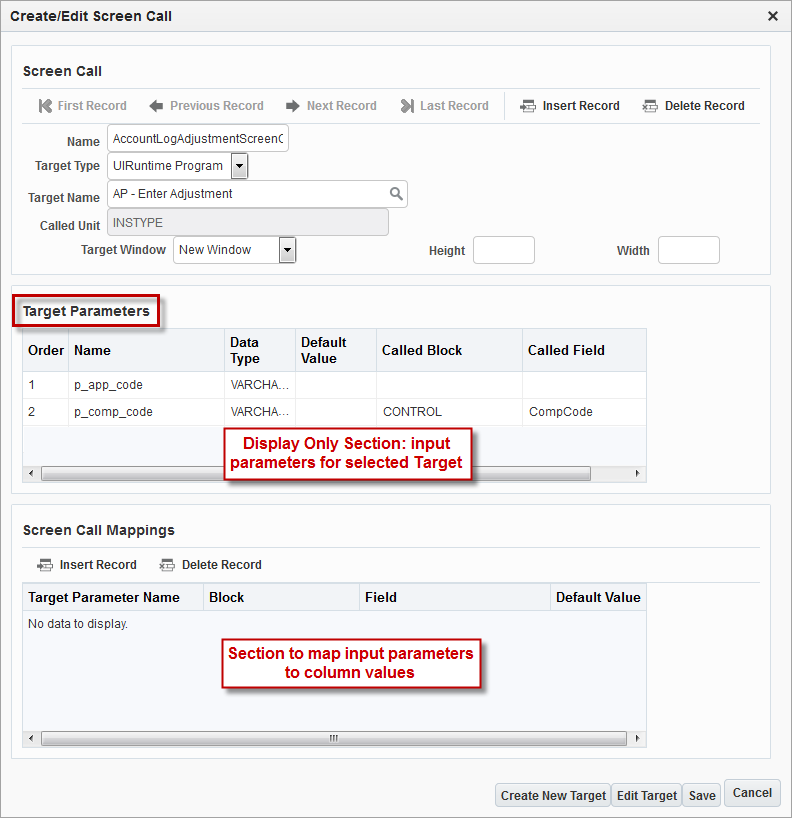
Once a target has been selected using the Target Name field, the Target Parameters section, framed by the red rectangle in the above screenshot, will display the target’s input parameters, if there are any.
Target Parameters
The Target Parameters section is for display purposes only, displaying the input (target) parameters that must be supplied with values in order to launch the target.
Screen Call Mappings
In the Screen Call Mappings section, a value is provided to a selected input parameter by mapping a value from one of the fields on the hyperlink’s row to the selected input parameter.
Map Log Columns to Target Parameters

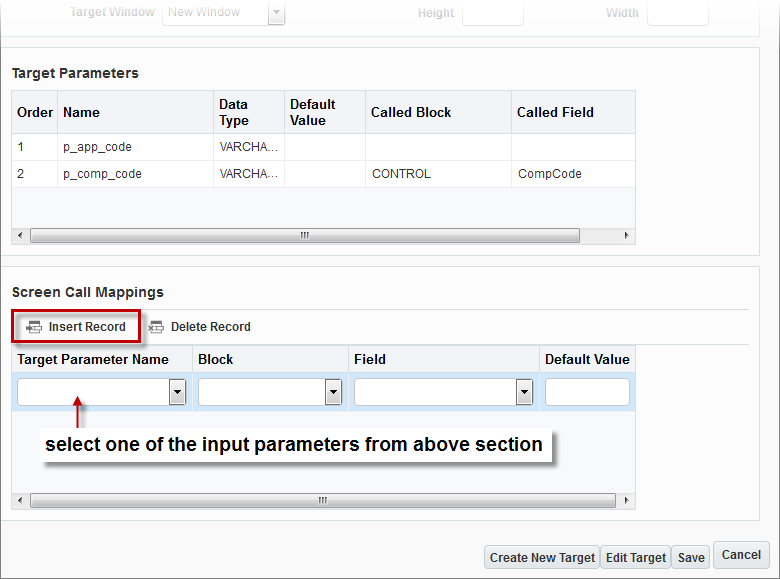
Each of the input parameters shown in the Target Parameters section must be mapped to a column in the log being created, or a default value must be provided using the Default Value field. In the Screen Call Mappings section, click the section’s [Insert Record] button (framed in red, above) to insert a new row to define a mapping.
The following table provides descriptions for the new row’s fields, used to define mappings.
| Field | Description |
|---|---|
|
Target Parameter Name |
This field’s list is populated with all of the input parameters from the upper section; select one of the input parameters, and use the rest of the fields to provide a mapping for it. Repeat the mapping process for each of the input parameters in the list. |
|
Block |
If a target’s screen’s fields are broken into screen blocks (sections), this field lists the blocks. The block chosen here has its fields listed by the Field field. |
|
Field |
This is the field (column value), on the same row as the hyperlink, that will supply the value for the selected target parameter. The fields displayed in this LOV are dependent on the Block field. If this field is used, the default value is not used. |
|
Default Value |
This field is an alternative to using the Field field; it can be used to provide a literal value for the selected input parameter. |
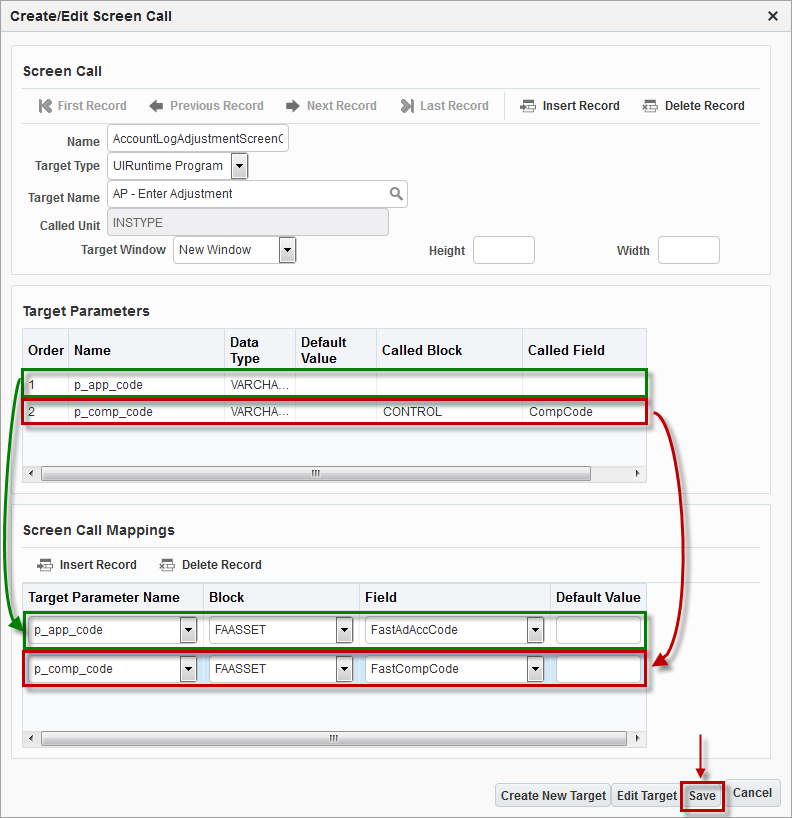
The following screenshot shows an example of a competed mapping for the two target parameters.

When finished providing a mapping for each input parameter, click [Save] to save the screen call and to make it available in the list of screen calls provided by the Link column, on the Log Builder screen.
[Create New Target] – Button
![Screenshot of the Create/Edit Target pop-up window accessed from the [Create New Target] button](../../../Resources/Images/12cTOOLS_-_Log_Builder/Create_New_Log_9.png)
This button brings up the Create/Edit Target screen to create a new target so that it is available in the Target Name field’s list. As shown by the above screenshot, the new target can be an external URL.
The values available for the Called Unit LOV are of the type specified by the Target Type field.
If the Target Type field is set to “External URL”, the URL field is used to specify a URL for an online target.
The Order field specifies the order that the parameters are supplied to the target, and the remaining fields are the same as those described in the previous Map Log Columns to Target Parameters section.
The Parameters section is used to provide parameters for the target, if the target requires input parameters in order to be launched. To provide a target parameter, click [Insert Parameter] and use the new row to detail it (refer to the previous section, Map Log Columns to Target Parameters, if details about any of the fields are required).
When finished, click [Save].