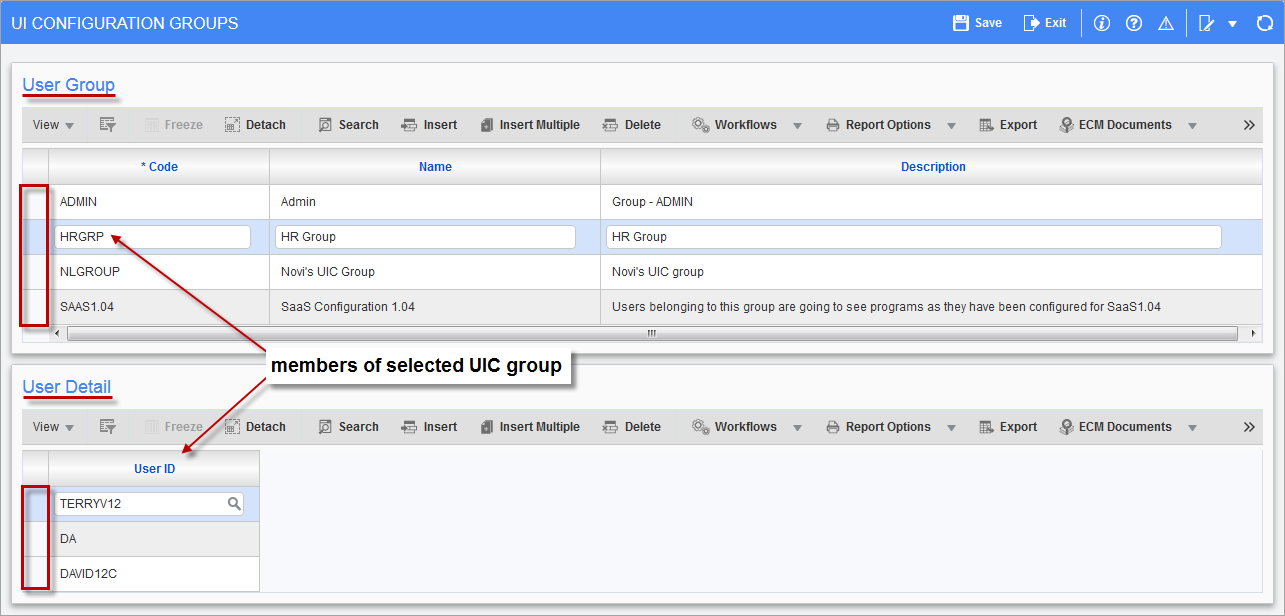
Pgm: SDUICONFIGGROUP – UI Configuration Groups; standard Treeview path: System > Setup > User Interface Configuration
The User Interface Configuration screen is the maintenance screen for UI configuration groups (UIC groups). UIC groups are used to group users for the purpose of assigning them a customized console, a customized Treeview, or a customized screen (via Lite Editor) at the group level.
For instance, human resources personnel can be added to a UIC group titled “HRGRP”, and when a customized console, Treeview, or screen is created for the group, the customized version would be saved at the group level, for the HRGRP UIC group.
User Group
The User Group section lists all of the created UIC groups. For the UIC group selected in this section, the User Detail section displays its members.
Add UIC Group
To add a UIC group, click [Insert] on the User Group section’s Block Toolbar. For the Code field, provide an identifying code for the UIC group; for the Name field, provided a name for the UIC group; and for the Description field, provide a description for the group. Click [Save] to commit the addition.
Edit UIC Group Name or Description
Select the group’s row, using the section area (framed by the red rectangle in the previous screenshot), then edit the group’s name or description using the Name or Description fields. Click [Save] to commit the changes.
Delete UIC Group
Select the group’s row, using the section area (framed by the red rectangle in the previous screenshot), then click [Delete] on the User Group section’s Block Toolbar. Click [Save] to commit the deletion.
User Detail
The User Detail section displays members of the UIC group selected under the User Group section.
Add Member to UIC Group
To add a member to a selected UIC group, click [Insert] on the User Detail section’s Block Toolbar. Select a user ID from the list of values. Click [Save] to commit the addition.
Delete Member from UIC Group
Select the member’s row, using the section area (framed by the red rectangle in the previous screenshot), then click [Delete] on the User Detail section’s Block Toolbar. Click [Save] to commit the deletion.