Step 1: Create New Canvas
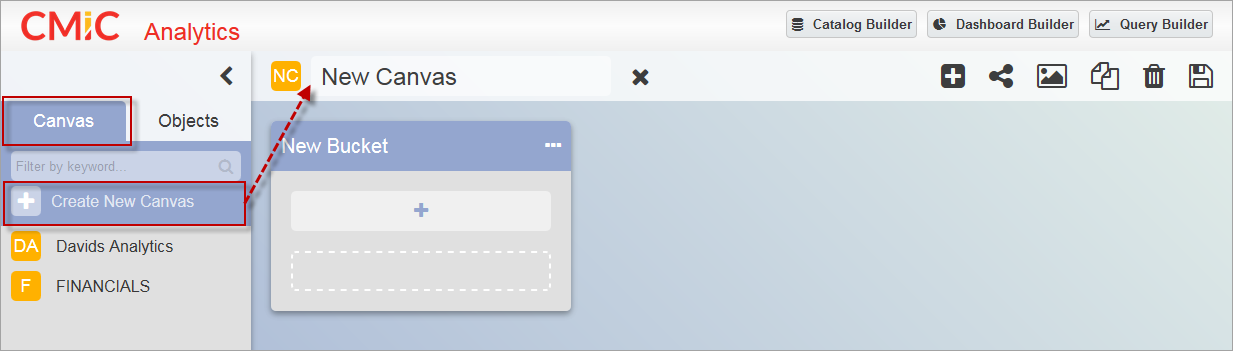
Click on the Create New Canvas icon ( ) in the Canvas tab of the Analytics Menu. A new canvas is created with one new bucket.
NOTE: To create a canvas in BI Analytics, a user must have the system privilege ‘BIBOARDCRT – CMIC BI: Allows the user to create BI Canvas’ and security role(s) that can update and delete canvases. Refer to System Privilege - BIBOARDCRT for more information.
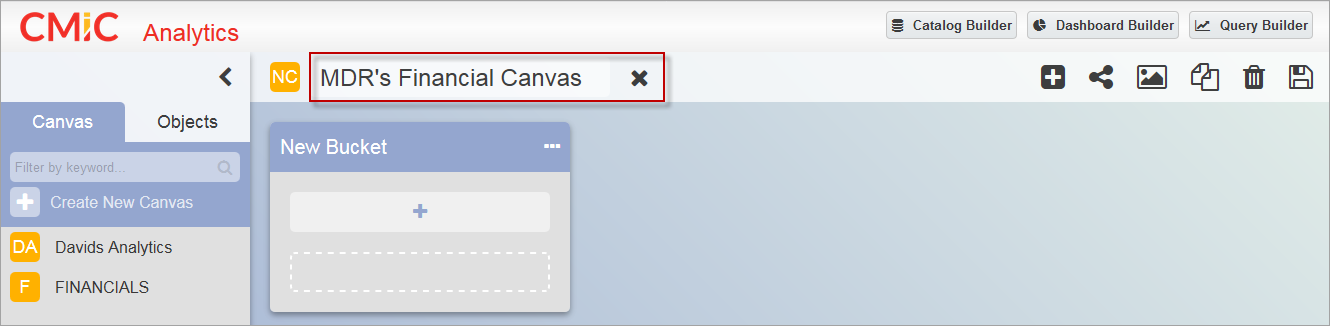
Enter a name for the new canvas.
Step 2: Add Buckets to Canvas
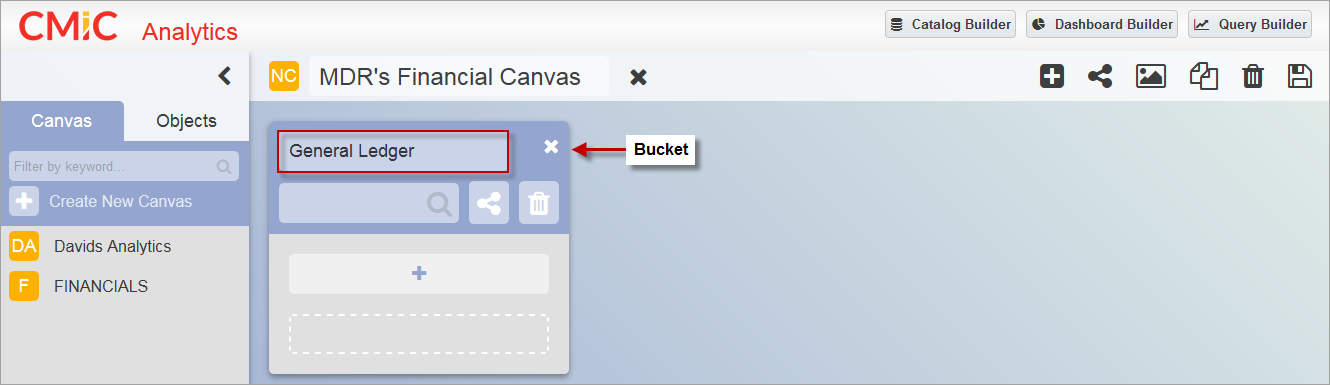
By default, when a new canvas is created, one new bucket defaults to the canvas. Click on the Ellipsis icon ( ) in the bucket to enter the bucket’s name.
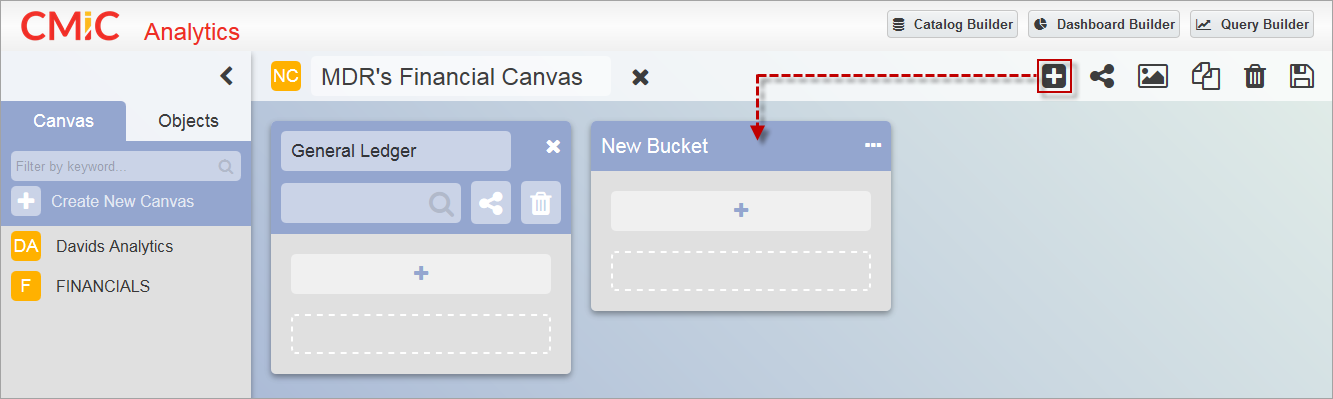
To add more buckets, use the Add Bucket icon ( ) in the canvas toolbar and update the names of the buckets. The order of the buckets can be adjusted by dragging and dropping them in the desired order on the canvas, as required.
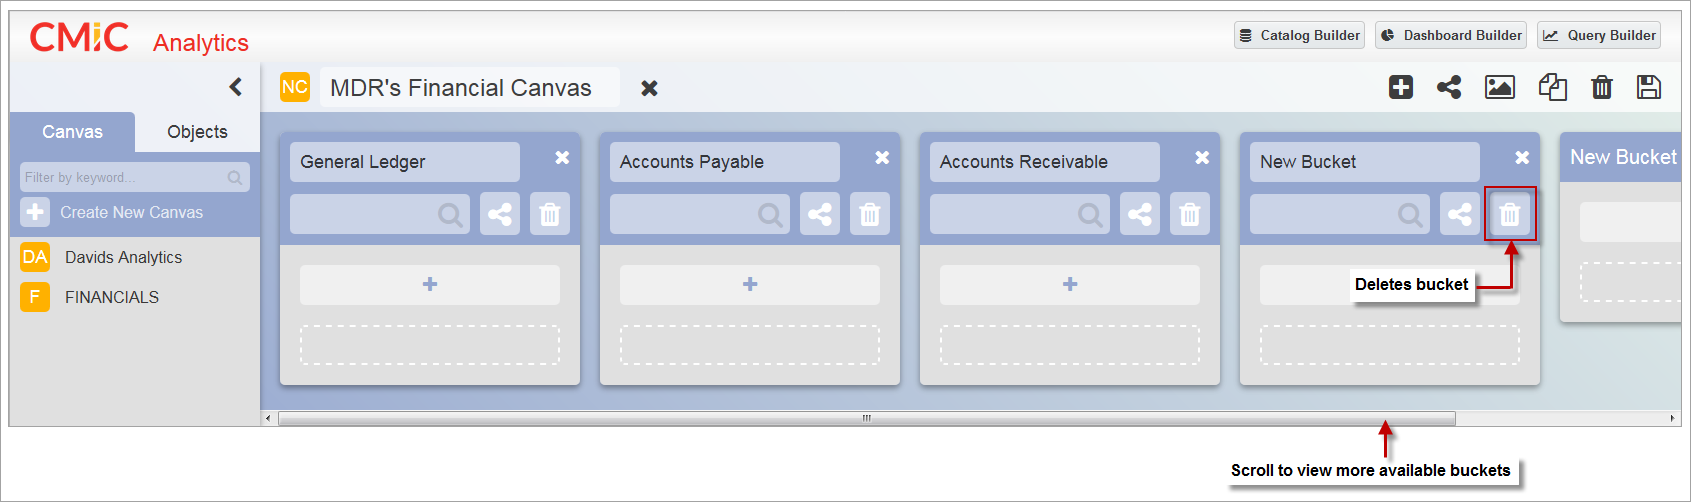
As more buckets are added, a scrollbar will appear at the bottom of the canvas to enable scrolling through the available buckets. To delete a bucket, click on the Delete icon ( ) inside the bucket.
Step 3: Add Objects to Buckets
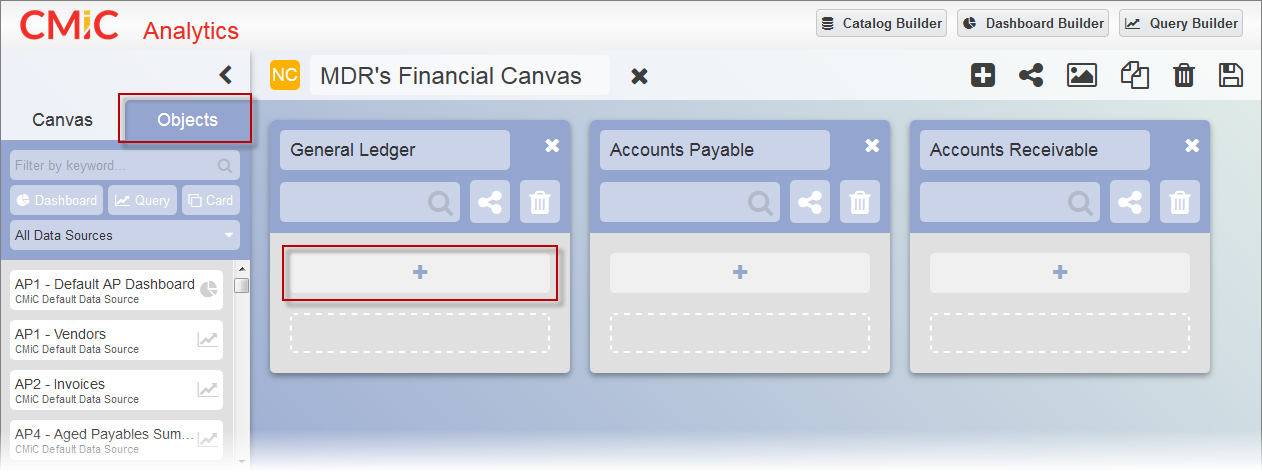
To open the list of objects, click on the Add Objects icon ( ) in a bucket, or click on the Objects tab in the Analytics Menu.
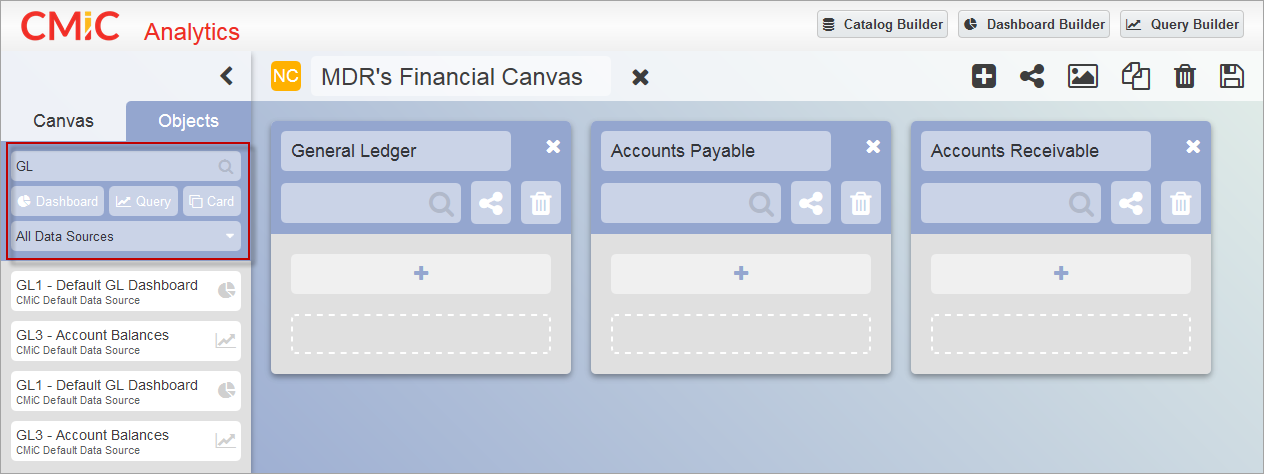
In the Objects tab, filter the list of available objects by entering a keyword in the search box, using the BI tool buttons, or selecting a data source from the drop-down menu. The BI tool buttons for [Dashboard], [Query], or [Card] can be selected/deselected to include or exclude dashboards, queries, or card views from the list.
Each of the objects is contained within a card and depending on the type of object, contains an icon that identifies the object as a dashboard ( ), query (
 ), or card view (
 ).
).
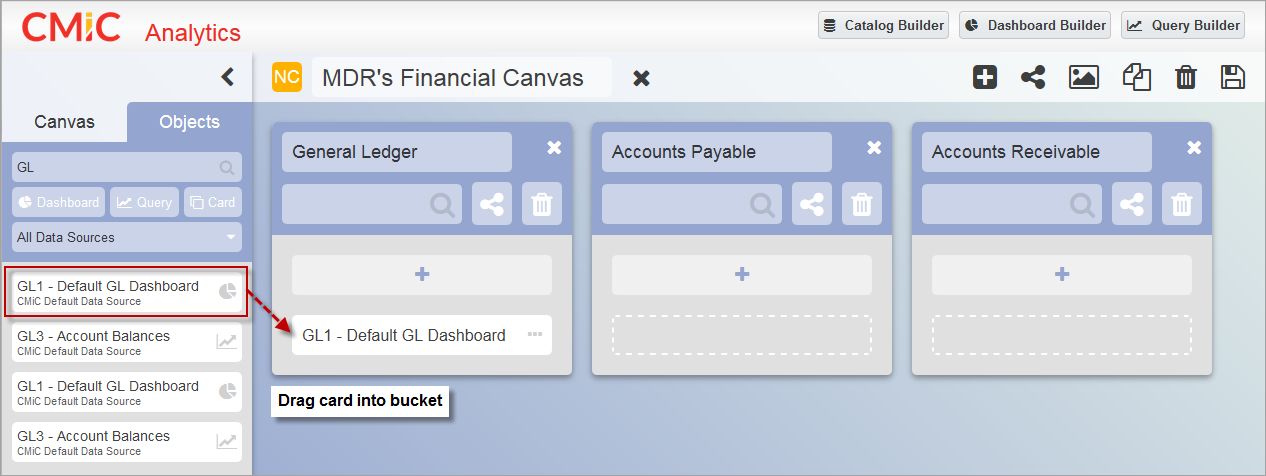
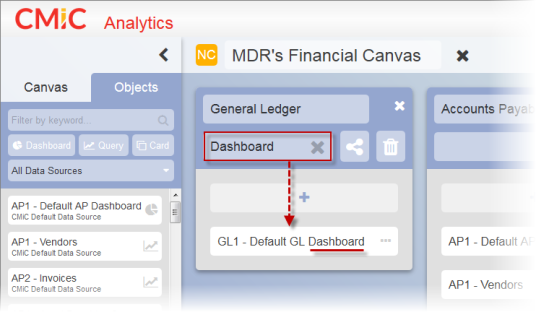
Select desired card from the list of objects and drag it into a bucket.
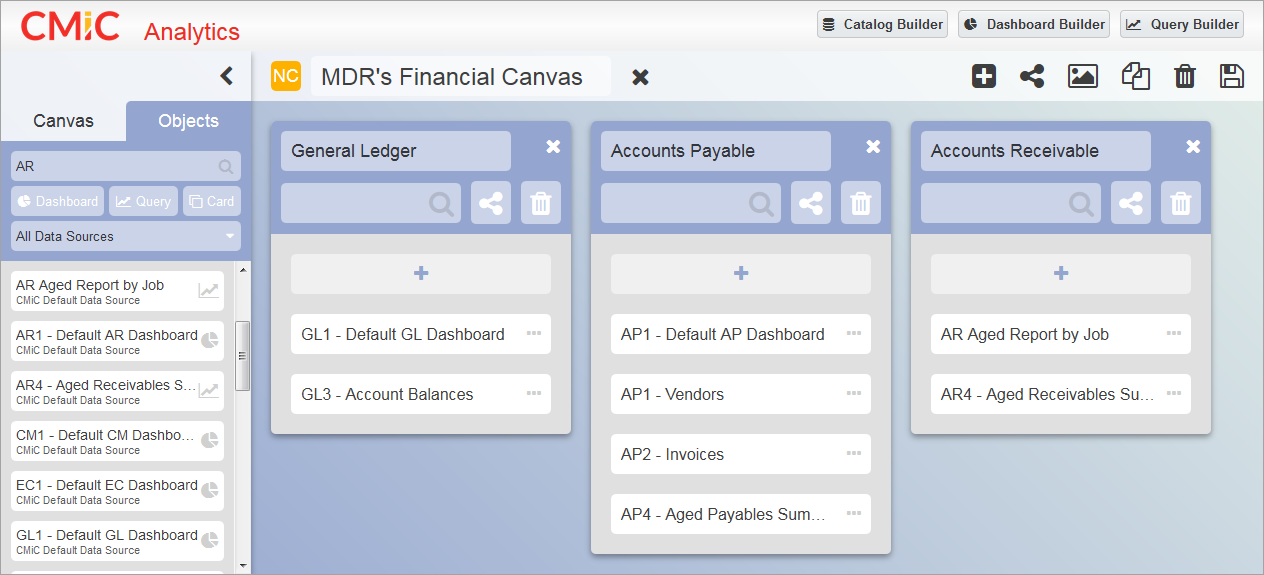
Repeat this process for each of the buckets. The order of the cards within each of the buckets can be reshuffled using drag and drop.
A search field is located in each of the buckets to search for cards within an individual bucket.
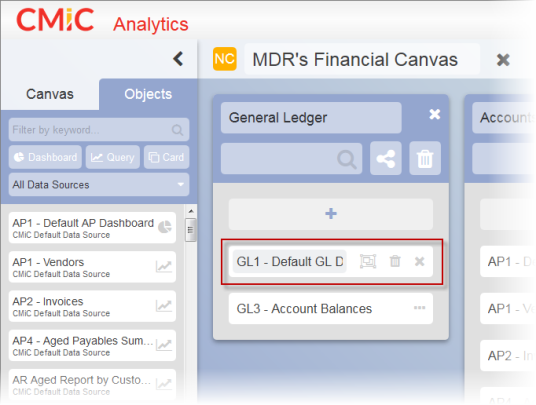
Clicking on the Ellipsis icon ( ) of a card allows the user to launch the object in a new browser tab (depending on the browser’s settings) using the Launch Object icon (
 ) or delete the card from the bucket using the Delete icon (
 ).
).
Step 4: Assign Security Roles to Objects in Buckets
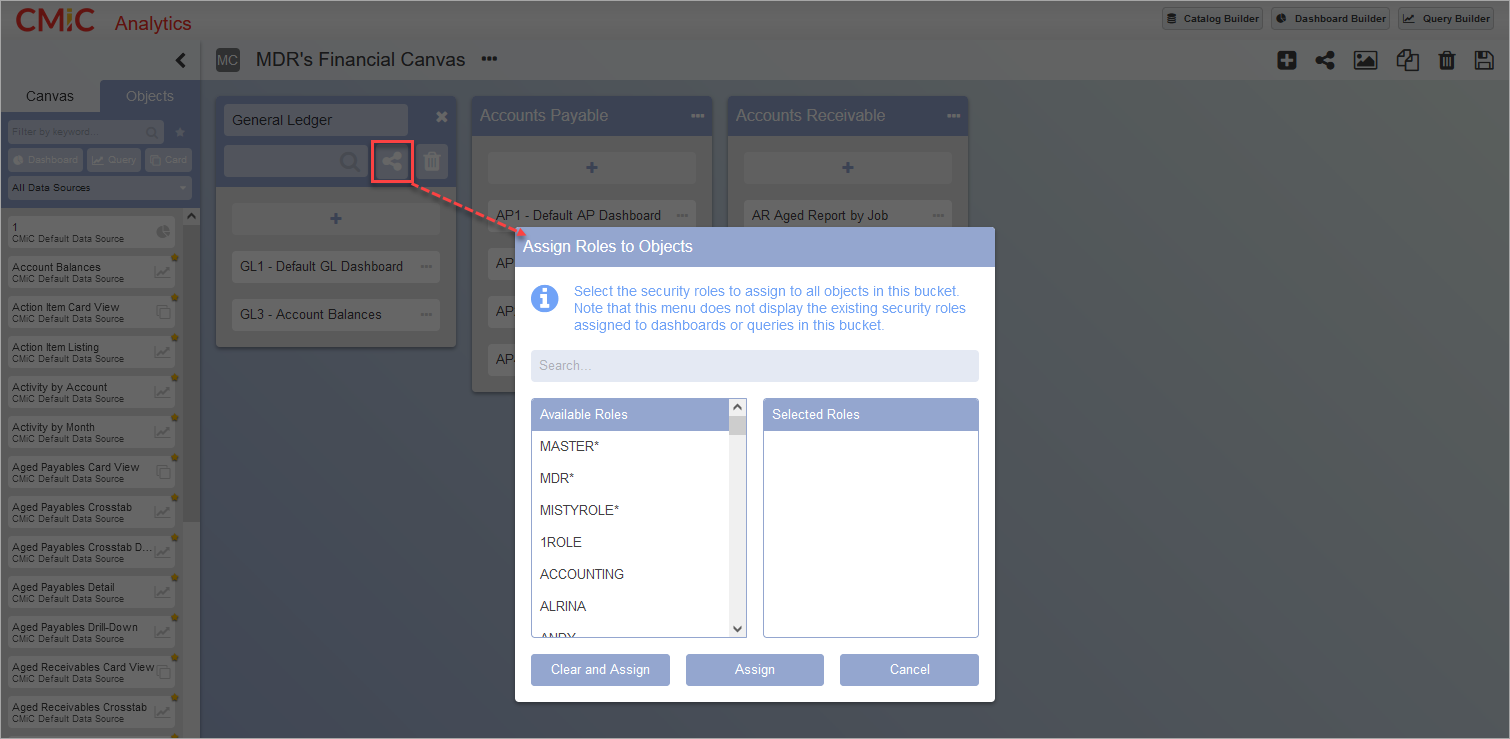
To assign security roles to all objects in a bucket, click on the Security icon ( ) to launch the Assign Roles to Objects pop-up window.
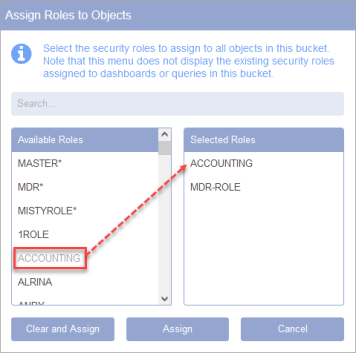
Add the required security roles by clicking on them in the Available Roles column. The selected roles will appear in the Selected Roles column. To unassign a selected role, click on the role in the Selected Roles column and it will be removed.
The Assign Roles to Objects pop-up window doesn't display the existing security roles assigned to dashboards or queries in this bucket. To clear prior assignments and then assign selected roles, click on the [Clear and Assign] button. Otherwise, to assign selected roles without clearing prior assignments, click on the [Assign] button.
NOTE: Users with the system privilege ‘BISECMNG – CMIC BI: Allows the user to modify security’ can assign security roles to dashboards/queries in a bucket without having the ability to run/view the content of the dashboards/queries. To run/view the content of a dashboard/query, users must have the security role assigned to the dashboard/query.
Step 5: Save and Assign Security Roles to Canvas
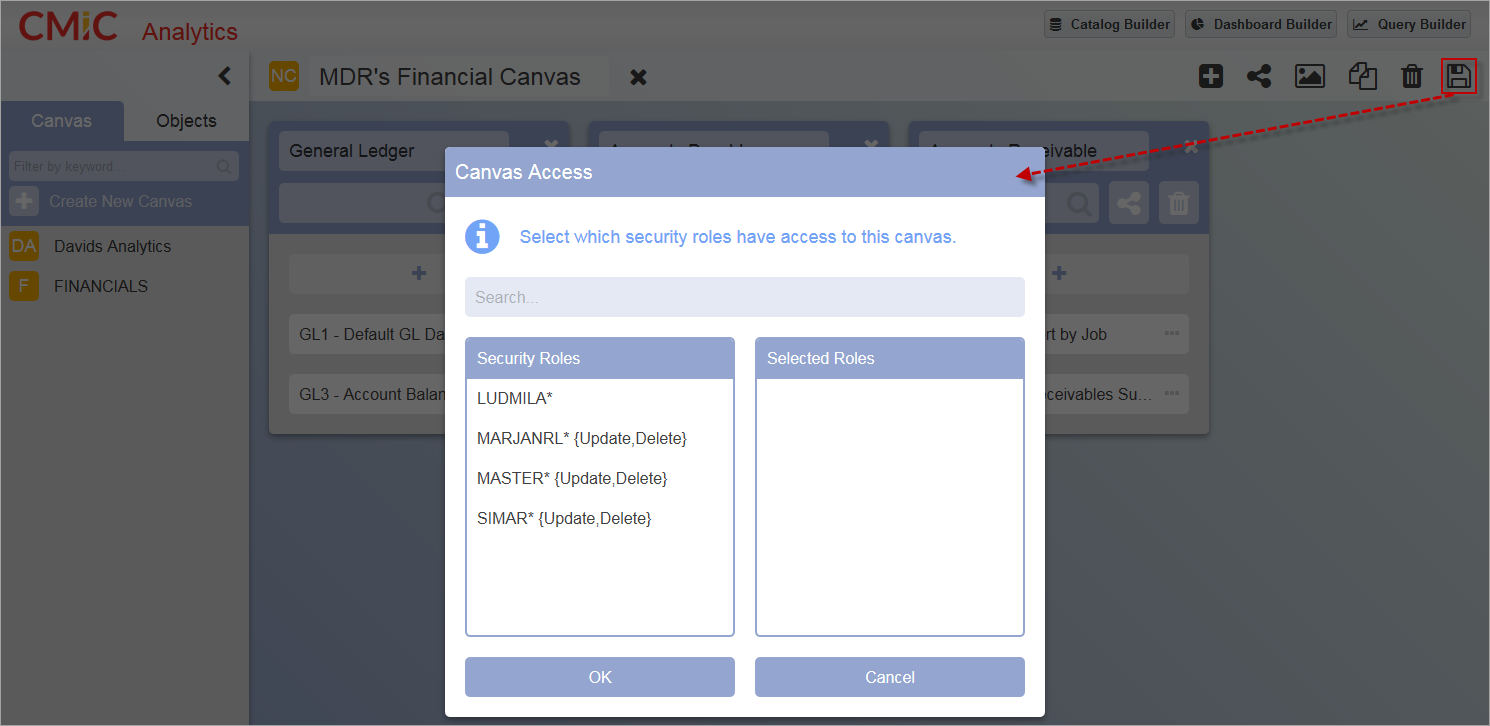
Click on the Save icon ( ) in the canvas toolbar to save the canvas. The Canvas Access pop-up window will be launched, prompting the user to assign which security roles should have access to the canvas. To assign security roles to a canvas, select the roles in the Security Roles column and they will appear in the Selected Roles column.
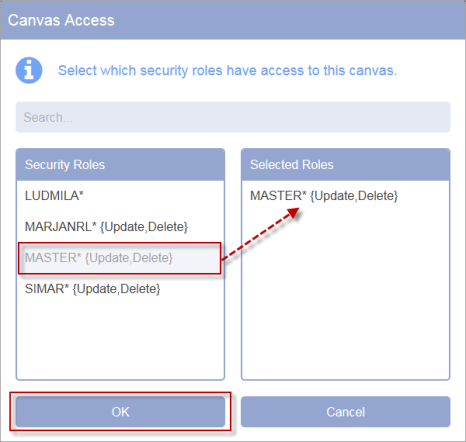
To unassign a selected role, click on the role in the Selected Roles column and it will be removed. The security role indicates whether it includes update and/or delete privileges. If a role does not have the update and delete suffix, then the role only has read-only access. When finished, click on [OK].
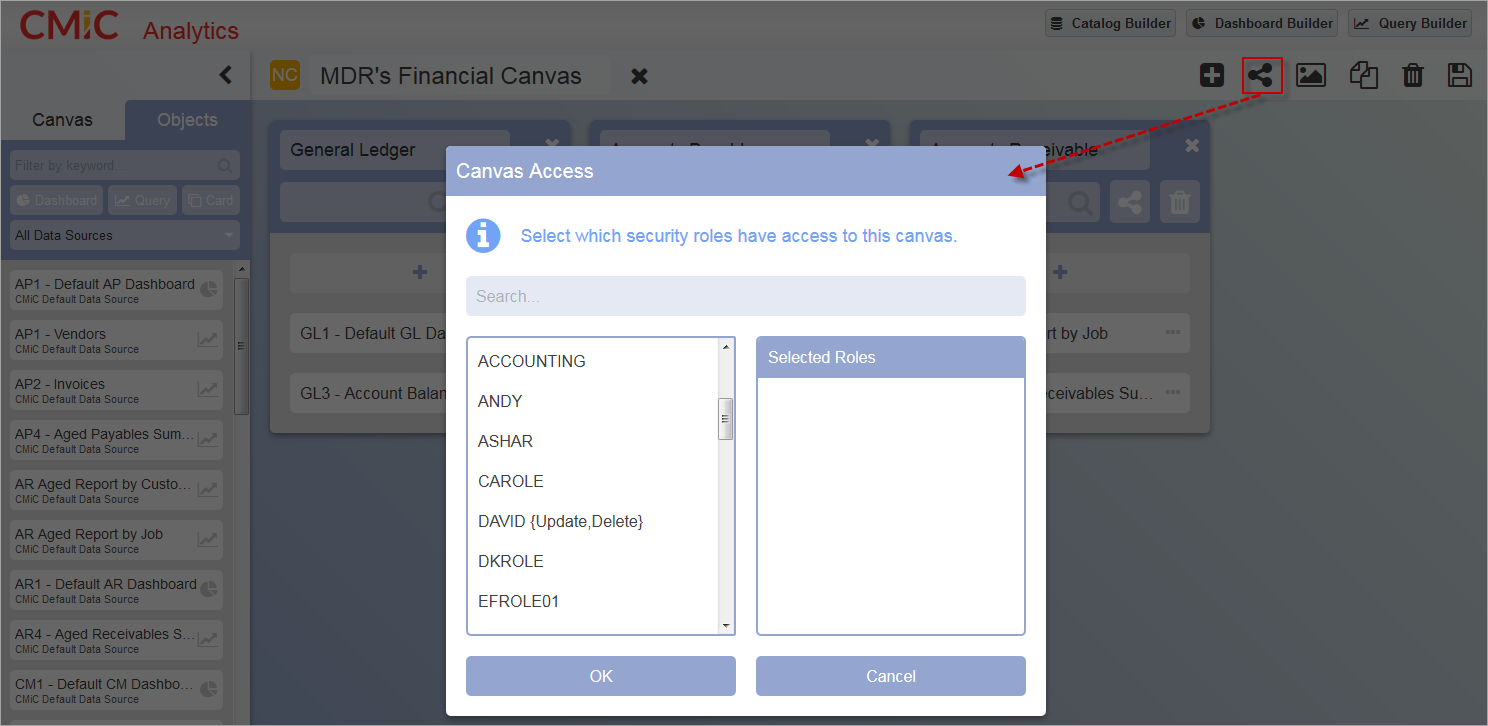
To update the security roles assigned to a canvas, click on the Security icon ( ) in the Canvas Toolbar to launch the Canvas Access pop-up window.
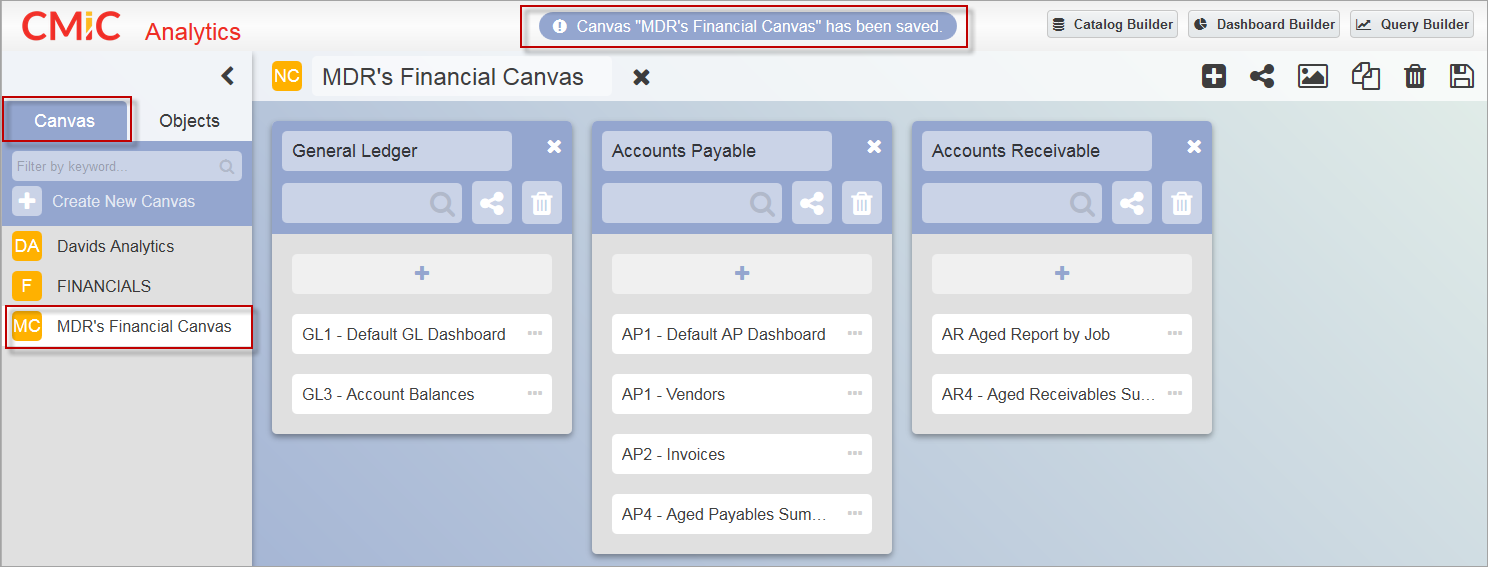
After the canvas is successfully saved, it will be added to the list of canvases available in the Canvas tab.
NOTE: If the user attempts to save the canvas before assigning any security roles, the user will be prompted to assign security roles before the canvas can be saved.
Step 6: Change Canvas Background
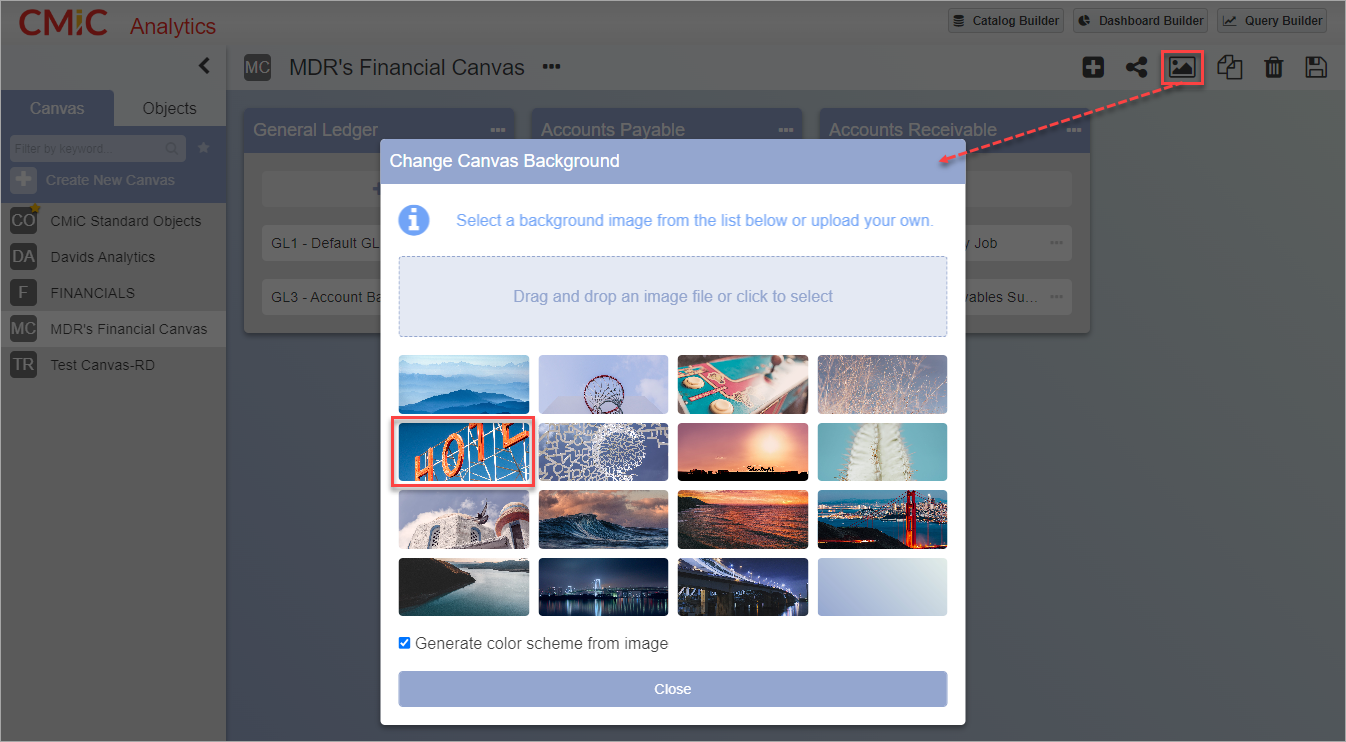
Click on the Change Canvas Background icon ( ) to launch a pop-up window where a new background theme can be applied to the canvas. Select a pre-loaded image or upload your own custom image file using the upload area. The upload area can be used to drag and drop an image file or to browse and select a file.
The 'Generate color scheme from image' checkbox is used to control whether the color scheme from the selected theme is applied to the entire canvas or only the background. By default, the box is checked.
The screenshots below show how this color scheme option can be applied.
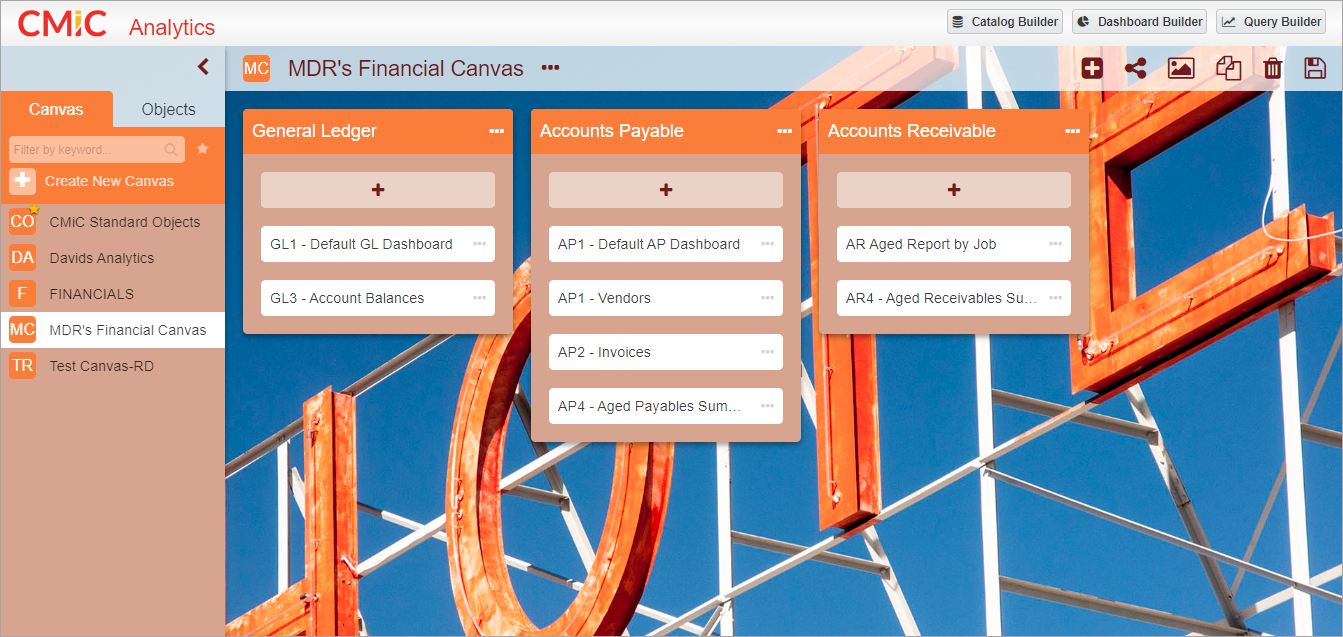
Applying a background theme to a canvas in BI Analytics with color scheme option selected
The screenshot above shows an example of a theme applied with the 'Generate color scheme from image' option checked. Notice how the orange theme is carried throughout the canvas, including the Analytics menu and the buckets.
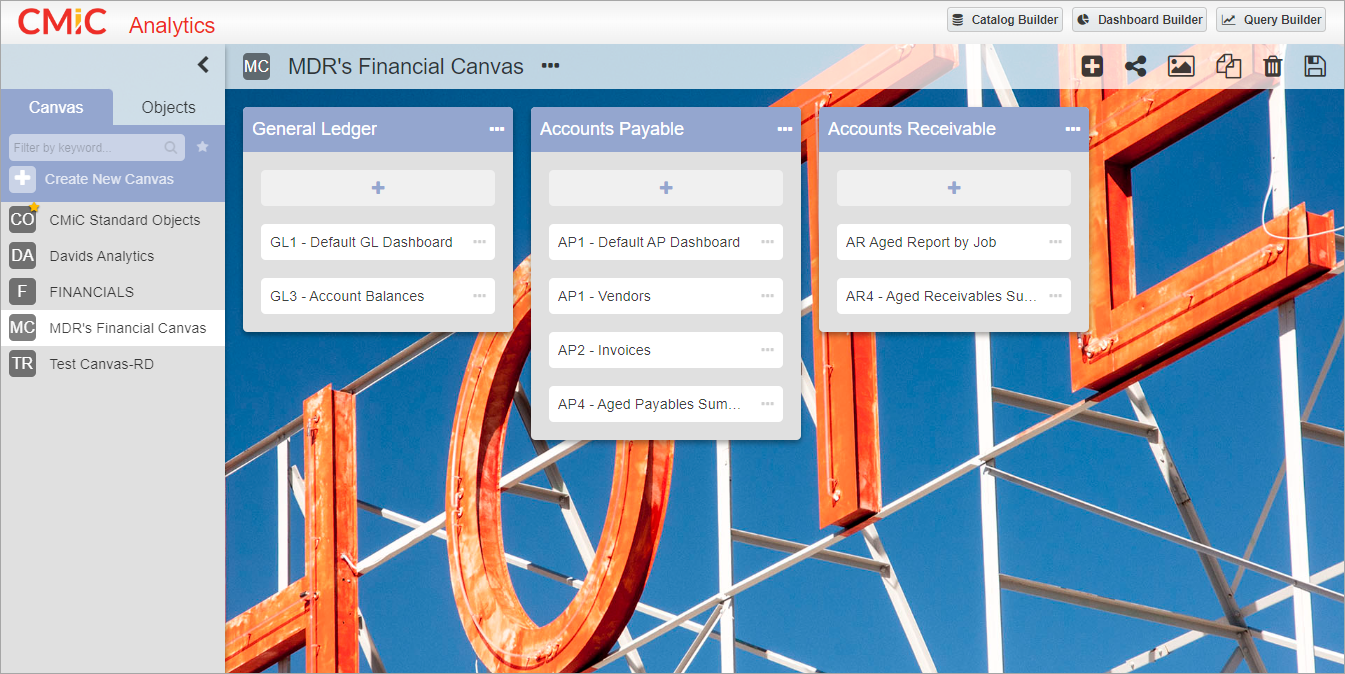
Applying a background theme to a canvas in BI Analytics with color scheme option deselected
The screenshot above shows an example of a theme applied with the 'Generate color scheme from image' option unchecked. Notice how only the background image was updated and the rest of the canvas remains the same.
When finished applying a theme in the Change Canvas Background pop-up window, click on the [Close] button to close the window.