NOTE: The portal can be accessed from your desktop or any mobile device.
Login Information
Client Salesforce sign-in page
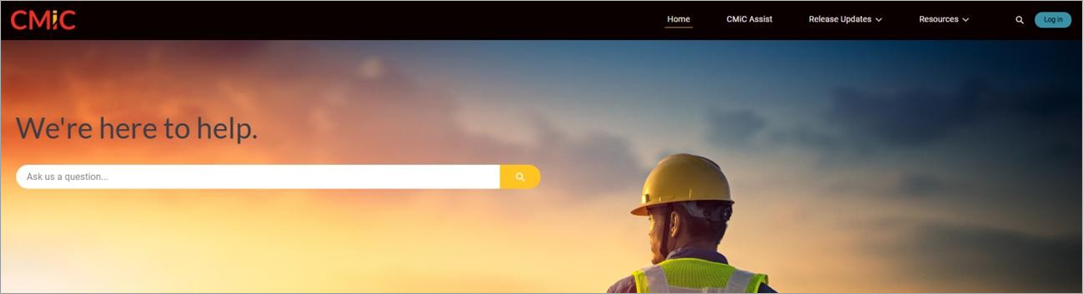
The URL for the CMiC Support Portal is http://www.support.cmicglobal.com/. CMiC's Support Portal can be rendered on mobile devices and is just as user-friendly as the desktop version.
CMiC has provided Authenticated Users for those requiring access to the CMiC Support Portal. If you require more users, have any questions, or are having login issues, please contact your Account Manager.
We also recommend reaching out to us if you have suggestions, comments, and concerns regarding the portal.
Home Screen
The drop-down lists across the top of the Support Portal will provide access to many CMiC Resources as well as CMUG Forum & User Voice. We will explore many of them in this guide.
User Settings
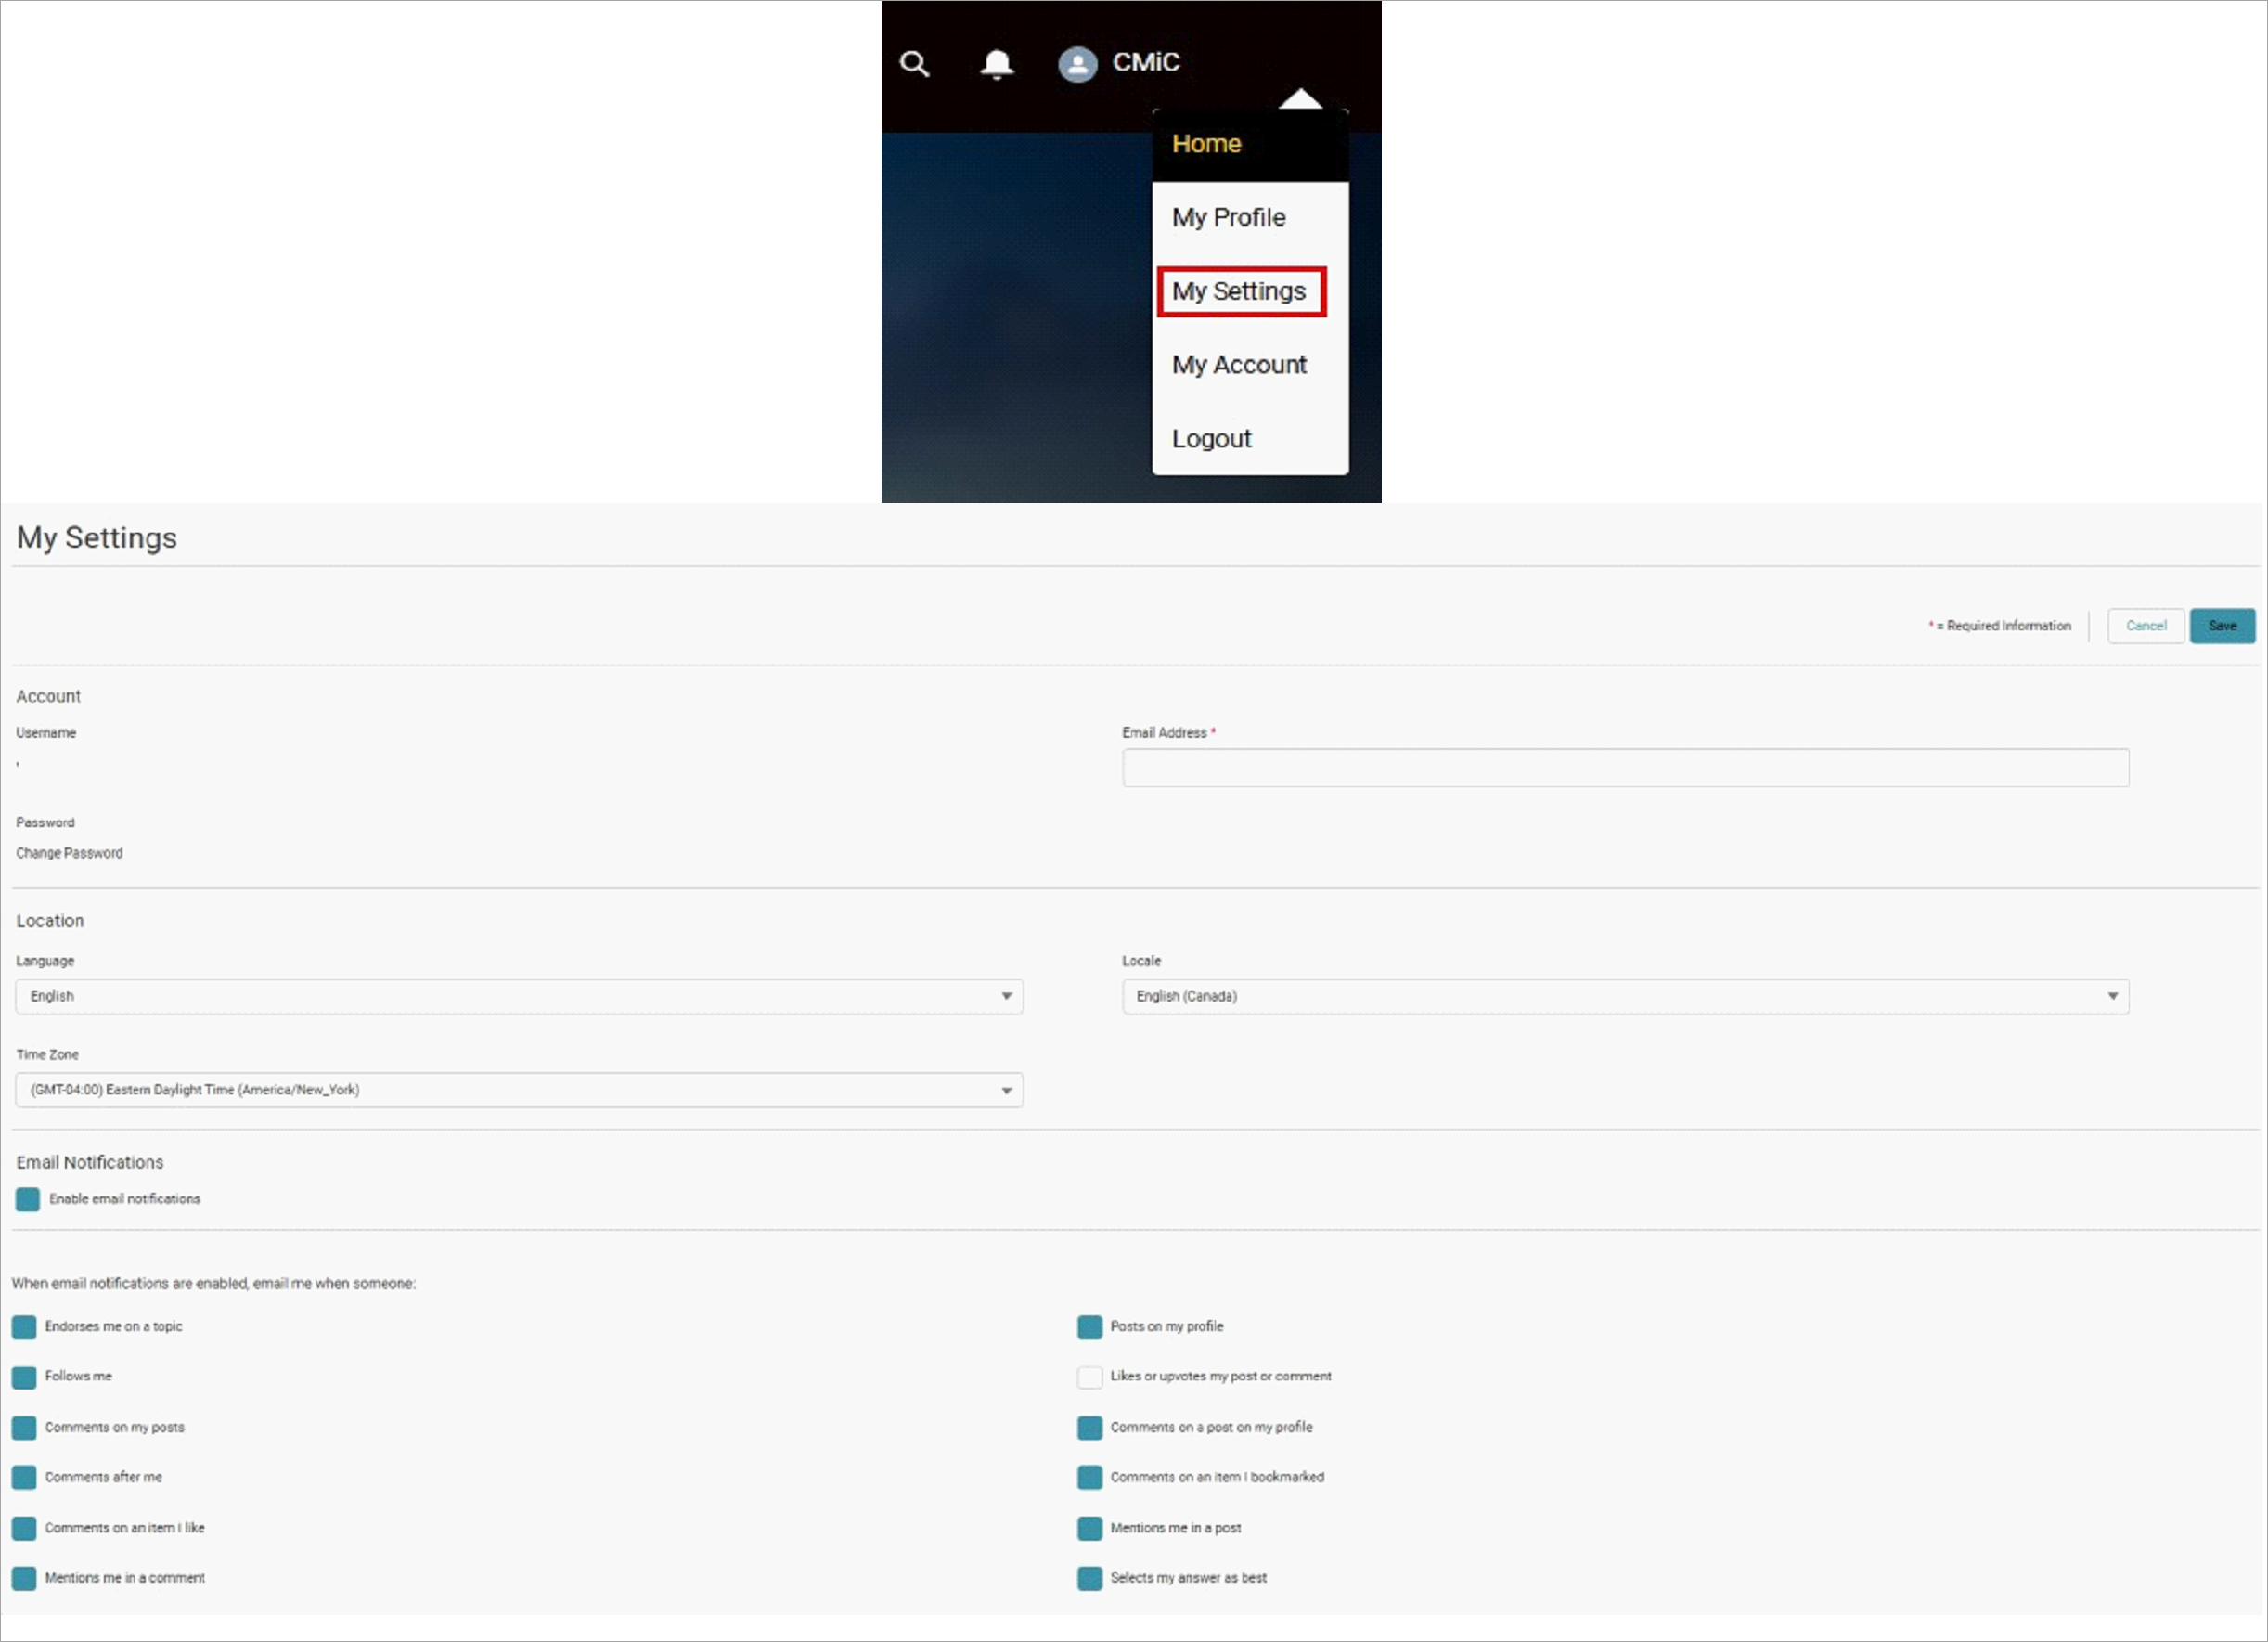
Email Notification Options for the Community Seen in My Settings
By clicking your User Icon in the top-right of the Support Portal you may access a variety of personal settings. My Profile contains basic information such as name, phone, etc. while My Account permits you to view other contacts from your organization. For Plus Users only, in My Accounts you may set each contact as:
-
Reference - Willing to be a CMiC Reference
-
Default Case Contact - Added as "CC" on all New Cases
-
Primary Contact - Contact for Marketing Notifications
-
No Longer at Company - Deactivated
Access My Settings in order to update your email, language, time zone, and email notifications for the community.
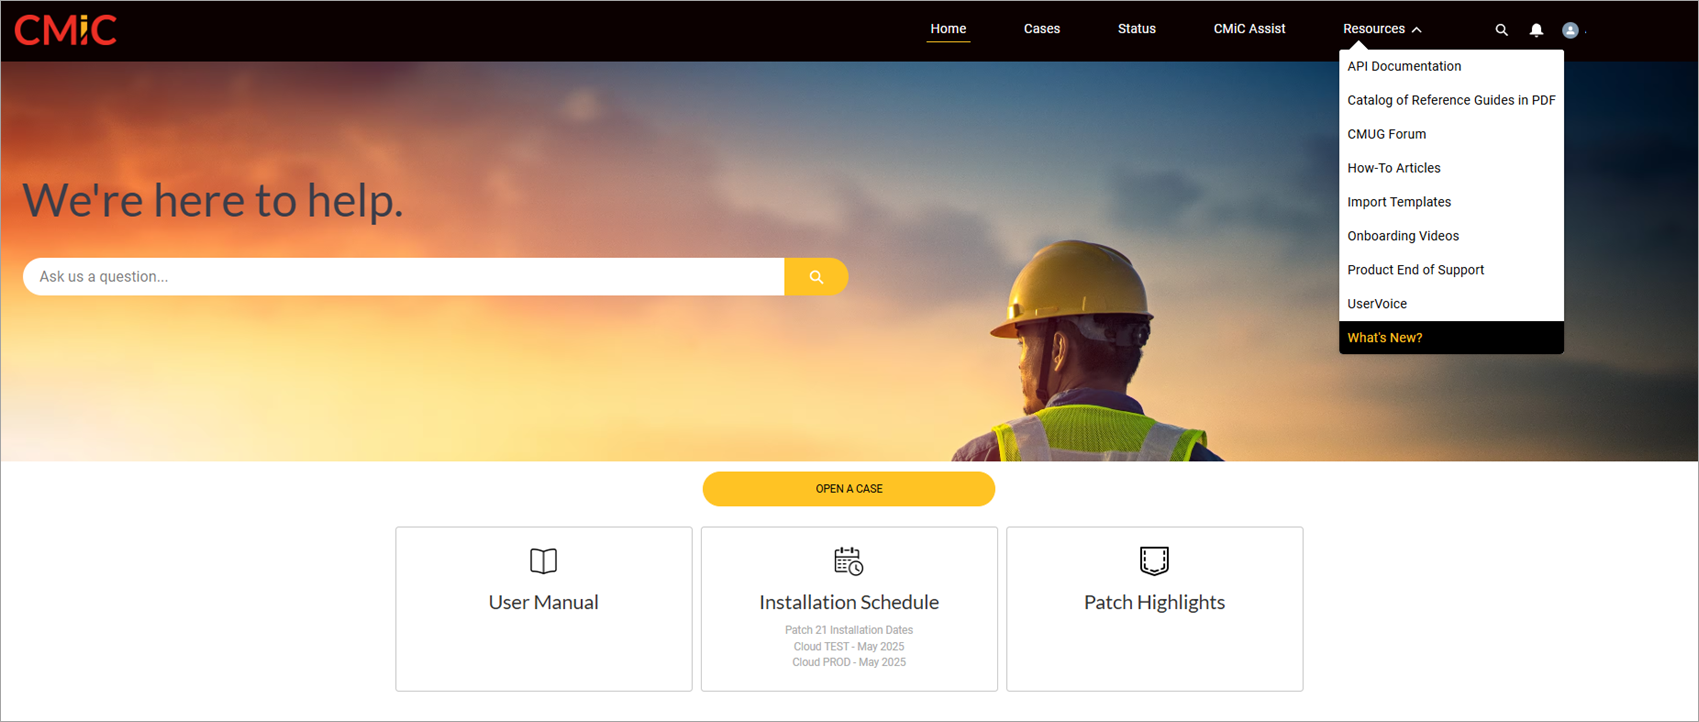
Resources
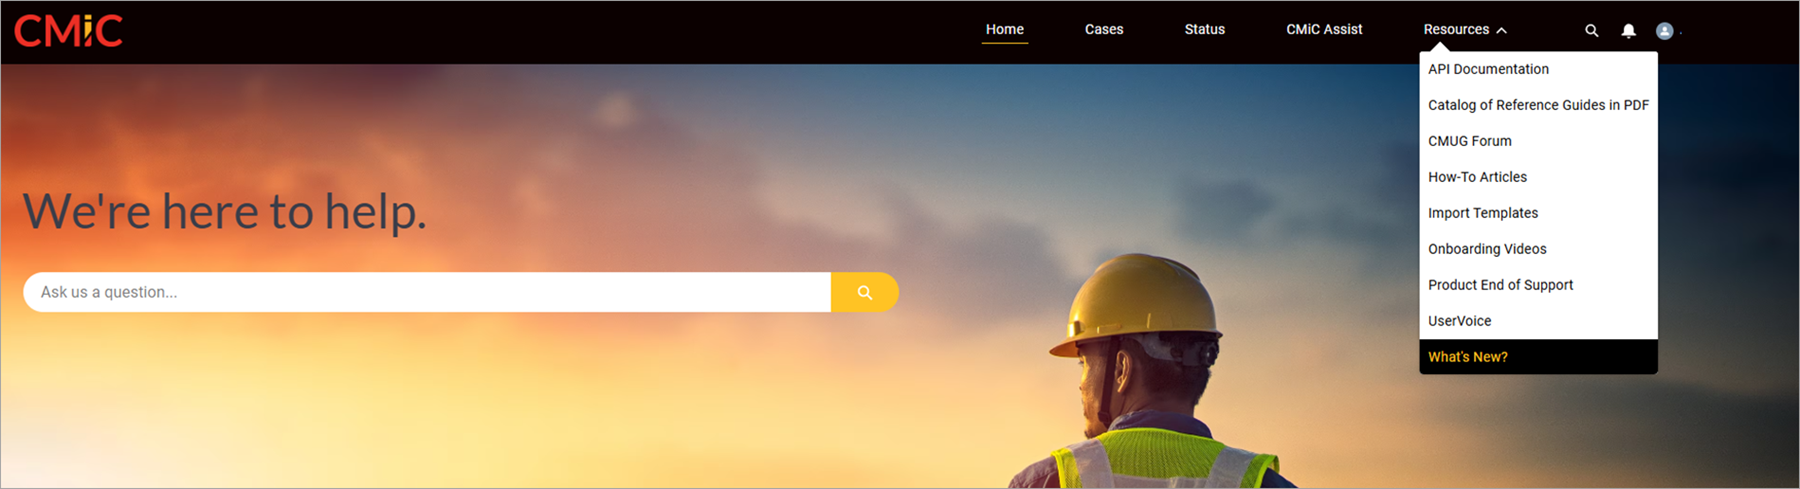
The Resources tab on the Home page provides links to many reference materials, as well as the CMUG and UserVoice forums.
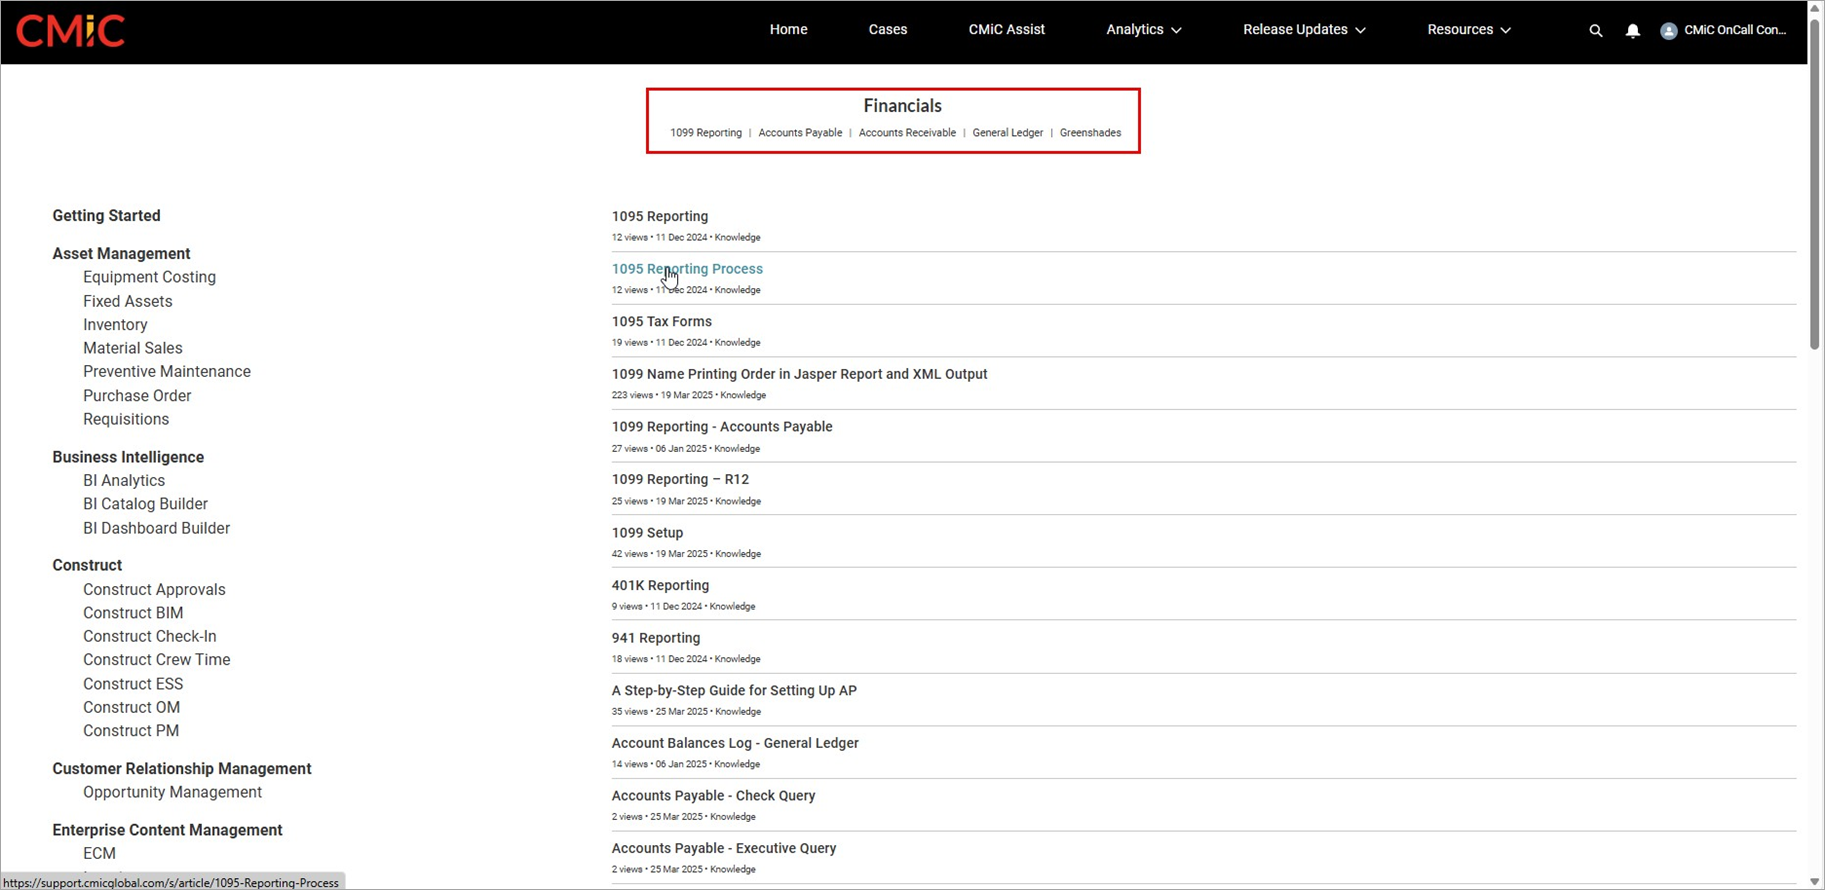
In addition, if you know the application for which you are seeking information, you can select from the links on the Home page for each module.

For example, selecting Financials will open a new page where you can find many articles on the various functions within the Financials application.
Searching and AI
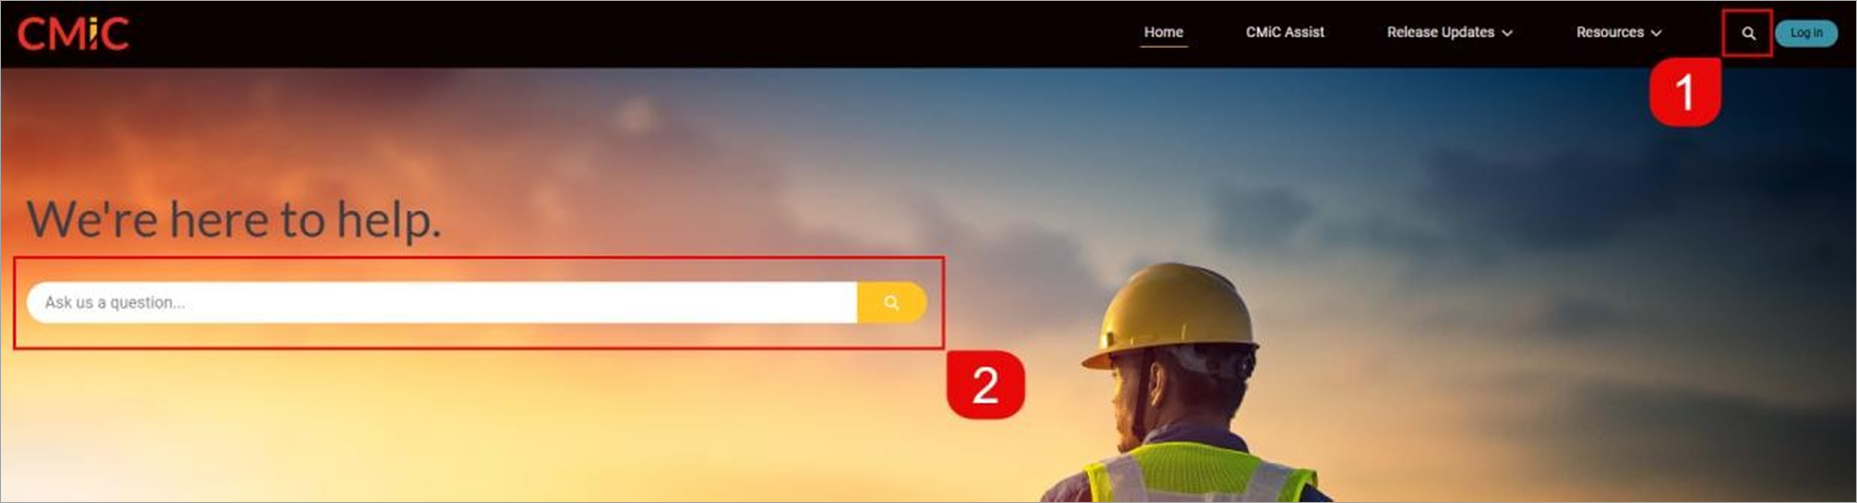
If you know the topic you are searching for, or you have a question regarding functionality or process, you can search within the Support Portal Knowledge Base to find guides to help you with your inquiries.
When you do utilize the search function, the Support Portal Einstein AI Agent will attempt to provide you with an answer based on your search entry. If the provided information is not sufficient, you can browse through the Knowledge Guides returned on the search or refine your search parameters and conduct a new search.
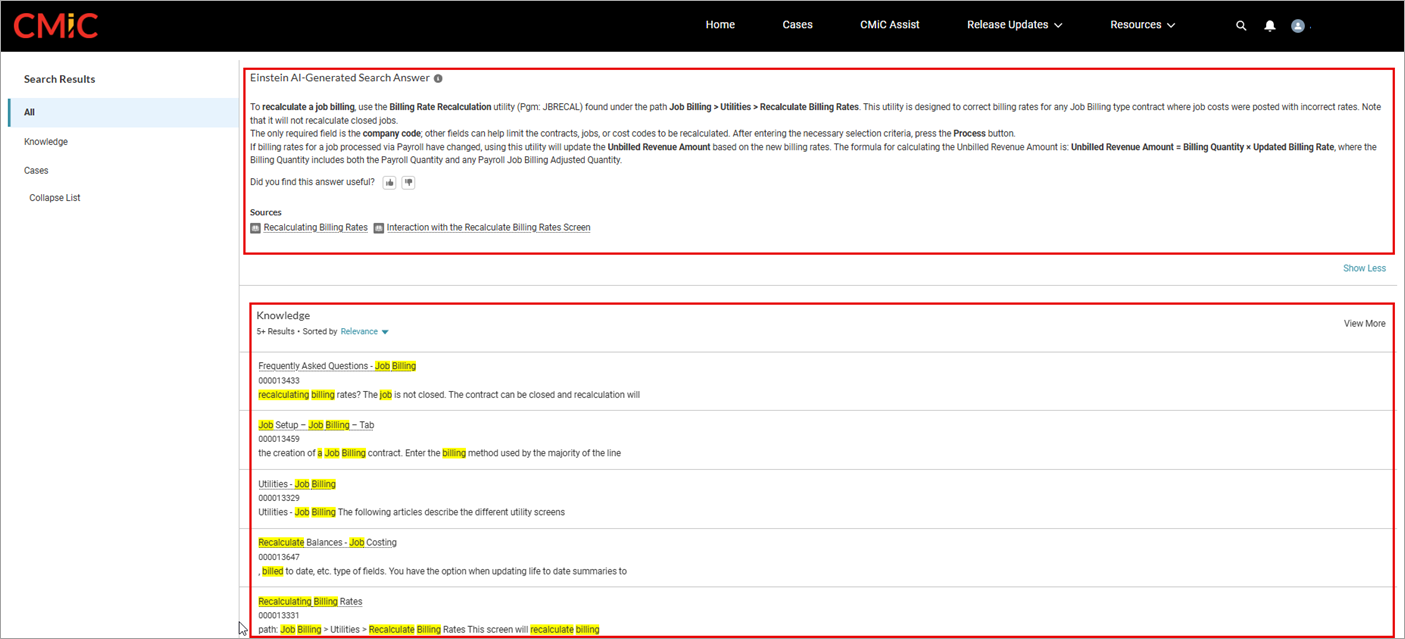
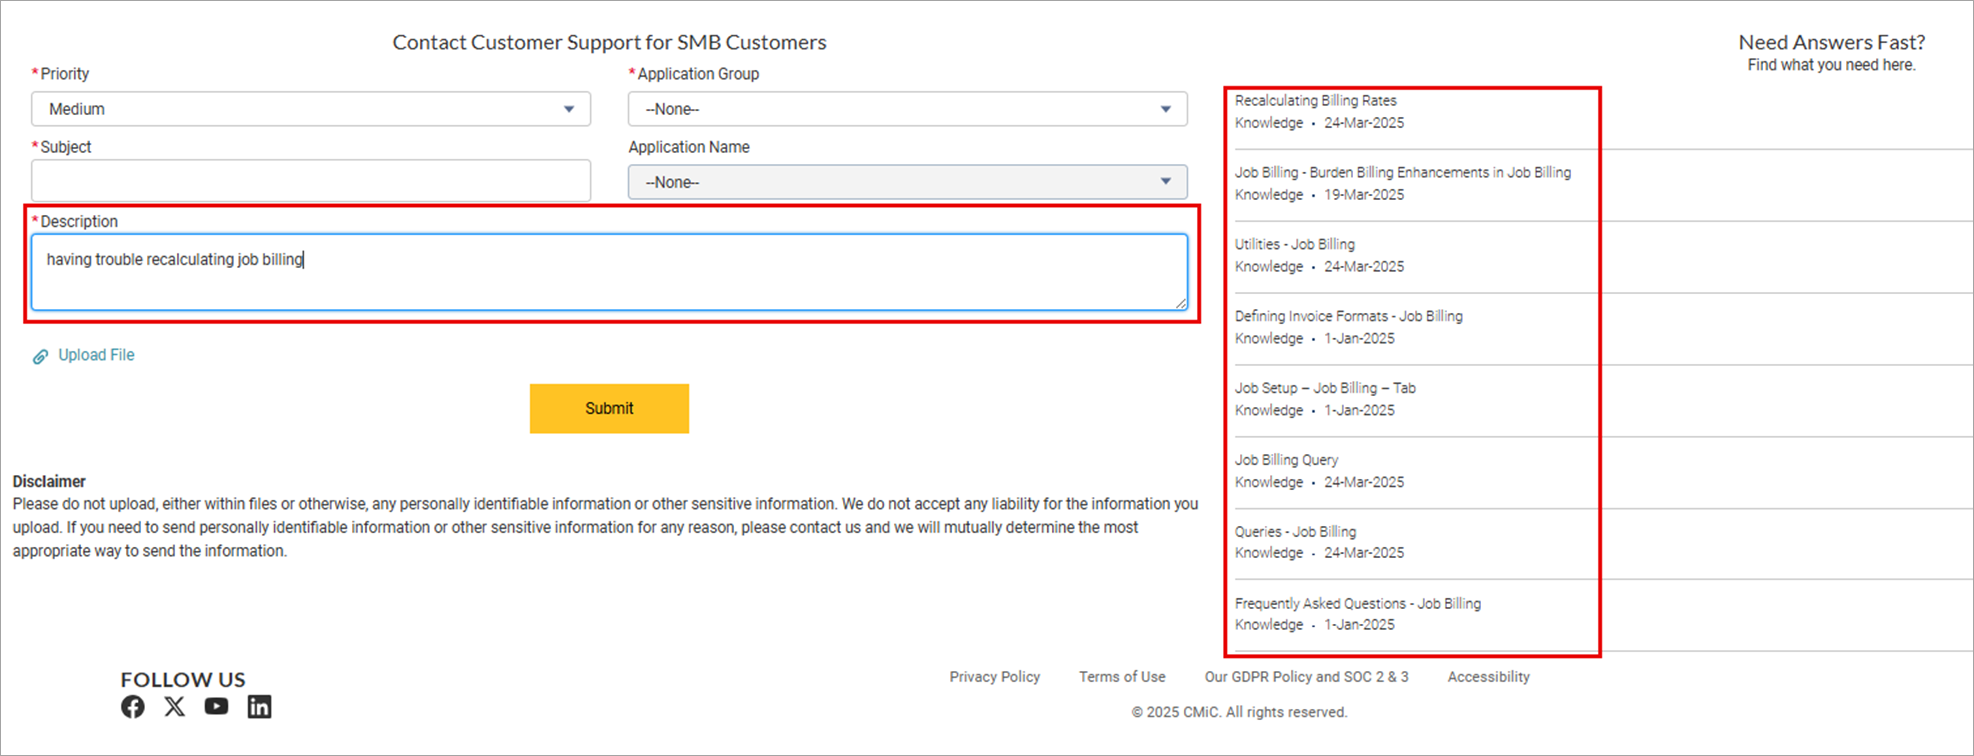
For example, if you are looking for information on how to recalculate a job billing, enter your question into the Search field.
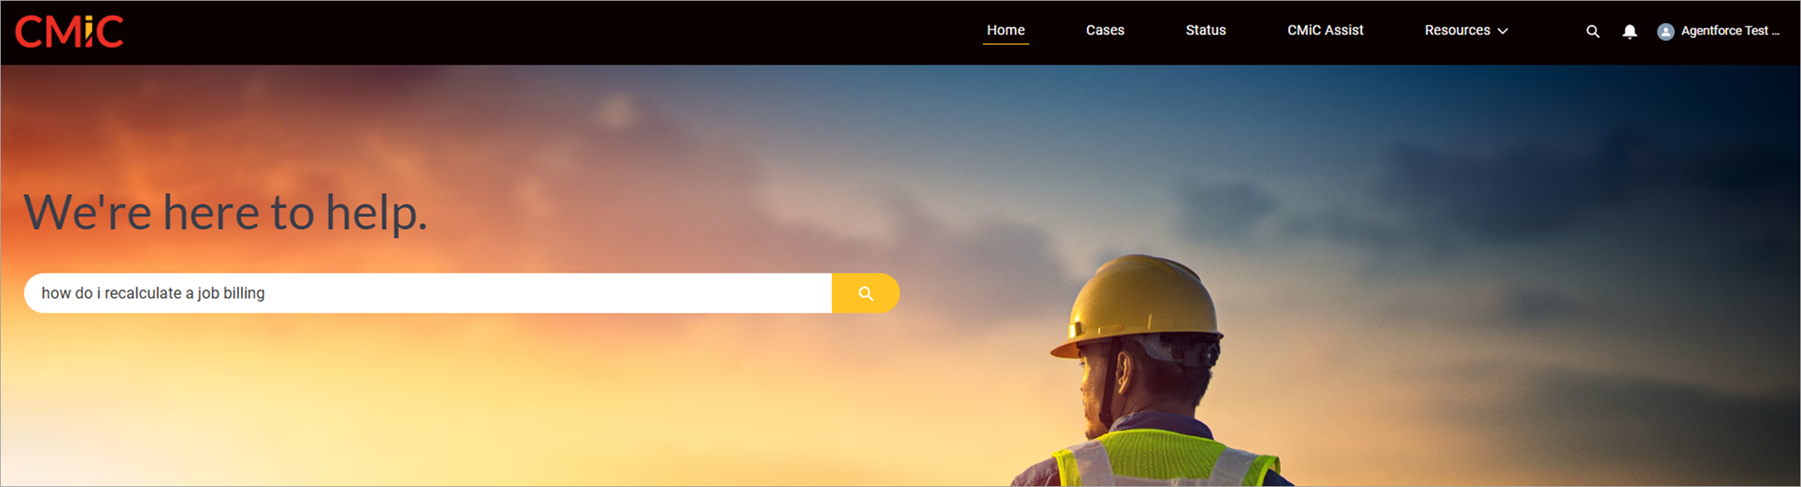
The system will return an AI generated answer, with links to sources, as well a list of guides related to the original search parameters.
Release Updates
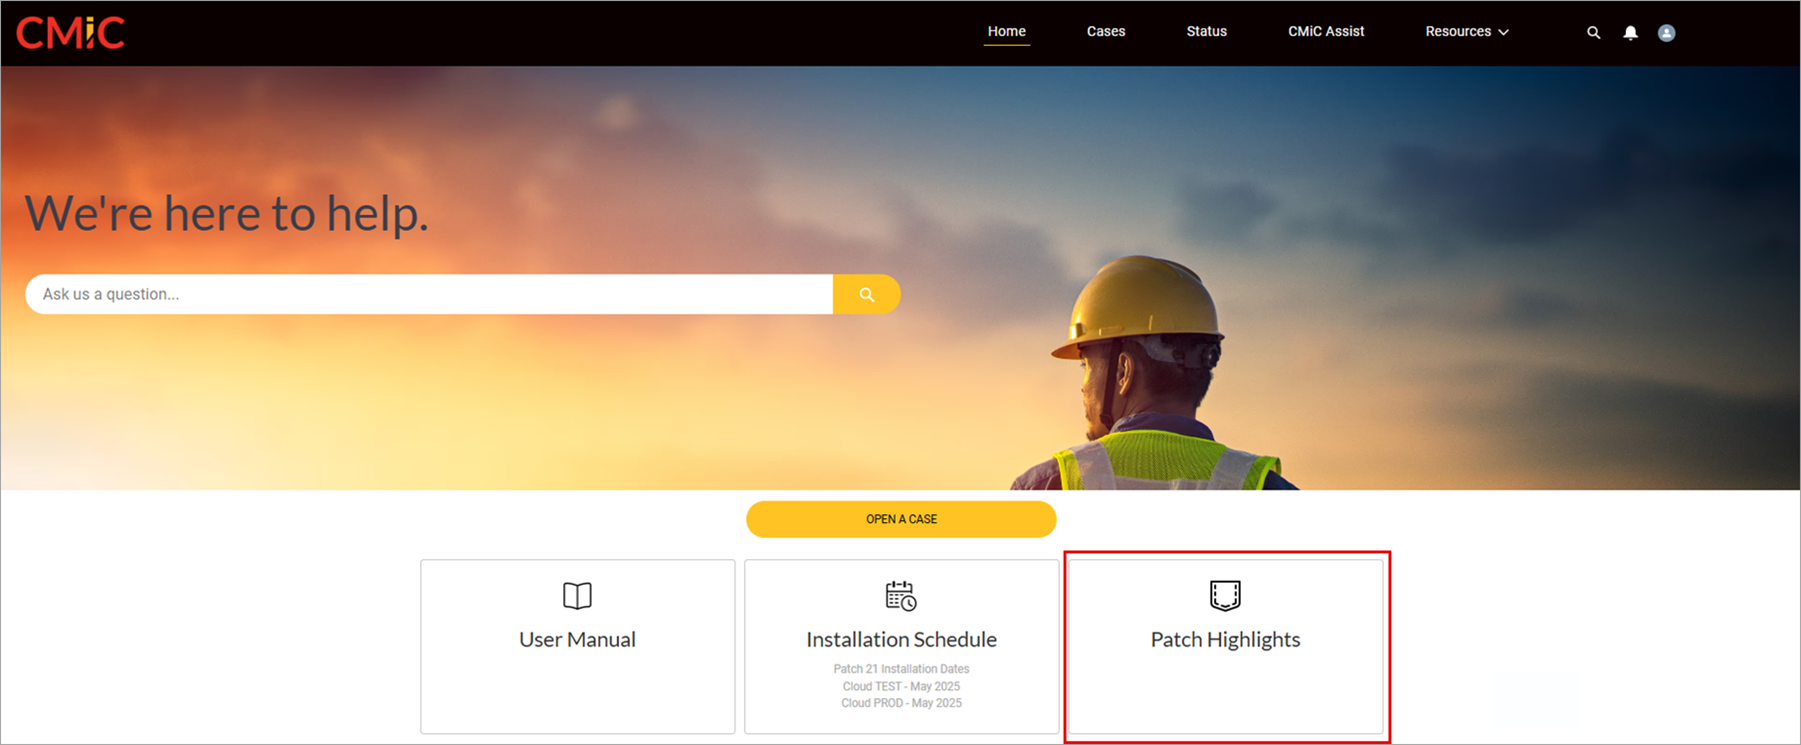
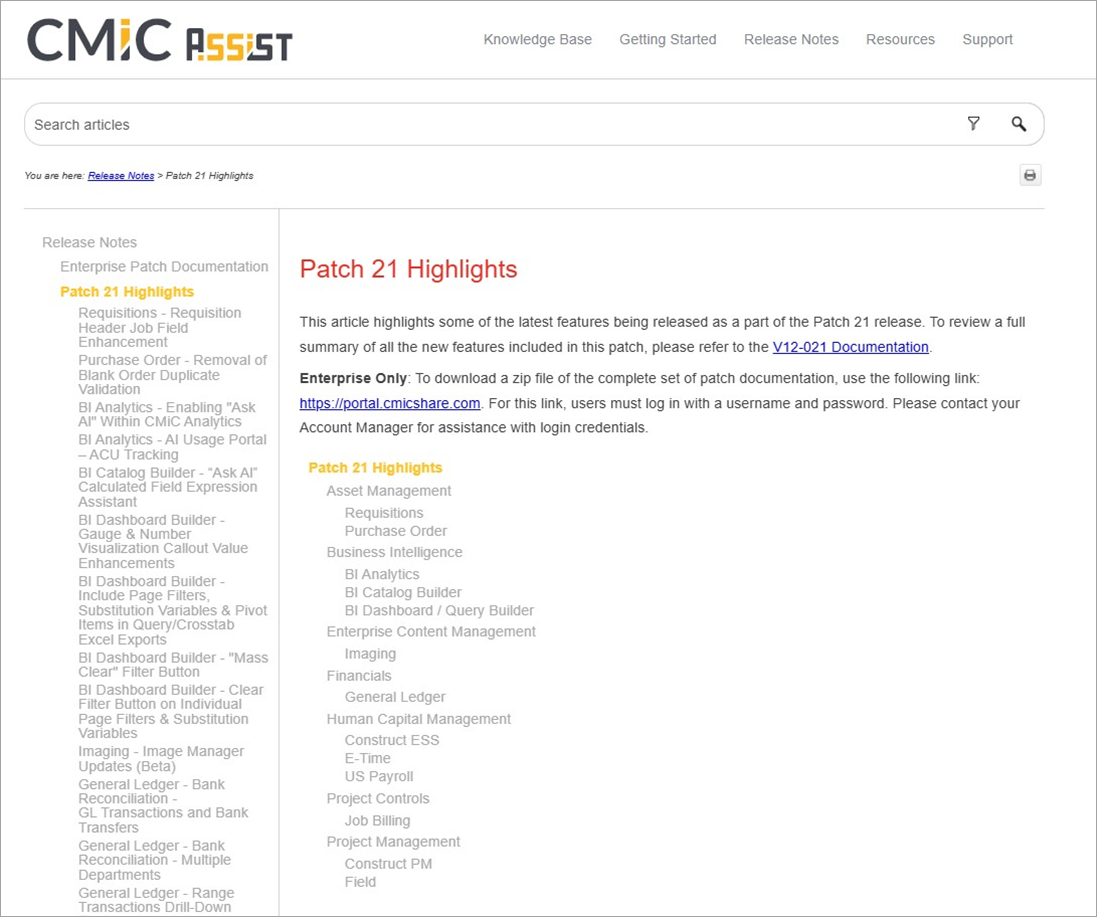
If you are looking for details on the most recent Patch releases or Mobile releases, you will find links under the Release Updates menu, or you can choose the Patch Highlights icon to access a summary of the key features of each patch.
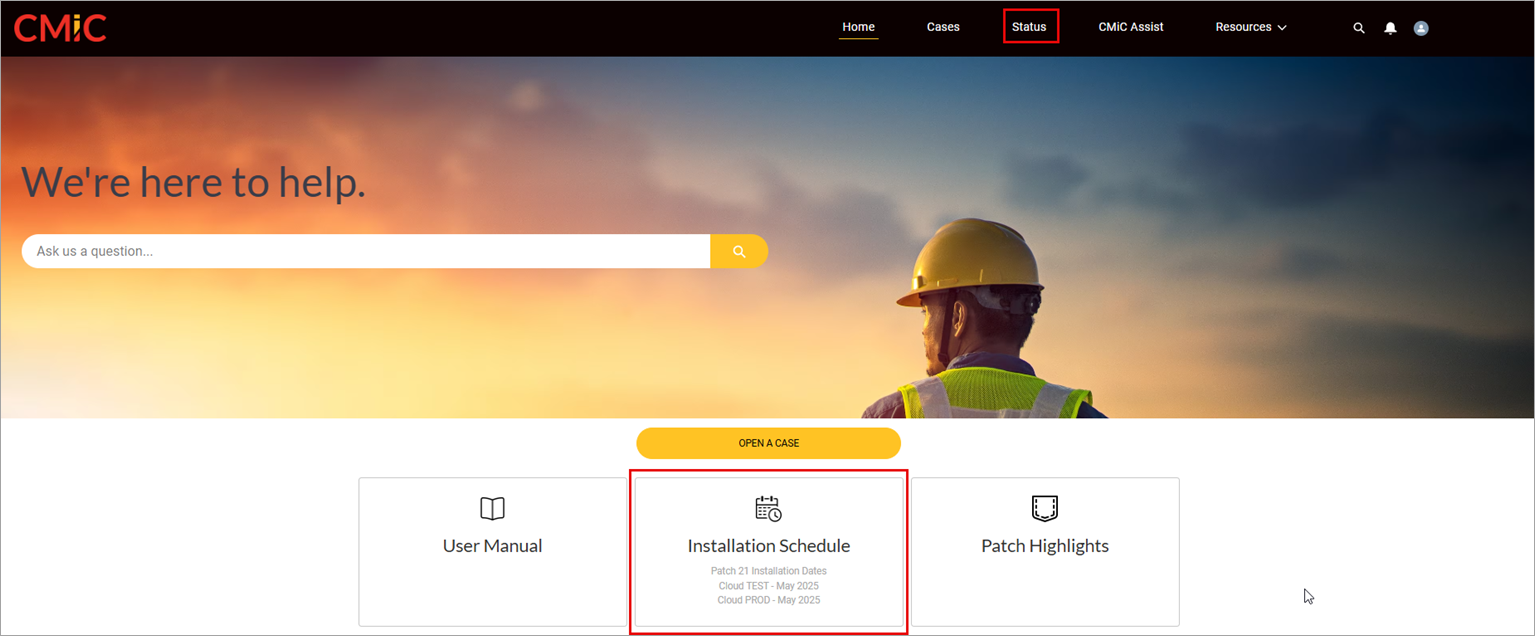
If you are looking for Patch Installation Schedule for Cloud, you will see this listed in the Installation Schedule icon. Selecting this option will take you to the CMiC Cloud Status page. You can also access the CMiC Cloud Status page via the Status option at the top of the homepage.
Case Entry
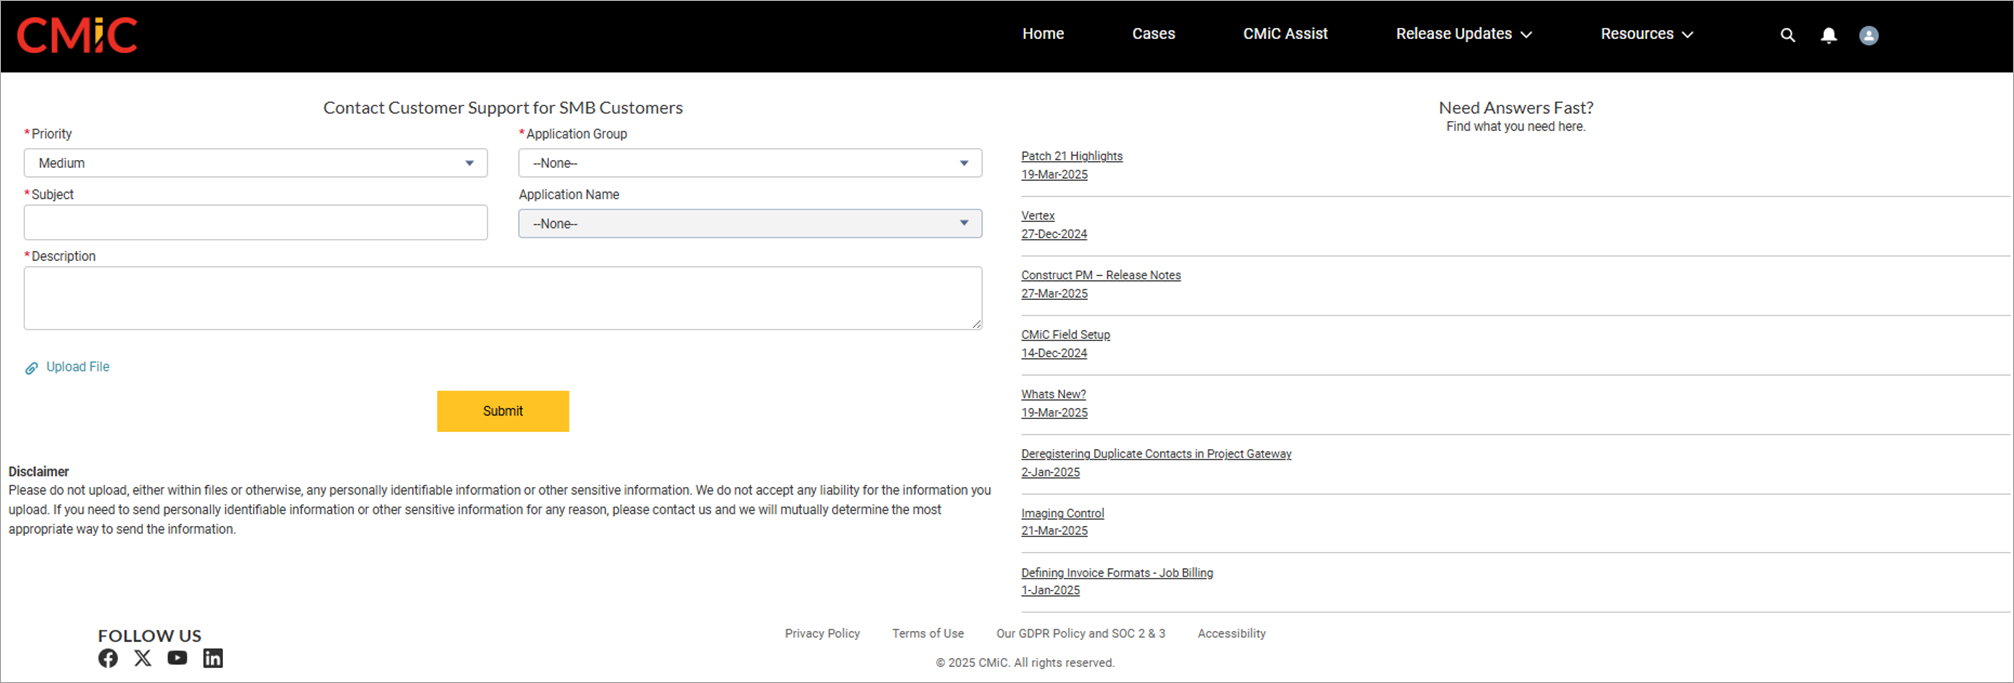
After logging in, please click on the [Open a Case] button.
You will be taken to the Case Entry screen.
While entering the Subject and/or Description fields, the AI agent will attempt to recommend a relevant article from the Support Portal Knowledge Base to address your issue.
Tips on entering cases:
-
Enter a concise subject that is clear and focused on what the problem is.
-
The description should include details of the problem, where and when it occurs, along with steps leading to the problem where applicable.
-
We recommend that you take at least one full screenshot of your desktop so we can capture the URL, User, and Timestamp. Full screen captures in general are beneficial to understand the origins of the difficulty or error.
-
If the issue is related to a report, please submit the report and the parameters used to run the report.
For more details, watch this video outlining Logging In and Creating Cases.
Reviewing Cases
Case List Views
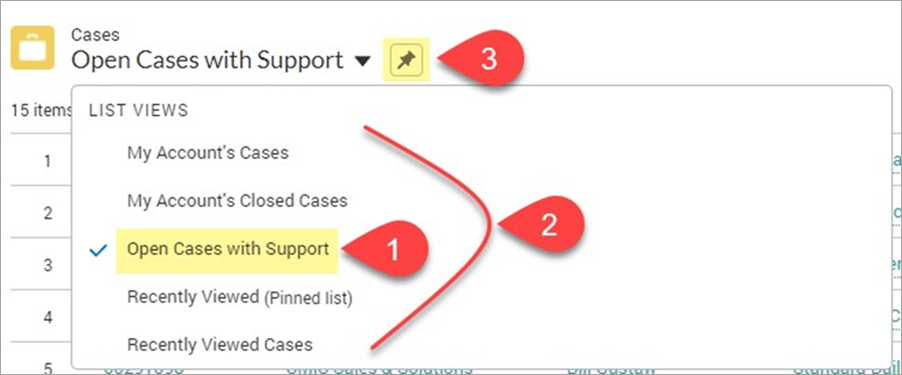
Case List View Drop-Down Menu
Accessing Cases from CMiC's Support Portal always take you to your pinned list (#1). The Case List View drop-down list will display a default list of views available (#2) for the user. Pinning (#3) will allow you to Pin, or set to default, any view you desire.
Creating Case List Views
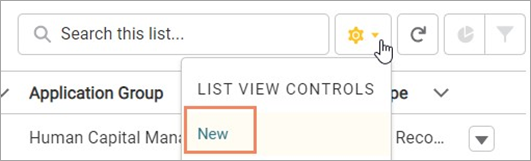
Users/departments/groups also have the option of creating their own list view which would only be visible to either them or their group. To do so click on the Gear ( ) icon and select New.
After entering a list name, there are three available options:
-
Only I can see this list view - Select this to create a personal list view
-
All users can see this list view - You do not have permission to share a list
-
Share list view with groups of users - You do not have permission to share a list
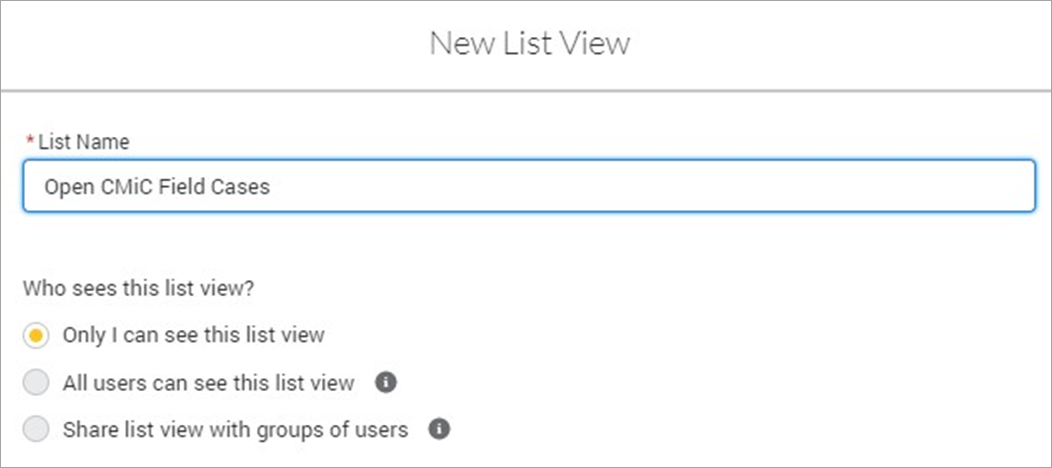
Create New List View
View List Controls
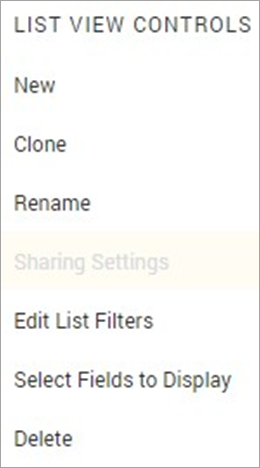
Clicking on the Gear () icon will bring forth other options available to customize the list view.
NOTE: The availability of some of these options is determined by who controls the List View.
-
New - Create a new List View from scratch.
-
Clone - Copy the current List View.
-
Rename - Change the title of the current List View.
-
Sharing Settings - No Access.
-
Edit List Filters - Provides filtering options for columns that are currently in your List View.
-
Select Fields to Display - Select which columns to display in your List View.
-
Delete - Delete the current List View for yourself and any shared users.
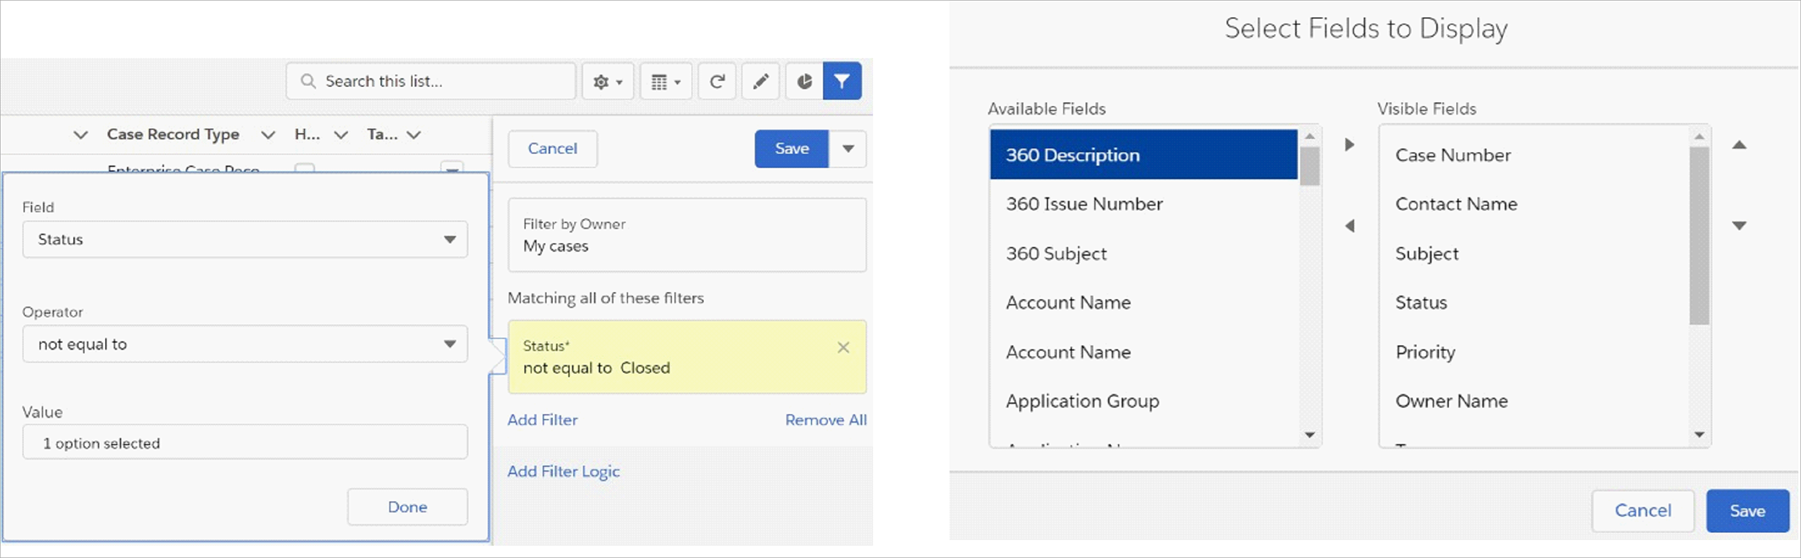
Example of Edit List Filters and Select Fields to Display
NOTE: If you are unable to modify a certain List View, it is because it is a standard view. Users can only modify views that they have created.
Case Details
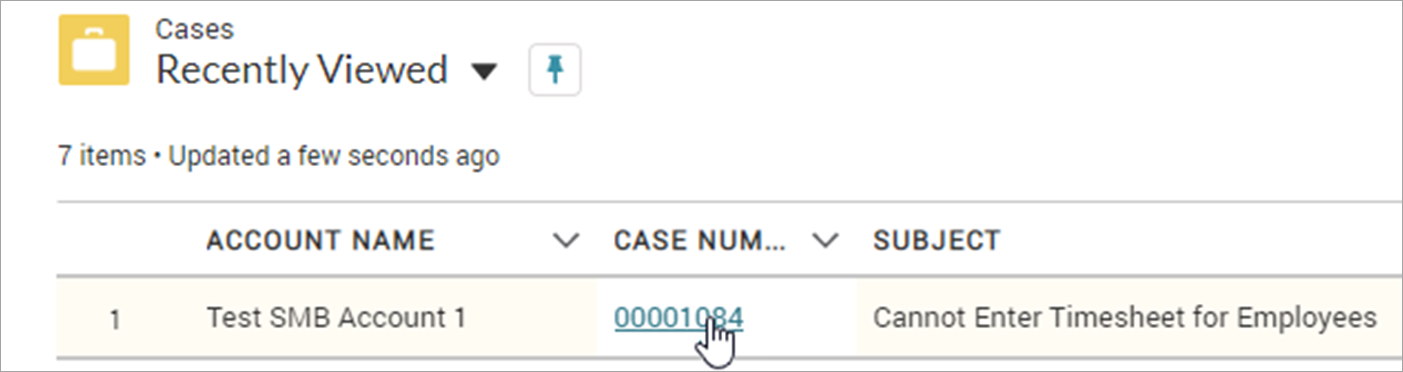
Case details can be viewed by clicking on the action link in the Case Dashboard.
After the case has been entered, users may add notes and additional attachments for further analysis, or spec documents for an enhancement. Users may close the case via the [Close Case] button.
The following is a short video outlining Reviewing Cases and Case Details.
Case Fields
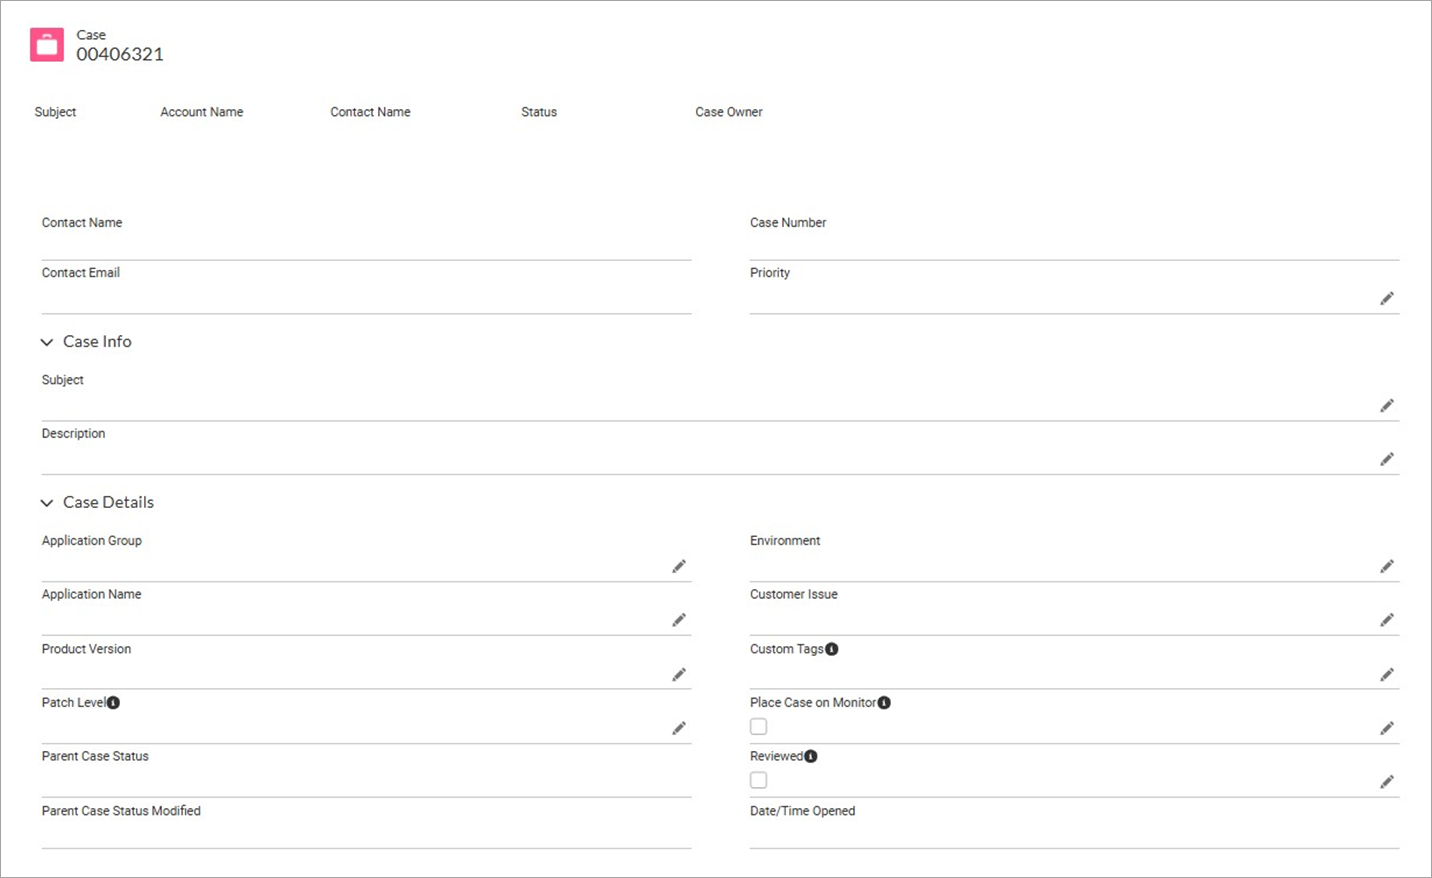
Parent Case is an existing case with the same issue that is already with the programming team.
The following is a brief description of the fields seen on a submitted case record:
Contact Name/Email
The contacts basic information.
Case Number
The CMiC Support Portal unique identifier. Use this number to quickly identify cases to CMiC representatives.
Priority
Your priority of the case.
Subject/Description
Case details entered by the case contact.
Application Group/Name
The application in which the case's scenario occurs.
Status
The current position of the case.
Custom Tags
Use customer tags to help organize your cases.
Customer Issue
Used by customer for their internal tracking.
Environment
The environment in which the case's scenario occurs.
Place Case on Monitor
Temporarily prevents the case from auto-closing.
Parent Case* Status
Displays the status of the parent case.
Parent Case Status Modified
Displays the date/time when the Parent Case Status field was last updated.
Inactive Case Email Alerts
Three alerts are triggered and sent to the case contact from the Support Portal following inactivity:
-
A reminder notification after one week in the customer's court.
-
A second reminder notification after two weeks in the customer's court.
-
Following a third week in the customer's court a final notification will be sent closing the case.
If more time is required to review the case, the user may set the case status to "Monitor".
Closed Cases
Closed Cases cannot be opened by the user so a new case must be opened. If you need the same case to be reopened and it was closed by mistake, please contact your Account Manager.
Case Contacts
The Case Contacts object allows the addition of contacts to the case that will receive updates regarding progress of the case. For every note that is added by a CMiC contact, an email notification will be sent to the case submitter and case contacts. The notification email will contain the body of the note that was added plus a link to the case in the portal. You will be required to log in to view the case.
For a case contact, a login is not required for a contact to be added, but they will be unable to view the case in the portal. To create case contacts for those contacts who wish to receive updates but not necessarily log in, please contact your Account Manager.
Default Case Contacts
If there are certain contacts that you would like defaulted to all newly created tickets, similar to Key Player, please contact your Account Manager, or set the Default Case Contact in the User Settings.
Articles
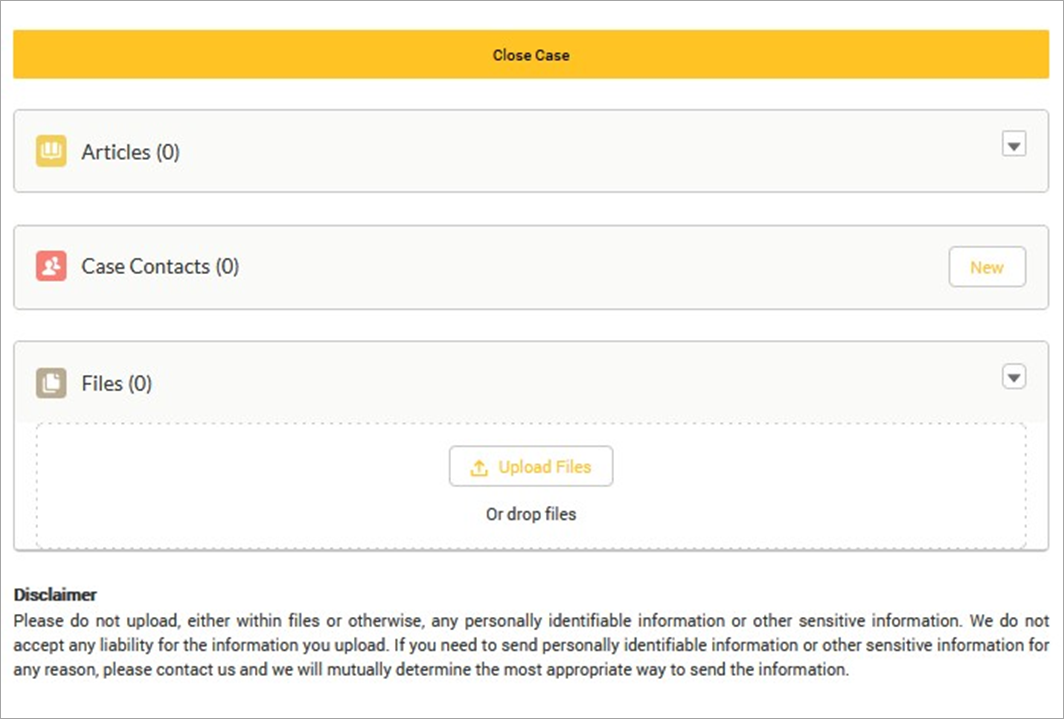
The Articles section will list any articles attached by CMiC for your review.
Case Notes
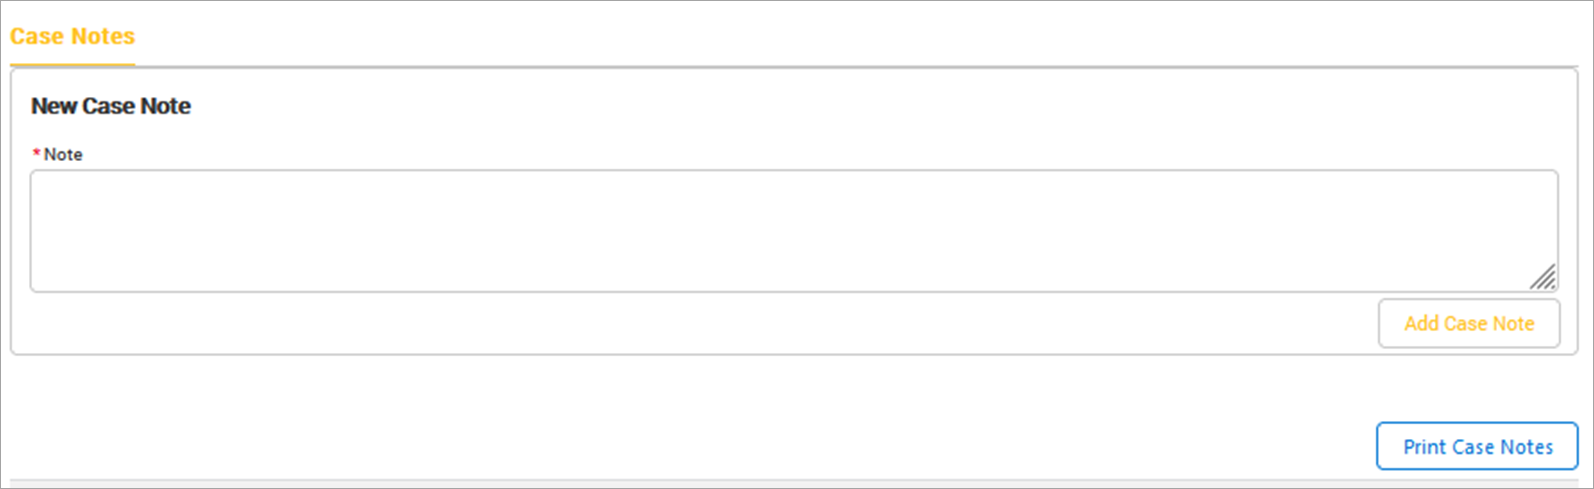
Adding a New Note and Print Case Notes Report
Please use the Case Notes object to respond to the case. As soon as a community user responds to a case, the status will change to CMiC's responsibility. All notes added by CMiC to the case will trigger a notification email to the case creator and the case contacts. This email contains the body of the note plus a direct link to the case on the Support Portal.
We recommend creating a specific folder in your Email Application for these and potentially automatic routing rule. This will allow you to audit/reference notes and emails later as needed.
Notifications Within the Portal
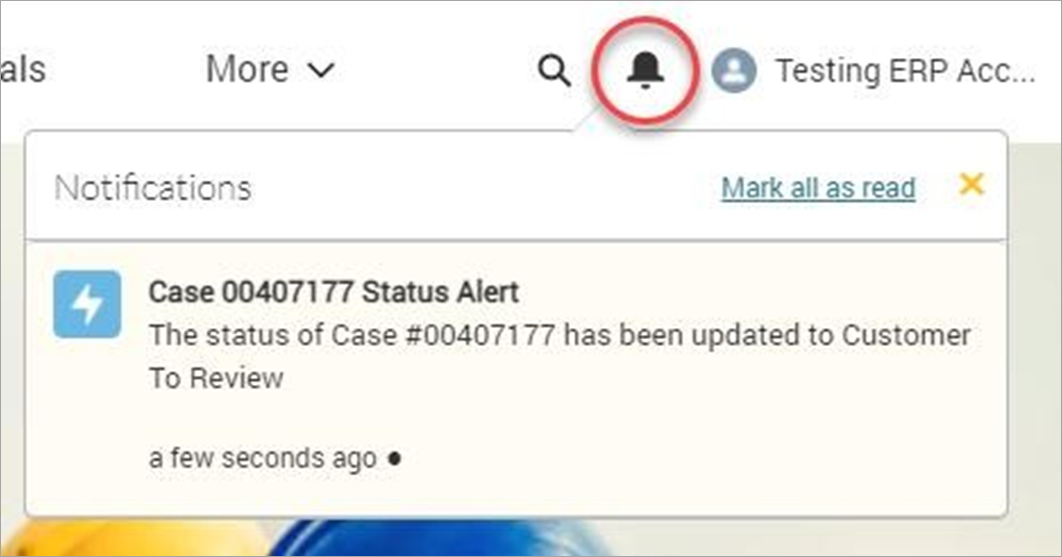
A notification also exists in the top-right corner of CMiC's Support Portal. The Bell will highlight to signify that a notification is available in the drop-down list. These notifications will be triggered by a status change and display for the case creator.
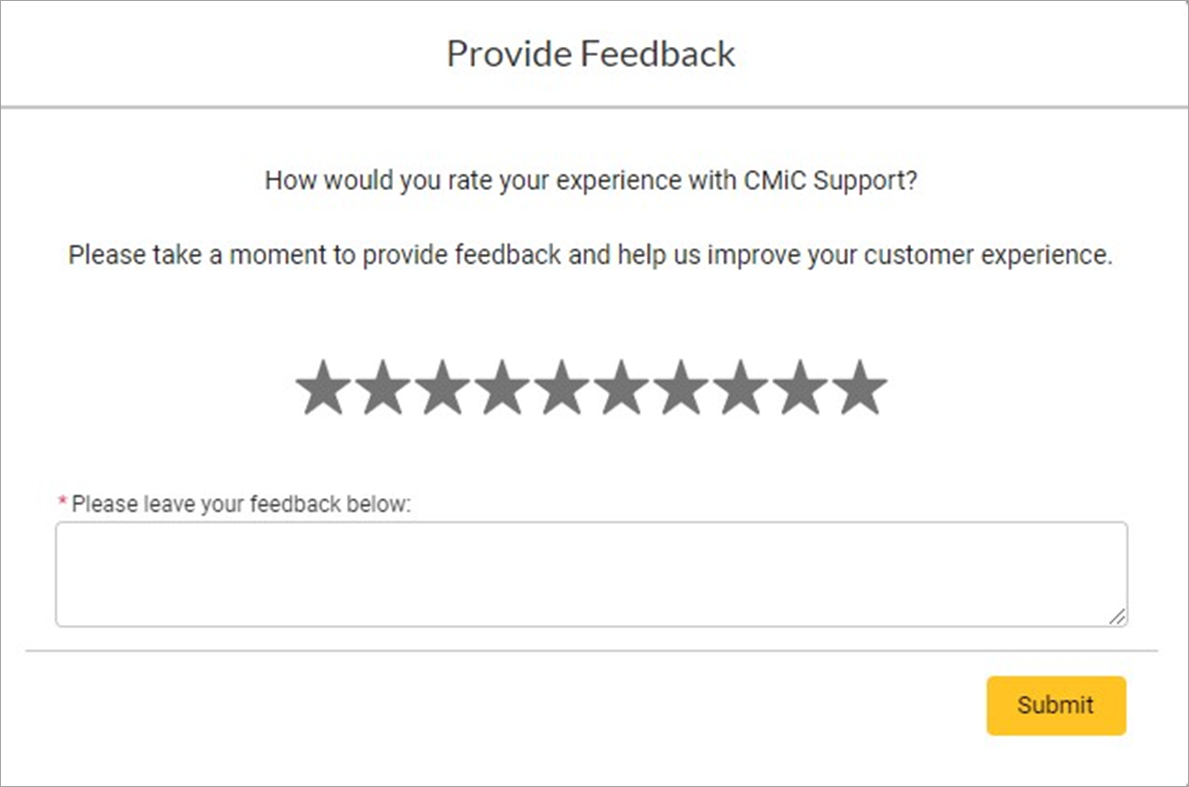
Case Feedback

The [Provide Feedback] button is located above the [Close Case] button.
Once you have clicked on the button, you will be asked to provide a star rating (out of 10) and provide a feedback comment based on the experience received on the case.
CMiC Assist

CMiC Assist is a publicly available resource repository for every step of the CMiC journey. Users do not need a Support Portal account to access the information found on CMiC Assist.
Upon launching the CMiC Assist, users can search for content, browse entire modules, or follow a tutorial.
Frequently Asked Questions
How do I set up an external consultant to manage our cases?
Please contact your account manager to let them know of the email address and name of the user that needs to be created. The email address must be unique so this means the consultant would have unique logins to view cases for all the accounts they are working with.
Who or what is Integration User?
Integration User is CMiC's implementation partner. They are assisting us with improving the portal and maintaining the sync with Jira. All records/notes brought over from Jira will use this name.
Why can I not log in?
If you are attempting to log in for the first time, please note that the verification email expires/locks after 24hrs. If you are attempting to use this link it will no longer function. Please contact your Account Manager to resend the verification.
Why do I have to reset my password every time I login?
If the Support Portal is constantly requesting you to reset this, it is because you are using the incorrect URL, you are using the URL from the verification email. Following verification, please use http://www.support.cmicglobal.com/.