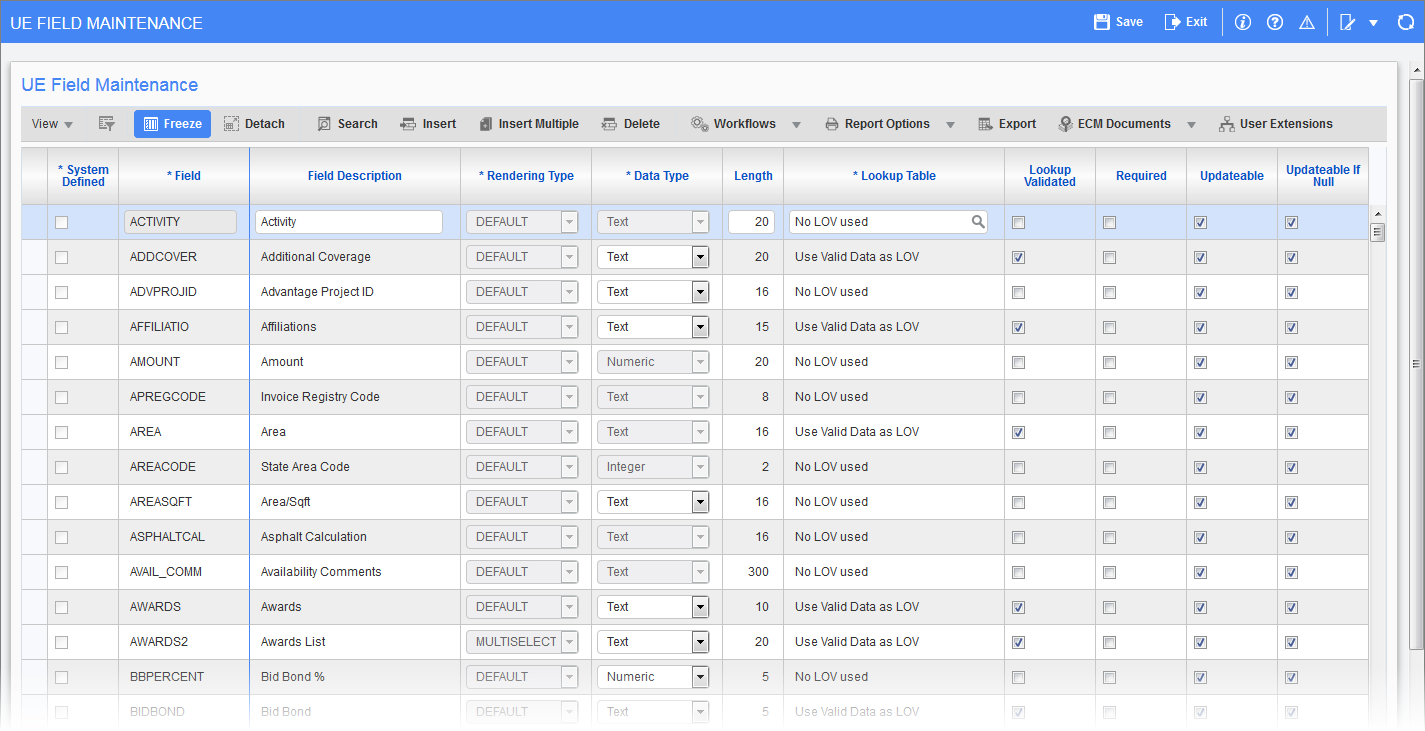
Pgm: UEFIELD – UE Field Maintenance; standard Treeview path: System > User Extensions> Field Maintenance
A User Extension (UE) field can be any type of data field. User extension fields act like extensions of the base table and can also be used in JSP screens as User Defined Fields on their own.
NOTE: Field security is not available for User Extension (UE) custom fields.
Enter the Field Details
System Defined – Checkbox
This is a display-only field that indicates if the field is user-defined or system-defined. Unchecked indicates user-defined and checked indicates system-defined.
NOTE: Records displayed in yellow indicate that they are either system-defined or attached to a User-Defined Distribution type and therefore cannot be changed.
Field (Code)
Enter the field code for the field being defined. Any combination of letters and characters can be used.
Field Description
Enter the description for the Field Code being defined. Any combination of letters and characters can be used.
Rendering Type
Select the rendering type from the drop-down menu. Options are “Default”, “Checkbox”, or “Multiselect”.
NOTE: UDFs with the type "Multiselect" are not permitted in CMiC Field (PMJSP) screens and only function in Enterprise (ADF) screens. When a multiselect UDF is used in CMiC Field, the user cannot choose multiple values, however this can be done in Enterprise screens.
Data Type
Select the appropriate data type for the storage of the data. The following options are available:
-
Date: UDFs of this type allow date values.
-
Integer: UDFs of this type allow only whole numbers and not decimals.
-
Numeric: UDFs of this type allow numbers including decimals.
-
Text: UDFs of this type allow any string of characters.
Length (of the field)
Enter the desired length of the field being defined. The length must not exceed 16 characters, otherwise the field name may not be displayed properly. For example, if the field is to be used for WBS, TAC, User Defined Transaction Types, Classifers, etc., the field must not be over 16 characters.
Specify the Field Options

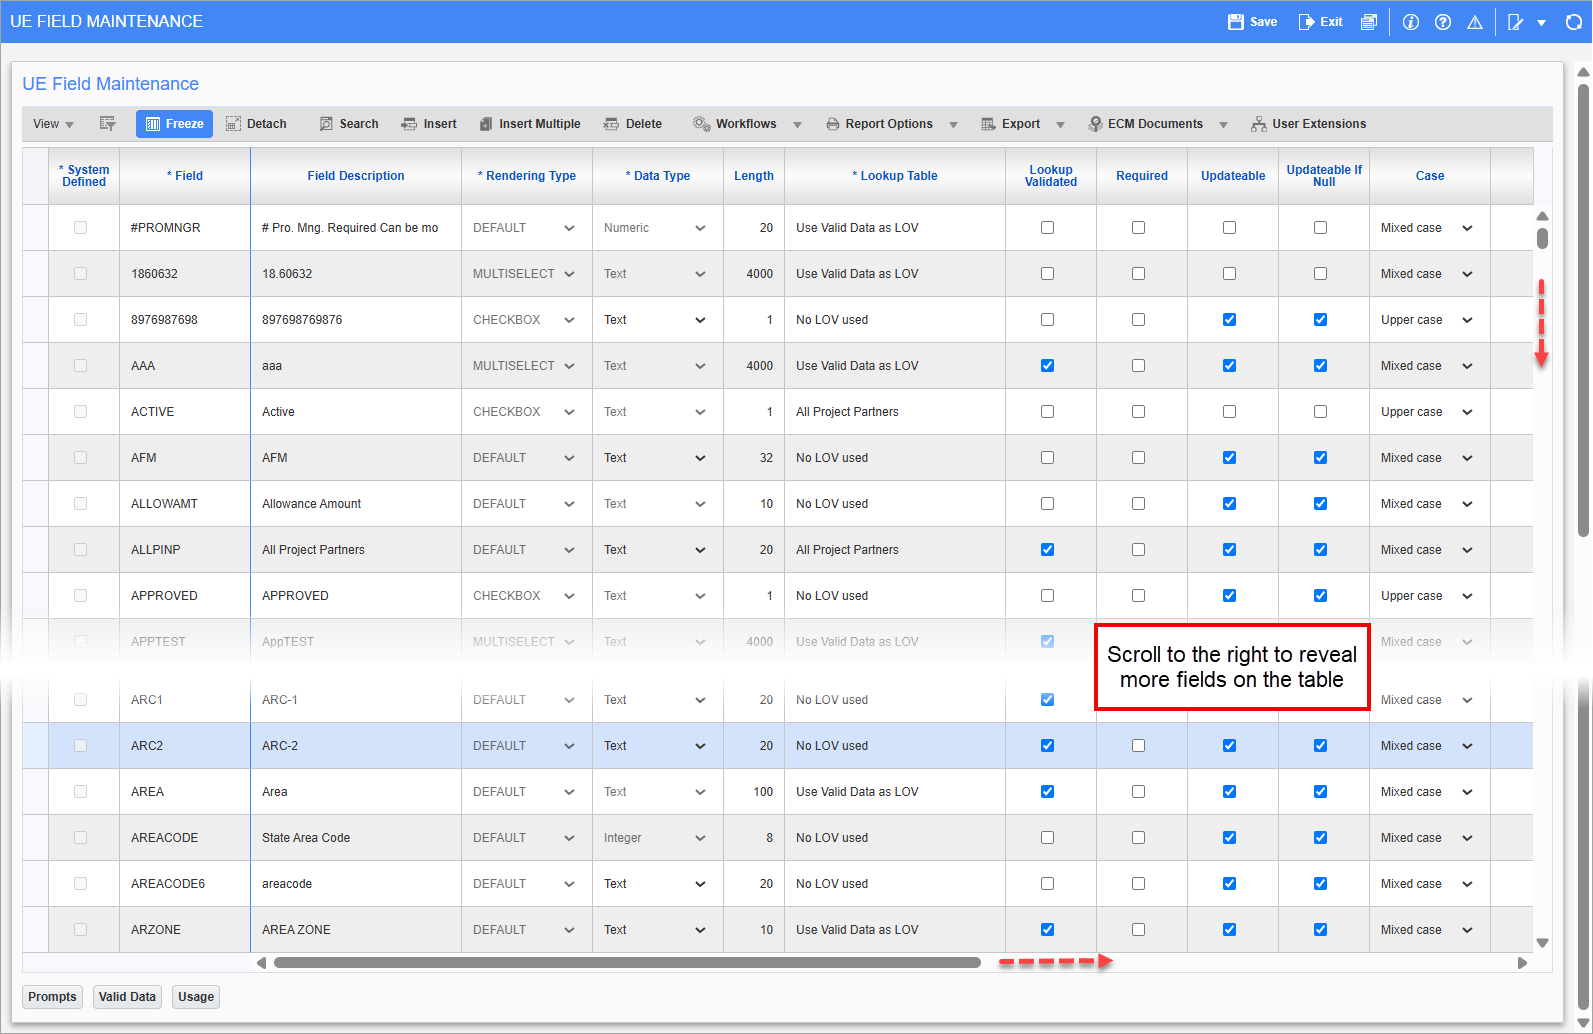
Pgm: UEFIELD – UE Field Maintenance; standard Treeview path: System > User Extensions> Field Maintenance (Field Options)
The field options define the characteristics of the User Extension fields. These characteristics include such things as whether the entry should be upper or lowercase, whether it is mandatory, the validation, as well as the table from which a list of values can be selected.
Field option fields can be viewed on the UE Field Maintenance screen by sliding the horizontal scrollbar along the bottom of the screen, as shown in the screenshot above. Each field described will be displayed in the order of their descriptions.
Lookup Table (Option)
Select the appropriate Lookup Table option required for the field being defined. In the Lookup Table option, the field validation needs to be defined for the List of Values entered into this field. You can specify whether you want validation against a table that you can define, or validation against the standard system tables, or no list of values validation at all.
Some of the tables supplied by the system are:
|
|
If you do not want a list of values validation
Select “No LOV used”. For example, if a field for a phone number was being created, validation against any list of values would not be required and therefore “No LOV used” would be selected.
If you want validation against a table that you can define
Select “Use Valid Data as LOV”. For example, to keep track of the area in which a job is in process, create a field called area and then define the valid areas that may be selected for input into this field. In this case, select “Use Valid Data as LOV” as the table lookup.
Once the “Use Valid Data as LOV” option has been selected, go to the [Valid Data] button option and enter the set of values that will be available to a user when the field prompt is displayed on the screen.
If you want to validate against system codes
Select one of the pre-defined lookup options. For example, to validate the project manager against the employee list, select “Employee” as the table lookup.
Lookup Validated – Checkbox
Check this box if entries made against this prompt are to be validated against a specific set of values. The system will check this box automatically if a Lookup Table option other than "No LOV used" has been selected. Leave this box blank if the entries made against this prompt will not require validation.
NOTE: This setting only applies when "No LOV used" is selected for the Lookup Table field. If any other lookup table is selected and this checkbox is unchecked, the system will still validate objects to ensure they are recognized as valid data.
Required – Checkbox
If checked, the system will not allow the user to exit the user extension without entering data in this field. This does not mean that the system will force the entry of user extension data when entering the base table data.
Updateable – Checkbox
Check this box to allow users to have the ability to enter or modify values in this field.
Updateable if Null – Checkbox
Check this box to provide the ability to enter a value in this field if it is blank; once a value has been entered, no modifications are allowed.
Case
Select the case in which to allow or convert all entries against this prompt. The options available are “Mixed case”, “Initial Letter Capitalized on Each Word”, “Upper case”, and “Lower case”.
Lower Bound Text, Upper Bound Text
The lower and upper bound fields are used to enter a numeric range of valid entry numbers for this prompt. If for example a valid entry into this field was only between 100 and 999, then 100 would be entered into the lower bound field and 999 into the upper bound field. When an entry is made against this prompt, the system will validate that the number entered is between these two numbers.
Default Value
(Optional) Enter a value that will automatically default against this prompt.
Field Help
Enter the help text that will appear at the top of the screen and the user moves to this prompt. For example, when defining the Project Manager, the following help text could be entered: “Enter the Project Manager’s name. A List of Values is available.”
Display Columns (JSP)
Enter the average display column width in characters of multi-line text input (only applicable for JSP).
Display Rows (JSP)
Enter the average display row height in lines of multi-line text input (only applicable for JSP).
NOTE: The settings in the Display Columns (JSP) and the Display Rows (JSP) fields are applied to the UE field only when used in the UE Table. This works for UE fields when used in the context of the UE Table pop-up window. These values for column display and row display were never intended to work with UDF (user-defined fields) or classifiers.
[Prompts] – Button (Customize the Prompt Detail)

Pop-up window launched from the [Prompts] button on the UE Field Maintenance screen
The prompt is the message on the screen requesting input. Since User Extensions can be displayed as either a multi-row tabular grid form or as a single row vertical form, both prompt types should be defined. Both prompts can be 30 characters in length, but the display length may differ based on the display type of the form.
The row prompt will display the full 30 characters and therefore can be a more detailed description. The column prompt will be as long as the data field created.
Language (Code)
The system will default the language code that is being used to define the User Extension. For example, if English is being used, the code ENG will appear in this field and does not require any change.
If a multi-lingual system is being used, it may be useful if this User Extension is created in a language other than the one defaulted. In this case, move to a new record and enter/select the appropriate language code for the system that will require this User Extension.
Description
The system will default the description from the UE Field Description. If the default language code is being used, there is no reason to change this field.
If a multi-lingual system is being used, enter the field description for the appropriate language.
Column Prompt
The column prompt will default from the Field Prompt. This prompt can be changed to a more user-friendly request for input. Remember that the system can only display as much of the prompt as will fit above the input column.
Row Prompt
The row prompt will default from the Field Prompt. This prompt can be changed to a more user-friendly request for input. This field can be up to 30 characters in length and the full 30 characters will display on a multi-row form.
Help (Field Help)
The system will default the Help from the UE field help. If a default language code is being used, there is no reason to change this field.
If a multi-lingual system is being used, enter the field help for the appropriate language.
[Valid Data] – Button (Create the Valid Data for the Field)

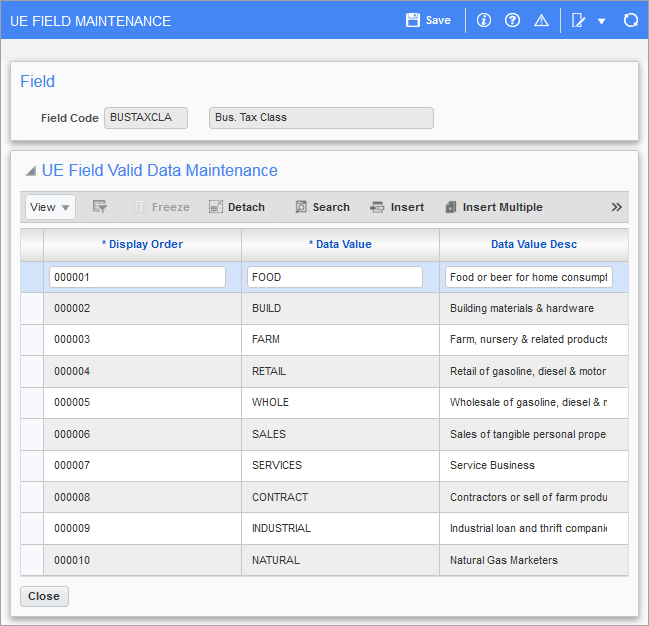
Pop-up window launched from the [Valid Data] button on the UE Field Maintenance screen
When “Use Valid Data as LOV” is selected as the Table Lookup option, the valid values for input into this UE field need to be defined in this pop-up window.
Display Order
The system will allow up to 9999 valid values to be entered against each field. The order in which these values display will be based on the number assigned to them within this field.
The display order number can be any positive number between 1 and 9999.
Data Value
Enter a value code that will be valid when an entry is made against the field prompt being defined.
Data Value Description
Enter the description for the value code being defined.
[Usage] – Button (Query the UE Field Table Relationships)

Pop-up window launched from the [Usage] button on the UE Field Maintenance screen
The UE Field Table Relationships pop-up window launched from the [Usage] button indicates where this field is used in the system.
This screen will only display data if the UE Table Maintenance setup has been completed and this field has been added to the appropriate table. This window does not allow data entry; it is only a query-only screen.