Overview
This quick guide provides procedures for transferring Subcontract Request for Payments (RFP) created in the Job Billing module to the Imaging module for the purposes of workflow approval.
This process involves the following modules: Job Billing, Subcontract Management, and Imaging.
Step 1: Define Document Type for SC RFP in Imaging
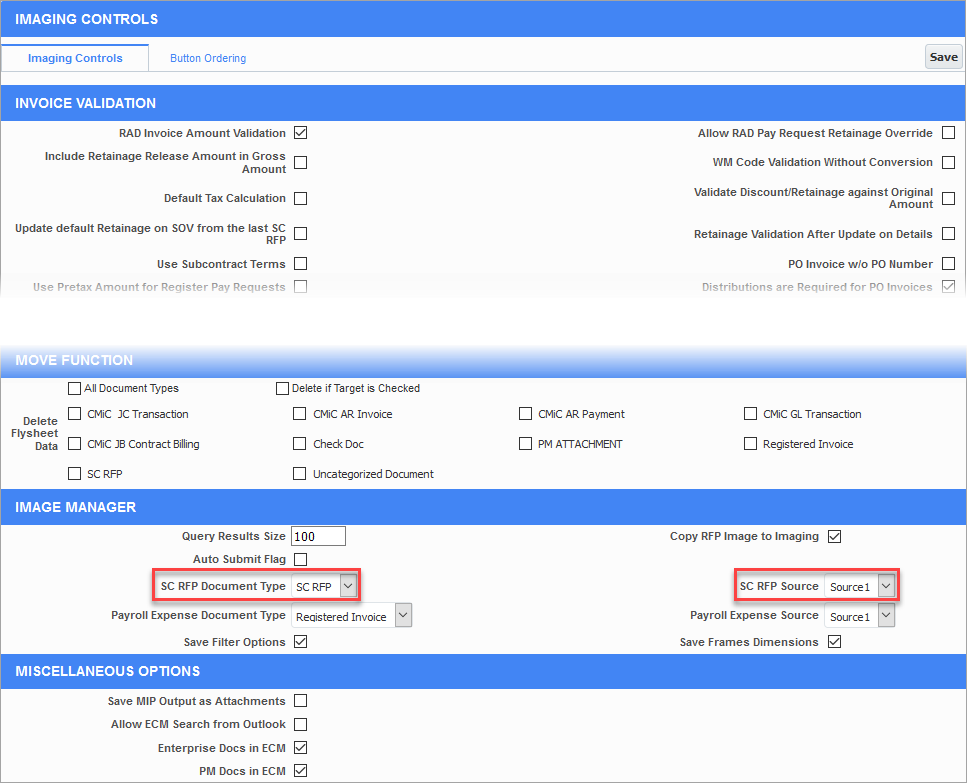
Imaging Controls; standard Treeview path: Imaging > Setup > Imaging Control
On the Imaging Controls tab of the Imaging Controls screen in the Imaging module, select the document type and source for the SC RFP invoice.
Selecting “SC RFP” as the document type in the SC RFP Document Type field transfers the SC320 report as an image and the associated invoices auto created from the Job Billing module to the Imaging module.
Step 2: Create SC RFP in Job Billing
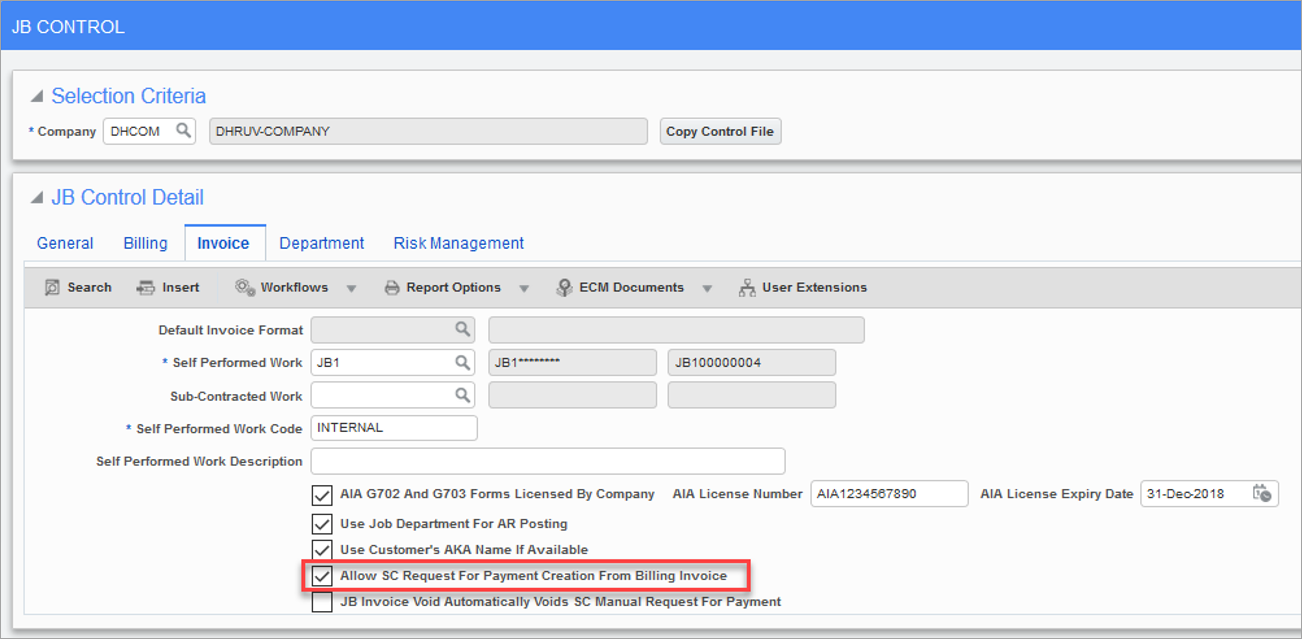
Pgm: JBCTRLFM – JB Control; standard Treeview path: Job Billing > Setup > Local Tables > Control – Invoice tab
Check the ‘Allow SC Request for Payment Creation from Billing Invoice’ checkbox on the Invoice tab of the JB Control screen in the Job Billing module. Checking this box allows for the creation of the SC RFP from the Prepare Billing screen after billing invoice has been generated.
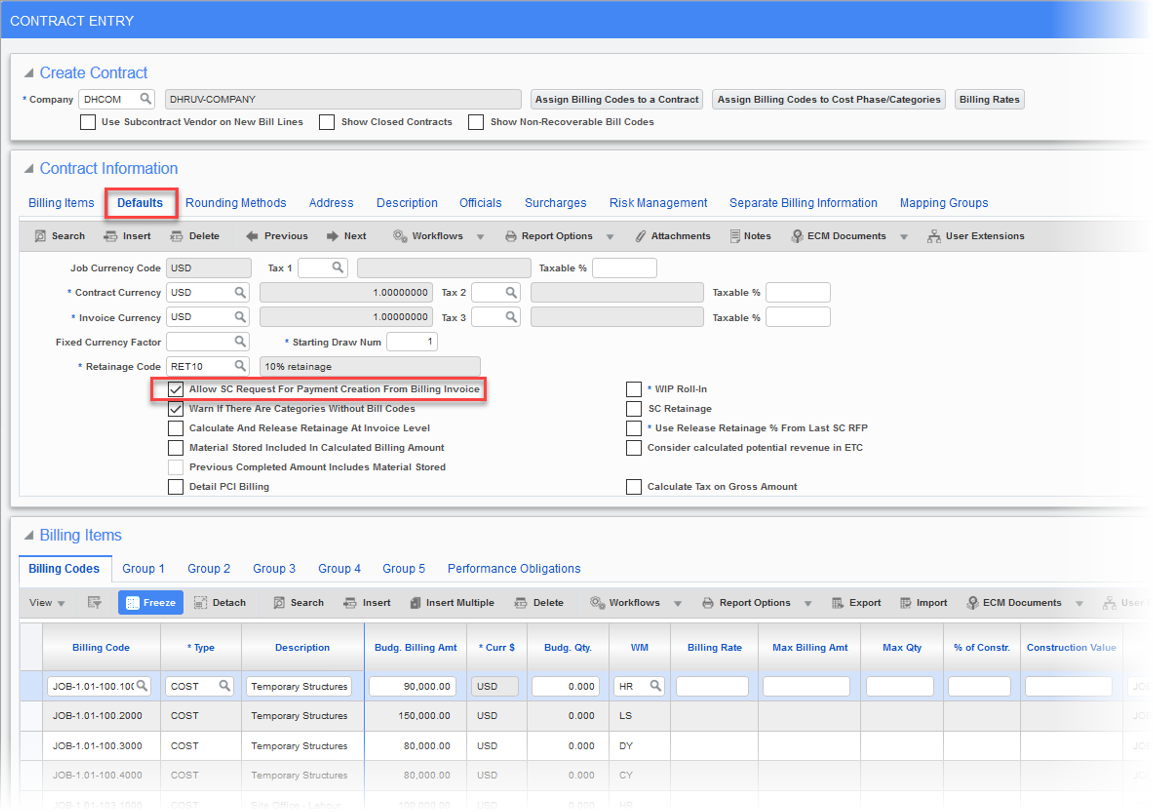
Pgm: JBCONT – Contract Entry; standard Treeview path: Job Billing > Contracts > Enter Contract – Defaults tab
On the Defaults tab of the Contract Entry screen in the Job Billing module, in the Contract Information section of the screen, check the ‘Allow SC Request For Payment Creating from Billing Invoice’.
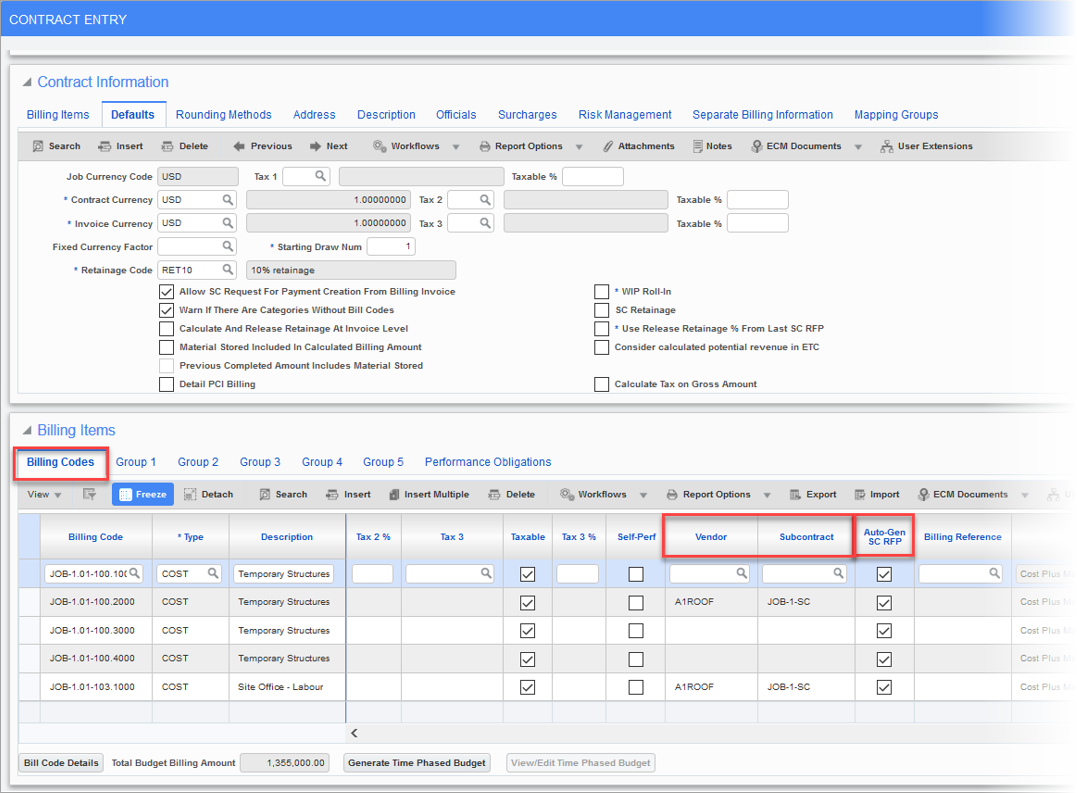
Pgm: JBCONT – Contract Entry; standard Treeview path: Job Billing > Contracts > Enter Contract – Defaults tab
In addition, on the Defaults tab of the Contract Entry screen in the Job Billing module, but this time in the lower half of the screen in the Billing Items section, click on the Billing Codes tab. For each billing code, assign vendor and subcontract codes and ensure the ‘Auto-Gen SC RFP’ checkbox is checked for each bill code.
Step 3: Verify SOV Lines in Subcontracts
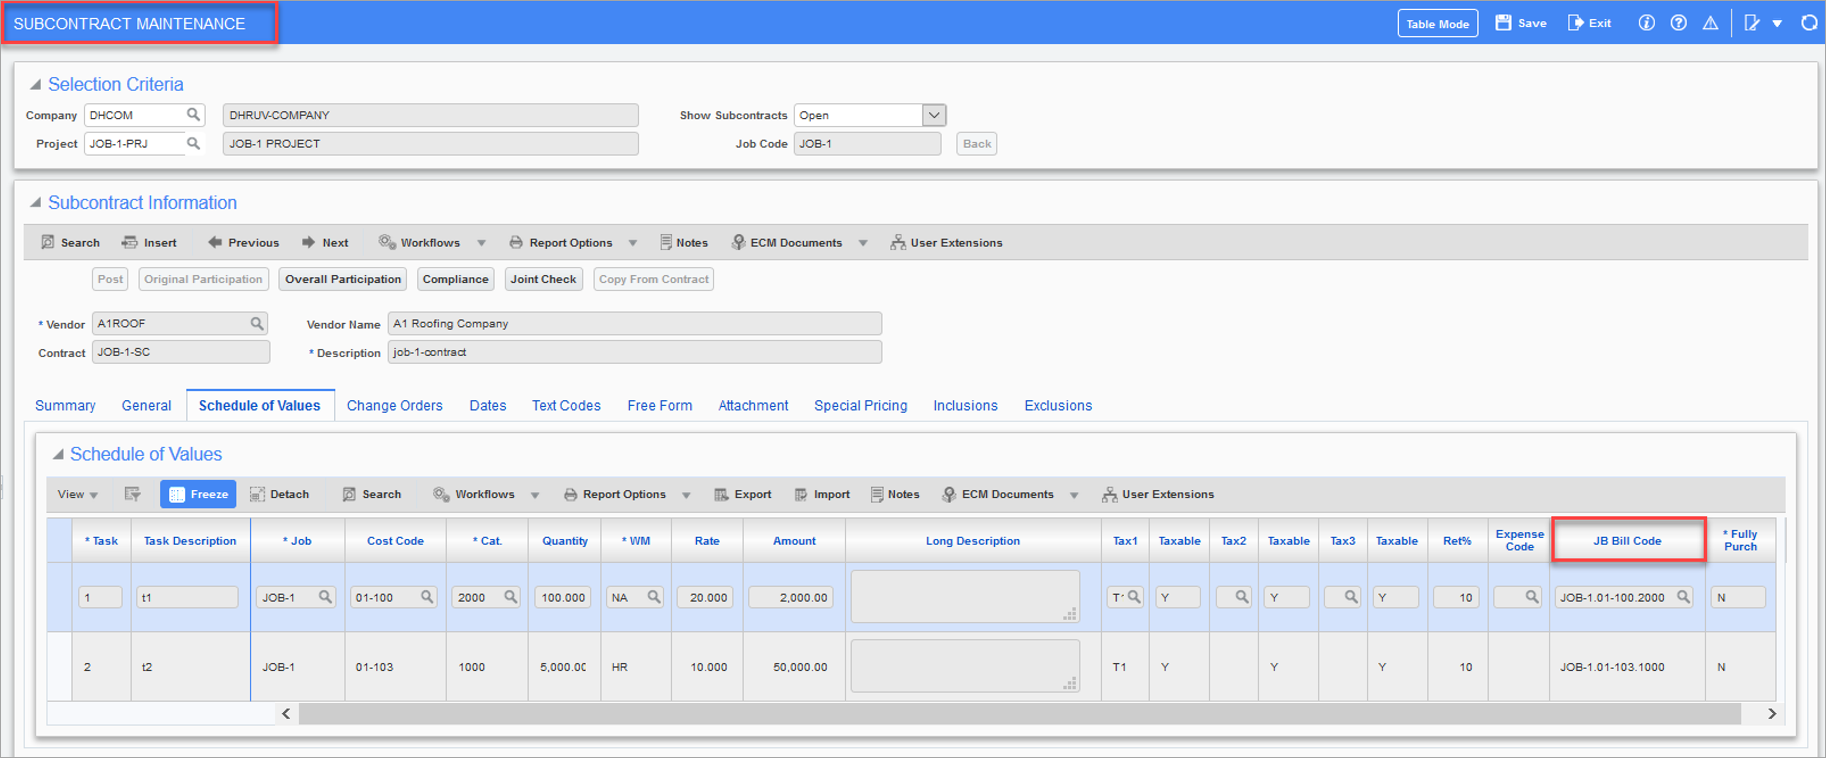
Pgm: PMSCFM – Subcontract Maintenance; standard Treeview path: Subcontract Management > Contracts > Enter Subcontract/Change Order
When creating subcontracts in the Subcontract Maintenance screen of the Subcontract Management module, ensure that the SOV lines are populated with appropriate bill codes.
Step 4: Generate Invoice in Job Billing
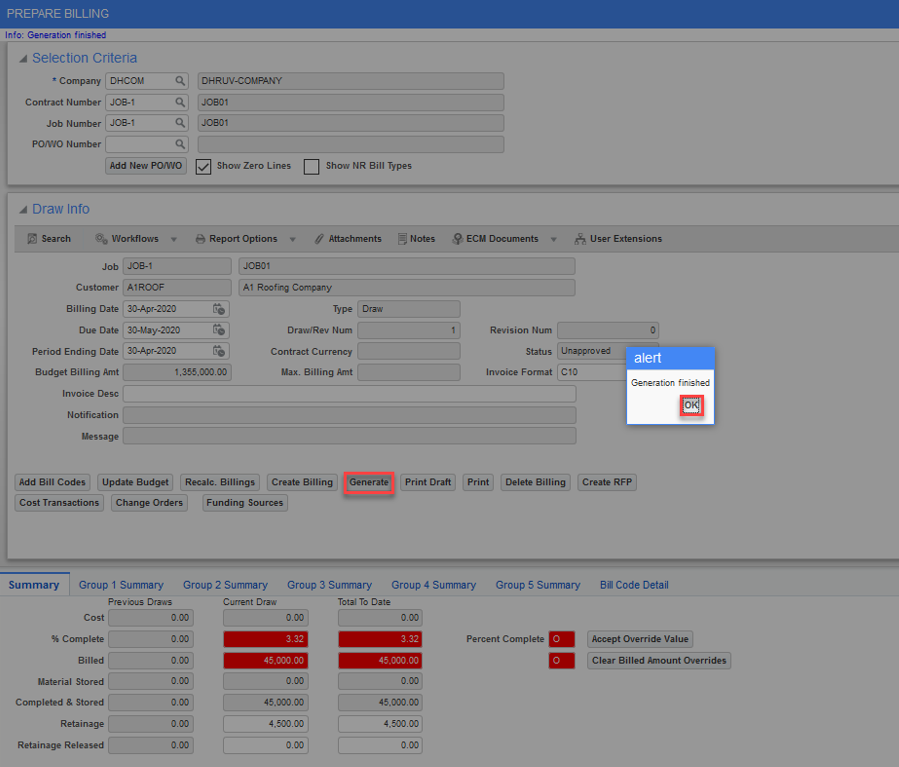
Pgm: JBBILL2 – Prepare Billing; standard Treeview path: Job Billing > Billing > GC Prepare Billing
Prepare the invoice using the Prepare Billing screen in the Job Billing module and click on [Generate]. Click [OK] in the pop-up window when invoice is finished being generated.
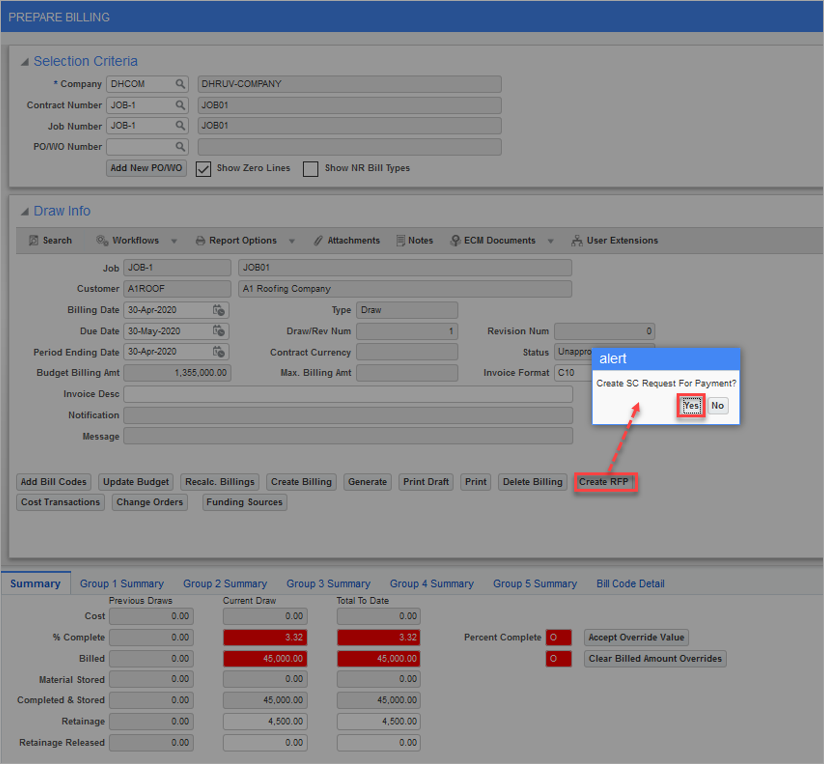
Pgm: JBBILL2 – Prepare Billing; standard Treeview path: Job Billing > Billing > GC Prepare Billing
Click on the [Create RFP] button to create an RFP from the Prepare Billing screen. When the Alert pop-up message is displayed, click [Yes] to create the RFP or [No] to cancel.
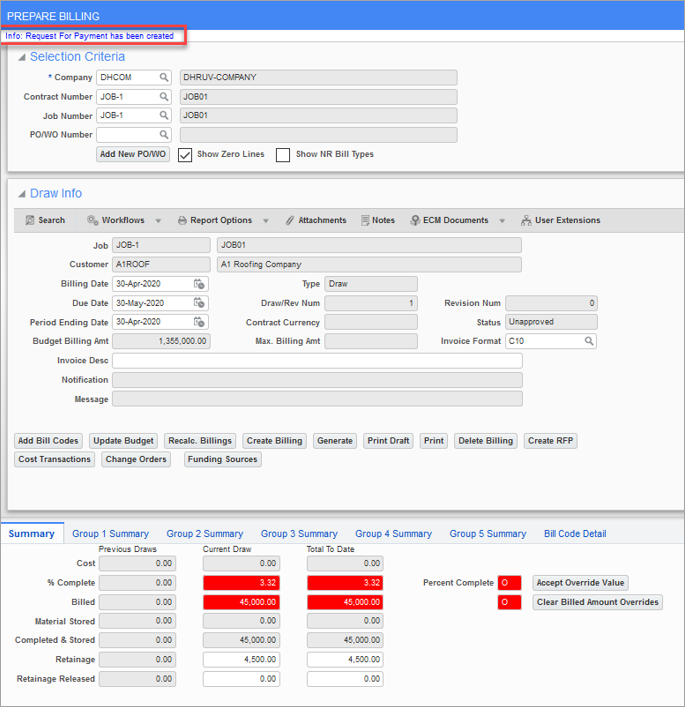
Pgm: JBBILL2 – Prepare Billing; standard Treeview path: Job Billing > Billing > GC Prepare Billing
A message will appear at the top of the screen to indicate that the RFP has been created.
Step 5: Add Transfer RFP to Imaging Screen to Subcontract Management Module Using Treeview Builder
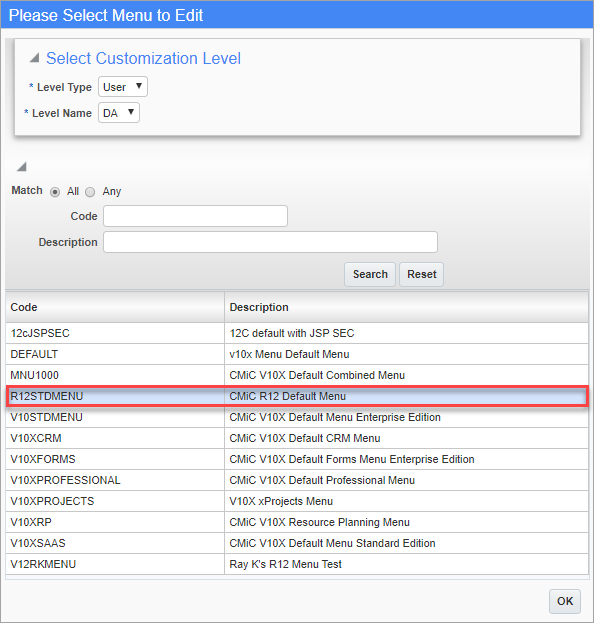
Treeview Builder tool
Launch the Treeview Builder tool and add the Transfer RFP to Imaging screen to the Subcontract Management module.
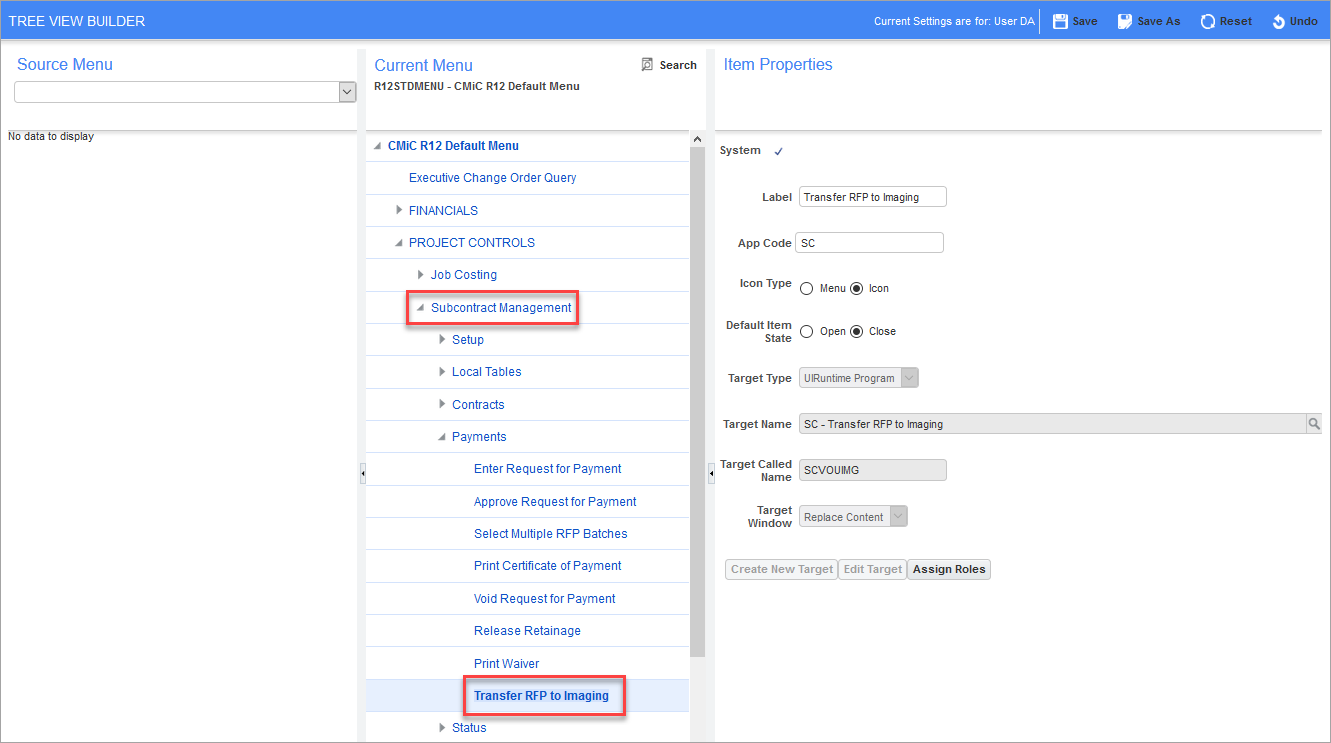
When finished adding the screen, click on [Save].
Step 6: Transfer RFP to Imaging from Subcontract Management
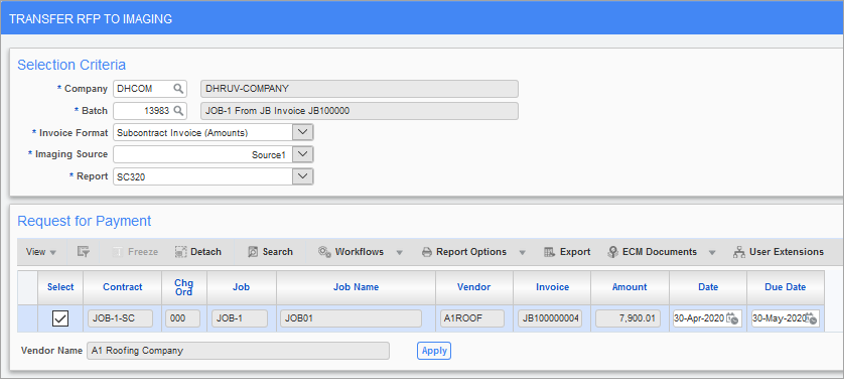
Pgm: SCVOUIMG - Transfer RFP to Imaging; standard Treeview path: Subcontract Management > Payments > Transfer RFP to Imaging
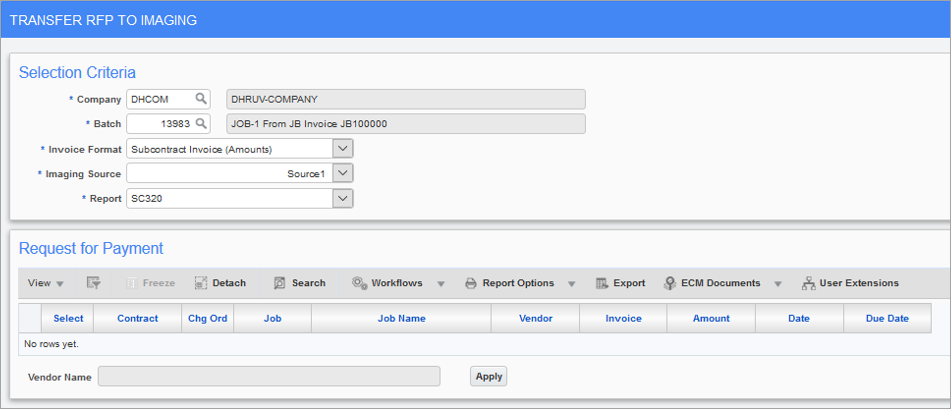
This screen is used to display Subcontract RFP batches created in the Job Billing module, allowing one or more vouchers to be selected and linked to the Imaging module for the purposes of workflow approval.
Selection Criteria – Section
Company
Enter/select company. The user’s default company is populated by default.
Batch
Enter/select the SC RFP batch created in the Job Billing module. The list of batches is limited to only those RFP batches created in Job Billing.
Invoice Format
Select the required invoice format from the drop-down menu. The “Subcontract Invoice (Amounts)” format is selected by default. This is SC Certificate of Payment Report (SC320), showing all the task detail amounts, including previous amounts and current amounts.
Imaging Source
Select the applicable imaging source from the drop-down menu. The selected imaging source must have assigned document types of “SC RFP Invoice”.
Report
Select the required report from the drop-down menu. Users can choose from two reports: SC320 and SC320_V1.
Request for Payment – Section
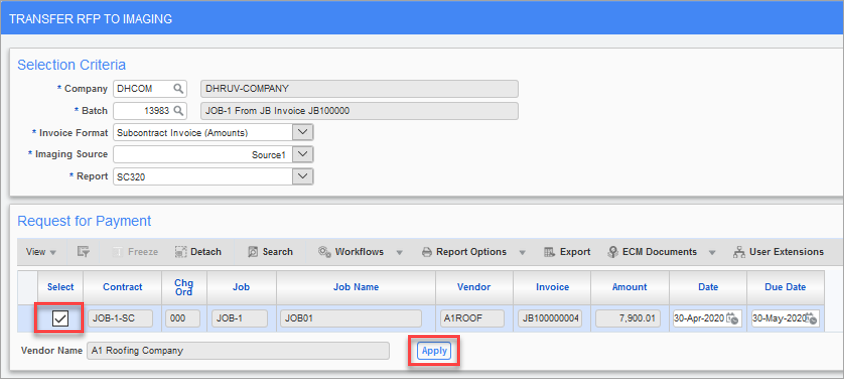
Pgm: SCVOUIMG - Transfer RFP to Imaging; standard Treeview path: Subcontract Management > Payments > Transfer RFP to Imaging
This section lists RFPs according to the batch specified in the Selection Criteria section. Select the RFPs to be transferred to the Imaging module using the ‘Select’ checkbox and click on the [Apply] button. Selected RFPs will be transferred to the Imaging module, along with the related reports and imaging files. When the RFPs have finished transferring, they will be removed from this section of the screen.
The vouchers are now removed from their original batches and moved to new Imaging RFP batches with one invoice per batch.
Step 7: View SC RFP Invoices in Image Manager
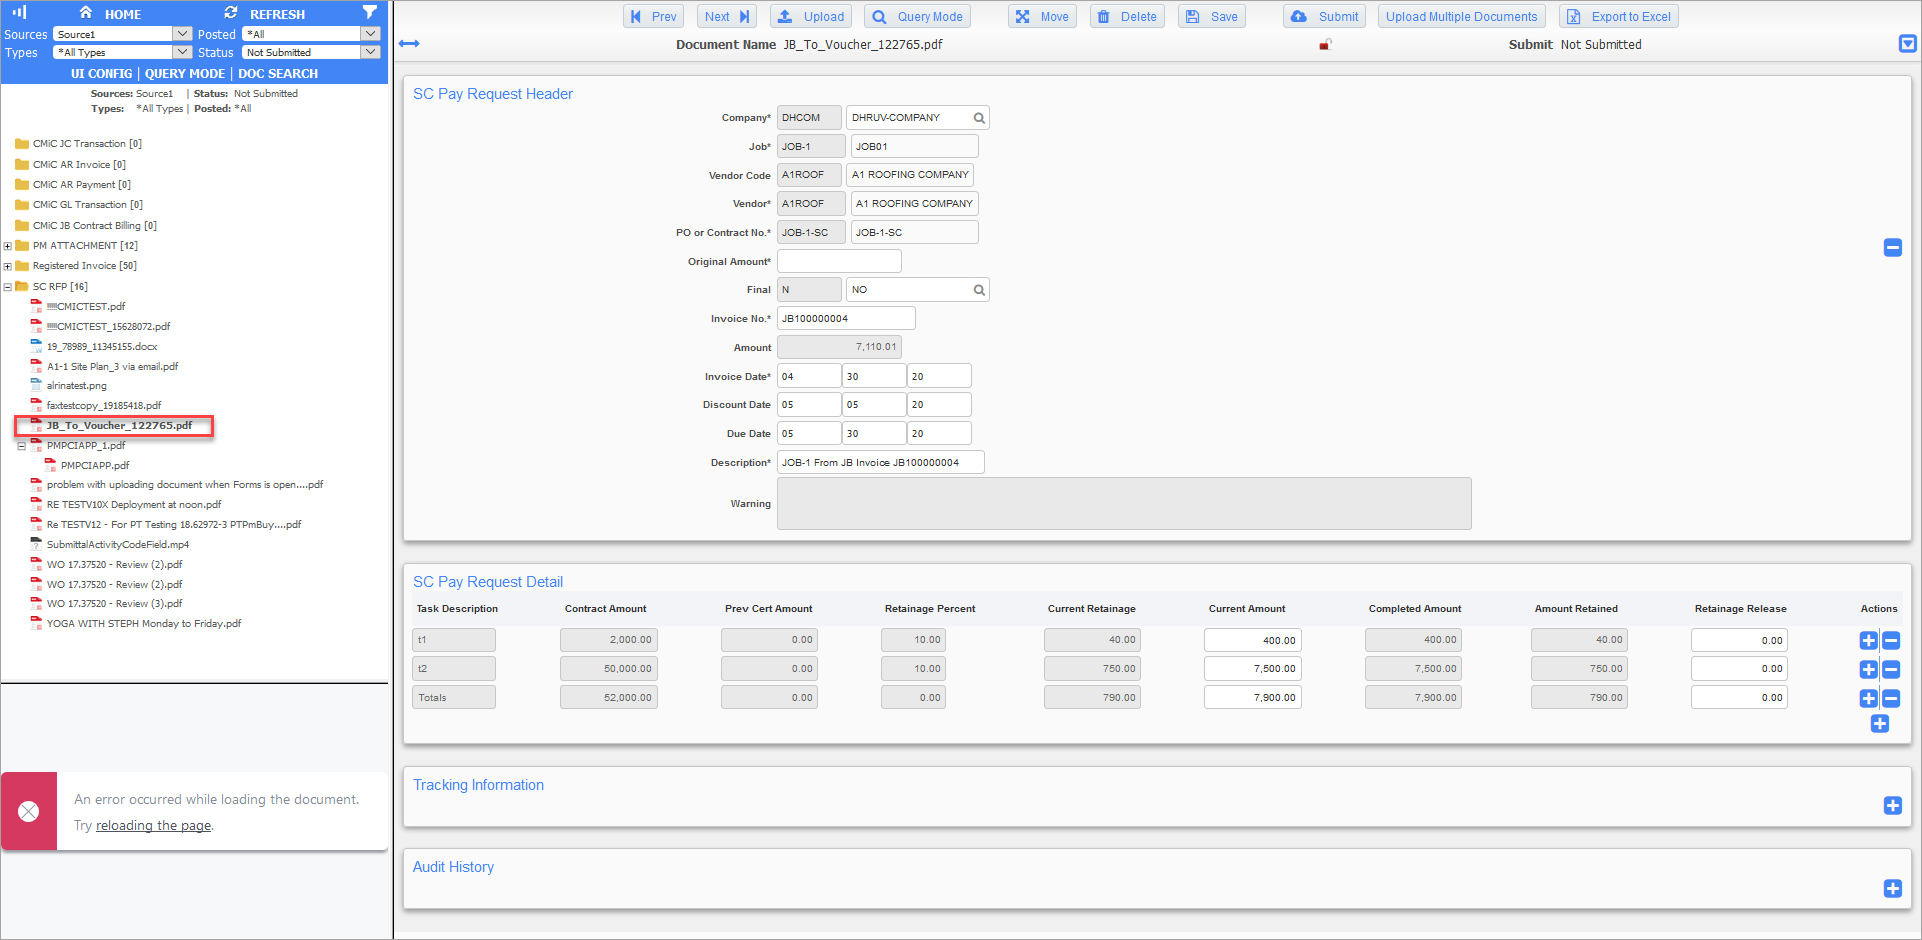
Imaging Manager; standard Treeview path: Imaging > Imaging Manager
The Image Manager now has the PDF images of the SC320 reports and the related SC RFP invoice under the specific document type, as defined in the Imaging Controls screen.
The status of the SC RFP invoice will be “Not Submitted”. Also, the voucher is not updateable by users, as the flysheet information is created from JB invoice generations, directly related to the billed amounts.
From this point forward, users may submit the invoice for workflow process for approval.