Pgm: RQCTRLFM – Requisition Control; standard Treeview path: Requisitions > Setup > Local Tables > Control
The Requisition Control screen is used to identify the general default information used within the Requisitions module.
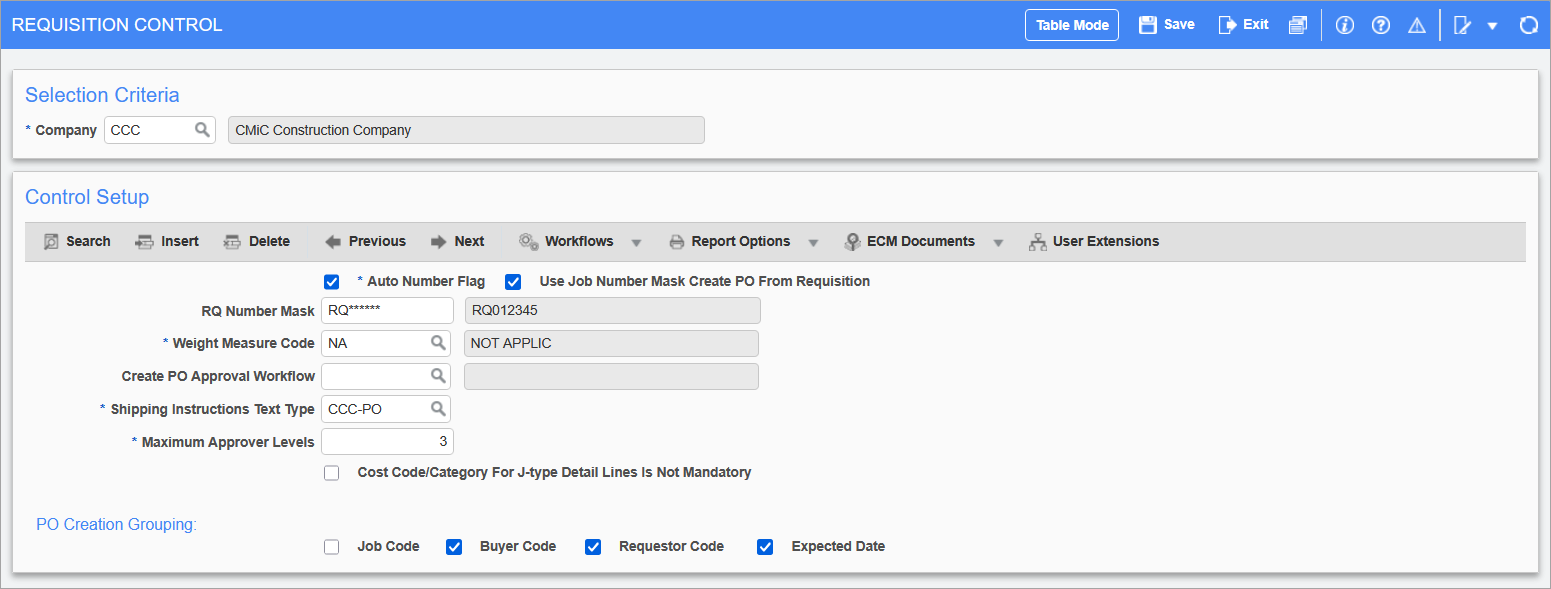
Auto Number Flag – Checkbox
If checked, the Requisitions Entry screen will display the Requisition (number) field as disabled and will automatically enter the number after the requisition is saved.
If unchecked, the Requisition Entry screen will require the entry of a user-defined requisition number.
RQ Number Mask
If using auto number, enter a unique numbering string.
The Requisition masks allow the numbering system to be customized for each of the string’s digits.
-
The asterisk (*) is used to indicate the placeholder for the numbers within the string.
-
Any combination of numbers, letters and characters can be used to create an invoice numbering string.
-
The system has pre-defined codes which may be used in combination with user-defined numbering/lettering or to provide a unique combination.
-
The pre-defined codes are in lowercase. Any code entered other than the following will be taken as fixed text and converted to uppercase.
-
The lowercase options available for Requisition (RQ) masks are:
b Business Partner Code (Customer)
c Company Code
y Year
-
y = Last digit of a 4-digit year
-
yy = Last 2 digits of a 4-digit year
-
yyy = Last 3 digits of a 4-digit year
-
yyyy = All 4 digits of the year
m Month
-
mm = Month of the year (i.e. December is 12)
d Day
-
d = Day of the week where 1 is Sunday
-
dd = Day of the month
-
ddd = Day of the year (i.e. 365 is December 31 unless a leap year)
-
Examples:
If the company has a vendor code “VAB401”, company code “CM”, and year “2018”:
Example 1 – If RQ Number Mask is ccbbb*****, the RQ code will appear as CMVAB00001.
Example 2 – If RQ Number Mask is yymmdd***, the RQ code will appear as 180101001.
Example 3 – If RQ Number Mask is **********, the RQ code will appear as 0000000001.
The system will begin the numbering process from right to left, based on the number of asterisk characters found within the mask. Asterisk characters found to the left of the total number will pre-fill with the number 0.
For example, if the invoice mask is RQ*****, and the last purchase order number is RQ00010, then the system will begin the numbering at the right most asterisk and fill the number 0 into all asterisk characters found to the left. In this case, the next requisition number created under this mask would be RQ00011.
Weight Measure Code
Enter/select the default unit in which quantitative information for the purchased or stocked items will be measured.
Shipping Instructions Text Type
Enter/select the shipping instructions text type that represents the text codes that will be used within Requisition Entry screen at the header and/or detail level.
Inventory Installed – Checkbox
If checked, this signals the Inventory module is set up and inventory items are active for requesting.
If unchecked, this signals that the Inventory module is not installed and all items (inventory, non-stock, and free-form items) must be entered using the Non-Stock Item screen (standard Treeview path: Requisitions > Setup > Non-Stock Item).
Maximum Approver Levels
Enter the maximum number of approver levels required for a requisition to pass through the approval stages. The approval number entered in this field will limit the number of approval levels that can be set up within the Approval Levels Maintenance screen (standard Treeview path: Requisitions > Setup > Local Tables > Approvers > Approval Levels).
Use Job Number Mask Create PO From Requisition – Checkbox
The default value for this checkbox is unchecked.
When checked, the mask defined in the Job PO Number Mask field on PO Control screen will be used when creating purchase orders, provided the detail lines have at least one 'J' line distribution.
NOTE: When unchecked (default value), the system would continue to use standard PO number mask for all types of requisitions.
Create PO Approval Workflow
(Optional) Specify the workflow to be launched to approve POs after they are created.
Job Code – Checkbox, Buyer Code – Checkbox, Requestor Code – Checkbox, Expected Date – Checkbox
By default, all checkboxes will be checked except for the 'Job Code' box. The 'Job Code', 'Buyer Code', and 'Requestor Code' checkboxes are available by default. The 'Expected Date' checkbox is hidden by default, but it can be added through the Lite Editor if needed.
In the Create Order from Requisition screen, the system will group purchase orders according to the checkboxes selected. For example, if only the 'Job Code' box is checked and the vendor is the same for all selected requisitions, the system will group the purchase orders based on the job code. If there is no job code, the requisition will be grouped with other requisitions that also don't have a job code.
In the Purchase Order Entry screen, the PO Comp,Job Code, and Job/Dept fields displays the respective values from the Requisition Entry screen. This only applies when the 'Job Code' box is checked.
If all checkboxes are unchecked, the system will default to grouping based on the vendor. Also, the Requester , Buyer, PO Comp, Job Code, and Job/Dept fields will be empty in the Purchase Order Entry screen.