Step 1: Enter Pay, Charge, and Bill Rates on the Employee Profile
Before setting up company rates of pay, it is important to understand the difference between the three rate types used in the US Payroll module:
-
Pay Rate: The rate per hour that the employee is paid for the hours entered on timesheets.
-
Charge Out Rate: The rate used to post costs to jobs.
-
Billing Rates: The rate per hour on the job timesheets that are eventually billed to the customer.
Enter these rates into the Hourly Rate, Charge Out Rate, and Billing Rate fields, respectively. These are the rates used if no other rates can be found for the employee.
Outside of the Employee Profile, rates can be specified in the Pay Rates sub-menu. Select from which screen rates should be taken with the Preferred Pay Rate, Preferred Charge Out Rate, and Preferred Bill Rate fields.
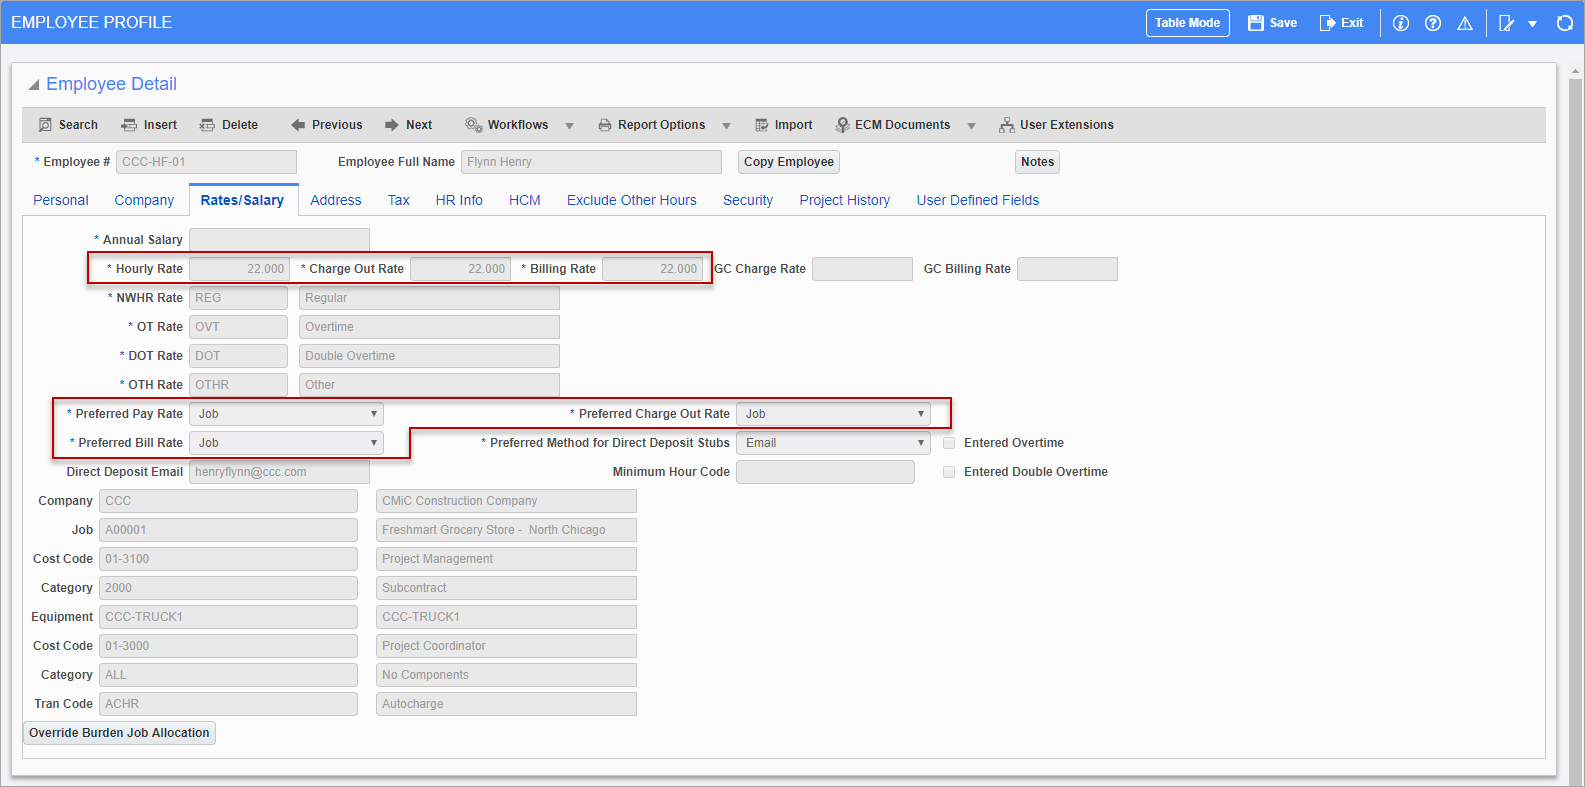
Pgm: PYEMPLOY – Employee Profile; standard Treeview path: US Payroll > Setup > Employees > Employee Profile – Rates/Salary tab
Step 2: Select Whether to Use Charge or Pay Rates on Employee Timesheets
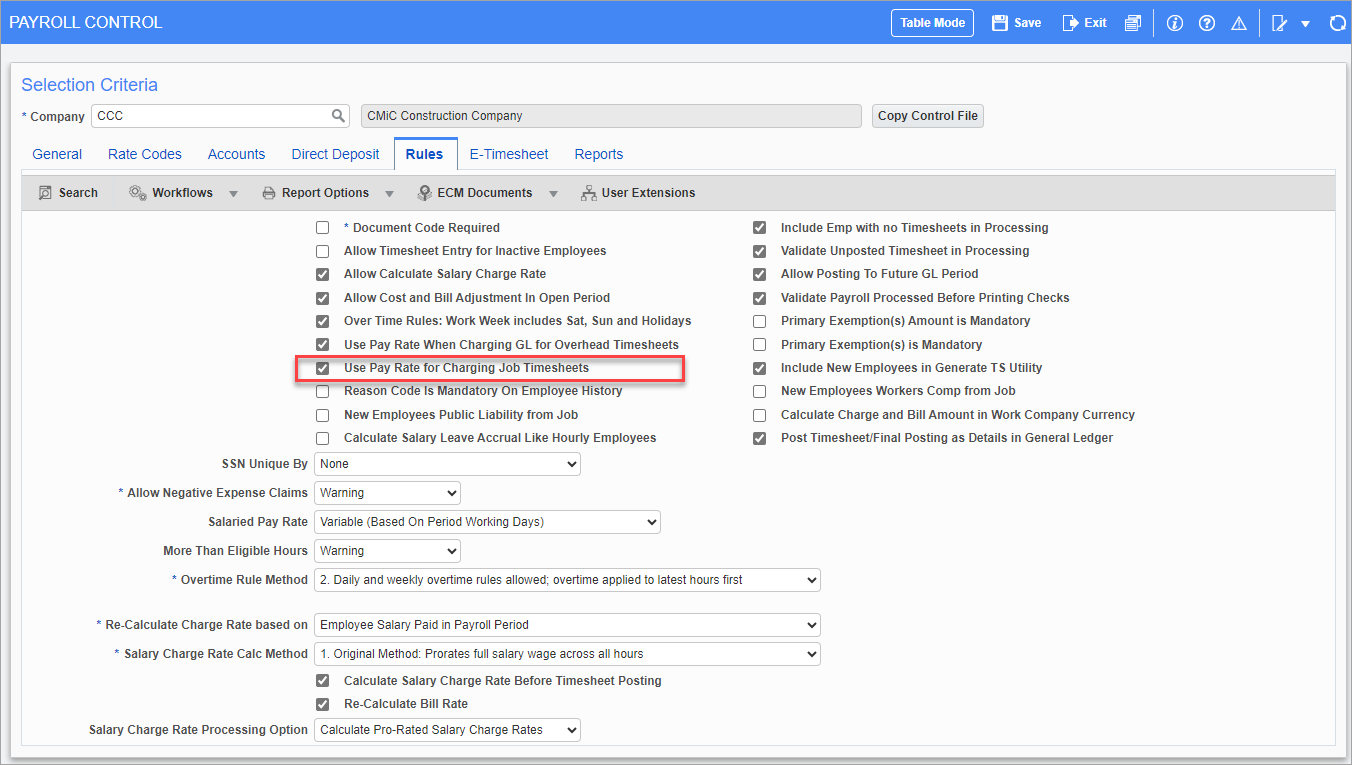
Pgm: PYCOMPRO – Company Profile; standard Treeview path: US Payroll > Setup > Company > Control – Rules tab
Check the ‘Use Pay Rate for Charging Job Timesheets’ box to use employee pay rates when posting timesheets. Leave it unchecked to use employee charge rates instead.
Step 3: Enter Rate Codes
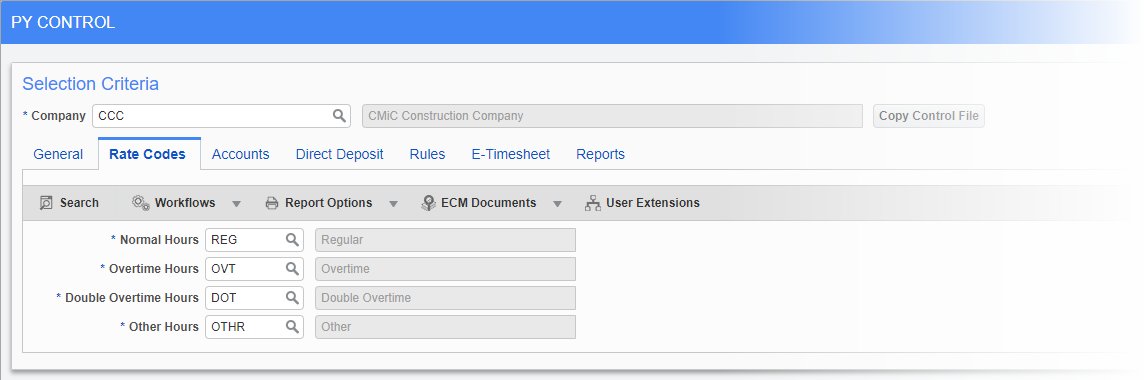
Pgm: PYCOMPRO – Company Profile; standard Treeview path: US Payroll > Setup > Company > Control – Rate Codes tab
Use the Rate Codes tab on the Company Profile to set the defaults codes for normal, overtime, double overtime, and other hours. These codes can be defined in the Rate Codes Maintenance screen (standard Treeview path: US Payroll > Setup > Local Tables > Rate Codes).
These codes are used to define the rates for different hour types when hours of that type are entered on employee timesheets.
Step 4: Enter Alternate Pay Rates
Pay, charge, and bill rates entered on the Employee Profile can be overridden via the Pay Rates sub-menu. Depending on the selection made in the Preferred Rates fields in Step 1, employee rates can be taken from the Trade, Customer, Job, Union, or Employee screens.
These screens can be used to enter date-sensitive rates. This means that the Employee Pay Rates screen is functionally distinct from the Rates tab on the Employee Profile.
These screens are useful if rates need to be defined for large groups of employees (e.g. for all members of a union or for all carpenters working on a job).
The Trade, Job, and Union screens have Non-Factor OT Rates tabs. If the relevant ‘Non-Factor’ boxes are checked, these rates are used rather than multiplying base rates by the multipliers detailed in Step 5.
NOTE: If the ‘Rate by Job’ box is checked on the Job Work Location screen the system automatically uses the Job Pay Rate for hours posted against that job, regardless of preferences made on the Employee Profile.
Step 5: Set Pay Rate Multipliers
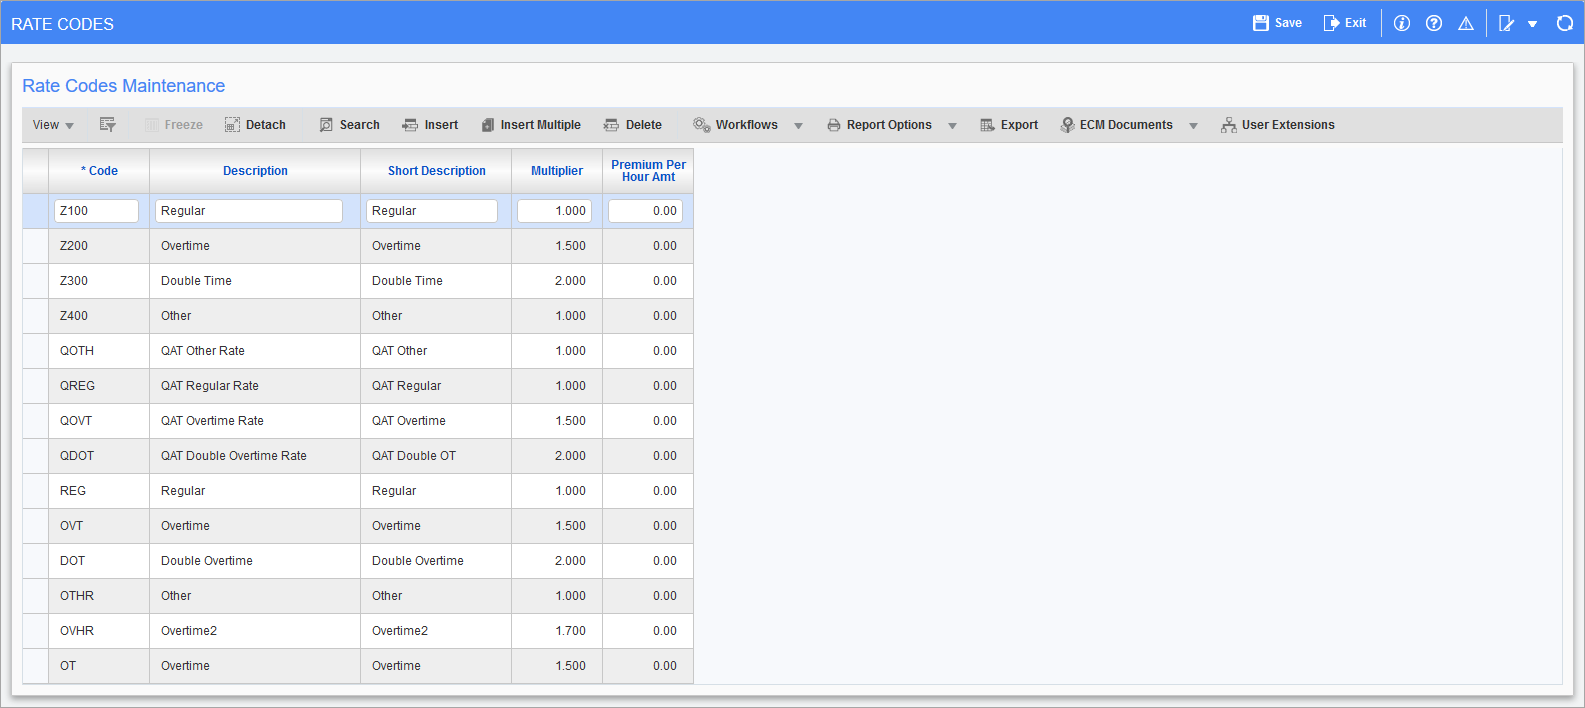
Pgm: PYRATCOD – Rate Codes; standard Treeview path: US Payroll > Setup > Local Tables > Rate Codes
Use the Rate Codes screen to enter multiplier values for each kind of hour type. These values are multiplied by the base rate to determine the rate for that hour type. Pay rates must be defined for normal, overtime, double overtime, and other hour types
Rate codes are defined at the company and employee levels. Note however, the system uses the rates for each class of hour based on the Employee Profile setting. The company setting is only used as the default for new employees.