
Pgm: PYTIMSHT_IMP – Timesheet Import Multi User; standard Treeview path: US Payroll > Imports > Import Timesheets from Oracle (Multi User)
This screen works in much the same way as the Import Timesheets from Oracle screen except that here, timesheet data can be imported for multiple users simultaneously. Users can upload, validate, and edit data using the buttons at the bottom of the screen before finally building a timesheet from the imported data.
The following sections detail the steps to be completed:
Complete Setup for System Privileges and System Options
System Privileges

Pgm: SDUSRMNT – User Maintenance; standard Treeview path: System > Security > User Maintenance – System Privileges tab
The following privileges are located on the System Privileges tab of the User Maintenance screen in the System Data module:
-
PYIMPUSRTM - In order to use the Timesheet Import Multi User screen, users should have the PYIMPUSRTM system privilege enabled, as shown in the screenshot above. This privilege allows users to edit and validate timesheet data imported by other users.
-
PYIMPTSRT - In order for the timesheet import to consider payroll rates provided in the ASCII file, users should have the PYIMPTSRT system privilege enabled, as shown in the screenshot above. This privilege allows users to import rates provided for the following fields: “NH_Charge_Rate”, “NH_Bill_Rate”, “OT_Charge_Rate”, “OT_Bill_Rate”,“DOT_Charge_Rate”, “DOT_Bill_Rate”, “OTH_Charge_Rate”, and “OTH_Bill_Rate”. The import will consider all the above data as override values and will not calculate rates automatically in import. If the data is not provided, the import will determine the rate based on the profile preference and the rate code assigned on the profile.
System Options
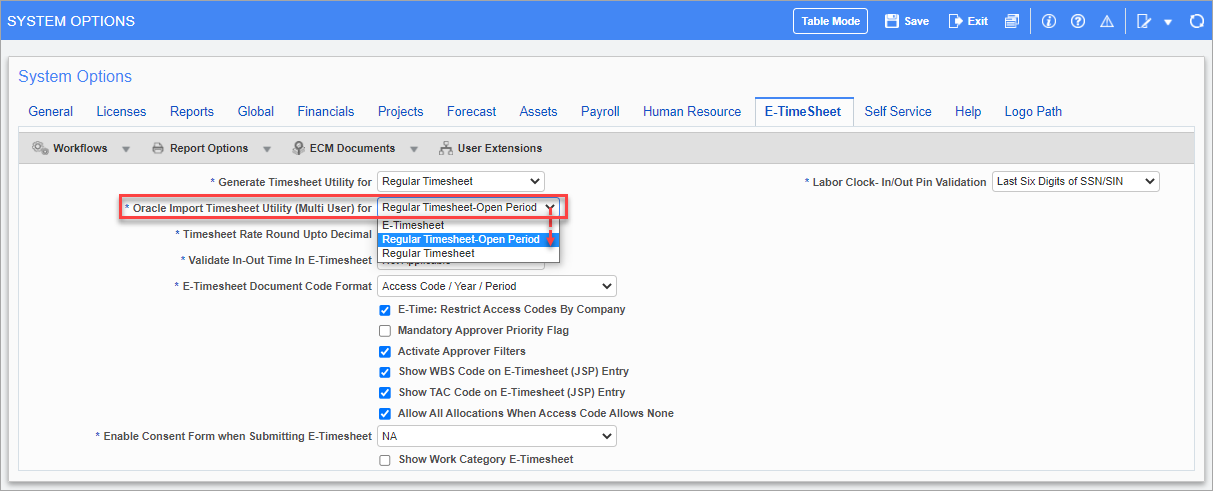
Pgm: SYSOPT – System Options; standard Treeview path: System > Setup > System Options – E-TimeSheet tab
Imported data can either be uploaded to the E-Timesheet table or the regular Timesheet posting table. This choice can be made in the System Options screen, shown above. Three options are available in the drop-down menu:
-
Regular Timesheet: This option is used for importing timesheet data into the regular Timesheet program and data will be imported for any date in any open period.
-
Regular Timesheet - Open Period: This option is used for importing timesheet data into the regular Timesheet program but data will only be imported into the first open period of the year, regardless of the date on the CTL or text file.
NOTE: If a previous period has been opened for adjustment, this setting will import the timesheet into that period.
-
E-Timesheet: This option is used for importing into the E-Timesheet program.
NOTE: When the program is initially installed, this field will default to a blank value. A blank value is equivalent to “Regular Timesheet - Open Period”. Depending on the type of timesheet data being imported, users should select the timesheet program option accordingly.
Users should ensure that the option selected matches the type of data being imported, otherwise imported records will not be inserted into the appropriate timesheet table. For example, if E-Timesheet data is being imported, and “Regular Timesheet - Open Period” is selected in this field, records will not be successfully imported into the E-Timesheet table.
If “E-Timesheet” is selected, access codes must be included in the import file for timesheet data to be successfully validated and imported into the E-timesheet table.
Import ASCII File to Oracle Table
Pgm: PYTIMSHT_IMP – Timesheet Import Multi User; standard Treeview path: US Payroll > Imports > Import Timesheets from Oracle (Multi User)
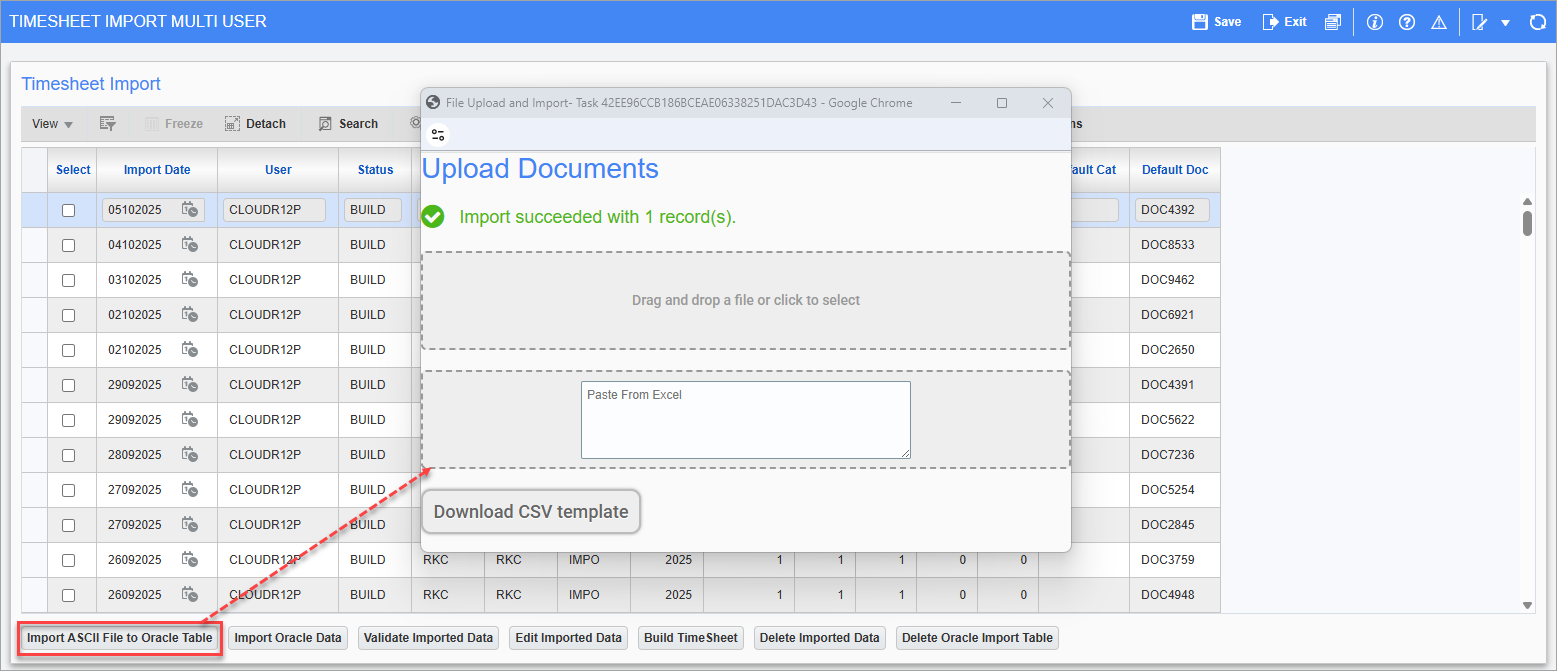
Press the [Import ASCII File to Oracle Table] button to directly import an ASCII file to the Oracle Timesheet table PYEMPTIMSHT_IMP. Refer to US Payroll - Importing Timesheets From Oracle for more information.
The Upload Documents pop-up, as shown in the screenshot above, allows users to select files or to paste data from a CSV file. A message will appear to indicate that the records were imported successfully.
Import Oracle Data
Pgm: PYTIMSHT_IMP – Timesheet Import Multi User; standard Treeview path: US Payroll > Imports > Import Timesheets from Oracle (Multi User)
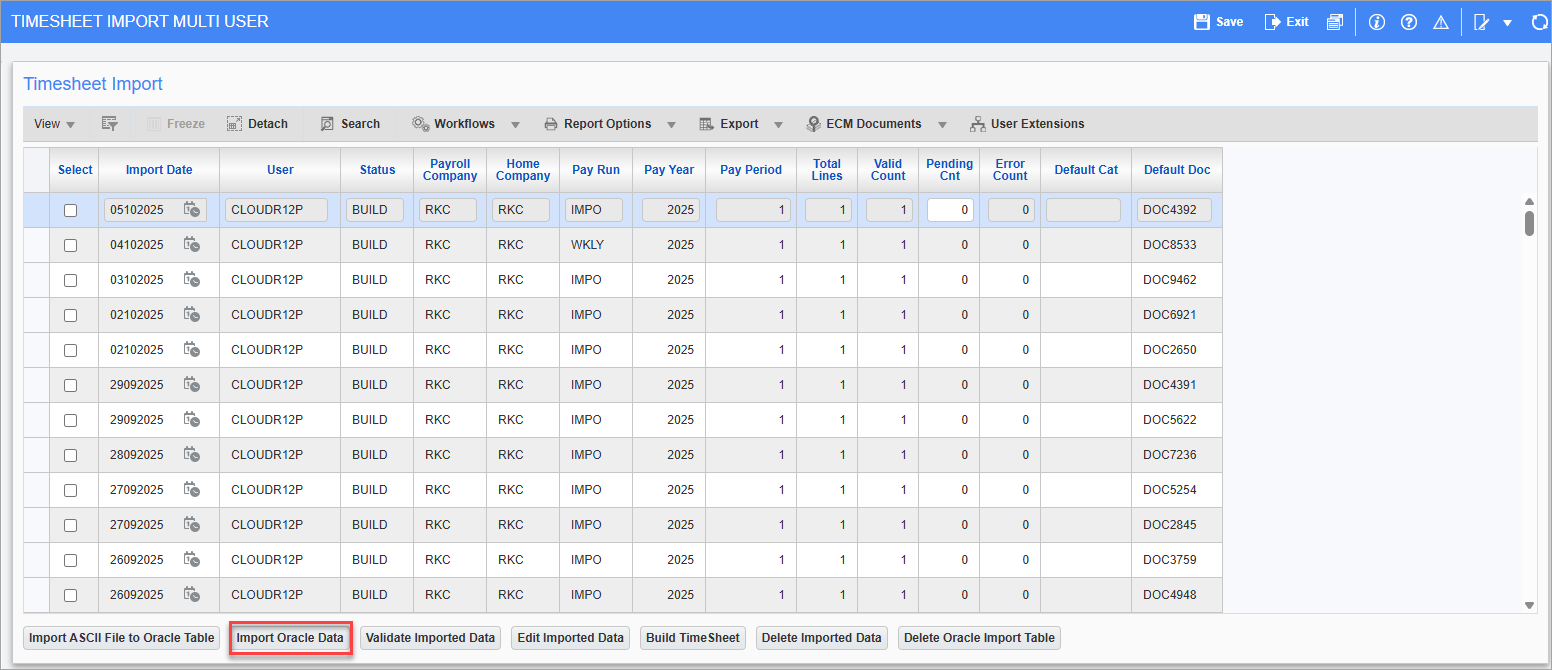
In the Timesheet Import MultiUser screen, press the [Import Oracle Data] button to import the ASCII file from Oracle containing timesheet data.
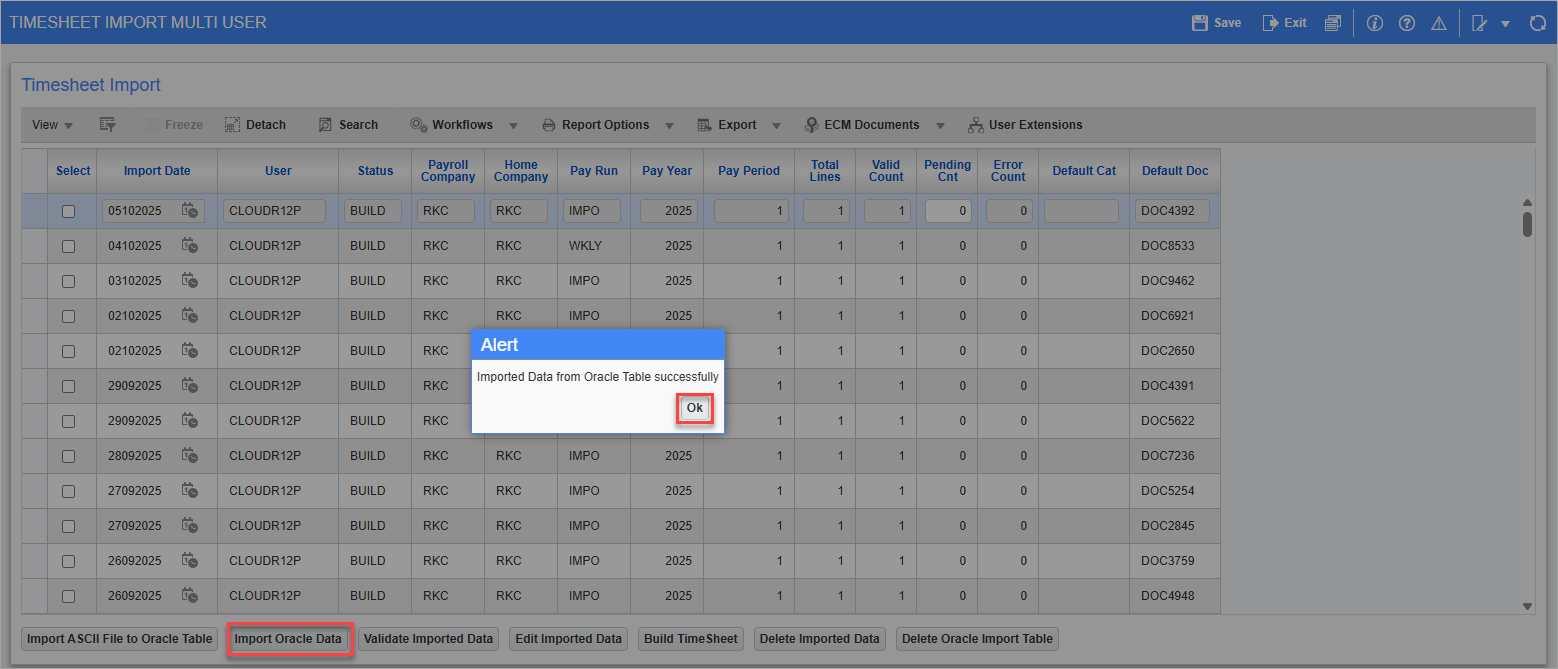
A message will be issued to indicate if the data imported successfully, as shown above.
The User field will indicate the user ID of the individual who imported the timesheet data. When a user initially imports the data for the first time, the Status field will display "Pending".
The records are filtered according to a user's security. If a user has the privilege to see imports from other users, then all imports will be displayed; otherwise, the user will only see the records they imported. Refer to System Privileges for more information.
Validate Imported Data
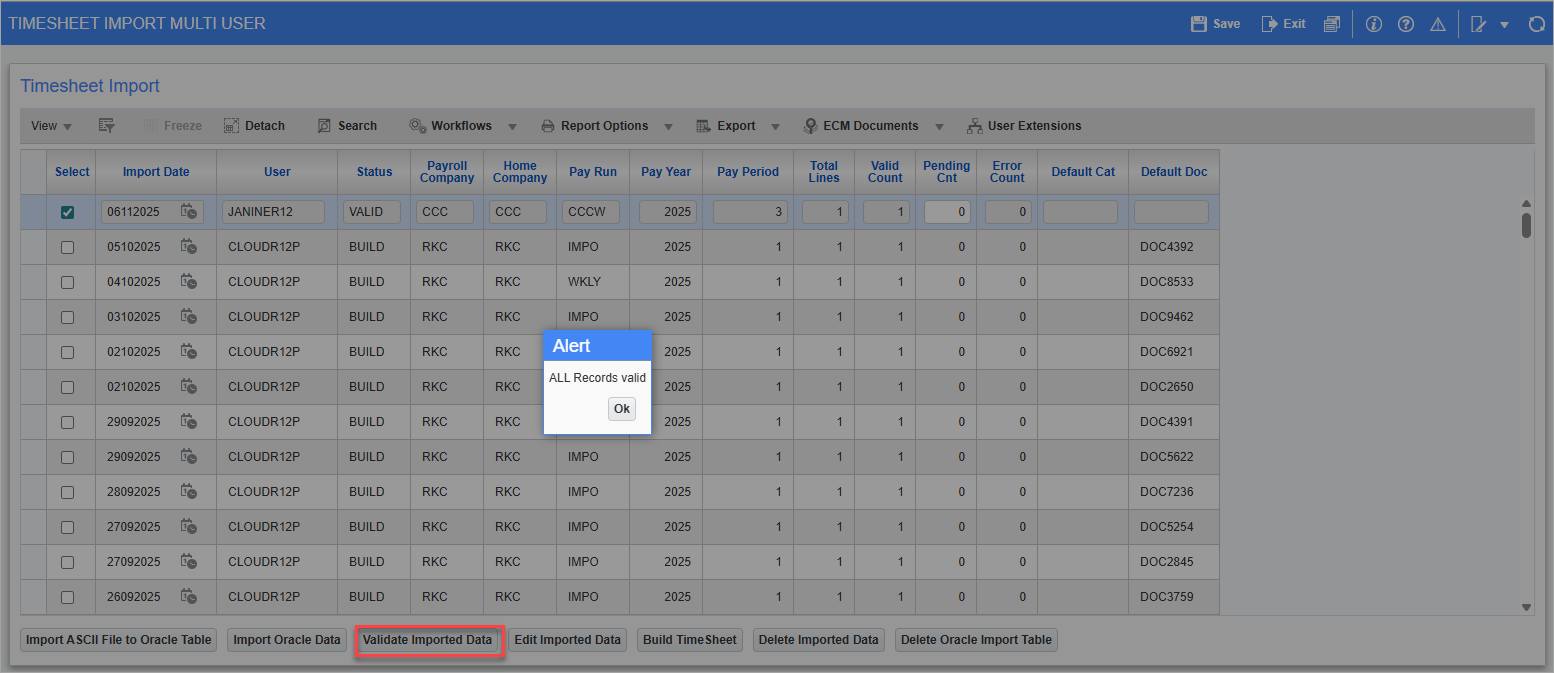
After data has been imported to the screen, select the rows to be validated and press the [Validate Imported Data] button.
A message will be issued to indicate if all of the records have been validated successfully.
NOTE: Validating of data can also be done in the Edit Import Data screen, shown below.
Edit Imported Data
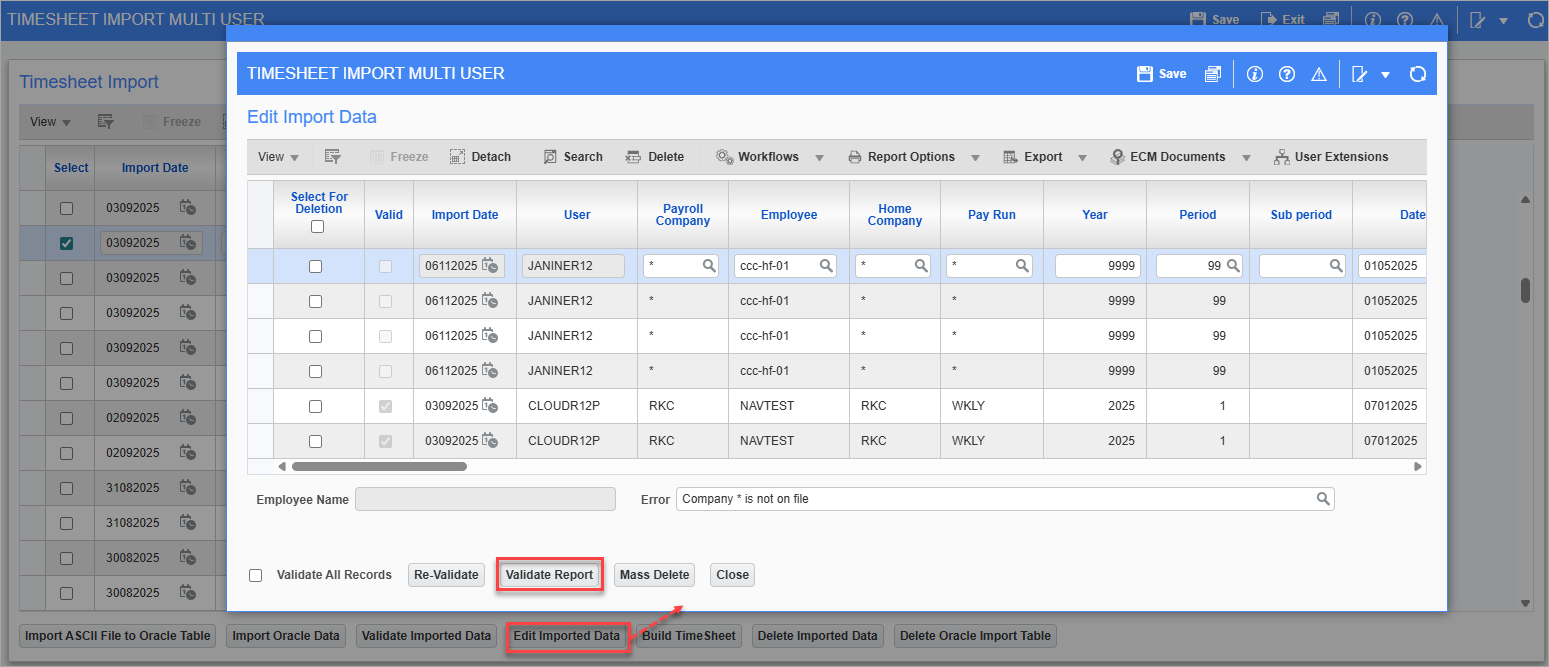
Press [Edit Imported Data] button to bring up the Edit Import Data pop-up window.
From here all imported data can be validated, either individually or by pressing the ‘Validate All Records’ checkbox. If an error is given in the Err Msg field after an attempted validation, press the [Validate Report] button to review the generated error.
Build Timesheet
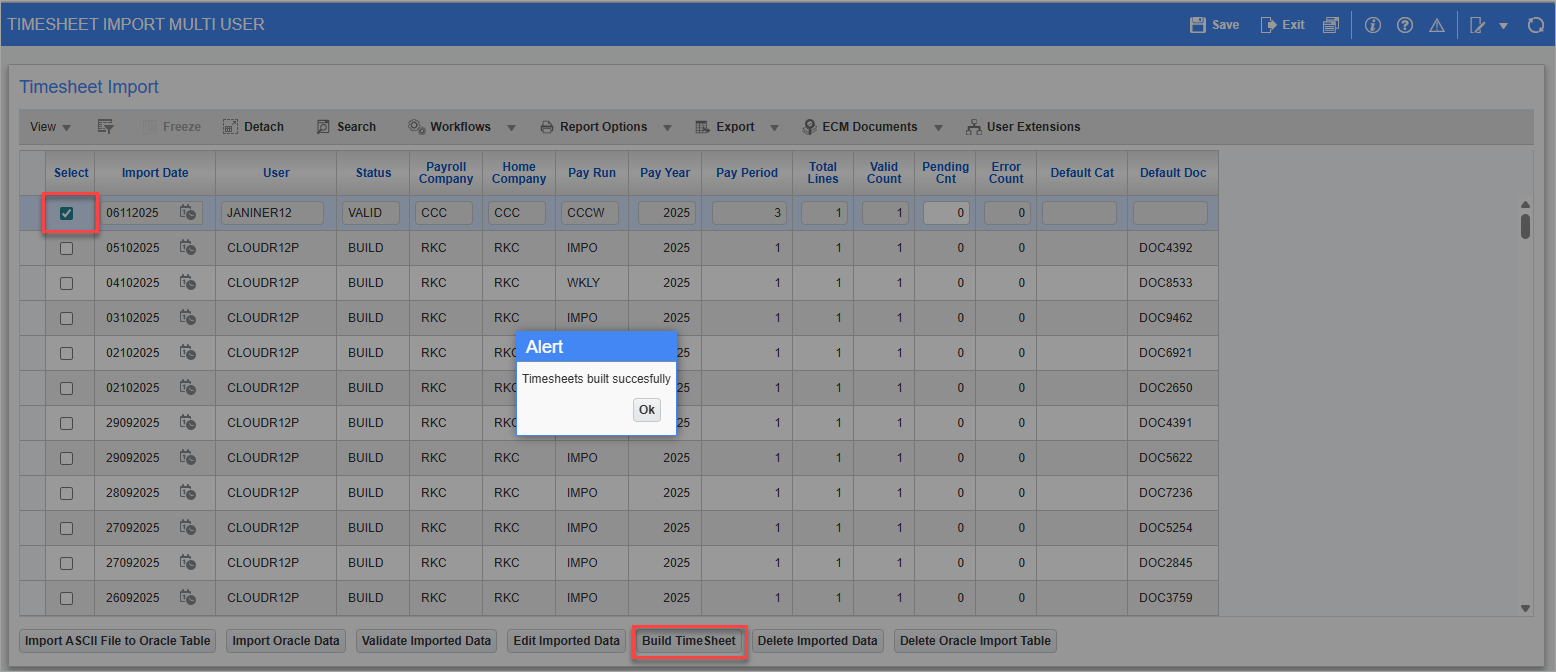
Once all timesheet data has been imported, edited, and validated, check the ‘Select’ box for all rows from which to build the timesheet and press the [Build Timesheet] button. This will import all selected data into the E-Timesheet table.
A message will be issued to indicate if timesheets have been built successfully.

The status of the timesheet data rows will update from "VALID" to "BUILD".
Delete Imported Data

Imported data can be deleted when the import is complete.
Check the ‘Select’ box for all rows to be deleted and click the [Delete Imported Data] button.
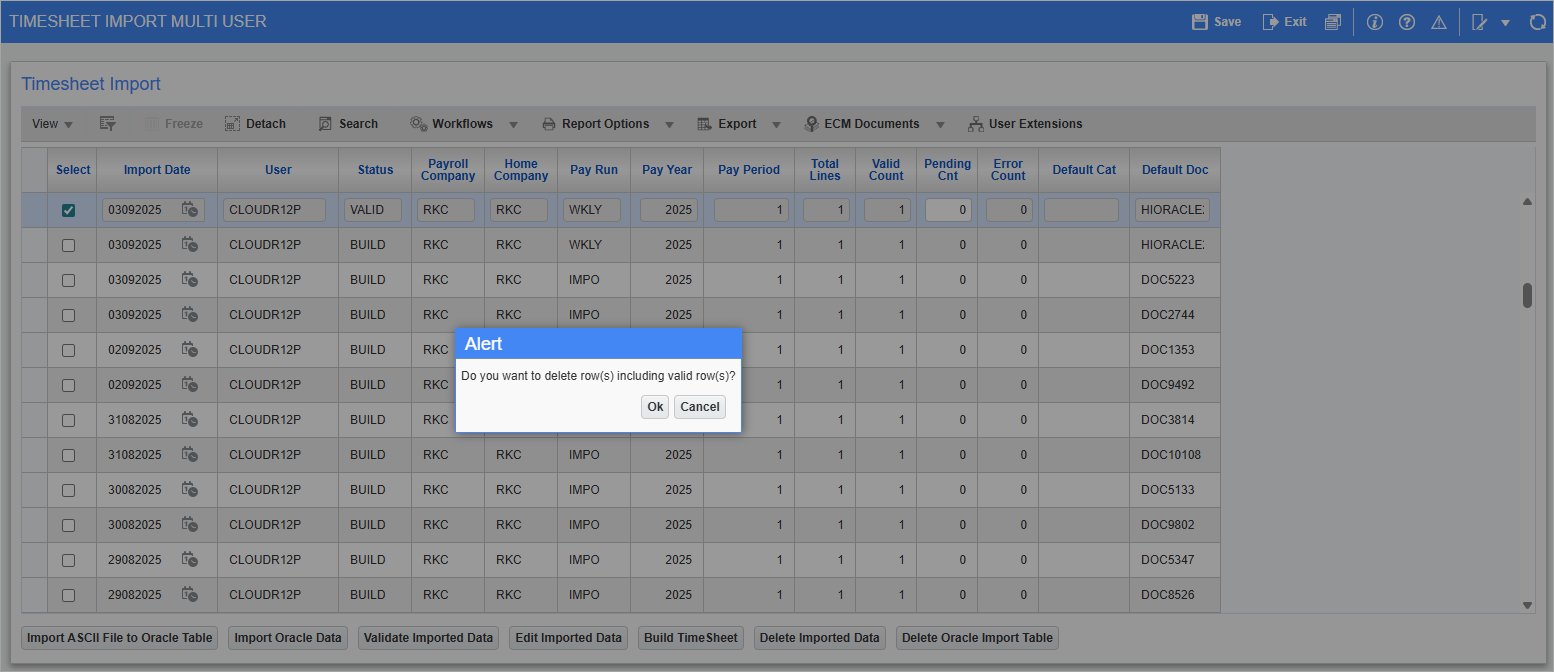
A message will be launched to confirm the deletion of the selected rows. Click [Ok] to confirm.
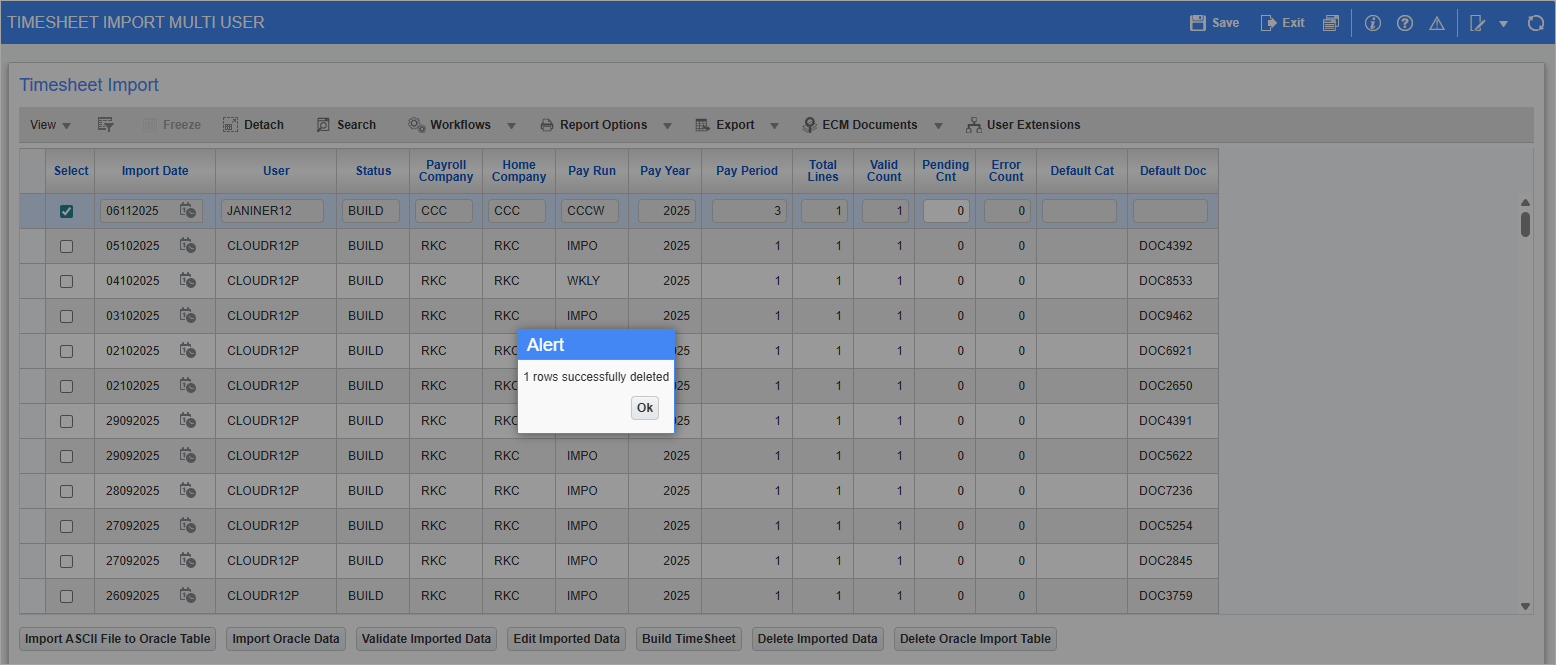
A message will be issued to indicate the number of rows successfully deleted.
Delete Oracle Table
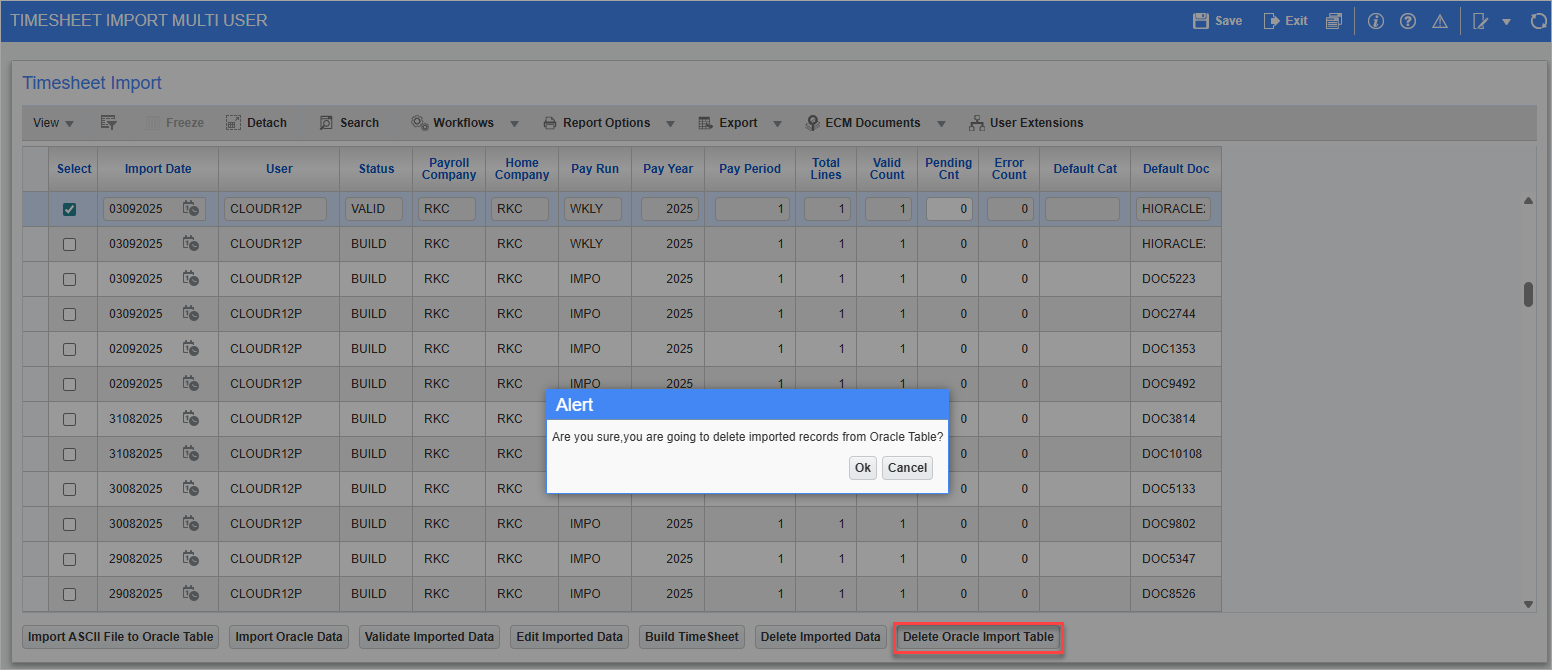
Use the [Delete Oracle Import Table] button to delete imported records from the Oracle table.
A message will be launched to confirm the deletion of the selected imported records. Click [Ok] to confirm.