Overview
Pgm: PYEMPIMP – Employee Import; standard Treeview path: US Payroll > Imports > Import Employees from ORACLE (Multi User)
This screen is used to import new employee records and make historical changes to any existing records in a quick and efficient manner. For new employees, the screen will import and insert a new Employee Profile record. For existing employees, where Employee Profile records exist in the system and are part of the payroll, historical changes will be made to the existing profiles. This import utility also facilitates employment history adjustments and allowing users to update hire or termination dates.
During the import process, employee profile data is imported from CSV files and then validated against US Payroll setup and/or International Payroll setup. During validation, employee profile and/or employee history data can be reviewed and updated as required.
The import process supports multi-user functionality, allowing multiple users to concurrently import employee data without causing any user lockouts. This flexibility contributes to a more efficient and collaborative workflow, ensuring that data can be processed simultaneously by different users.
Imported Data Records
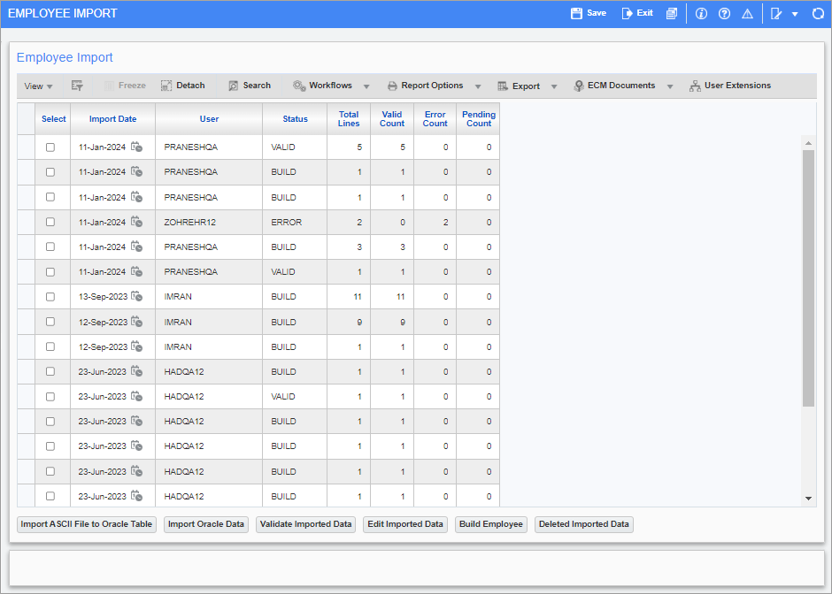
Imported Data pop-up screen
The Imported Data pop-up screen is a log consisting of all major required fields for the employee profile and history. This screen works with Excel style data to display all columns and allows data to be imported into the screen using standard import functionality with validation.
All columns are available for users to either type data or import from CSV files. Some of the key fields are described in more detail below.
NOTE: Reason Code and Security Code fields have been added to the IMPORT EMPLOYEE CTL file. Employee security validation has also been included in this screen. Users are assigned security access via their security group, defined under the Employee Security tab of the User Maintenance screen in the System Data module. Reason code validation has been added to the import and it is defined as per the Payroll Company Control File. If enabled, then a reason code is required.
Employee Number
The Employee Number field is a required field. A valid employee number must be entered in this field.
Effective Date
The Effective Date field is also a required field.
The date will be used for employee data change based on the action code provided.
Action Code
This field has several codes available for selection (e.g. Change, Deceased, Increment, New Hire Date, Promotion, Termination, and Transfer).
Reason Code
If the 'Reason Code Is Mandatory On Employee History' box is checked on the Rules tab of the Payroll Control File screen, then a reason code is required when adding a history record in the Employment History Maintenance screen.
Importing New Employee(s)
When importing new employees (i.e., New Hired (NR)), the user must provide all required fields to import employees with the effective date and employee details. The screen will populate default fields from the company (when left blank) or HR fields such as Dominant Hand, Calculated Accrued Leave From, or any other checkbox or drop-down option needed to default.
The process will validate all input data and will insert employees in the profile as “New Hired” employees. The data will also be inserted into the Employment History record.
Importing Existing Employee Changes (Employee History)
The Employee Import screen allows users to make employment history changes in bulk.
This is useful since an employee's hire date and/or termination dates are only updatable through the Employment History Adjustment screen, and with this screen users can now import and update hire and/or termination dates for several employees at once.
Some valid action code examples are as follows:
-
CH = Change
-
DE = Deceased
-
IN = Increment
-
NR = New Hire Date
-
ND = New Hire Date as well
-
PR = Promotion
-
RR = Rehire
-
RT = Retired
-
TM = Terminated
-
TR = Transfer
NOTE: Effective date is validated during import. Changes with an effective date less than the original hire date of an employee are not allowed, except when changing the Hire Date itself.
The Employee Number must be in the import CSV file template.
Change Record (CH) - The user will provide the employee’s number with the effective date and the values changed for an employee. The rest of the fields can remain empty. The program will verify if the employee (employee number) existed in the Employee Profile table. If the employee exists, a historical record will be created with “CH” status with the effective date. In the CSV file, the CH code is supplied for Change Record.
Increment (IN) - The user will provide the employee’s number with the effective date along with the annual salary or pay rate changes for an employee. The program will automatically verify if the employee (employee number) existed in the Employee Profile table. If the employee exists, the process will validate if the employee’s annual salary or pay rate is changed. A historical record will be created with “IN” status with a new effective date. In the CSV file, the IN code is supplied for Increment.
Terminated (TM) - The user will provide the employee’s number with the effective date and employee status “In Active”. In the CSV file, the TM code is supplied for Terminated. The program will automatically verify if the employee (employee number) existed in the Employee Profile table with active status. If the employee exists and is active, a historical record will be created with “TM” status and terminate the employee in the Employee Profile by performing the steps described below:
-
The program will query the last record from the Employment History based on the effective date provided.
-
That record will be copied as a new record with the effective date and status “TM”.
-
A procedure will be called to update the profile status.
Re-Hired (RR) - The user will provide the employee’s number with the effective date and employee status “Active”. The program will automatically verify if the employee (employee number) existed in the Employee Profile table with “Inactive” status. If the employee exists and is “Inactive”, the program will create a historical record with “RR” status and “Re-Hired” the employee in the Employee Profile by performing the steps described below:
-
The program will query the last record based on the effective date.
-
A new record will be created with the effective date and status “RR”.
-
A procedure will be called to update the profile status.
Import ASCII File to Oracle Table
The steps to complete the import process are provided below.
![Screenshot of pop-up launched from [Import ASCII to Oracle Table].](../../../../Resources/Images/PYU_12c_for_import/PYU_EmployeeImport4.png)
To import Employee Profile data and/or Employee History data, navigate to the Employee Import screen. Once the screen is open, press the [Import ASCII File to Oracle Table] button to launch the File Upload and Import pop-up window, where two options are available for importing data. Either use the “Drag and drop a file or click to select” option, or copy data from an Excel spreadsheet and paste it in the "Paste From Excel" option. For convenience, the [Download CSV Template] button is available to download a copy of the import CSV template.
If there are no issues with the CSV file, it will be uploaded, and the data will be imported successfully into the Oracle table.
Import Oracle Data
![Screenshot of pop-up window launched from [Import Oracle Data].](../../../../Resources/Images/PYU_12c_for_import/PYU_EmployeeImport5.png)
Press the [Import Oracle Data] button to import the data from the Oracle table. The imported data should be displayed with a status of “Pending”.
Validate Imported Data
![Screenshot of Employee Import screen with record selected and [Validate Employee Data] button highlighted.](../../../../Resources/Images/PYU_12c_for_import/PYU_EmployeeImport6.png)
Select the row and press the [Validate Imported Data] button.
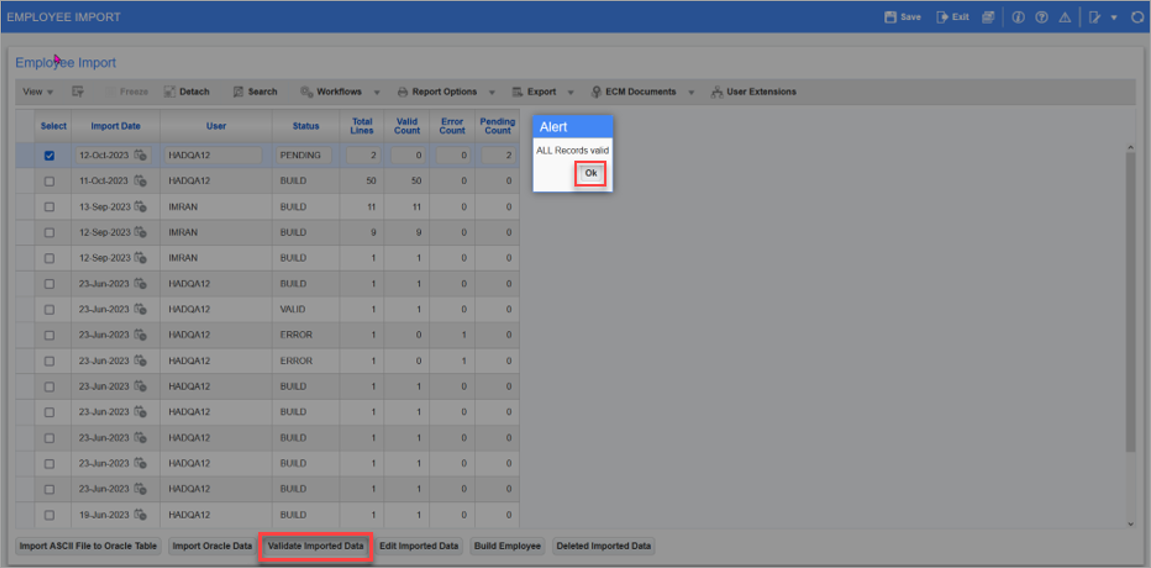
If the imported records are valid, an Alert pop-up window will indicate that all records are valid.
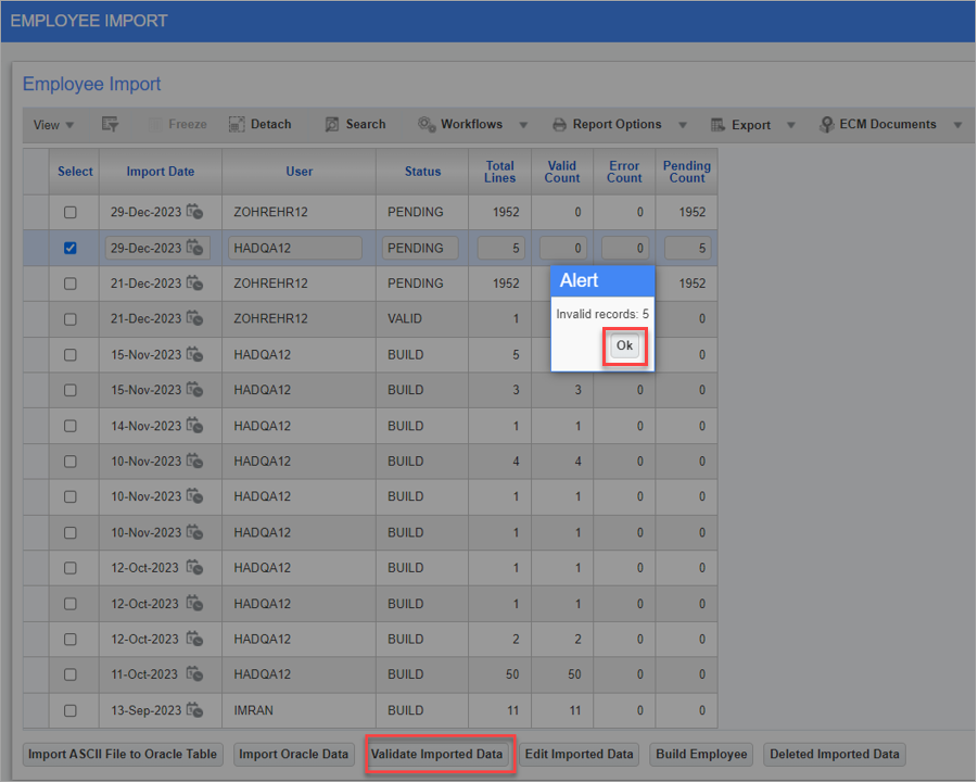
If the imported records are invalid, then an Alert pop-up window will indicate the number of invalid records (e.g., Invalid records: XX).
If the records are invalid, then the status of the imported file will change to “Error”.
Edit Imported Data
![Screenshot of Employee Import screen with invalid record selected and [Edit Imported Data] button highlighted.](../../../../Resources/Images/PYU_12c_for_import/PYU_EmployeeImport9.png)
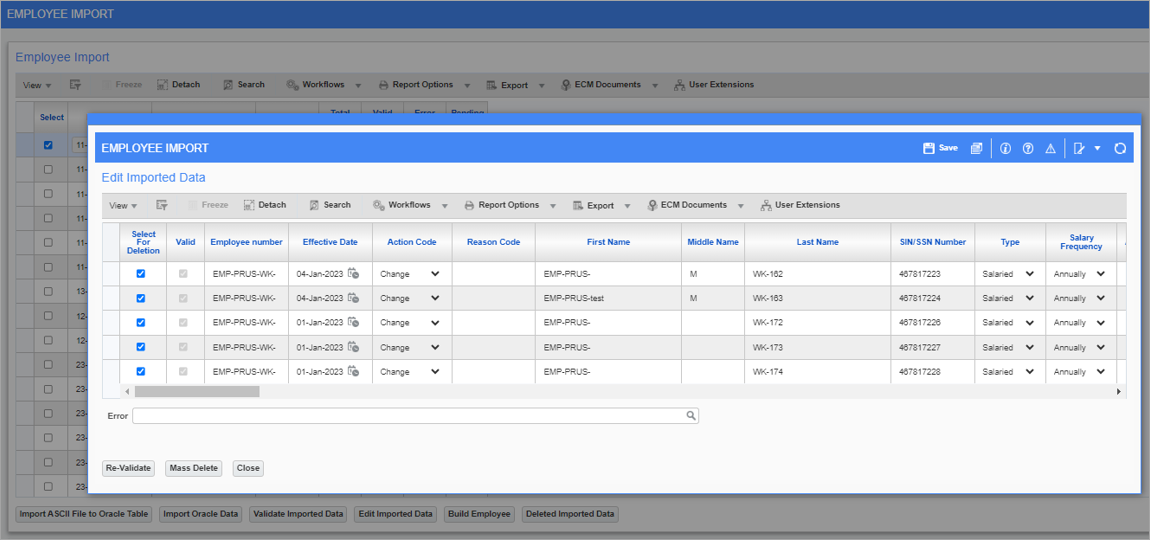
Check the 'Select' checkbox against the imported file with the “Error” status and then click [Edit Imported Data] to review the invalid records.
![Screeshot of pop-up window launched from the [Edit Imported Data] button.](../../../../Resources/Images/PYU_12c_for_import/PYU_EmployeeImport10.png)
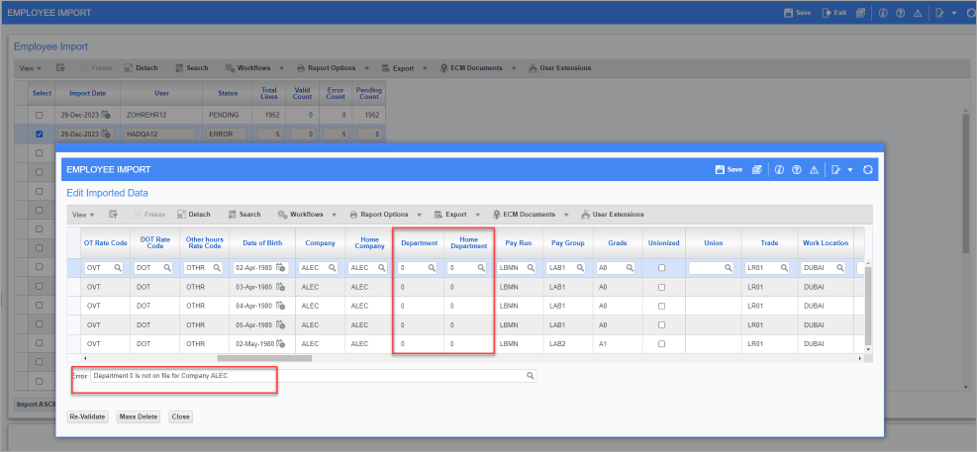
![Screenshot of Edit Imported Data pop-up window with [Re-Validate] button highlighted.](../../../../Resources/Images/PYU_12c_for_import/PYU_EmployeeImport12.png)
Fix any errors (e.g., correct the department number in the file) and then press the [Re-Validate] button.
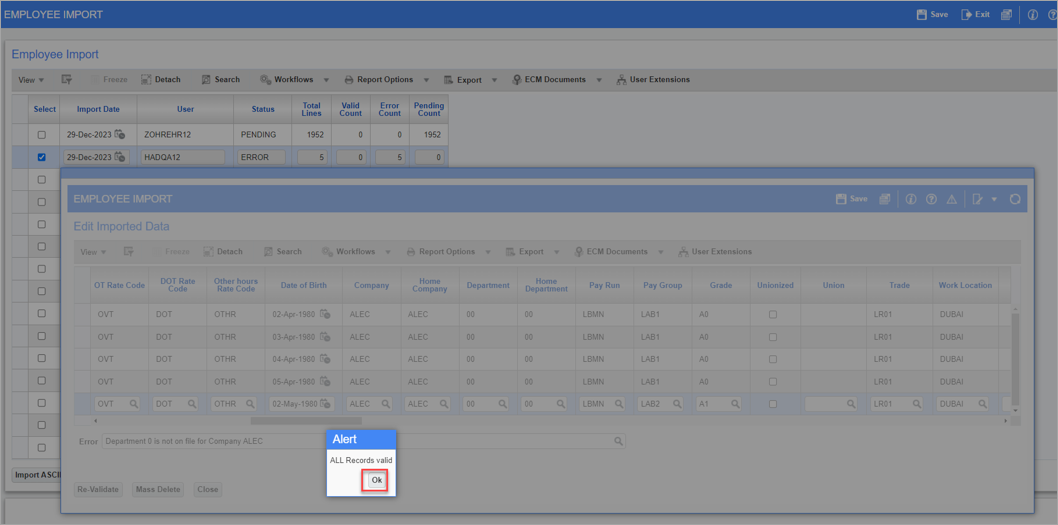
When all records are valid, press [OK] and then [Close].
The status of the file will change to “Valid”.
Build Employee Data
![Screenshot of Employee Import screen with Alert pop-up window launched from [Build Employee] button.](../../../../Resources/Images/PYU_12c_for_import/PYU_EmployeeImport14.png)
To build employee data, press the [Build Employee] button.
An Alert pop-up window will indicate if employees have been created/updated successfully.
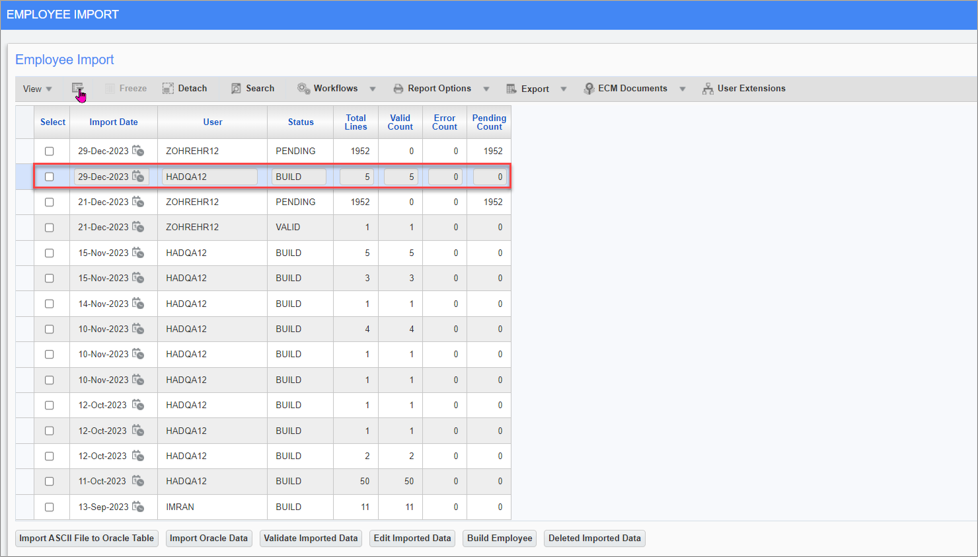
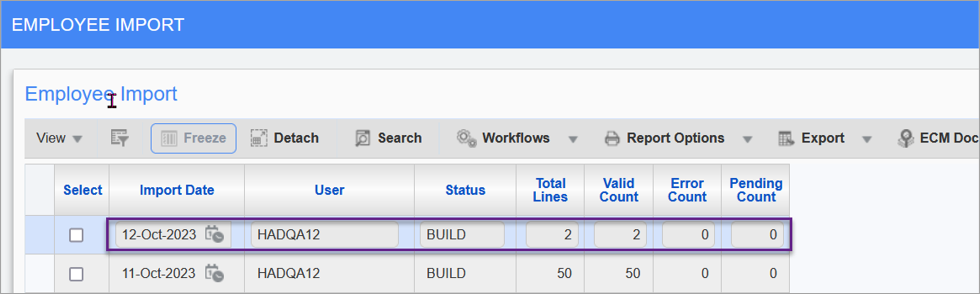
Once built, the status of the file changes to “Build”.
Verify Imported Data
Navigate to the Employee Profile and/or Employee History screen to verify the imported data:
-
Verify the new imported employee(s) created in the Employee Profile.
-
Verify the Employee History record changes created in Employee History are also visible in the Employee Profile.
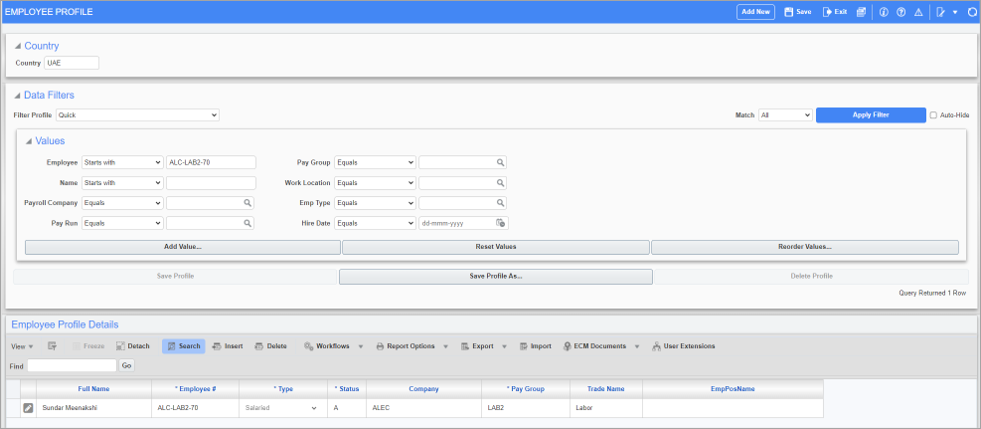
Pgm: PYEMPLOY – Employee Profile; standard Treeview path: US Payroll > Setup > Employees > Employee Profile
Pgm: PYEMPIMP – Employee Import; standard Treeview path: US Payroll > Imports > Import Employee from ORACLE (Multi-User)
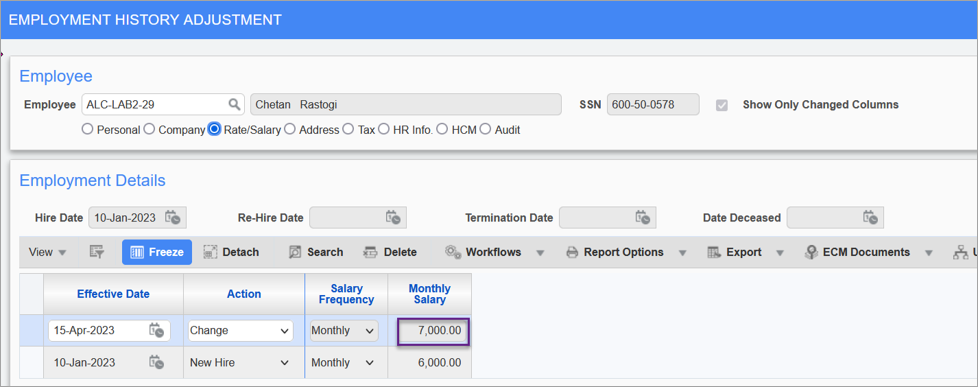
ALC-LAB2-29: History Changes Effective Date 15-APR-2023 updated successfully for Grade, Pay Group, Salary and Contract Type, as shown below.

Pgm: PYEMPLOY – Employee Profile; standard Treeview path: US Payroll > Setup > Employees > Employee Profile – Company tab
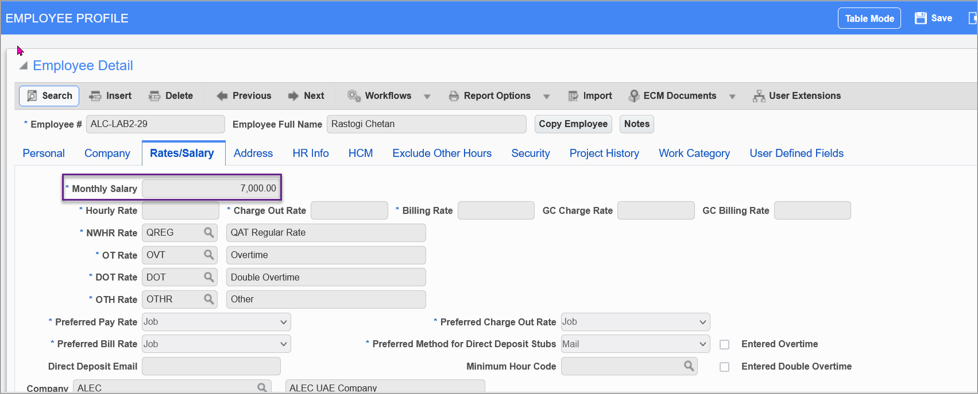
Pgm: PYEMPLOY – Employee Profile; standard Treeview path: US Payroll > Setup > Employees > Employee Profile – Rates/Salary tab
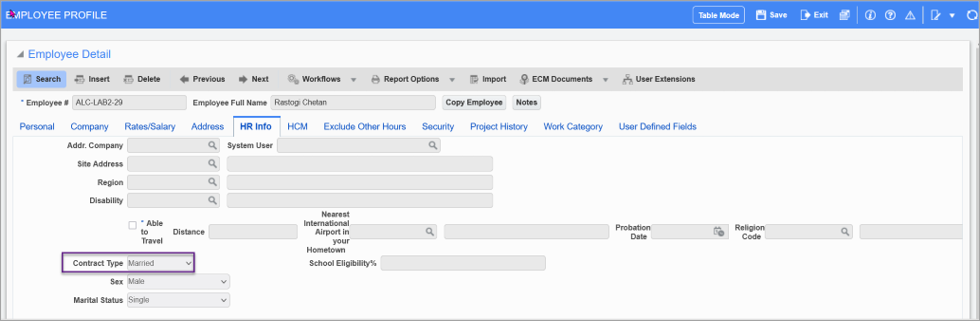
Pgm: PYEMPLOY – Employee Profile; standard Treeview path: US Payroll > Setup > Employees > Employee Profile – HR Info tab
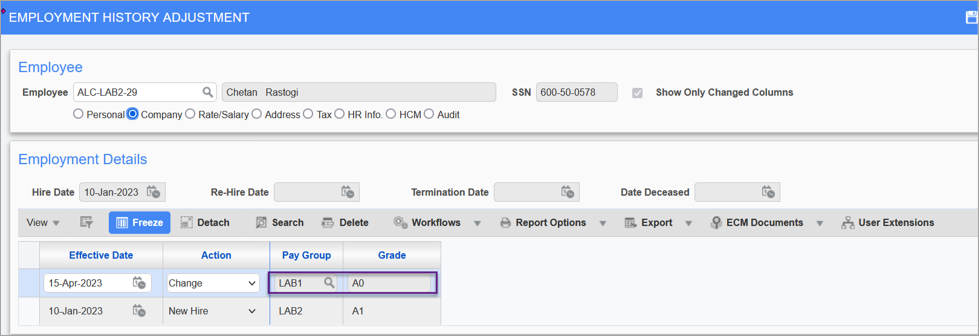
Pgm: PYHISADJ – Employment History Adjustment; standard Treeview path: US Payroll > Utilities > Employment History Adjustment
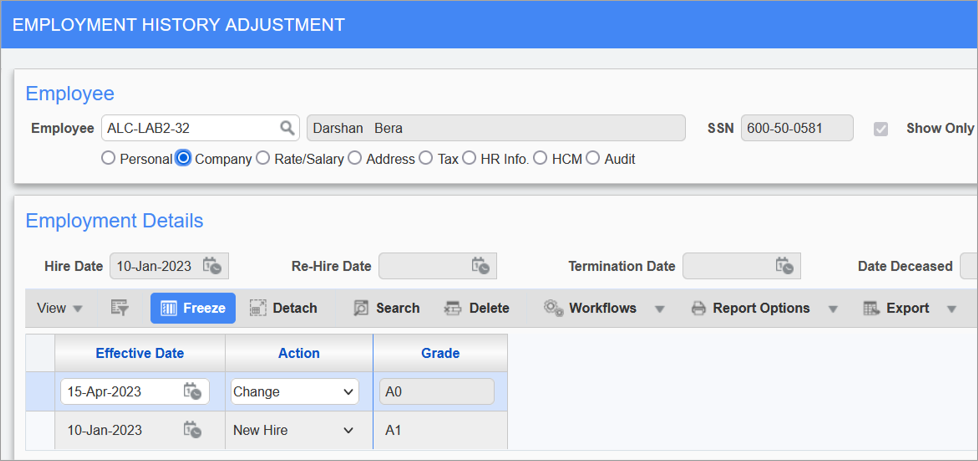
Pgm: PYHISADJ – Employment History Adjustment; standard Treeview path: US Payroll > Utilities > Employment History Adjustment
ALC-LAB2-32: Changes updated successfully.
Pgm: PYHISADJ – Employment History Adjustment; standard Treeview path: US Payroll > Utilities > Employment History Adjustment
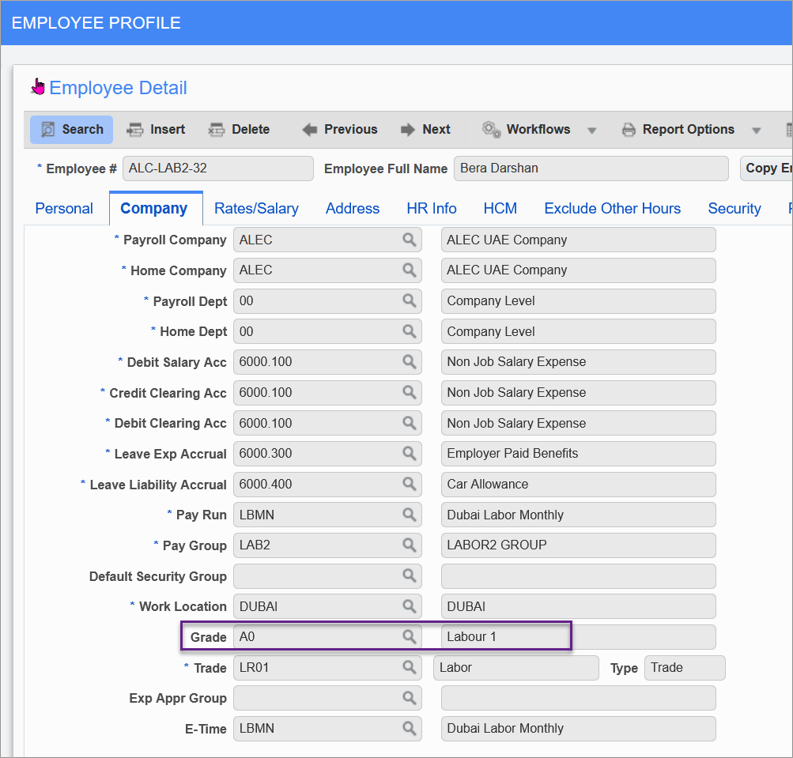
Pgm: PYEMPLOY – Employee Profile; standard Treeview path: US Payroll > Setup > Employees > Employee Profile – Company tab
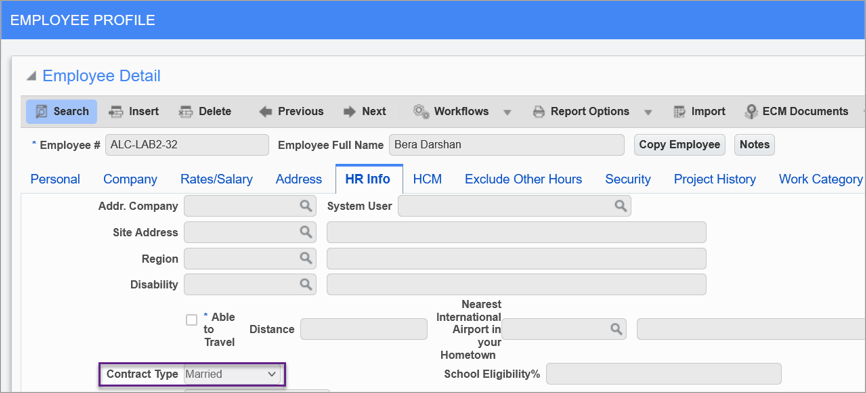
Pgm: PYEMPLOY – Employee Profile; standard Treeview path: US Payroll > Setup > Employees > Employee Profile – HR Info tab
Delete Imported Data
![Screenshot of Employee Import screen with Alert pop-up launched from [Deleted Imported Data] button.](../../../../Resources/Images/PYU_12c_for_import/PYU_EmployeeImport26.png)
To delete imported data, click on the [Delete Imported Data] button. A confirmation message will be displayed to confirm the deletion request. Click on [OK] to proceed with deletion.
Deleting data removes imported data from the temporary table and erases the corresponding CSV file.