Overview
Bank and branch maintenance screens are shared across modules and may already have had the required data entered. However, there are some minor differences in bank account setup for Payroll compared to the rest of the Enterprise system. As such, it is recommended to follow the setup shown in this guide even if the Banking sub-menu in Global Tables under the System Data module has been used already.
Currencies
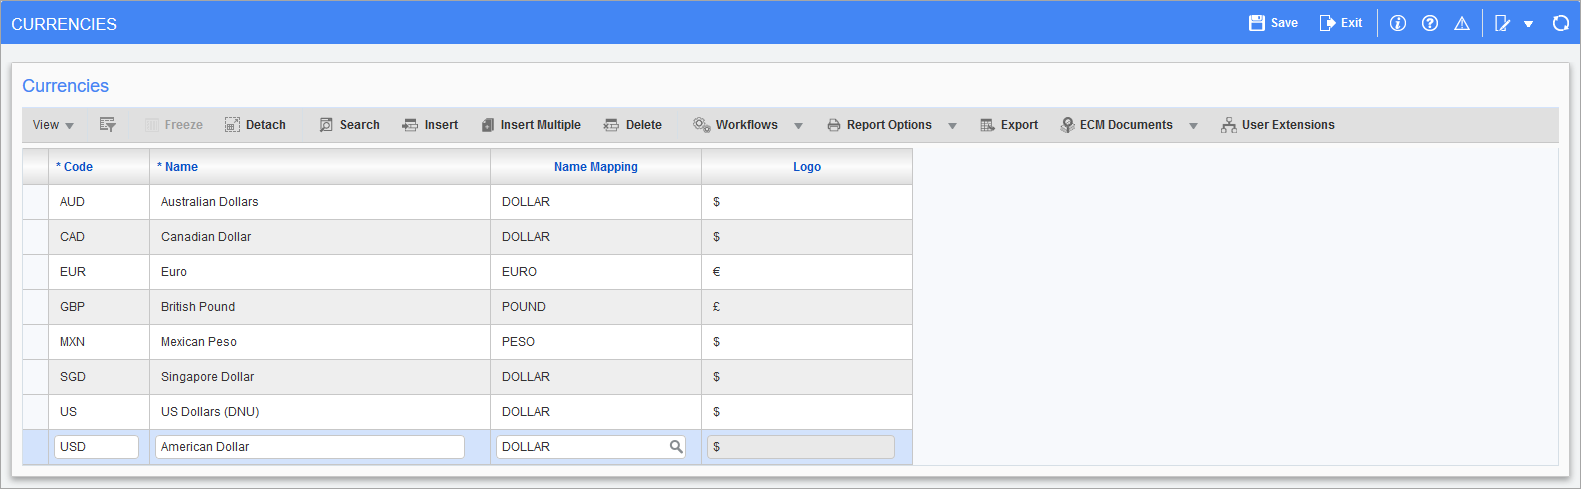
Pgm: BACURR – Currencies; standard Treeview path: System > Global Tables > Banking > Currencies
In order to use multiple currencies in the software, all applicable currency codes must be set up in this screen.
Code, Name
Enter the code and full name of the currency.
Name Mapping
Enter/select the mapped name for the currency. The corresponding symbol appears in the Logo field.
Bank Account Types
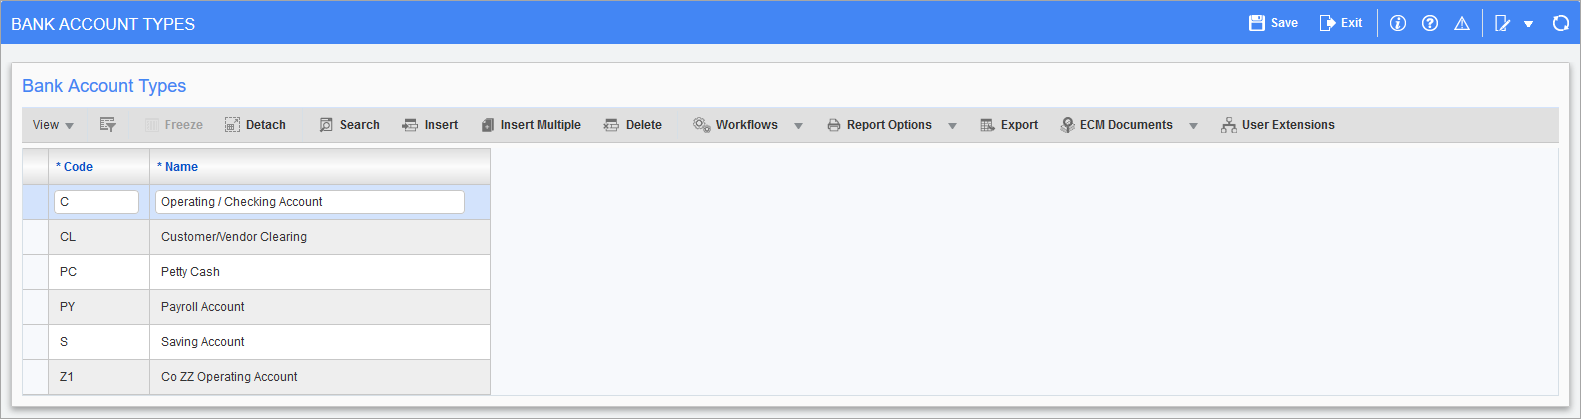
Pgm: BAACCTP – Bank Account Types; standard Treeview path: System > Global Tables > Banking > Bank Account Types
The Bank Account Types screen is used to define the types of bank accounts used in an organization.
NOTE: Bank account types are mandatory for the setup of bank accounts in the Bank Account Maintenance screen. For this reason there must be at least one bank account type defined for each company.
Code, Name
Enter the code and names for the bank account type.
Banks
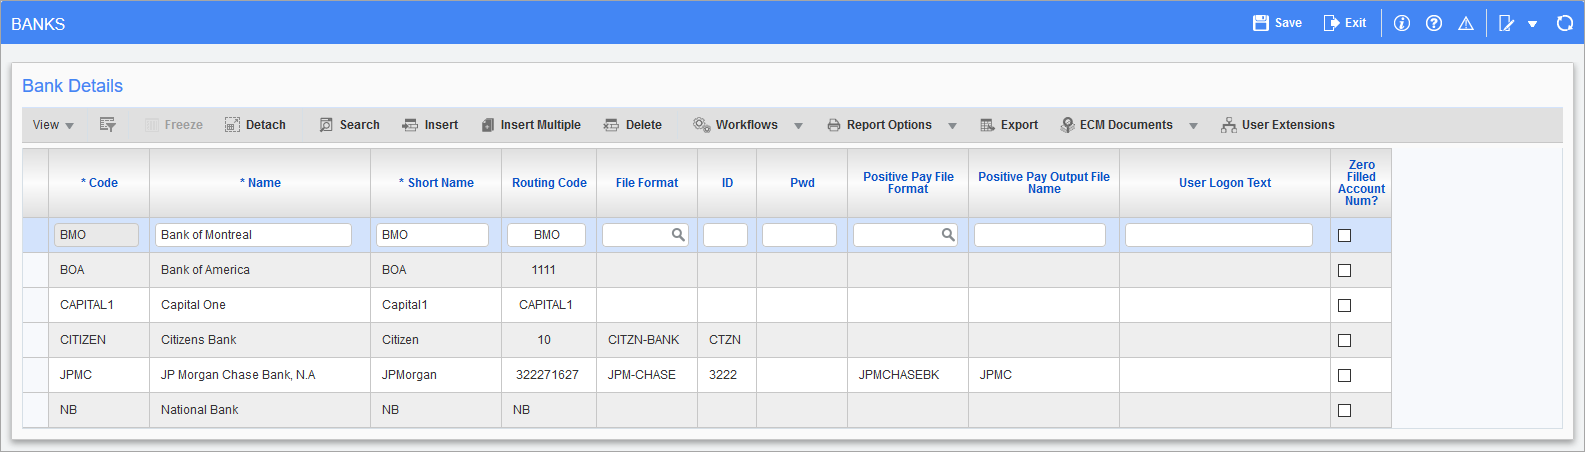
Pgm: BABANK – Banks Details; standard Treeview path: System > Global Tables > Banking > Banks
The Banks screen is used to define the banks that can be accessed through the Payroll module. For those companies using electronic funds transfer (EFT), these include the banks that distribute the payroll, as well as all the different banks used by the employees to receive their pay.
NOTE: This maintenance screen is only related to Payroll Processing. Additional bank setup is required in order to use other modules. See the System Data guide for more details.
Code
Enter the code for the bank.
Name, Short Name
Enter the full and short names of the bank.
Routing Code
Enter the routing code, a bank-defined code for the purposes of direct deposit.
ACH Date Format
Enter the desired date format to appear on ACH Check/Register reports. If no value is entered in this field the format is “YYMMDD”. For example, the third of January, 2015 will appear as “150103”.
File Format
Enter/select the file format required for the bank. The file format is provided by the bank and represents the format of the direct deposit file.
ID
Enter the identification code of the bank.
PWD
Enter the bank password.
Positive Pay File Format
Enter/select the positive pay file format required for the bank. The positive pay file format is provided by the bank and represents the format of the direct deposit file.
Positive Pay Output File Name
Enter the positive pay output file name.
User Logon Text
If specific logon information must be sent with the direct deposit file, then enter that information here. This requirement is specified by the financial institution.
Zero Filled Account Num? – Checkbox
Check this box to have the account number maintain zero value leading digits. This requirement is specified by the financial institution.
Bank Branches
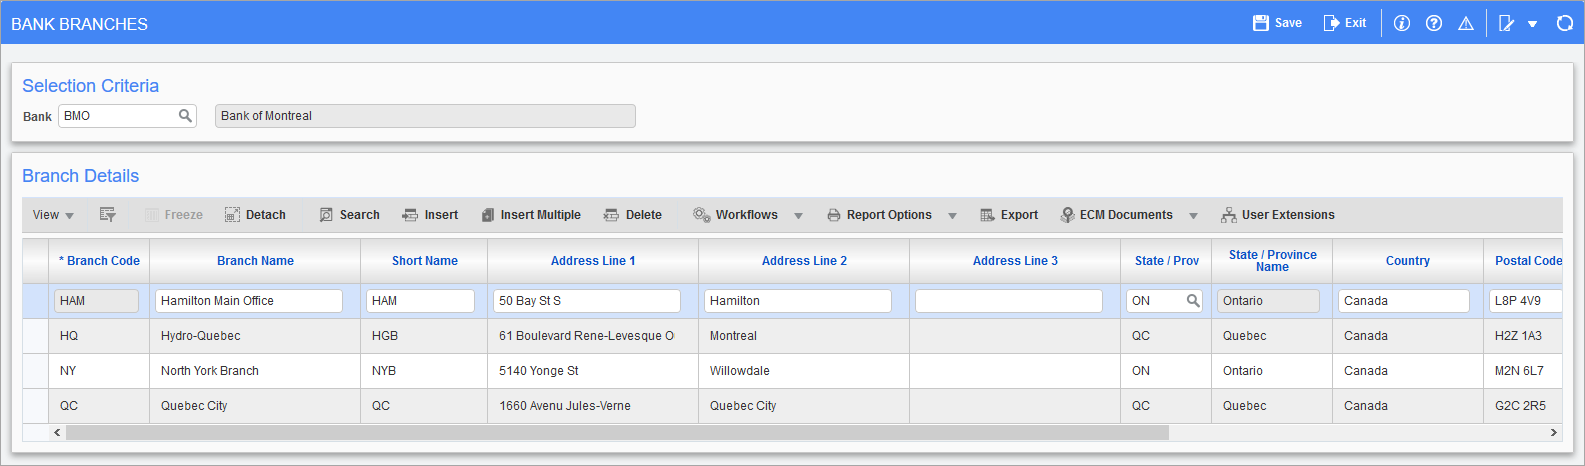
Pgm: BABRANCH – Bank Branches; standard Treeview path: System > Global Tables > Banking > Bank Branch
The Bank Branches screen is used to define the branches that are accessed using the Payroll module. For those companies using EFT, this includes the branches from which the payroll is distributed as well as all the different branches that are used by employees to receive their pay.
Bank
Enter/select the bank for which a branch is to be defined or viewed in the table below. This code can be set up in the Banks screen.
Branch Code
Enter the code for the branch.
Branch Name, Short Name
Enter the full and short names of the branch.
Address Line (1-3)
Enter the street address of the branch. This address is required to use the “Print Bank Address” option on checks.
State/Prov, Country, Postal Code
Enter/select the state, country, and postal code of the bank branch. The name of the state appears in the State/Province Name field.
Contact Name
Enter the name of the contactable employee at the bank branch.
Tel Cntry Code, Area Code, Phone Number
Enter the phone number of the bank branch.
Bank Account Maintenance
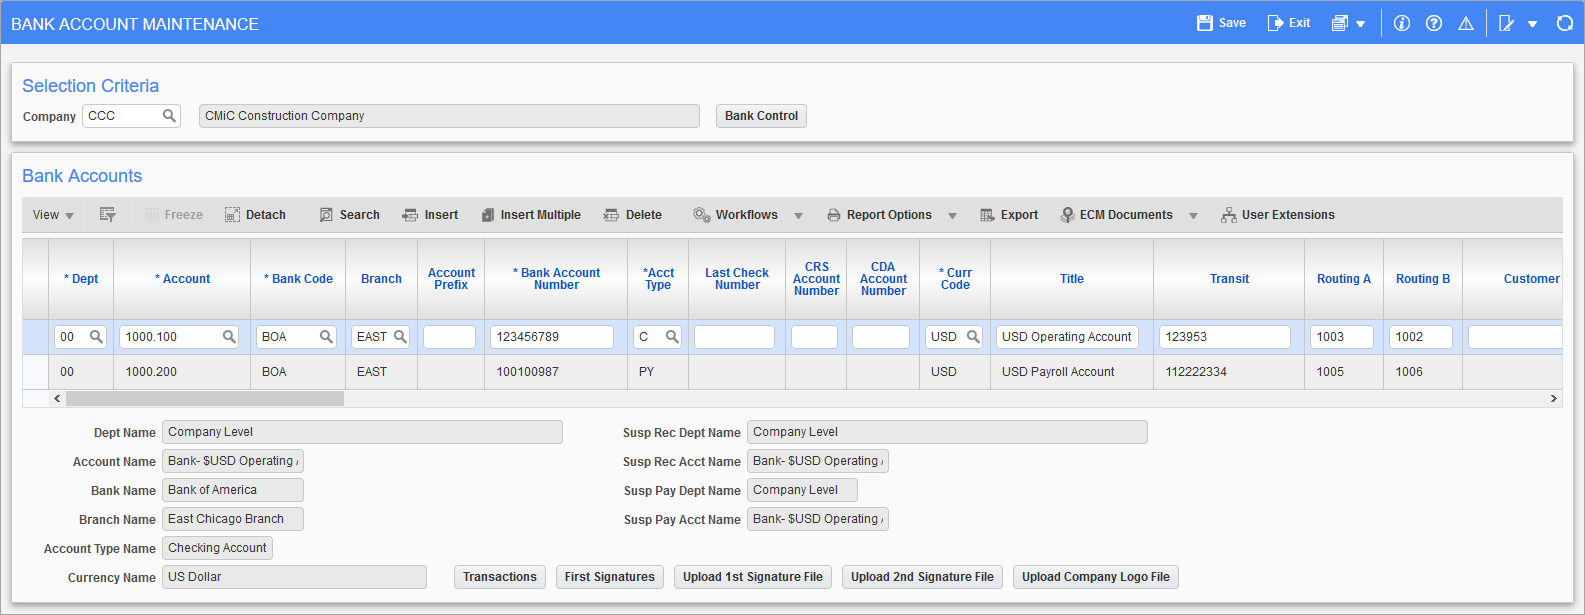
Pgm: BABNKACC – Bank Account Maintenance; standard Treeview path: System > Global Tables > Banking > Bank Account
The Bank Account screen is used to define the bank accounts used by the company to distribute payroll funds. Please note that employees can be paid out of different pay groups, and each pay group can be paid out of a different bank account.
The bank accounts defined in this screen are used to process cash receipts, cash payments, and payroll transactions. Bank accounts are based on specific General Ledger accounts and so must be assigned a unique General Ledger account.
NOTE: Do not enter employee bank account information into this screen. Employee bank account information can be entered in the Employee Direct Deposit screen (standard Treeview path: US Payroll > Setup > Employees > Direct Deposit).
Dept
Enter/select the department to which the account belongs.
Account
Enter/select the General Ledger account to associate with the bank account. The GL account must have been set up previously in the Maintain Accounts screen in the General Ledger module (standard Treeview path: General Ledger > Setup > Maintain Accounts).
Bank Code
Enter/select the bank code for the bank to which this account belongs.
Branch
Enter/select the branch code from the listing provided by setups in the Bank Branch Maintenance screen.
Account Prefix, Bank Account Number
Enter the prefix and number of the account.
Acct Type
Enter/select the bank account type for this account.
Last Check Number
Enter the last check number used for this account. The system uses this to determine the next check number to use.
CRS Account Number, CDA Account Number
Enter the CRS and CDA account numbers.
Curr Code
Enter/select the currency used by the bank account.
Title
Enter the bank account title.
Transit
Enter the bank account transit number. This number is provided by the financial institution.
Routing A/B
Enter the A and B routing numbers for the bank account.
Customer ID
Enter the customer ID number.
PosPay Cust ID
Enter the positive pay ID.
Check Date Format
Select the check format from the drop-down menu.
Susp Rec Dept Code, Susp Rec Acct Code, Susp Pay Dept Code, Susp Pay Acct Code
Enter/select the department and GL account codes for the receiving and payment accounts.
Third Party Check File Format
Select the file format from the drop-down menu.
EFT File Format
Select the EFT file format from the drop-down menu.
1st Signature File Name, 2nd Signature File Name
Enter the 1st and 2nd signature filing names to be printed on AP checks.
Company Logo File
Enter the path to company logo to be printed on AP checks.
NOTE: Payroll check logos are set up in the Check Options tab of the Pay Groups screen in the US Payroll module (standard Treeview path: US Payroll > Setup > Company > Pay Groups).
Pay Through
Enter the method through which the account pays.
Currency Designation
Enter the ISO currency code for the currency of the bank account.
Amt For Two Signatures
Enter the monetary amount, above which, two signatures are required to initiate a transfer.
Amt For Manual Signature
Enter the monetary amount, above which, a manual signature is required to initiate a transfer.
Comp Alternate Address Code
Enter/select the alternate address code for the company.
Print Company Address, Print Bank Address, Print Check Frame, Print Routing, Print MICR – Checkboxes
Check these boxes to print the company address, bank address, check frame, routing number, and MICR code, respectively.
Select First Signature Name During Check Printing Process – Checkbox
Check this box to have the first signature name appear on all printed checks.
File Number
Enter the file number for the account.
Last Statement
The last bank statement from the account appears here.
Balance
The balance of the account appears here.
IBAN Number
Enter the IBAN number for the account.
Transactions, signatures, signature files, and the company logo can all be uploaded with the buttons at the bottom of the screen.