Prequalification Approval Workflow Setup
-
Enable the workflow to be used for the tenant by navigating to the Workflow Event Maintenance screen and enabling the CMiC PM Vendor Prequalification workflow by checking the 'Active' checkbox next to it.
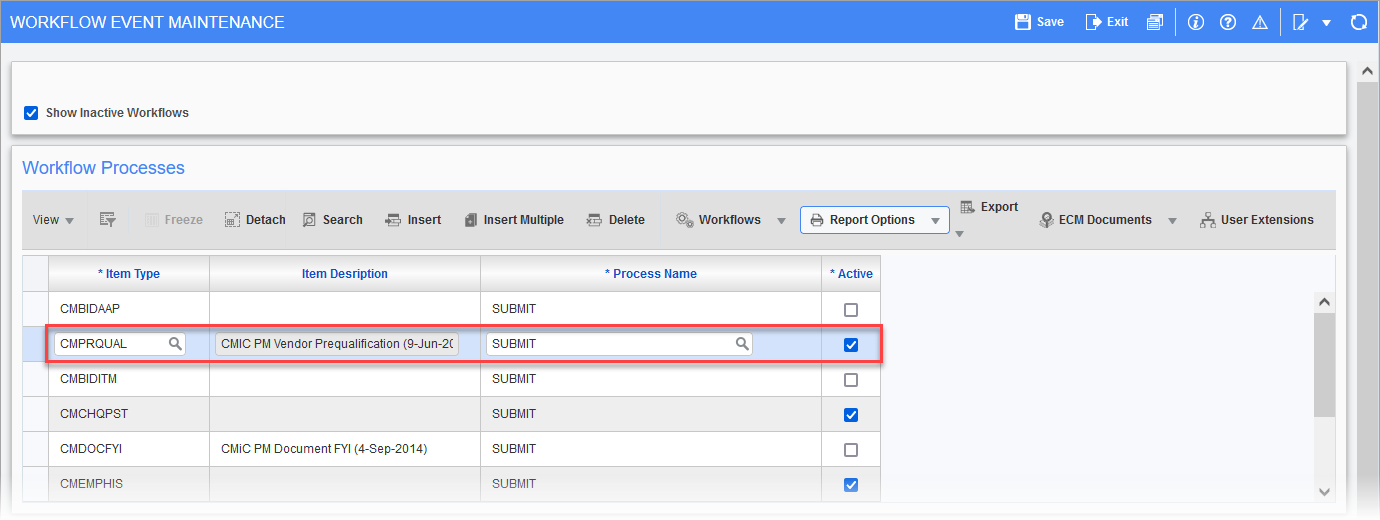
Pgm: WKFEVMNT - Workflow Event Maintenance; standard Treeview path: Workflow > Setup > Event Based Launch Maintenance
NOTE: If the screen is not available on the Treeview, it can be added using the Treeview Builder tool. The program code is WKFEVMNT and can be found in the standard default menu.
-
Navigate to the Resource Lookup Rules screen found under Workflow > Setup on the Treeview.
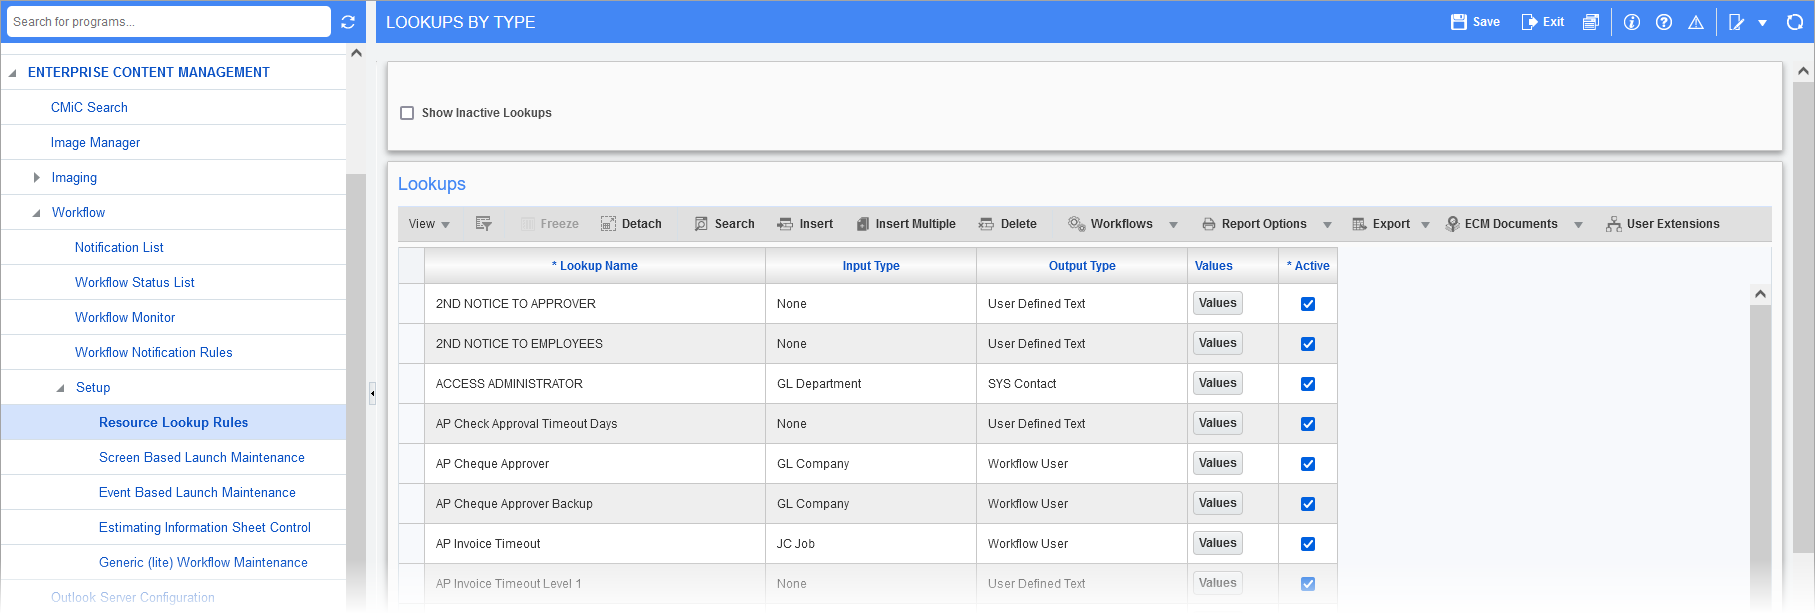
Pgm: WKFLOOK - Lookups By Type; standard Treeview path: Workflow > Setup > Resource Lookup Rules
The workflow lookups used are:
-
Prequal Admin 1
-
Prequal Admin 2
-
Timeout Minutes - External Pre-qual Approvers
-
Timeout Minutes - Internal Pre-qual Approvers
-
-
Search for Prequal Admin 1 and Prequal Admin 2 lookups. The [Values] button on the right of these lookups allows the ability to add one person per lookup. Insert a record and to the right of User ID, use the LOV to select a user. These users will be the Prequal team and will receive certain notices from Workflow.

[Values] button pop-up window
-
The two other values required, but that should already have default values, are Timeout Minutes - External Pre-qual Approvers and Timeout Minutes - External Pre-qual Approvers. This is a timeout setting for approval that notifies the Prequal admins if the approvals are not being completed in a timely manner.
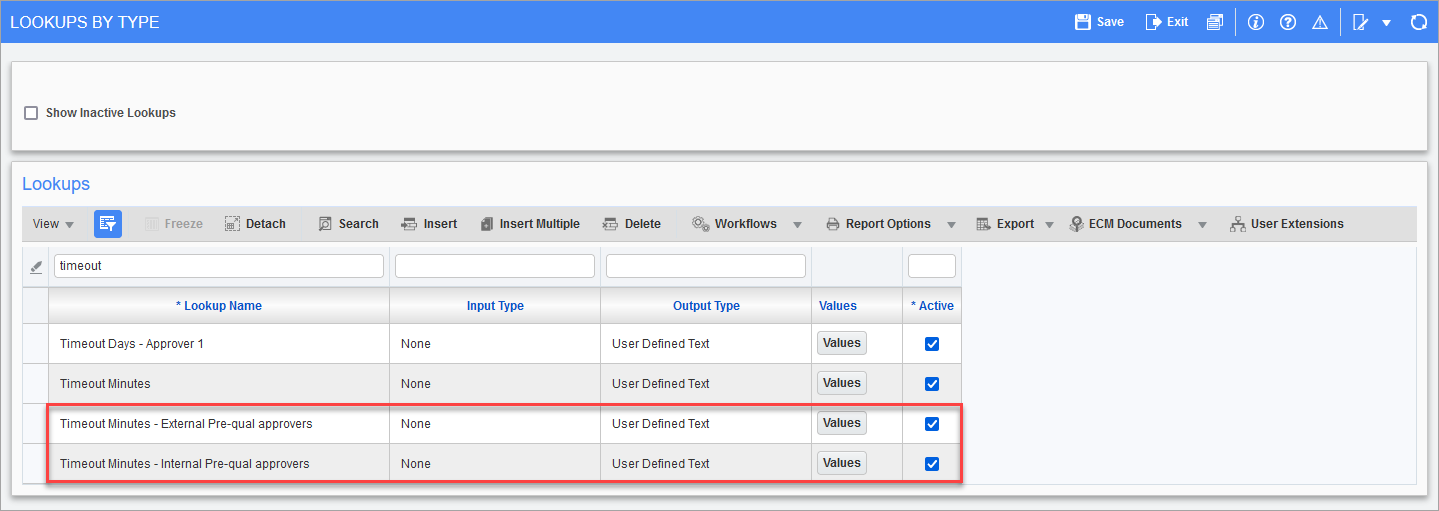
Pgm: WKFLOOK - Lookups By Type; standard Treeview path: Workflow > Setup > Resource Lookup Rules
-
The Prequalification department email address should already be set in the Prequalification Control screen. This will be used by Workflow for rejection notices (e.g. missing approvers) and when the workflow is completed.
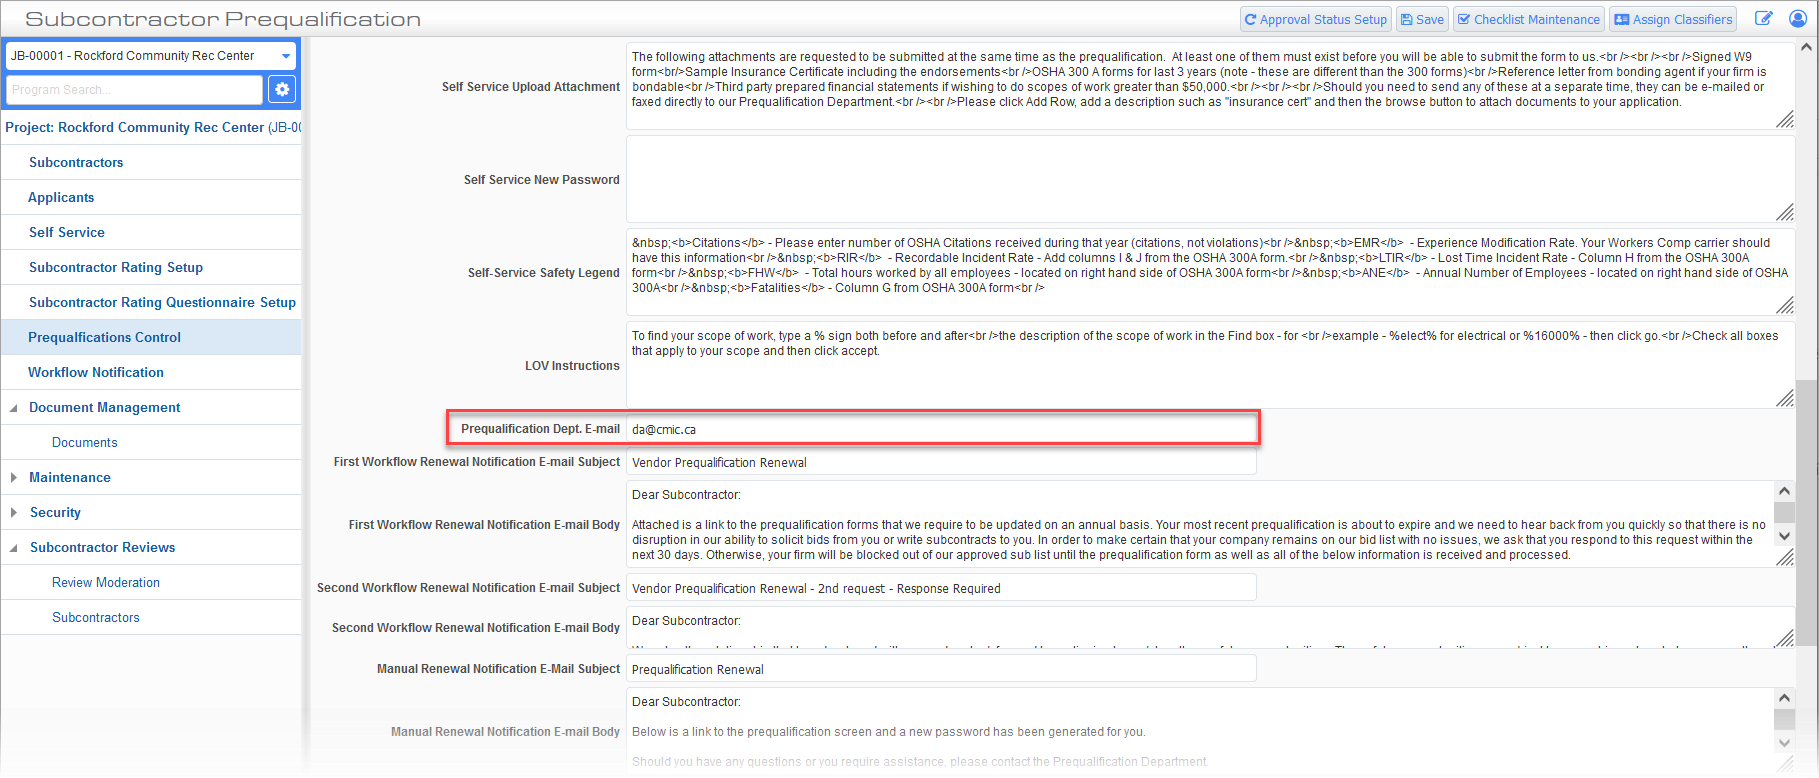
Subcontractor Prequalification > Prequalification Control
-
In the Subcontractor Prequalification Applicants or Subcontractors screens, there should now be a [Workflow] button. This is used to start the Approval workflow.
-
To set the approvers, go to the Approvals tab of the record.
-
Use the
 (Insert New Row) icon on the right to add an approver.
-
The year ending is the current year. Each year when the subcontractor is to be approved again, insert a new record and enter the new year. The audit of all approvals is kept together in the Approvals tab so this allows for the ability to see when each approval was done and by whom.
-
Order is the order in which approvals will happen. For example,1 is first, 2 is second, etc.
-
Approver name chosen from the LOV.
-
Approval type is what part of the prequalification are they approving. Note that if the regional approver is chosen, the order number will disappear. The regional approver(s) will be added to the approval process once all the other approvers in sequential order have finished. There can be a maximum of 20 regional approvers.
-
-
-
Each user in the workflow process can approve or reject. Doing so does not affect the workflow continuing and completing. The user’s response is logged in the Approvals tab, they can also enter comments when they approve/reject and those will be logged and the Prequal team can review those comments.
-
The workflow can be restarted with new approvers once any rejections are handled and if a new approval is required.