General Overview
The import function is used to import header and detail information into purchase orders, warehouse receipts, cost receipts and job receipts. It can also be used to import header information into vouchers associated to POs.
The [Import] button is located on the Block Toolbar of the header section and detail section of the screen.
![Screenshot of [Import] buttons on Purchase Order Entry.](../../../../Resources/Images/PO_12c/PO_Importing1.png)
[Import] button located on the Block Toolbar
The [Import] button allows users to import records from a CSV (Comma Separated Values) spreadsheet file. Users can download a CSV template file and use that template to enter data as required. Records can then be uploaded, validated and imported into the Header section or the Detail section of the screen.
NOTE: The location of the [Import] button on the Block Toolbar determines whether users are working with header or detail information. Use the [Import] button on the Header Block Toolbar to upload header records or access the header .csv template. Use the [Import] button on the Details Block Toolbar to upload detail records or access the details .csv template.
Click on the [Import] button to open the Data Import pop-up window. The Data Import pop-up window is used to download templates as well as upload files.
To download a .csv template, click on the down arrow next to the [Upload New] button and select “Download CSV Template” from the drop-down menu.
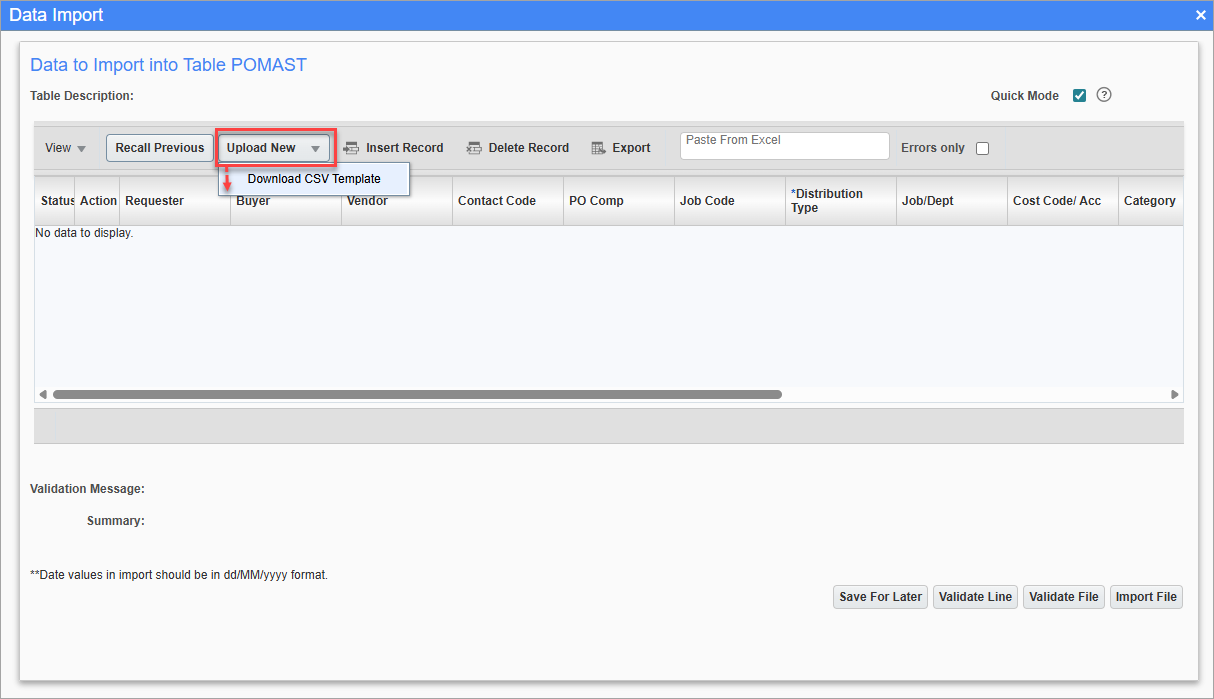
Data Import Pop-up – Download CSV Template
Open the .csv file either in a spreadsheet (e.g. MS Excel) or in a text editor (e.g. Notepad) and enter data as required. Remove any asterisks (*) that may indicate a required field as per the CMiC database column definitions. Also ensure that the text template is not altered in any other manner, other than removing the asterisks (*).

Example of .csv template file in spreadsheet (MS Excel)

Example of .csv template file in text editor (Notepad)
Users can upload data from a .csv file into CMiC tables in one of two ways.
Users must first click on the [Import] button on the Header or Detail Block Toolbar of the screen to open the Data Import pop-up window.
-
Paste From Excel – Directly copy the records (exclude the header) from a spreadsheet application, such as MS Excel, and paste into the Paste From Excel field in the Data Import pop-up window.
-
[Upload New] – Click on the [Upload New] button on the Data Import window. The Upload New File pop-up window will open, allowing users to navigate to the directory that contains the .csv file they would like to upload. Choose the file and click on the [Upload] button. The .csv file must contain the header record as well (for the system to correctly parse the data).
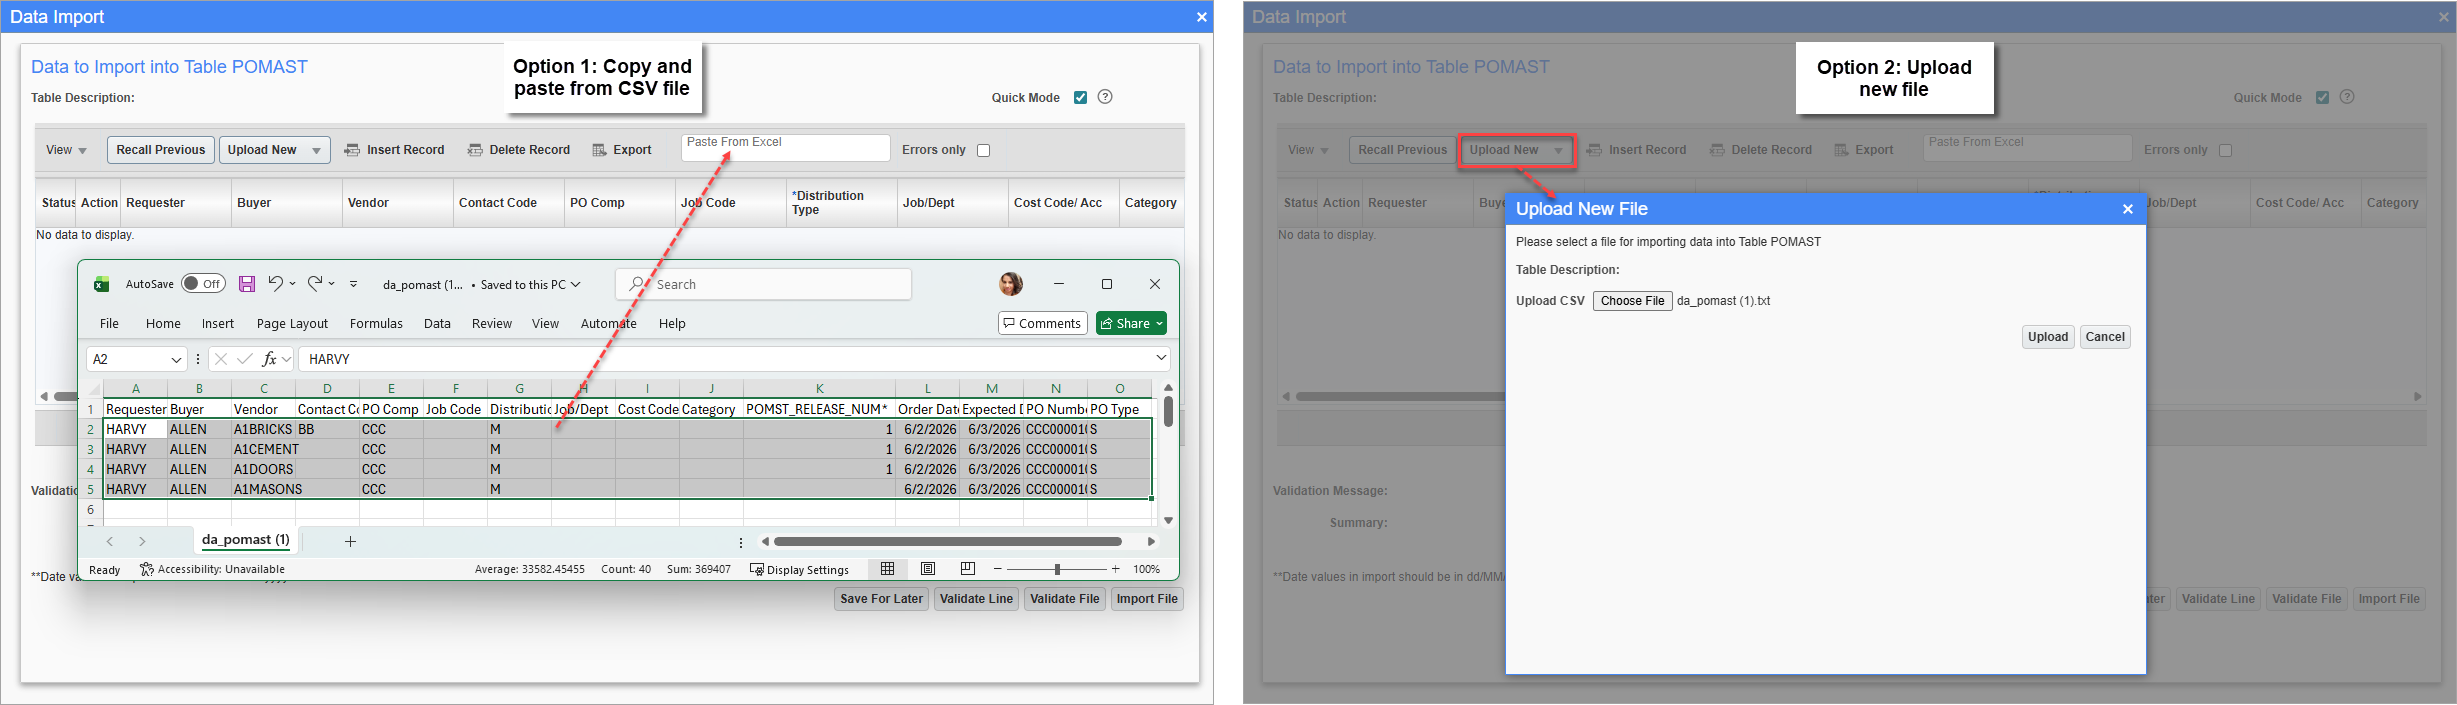
Data Import pop-up window showing two ways to upload .csv files
Validating and Importing Files
Once the file is uploaded, users must validate the file and import. If the file is not validated and imported, the data will not be saved to the CMiC tables.
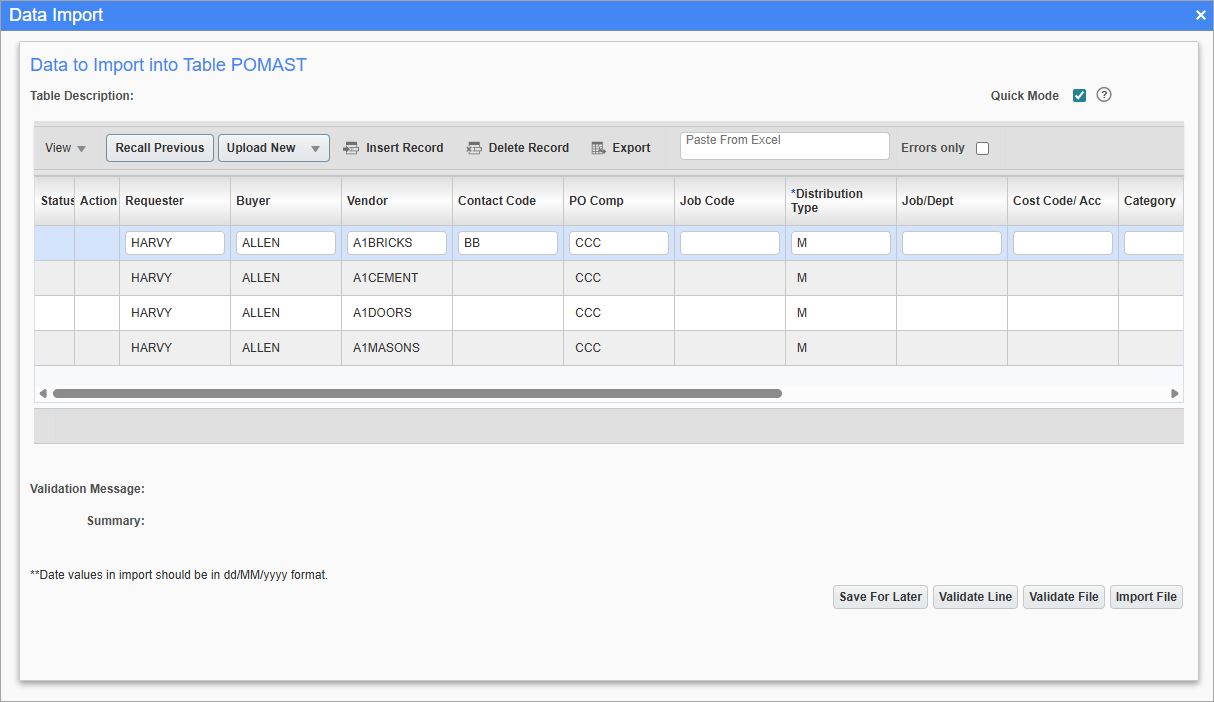
Data Import pop-up displaying records ready to be validated and imported
[Save] – Button
Commits any changes made to the imported records.
[Validate Line] – Button
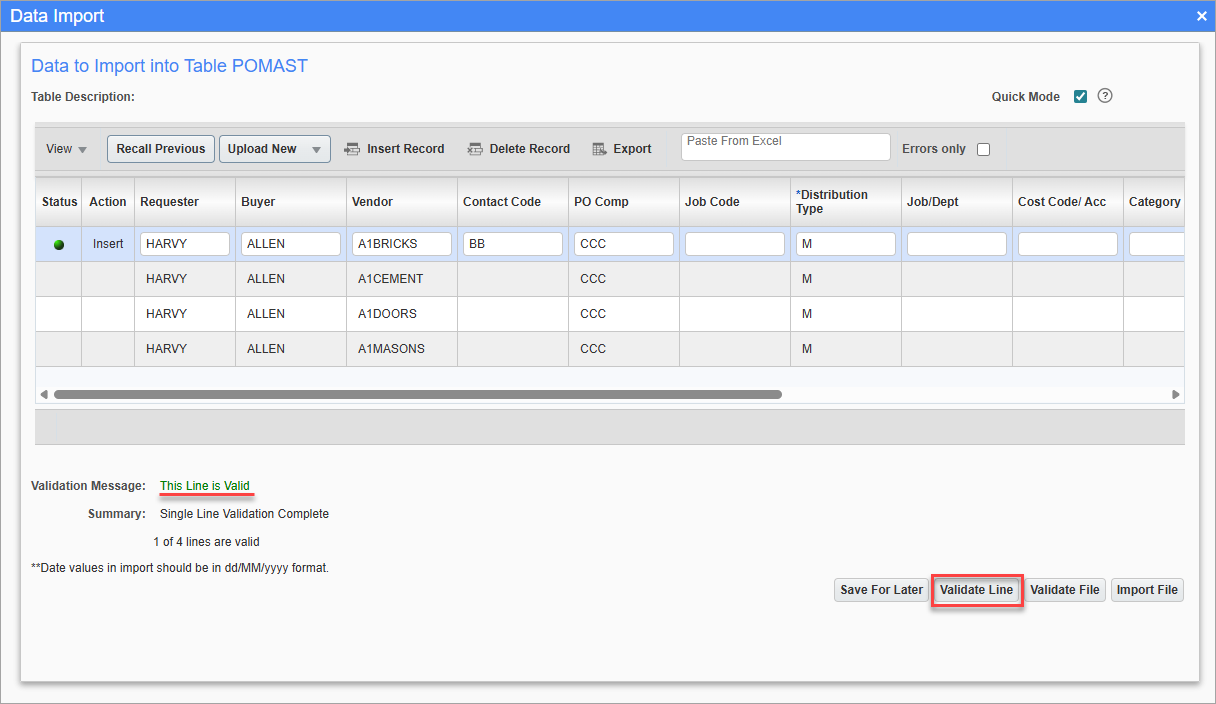
When a record is selected, use the [Validate Line] button to validate a specific line and make corrections, if required.
[Validate File] – Button
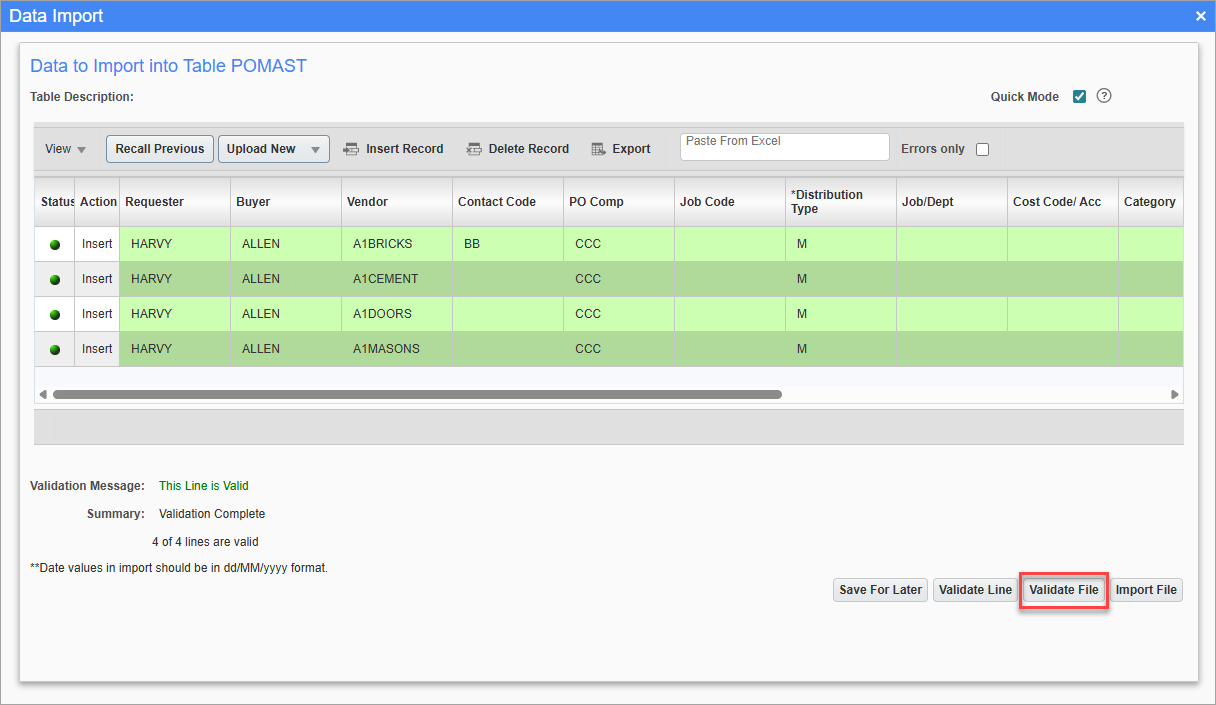
Use the [Validate File] button to validate all the records in a file
[Validate and Import File] – Button
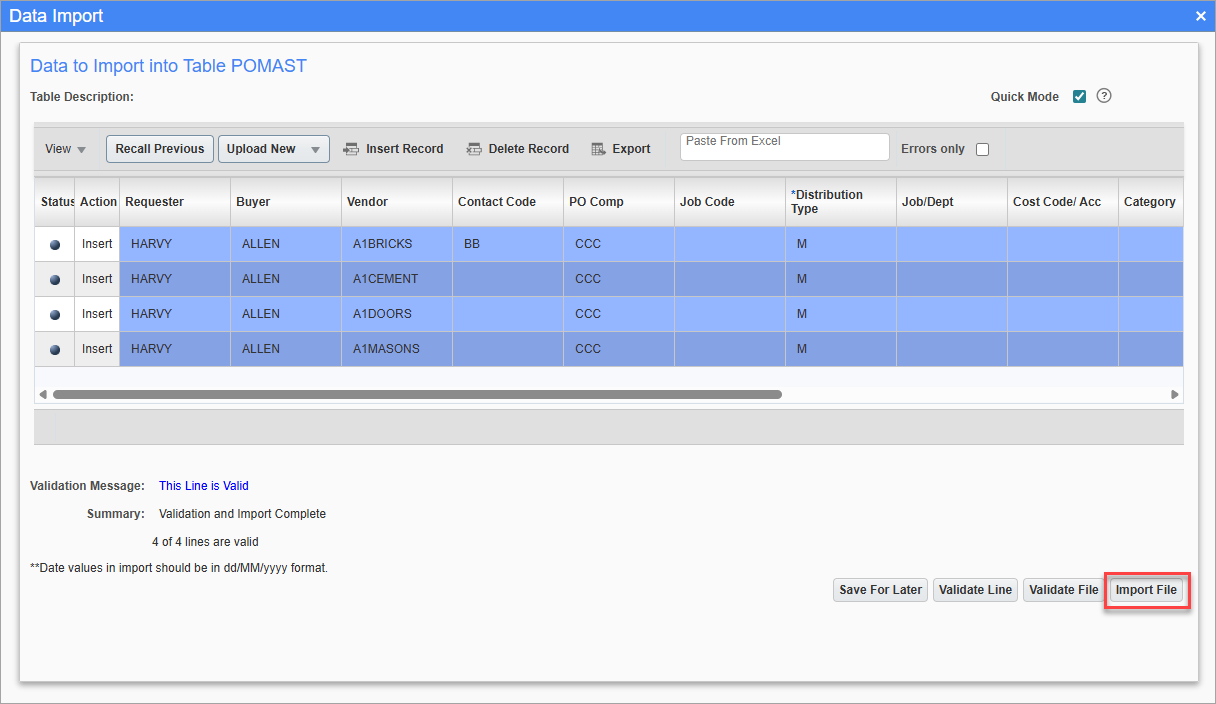
Once data is validated, use the [Import File] button to import data into the CMiC tables.