This guide describes a more organized approach with collection and environment in Postman. The collection will have all the API request that you may want to test. The environment will contain all the variables used in the API request for ease of switching between different environments like TEST and PROD. Examples of different environments are the API server, OAuth application, etc.
Requirements From Identity Provider
-
Application (client) ID
-
Client Secret
-
Only if planning to use the Client Credentials Flow
-
-
Authorization URL
-
With Entra ID, use the v2 endpoint
-
-
Token URL
-
With Entra ID, use the v2 endpoint
-
-
Scope
NOTE: With Entra ID and the Client Credentials Flow, you will need to know the Application ID URI, as the scope is different and it is the prefix with a suffix /.default.
Setup in Postman
-
Create a Collection
This is a collection of requests which can be setup to use environment values for ease of switching between different settings. For example, there may be environment values that differ between TEST and PROD.
-
Create an Environment
This is the name-value pairs for central maintenance where the name is used in the collection request.
For example, Name = api-server with value = https://myapi.server.com, then in the collection request use {{api-server}}.
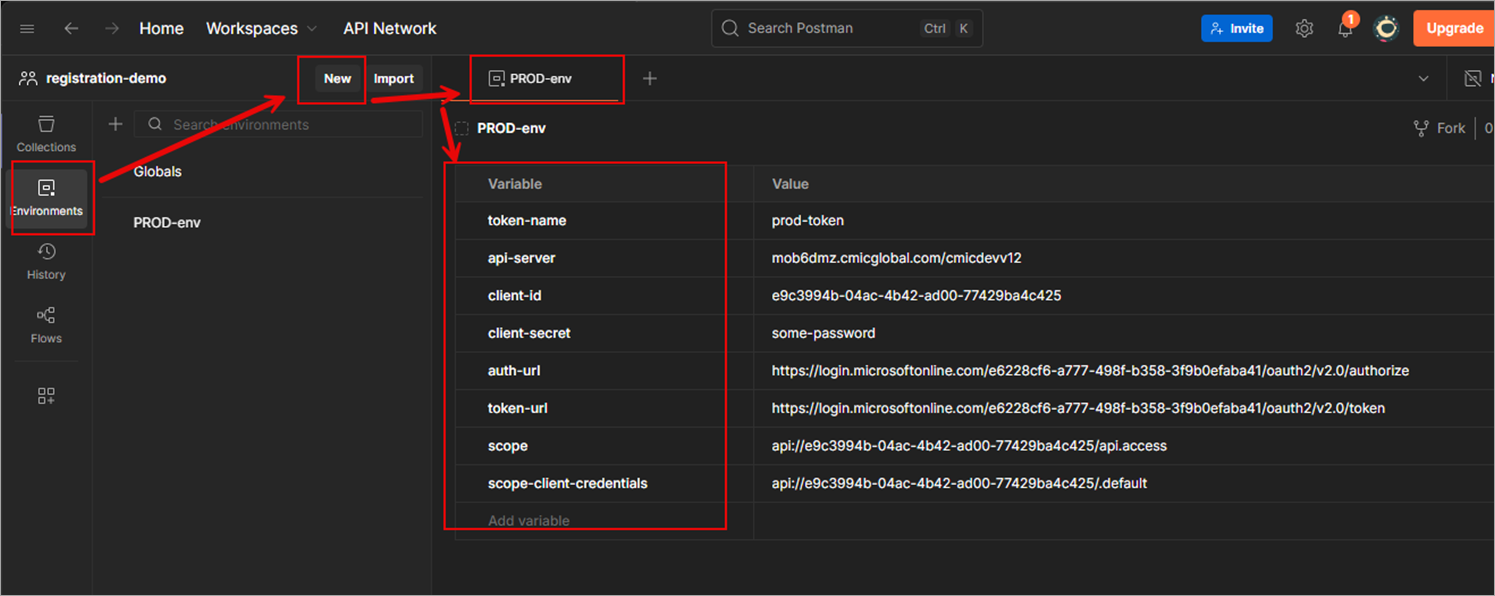
Setup Environment
-
Click Environments.
-
Click New.
-
Enter a name by replacing the placeholder text, "New environment".
-
Create the necessary variables.
-
The following template environment file can be imported if needed.
Setup Collection
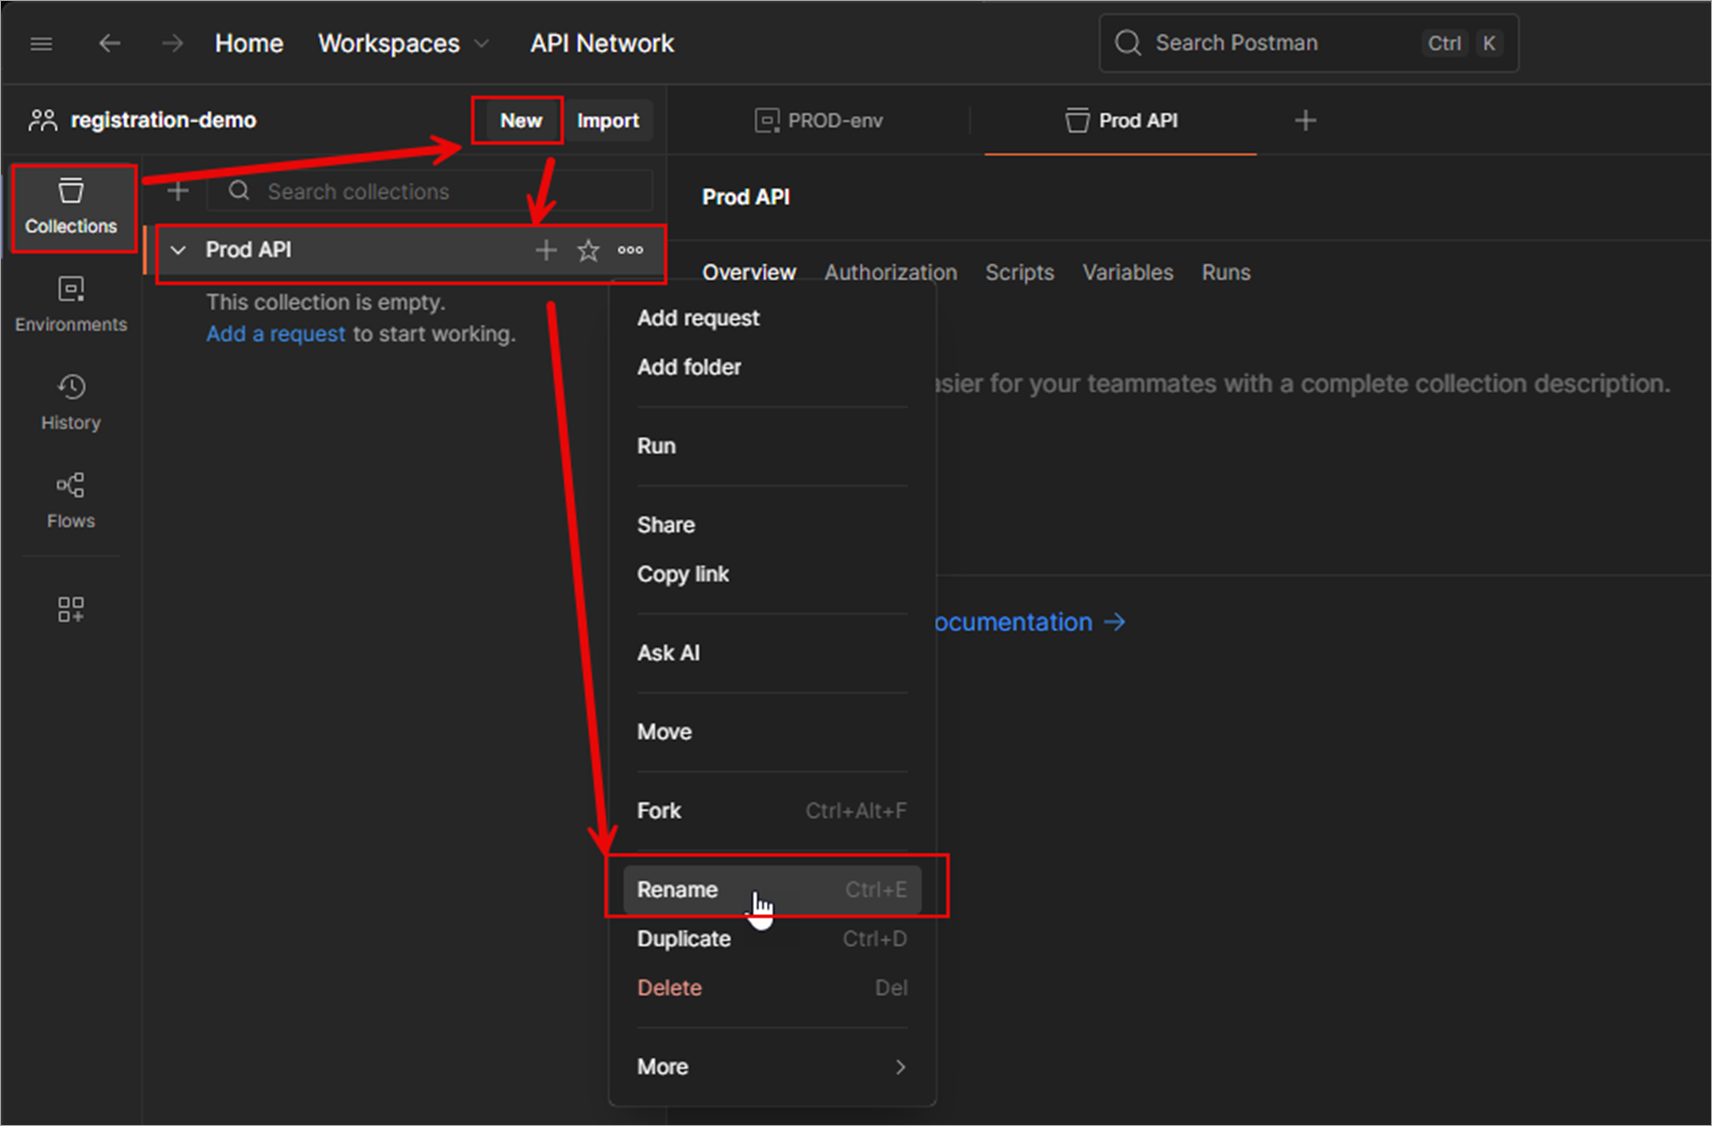
NOTE: If you already have a collection to use, the following steps can be skipped.
-
Click Collections.
-
Click New.
-
Click Collection.
-
Right-click on Collection and select "Rename" from the drop-down menu.
-
Enter a name (e.g. PROD APIs).
-
Click on "Add Request".
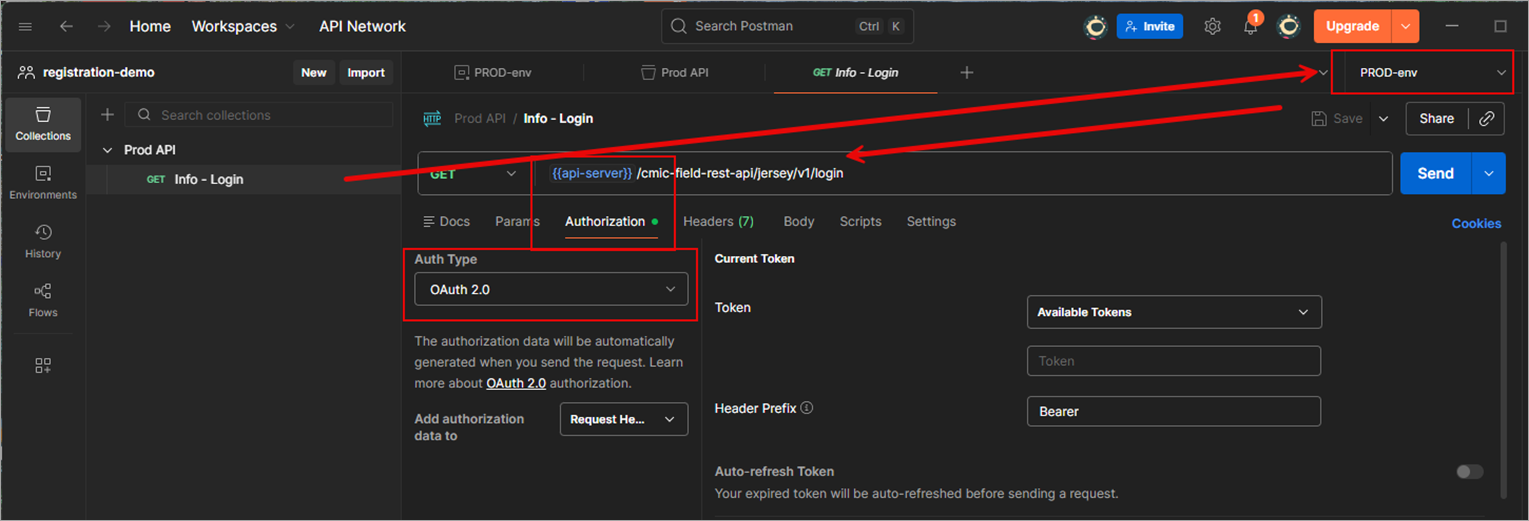
Setup Request
-
Select your environment (top right).
-
Set the HTTP Request URL = {{api-server}}/api-uri.
-
Replace "api-uri" with the API URI you want to test, e.g. /cmic-field-rest-api/jersey/v1/login.
-
Click the Authorization tab.
-
Set the Auth Type to "OAuth 2.0".
-
Next to Configure New Token.
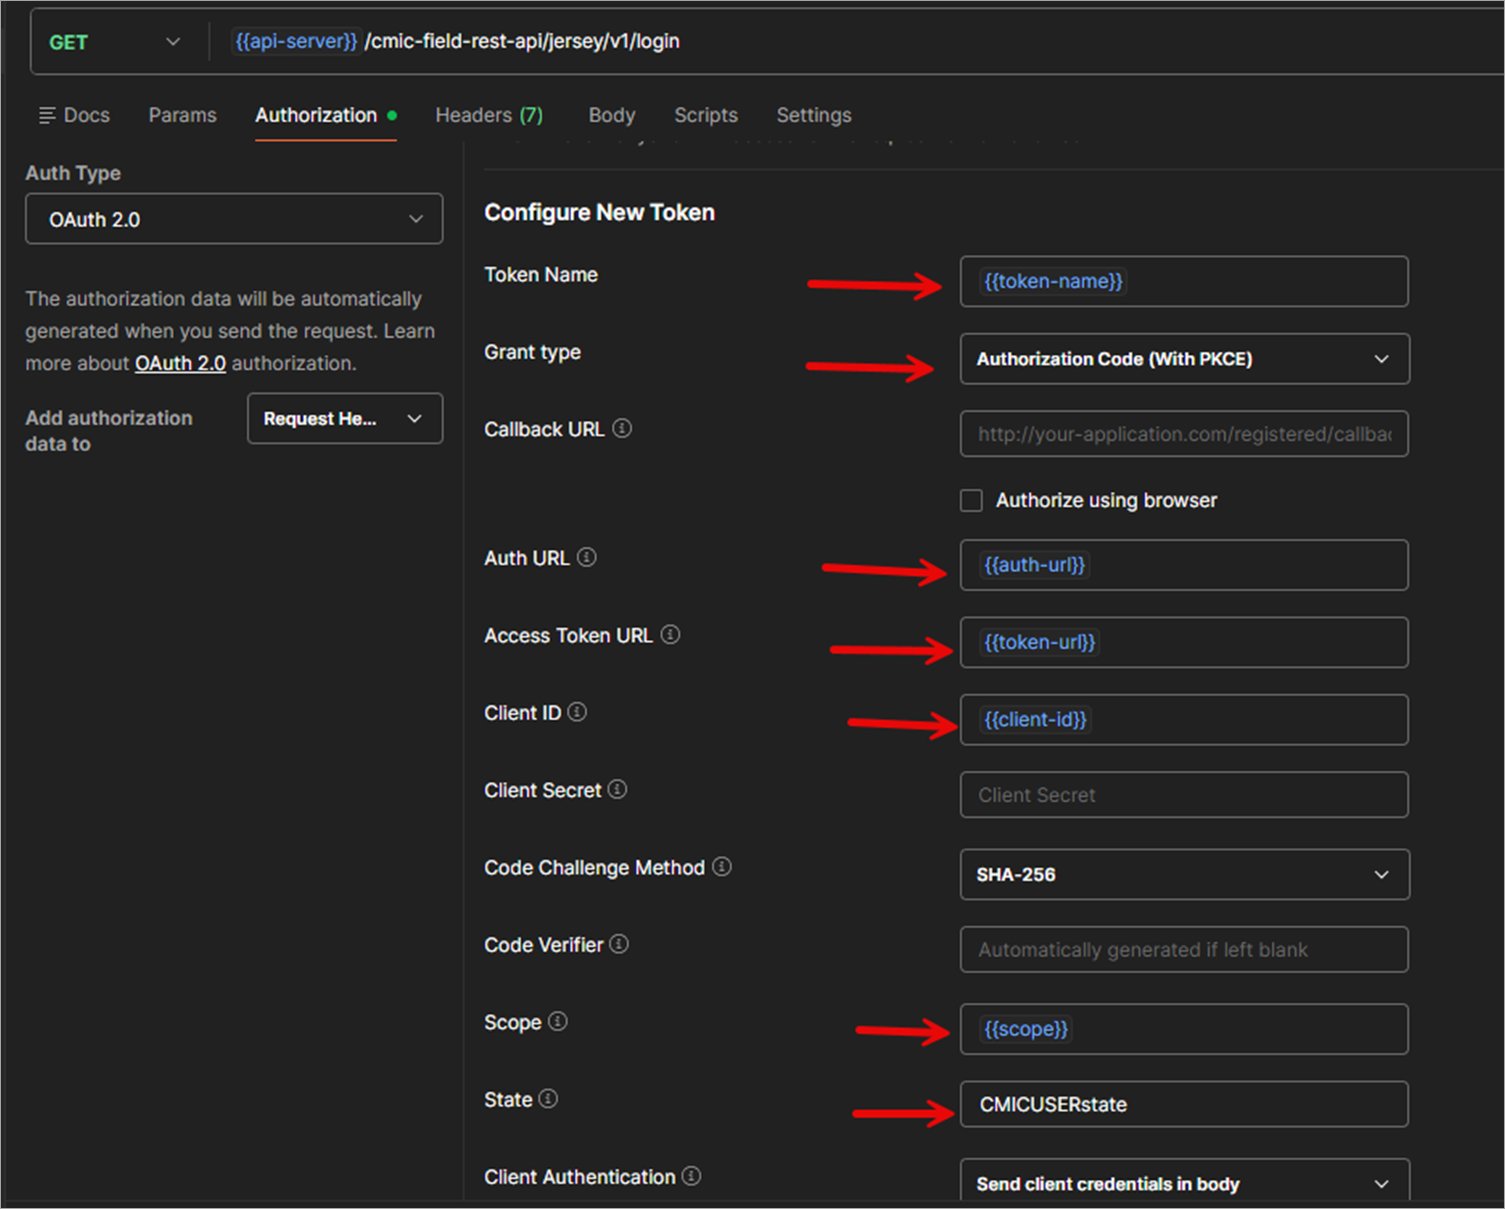
User Flow
-
Enter Token Name = {{token-name}}
-
Set Grant Type = Authorization Code (With PKCE)
-
Set Callback URL = <something setup in your application> (e.g. msauth.iso.demo://auth)
-
Enter Auth URL = {{auth-url}}
-
Enter Access Token URL = {{token-url}}
-
Enter Client ID = {{client-id}}
-
Enter Scope = {{scope}}
-
Enter State = Userstate (up to your choosing)
Userless Flow
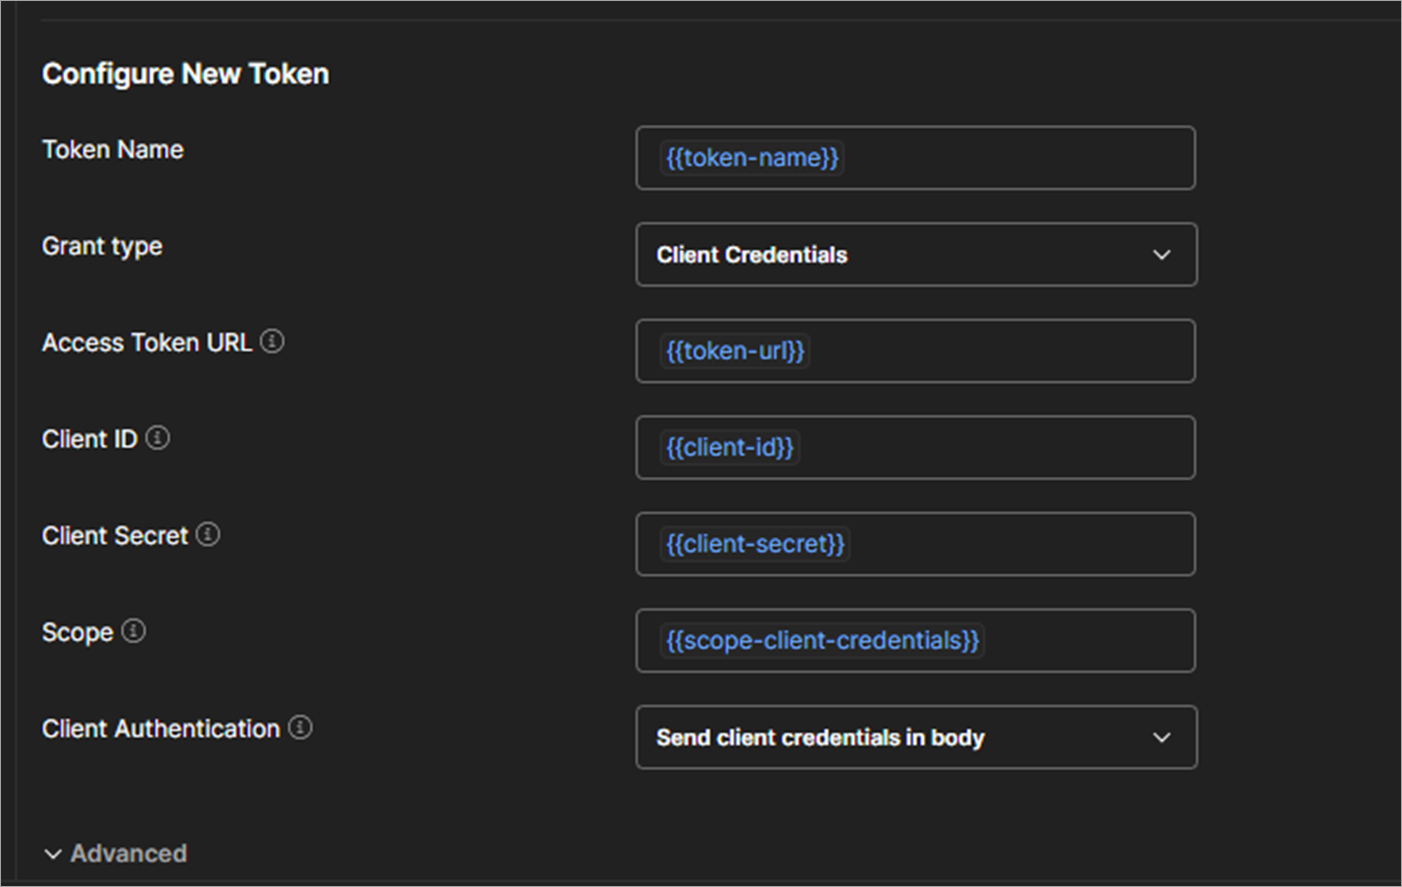
NOTE: It is best to duplicate a previous environment and update the values.
-
Enter Token Name = {{token-name}}
-
Set Grant Type = Client Credentials
-
Enter Access Token URL = {{token-url}}
-
Enter Client ID = {{client-id}}
-
Enter Client Secret = {{client-secret}}
-
Enter Scope = {{scope-client-credentials}}
Get New Access Token

Before you can make an API call, it is required to get a token.
-
At the bottom of the Authorization tab, click [Get New Access Token].
-
This will initiate the Single Sign-On process, if you have not done so before.
NOTE: Postman caches cookies. You can clear them by clicking "Clear cookies".
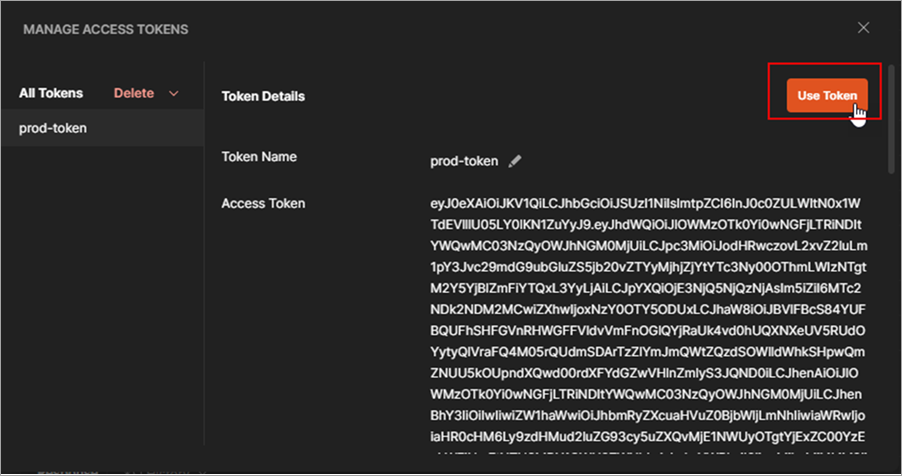
-
When the user prompt displays, click [Use Token]. This will use the token you just received for the API call.
-
Try to call the API.
-
If authentication was completed successfully, you’ll see a Success pop-up window and will proceed to another pop-up window with the latest received token.
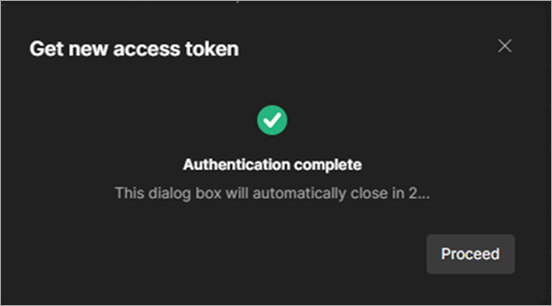
-
If you get an authentication failed, this could be setup with the application you used specified by client-id or your setup like wrong scope. Please double check your setup, the error should be clear in the console (which might be hidden in the URL or the response body).
-
Validate claims in Access Token
-
Copy the Access token and go to a site like:
-
Ensure the claims are present. For example, with Entra ID:
-
aud (appid if v1.0 token)
-
issuer
-
email
-
upn (does not need to be present if email is there).
-
Validate CMiC API is OAuth Protected
To validate that the API server is protected by OAuth, call it from a browser or from Postman without a token and the response should be as shown below:
Unauthorized access
Error reference: 0ea08ad6-b1a3-4271-81d2-3f7b5e94bf26
Time: Dec 05, 2025 3:08:14 PMRequest to CMiC API Through OAuth
If the token was validated and meets the requirements, you can try making a request to an API. If the API request fails and the response contains an error reference, it could be due to few reasons:
-
Token is missing the claim to identify the user.
-
Token ipaddr was present, but there's a mismatch to the client's IP.
-
Token is expired.
-
Setup in the API Security’s App Registration is not complete or incorrect.
-
Check your setup and review the server logs with the error reference to find the root cause.
Otherwise, if the API request continues to fail, this can be due to the user’s API security.