Overview
The details below guide you through creating an Entra ID Application and then configuring it for your needs. The key information required is listed below:
-
Application Identifiers
-
Application (Client) ID
-
OAuth 2.0 authorization endpoint (v2)
-
OAuth 2.0 token endpoint (v2)
-
-
For User Flow
-
Scope (User Flow)
-
Platform configurations
-
Redirect URI
-
-
For Userless Flow
-
Client Secret
-
Application ID URI (Userless Flow)
-
Step 1 - New Registration
-
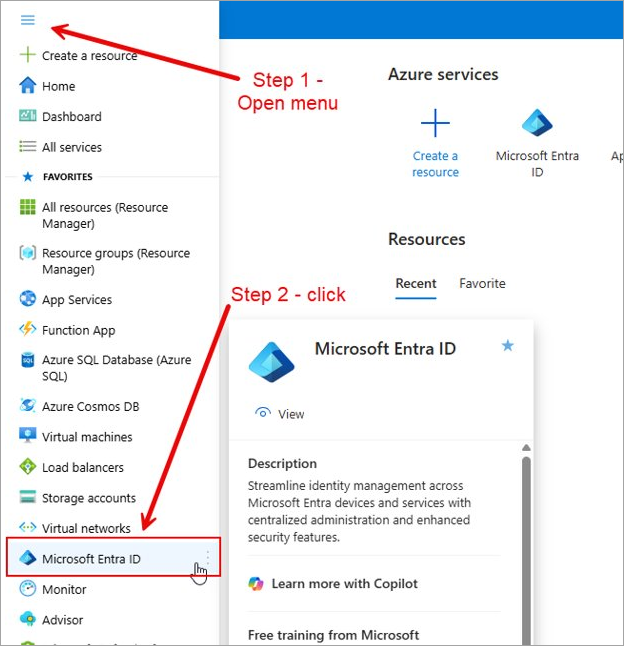
Once you have logged into the Entra ID portal, click the menu icon on the top left corner and select "Microsoft Entra ID".
-
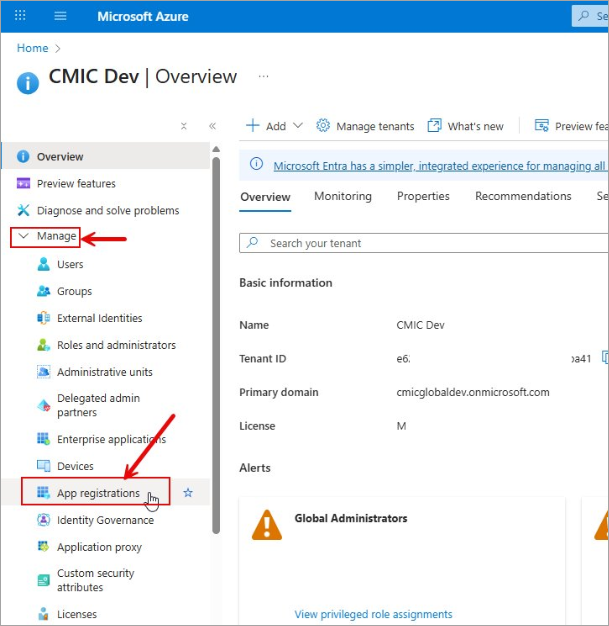
Expand the Manage menu section and select "App Registrations".
-
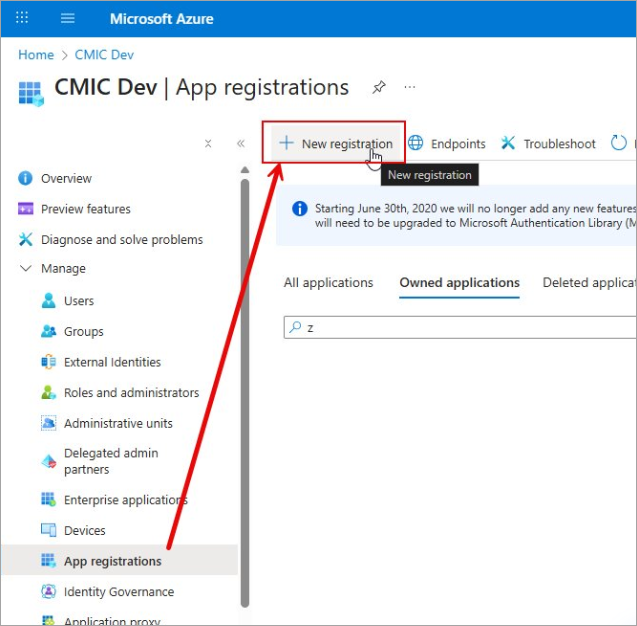
Click on the [+New Registration] button.
-
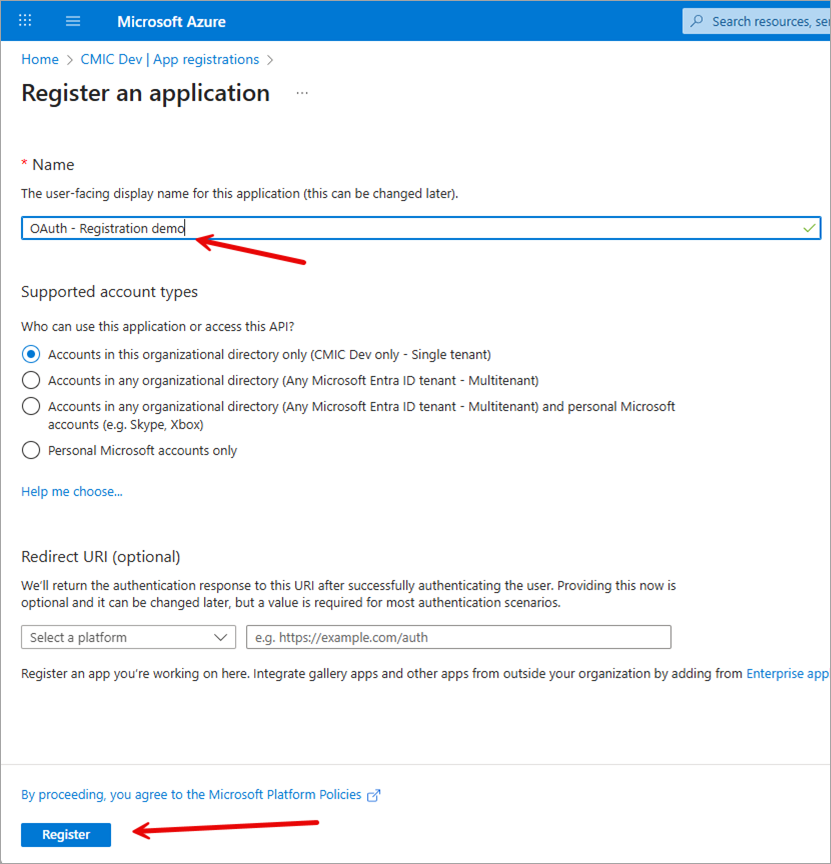
Under the Name section, enter a name for the application. This can be changed later, if needed.
-
Under the Supported Account Types section, there is no change needed unless you want to allow access for any Entra ID tenant. This is specific to interactive flow which the user needs to authenticate.
-
The Redirect URI section is optional. It depends on the use case with this application.
-
Click the [Register] button.
Step 2 - Token Configuration
-
Under the Manage menu, select "Token Configuration".
-
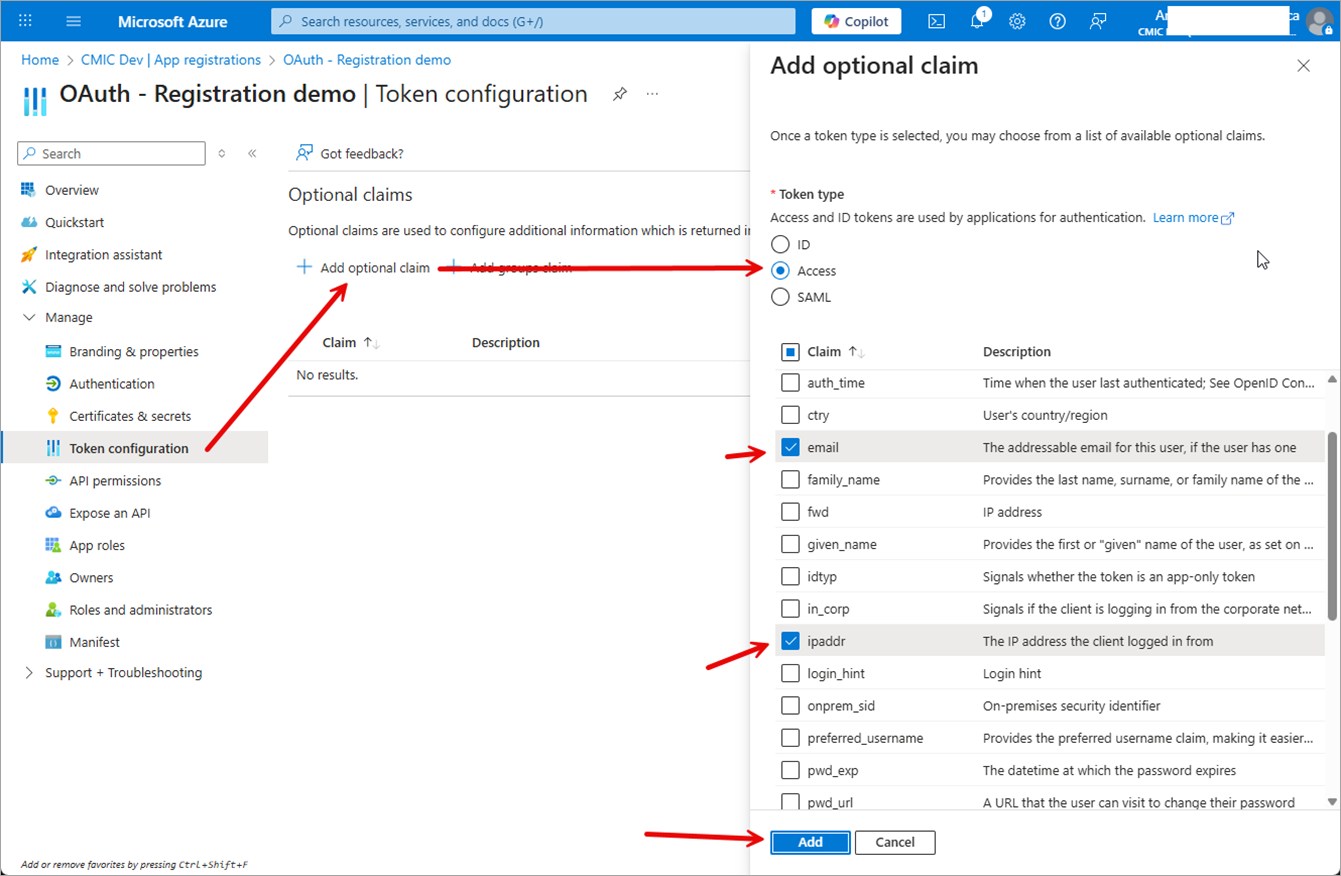
Click on Add Optional Claim.
-
Set the Token Type field to "Access".
-
Select "Claim" and check the following boxes:
-
email
-
ipaddr
-
upn
-
-
Click the [Add] button.
-
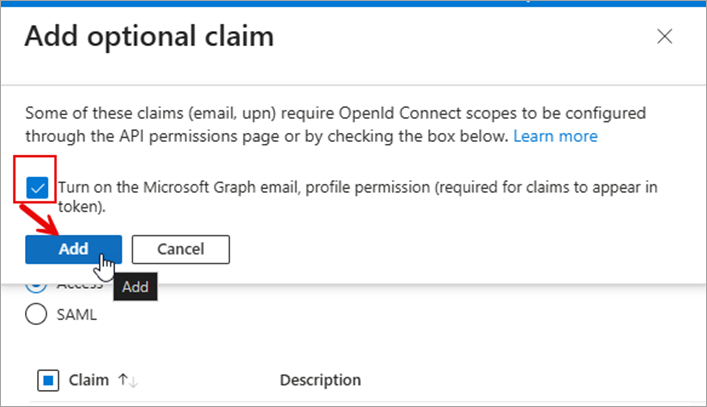
If prompted to turn on Microsoft Graph permissions, check the box and click the [Add] button. These are delegated permissions.
Step 3 - Expose an API
-
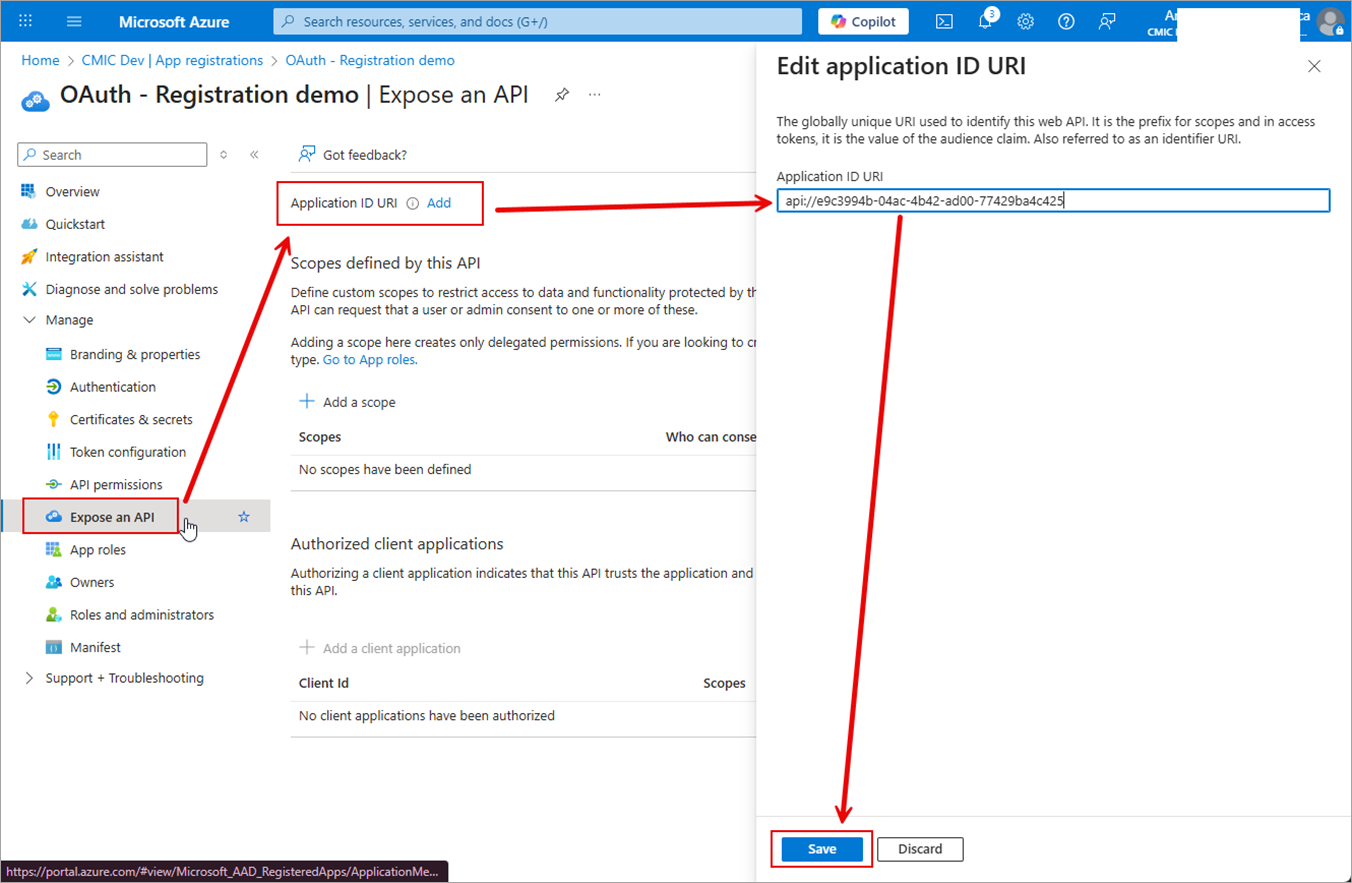
Under the Manage menu, select "Expose an API".
-
Click Add to the right of the Application ID URI header.
-
Leave the default value in the Application ID URI field
-
Click the [Save] button.
-
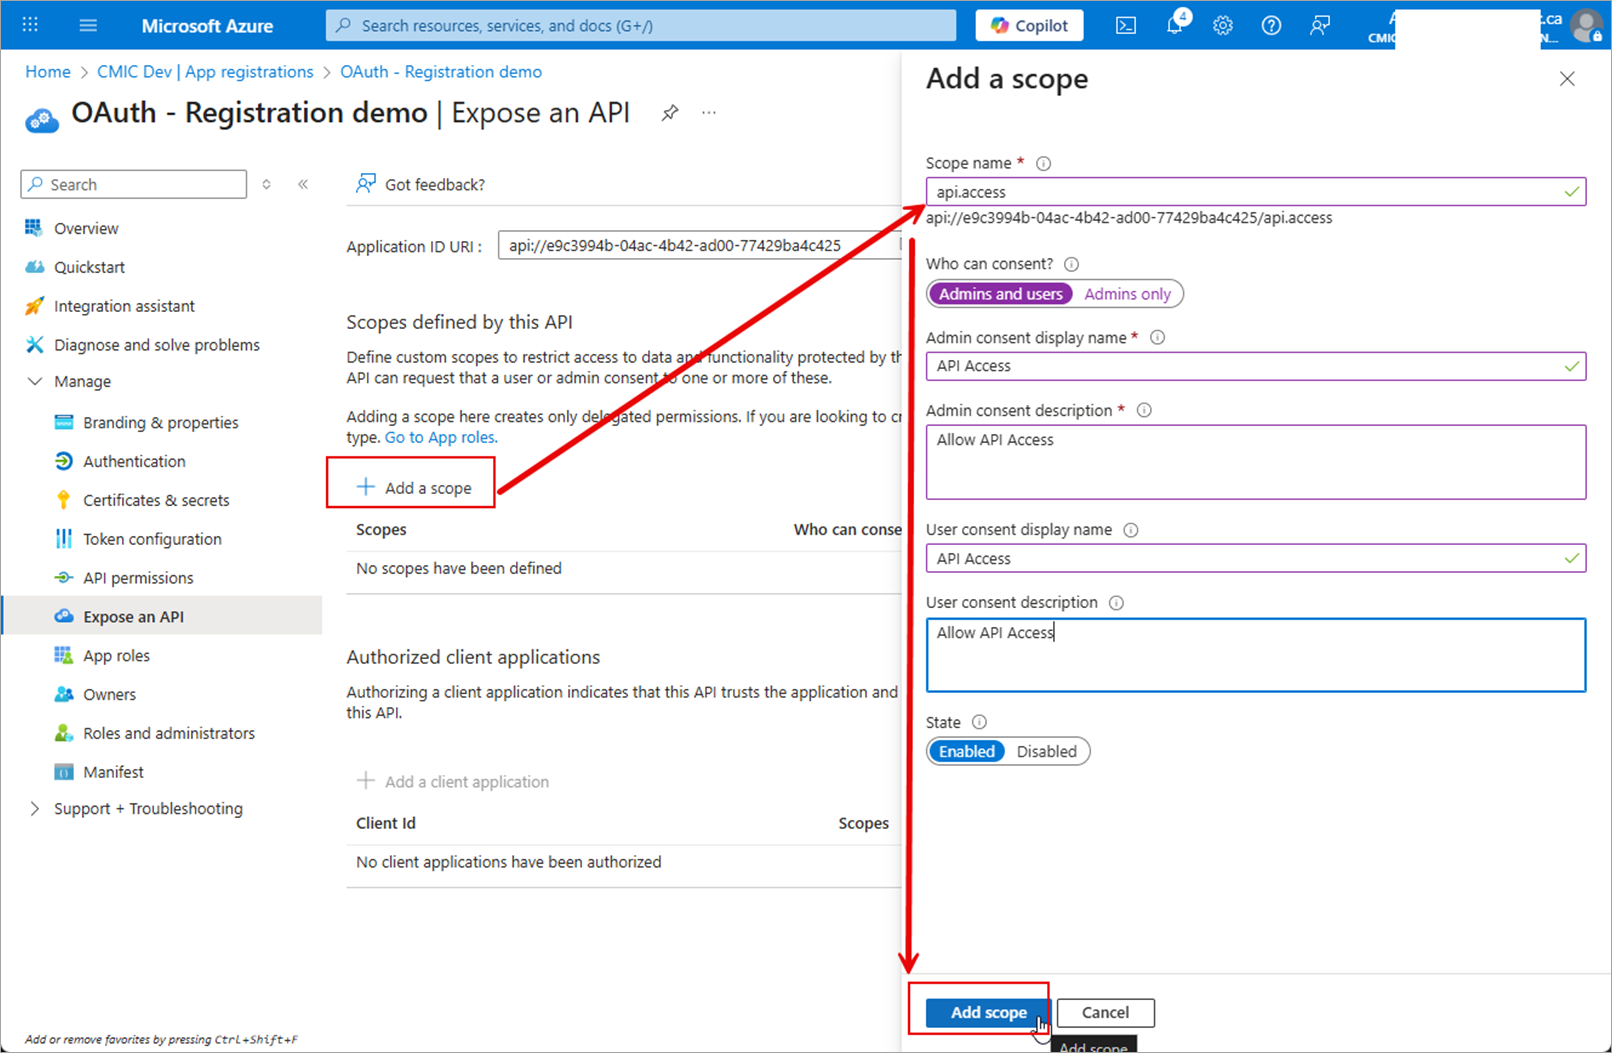
In the Expose an API screen, click the [+ Add a Scope] button to add a scope that is used when requesting a token for the authenticated user, and can be consumed by CMiC API. This is required for user interactive flow.
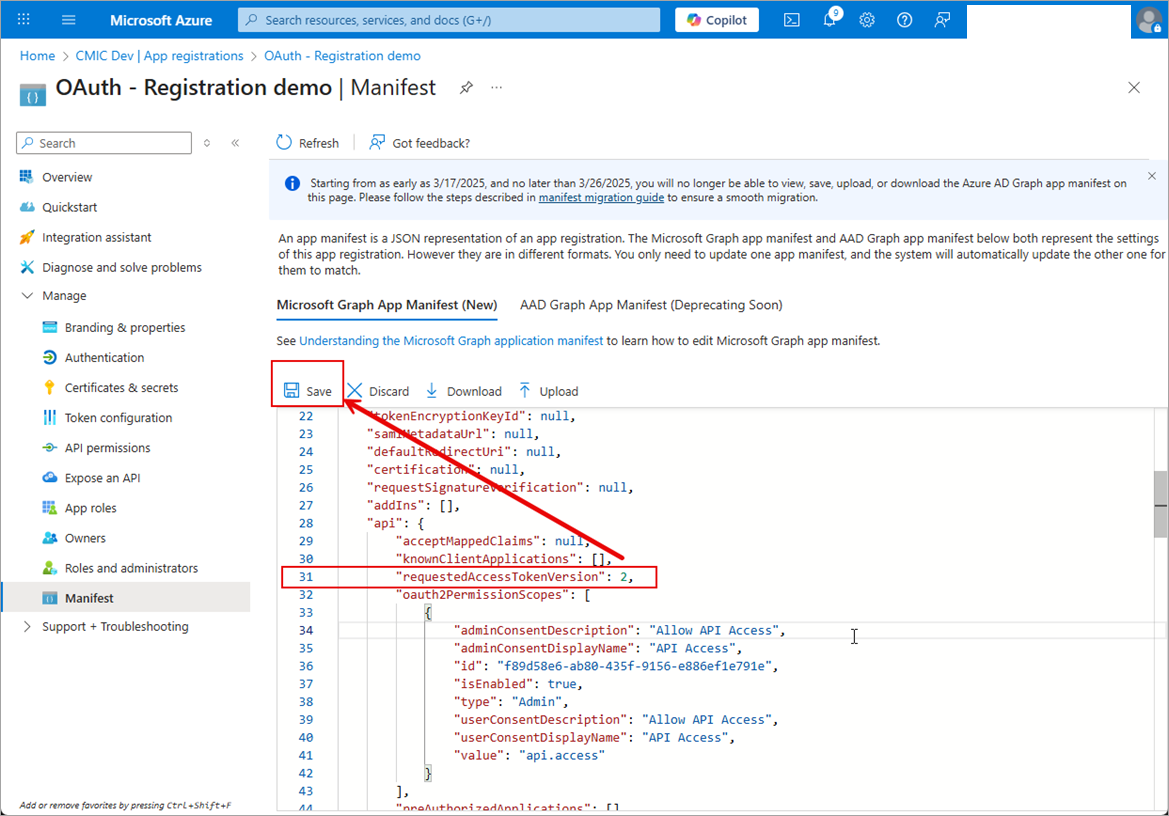
Step 4 - Manifest
-
Under the Manage section, select "Manifest".
-
Change requestedAccessTokenVersion from "null" to "2". This changes the version and format of the JWT produced independent of the endpoint.
-
Click [Save].
Step 5 - Additional Configuration
Now that the base configuration is complete, next is additional setup that’s needed depending on your OAuth flow.
-
User interactive (e.g. Applications)
-
Userless/non-interactive (e.g. Server to server communication)
CMiC does not support userless tokens prior to Nexus 1, to avoid unexpected results do not use the same application for both flows.
User Flows
IMPORTANT: Before you can safely use this with CMiC, be aware of how you are creating users in CMiC. Issues will be present if users are not created in a uniform way, which can be mapped to a specific attribute from your Identity provider (IdP) or translated from some attribute. For example, Are you setting the username to email?
If email attribute does not correlate to a CMiC username, it would require the custom claim “cmicuser” to be configured on your application.
This will require setup for the Platform Redirect URI, such as single-page application, iOS app, or Android app.
CMiC User Configuration
It’s important to know that with federation (Entra ID), the key attributes in a token related to the user are upn and email claims. Inside CMiC, it would be expected that you have a CMiC username to match the value.
We rely on the email claim first, but if it's not present, then we use the upn claim. If there happens to be a custom claim “cmicuser”, this will be first, then email, then upn.
Thus , there is no additional setup required, but there are conditions where you may need to do add a custom claim “cmicuser” when email or upn is not what a user would enter during single sign-on (SSO). For example, there is no federated SSO, or there is a federated SSO, but the user created in CMiC matches the email or upn from the Identity Provider (IdP) user’s identity.
This might not be trivial or possible if there is no uniform way to translate a user’s IdP attribute to what’s expected in CMiC.
For example, the users created in CMiC could have some with firstname.lastname and another set as lastname.firstname. If this is the case, a translation would be difficult to determine.
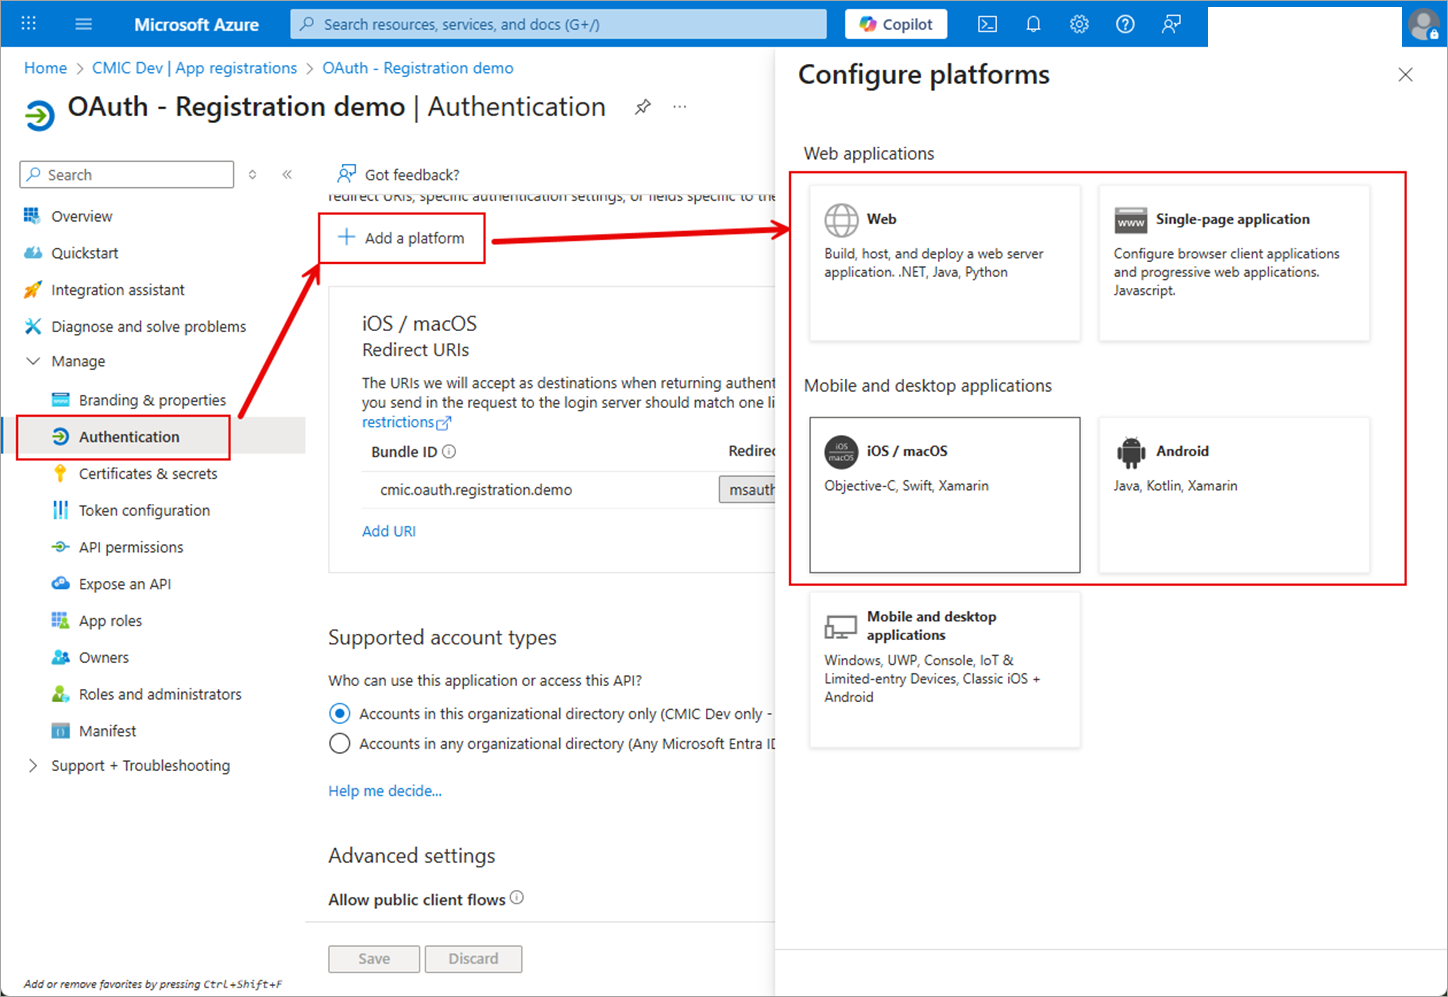
Setup Authentication
-
The Redirect URL will need to be setup, which is parameters for the OAuth User Flows. Navigate to Authentication under the Manage section.
-
Click [+ Add a Platform].
-
Select the option that applies.
-
For CMiC mobile apps in iOS and Android:
-
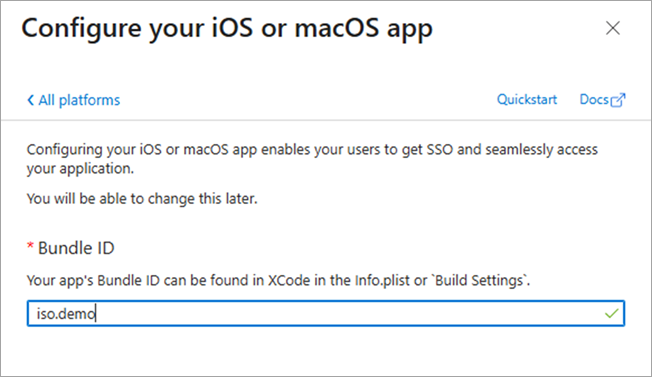
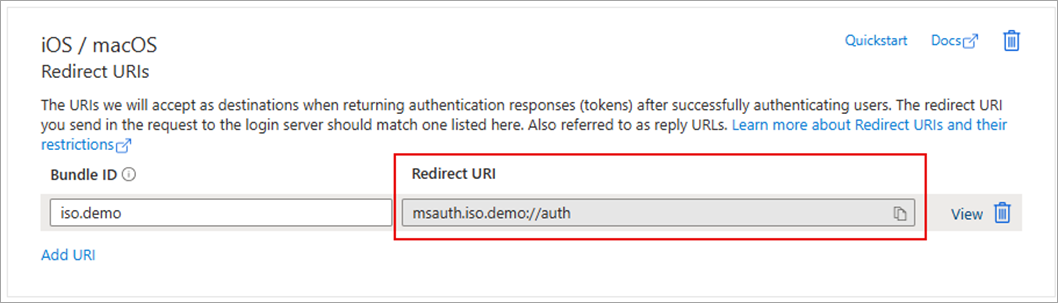
iOS Mobile Application
-
Enter the Bundle ID.
-
Click Configure.
-
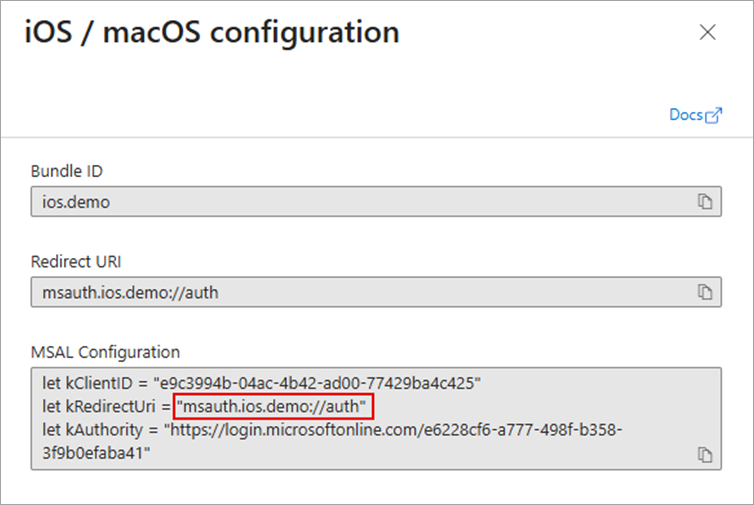
Click Done.
-
Copy the Redirect URI
-
-
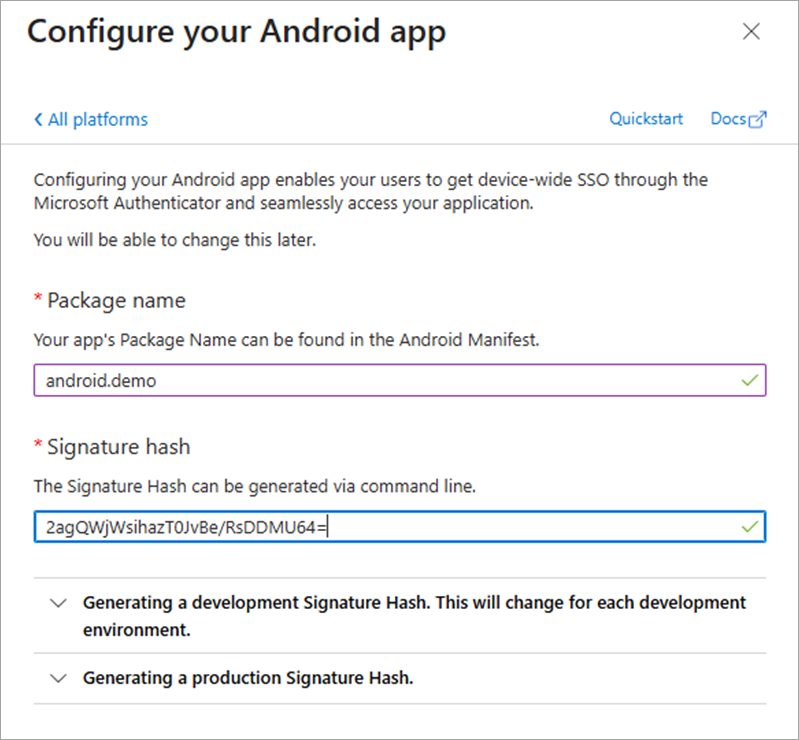
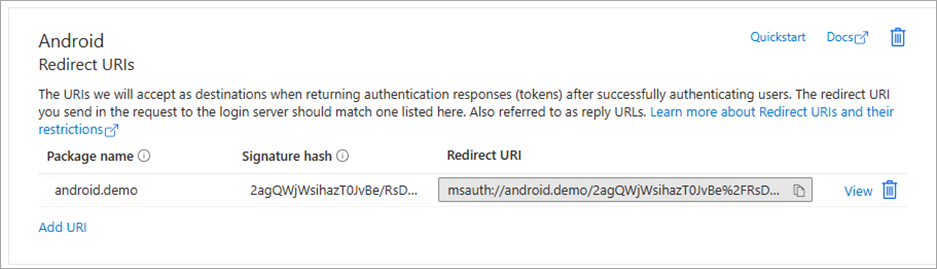
Android Mobile Application
-
Enter Package Name.
-
Enter Signature Hash. For CMiC Mobile, enter "2agQWjWsihazT0JvBe/RsDDMU64=".
-
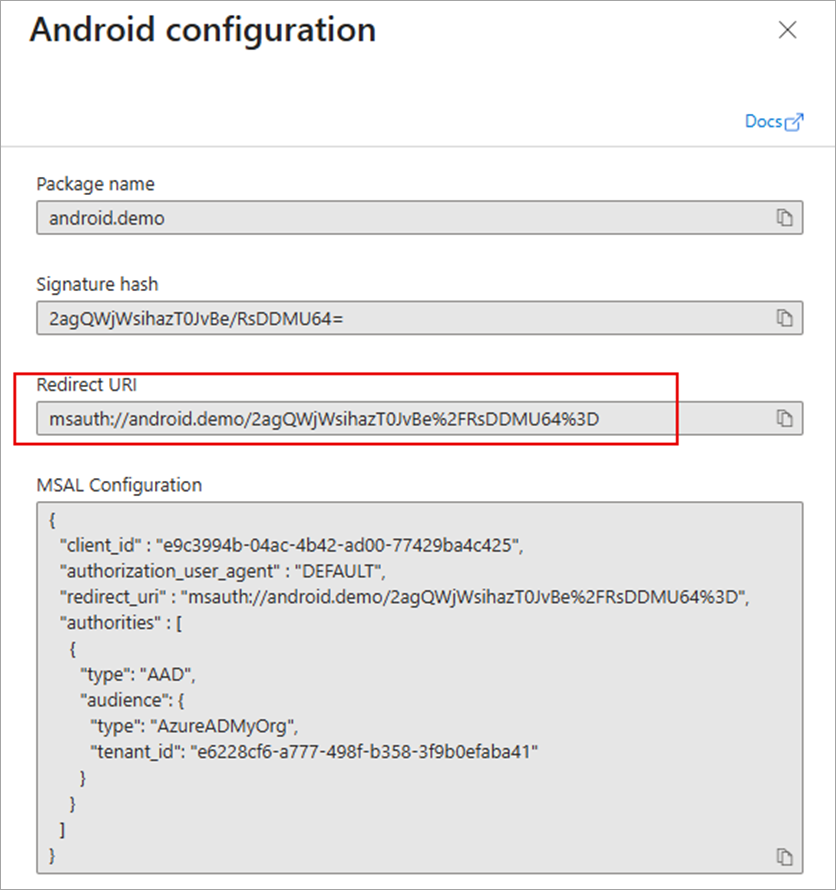
Click Configure.
-
Click Done.
-
Copy the Redirect URI.
-
-
-
Userless Flows
To support userless tokens, additional configuration is required with custom claim, where the default custom claim supported is “cmicuser”.
The value set is for all tokens generated. It cannot be a lookup by attribute or transformation since there is no authenticated user.
NOTE: A CMiC Service Account must be created first before attempting this setup. You may not have the permissions to complete all the steps and should reach out to your IT Team if there is a step you are not able to complete.
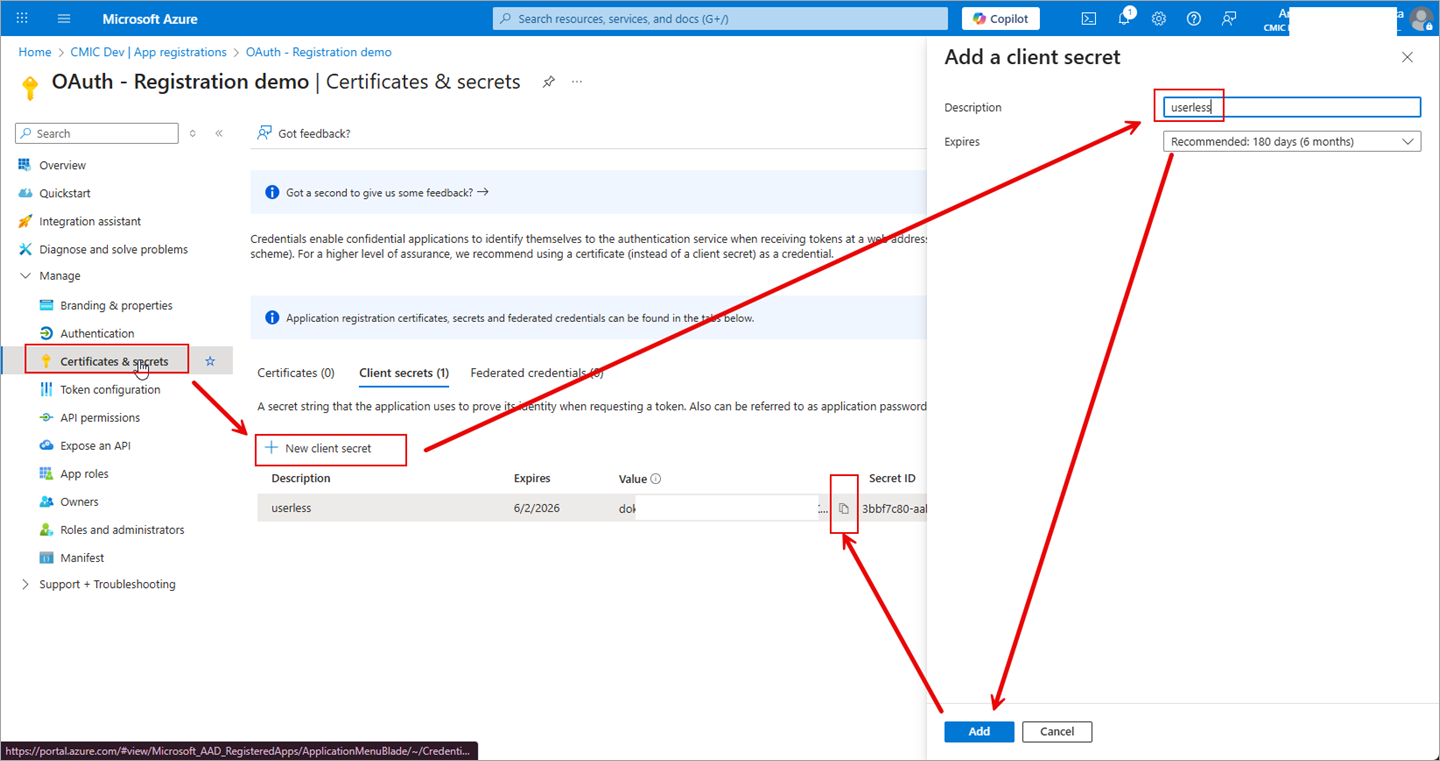
Create Client Secret
-
You will need to create a secret that is required to use the Client Credentials Flow. Under the Manage menu section, navigate to "Certificates & Secrets".
-
Click [+ New Client Secret].
-
Enter a description in the Description field (e.g. userless) and set the Expires field to how long the secret is active.
-
Click [Add] and ensure you save the value. You only see it once.
Setup Custom Claim
-
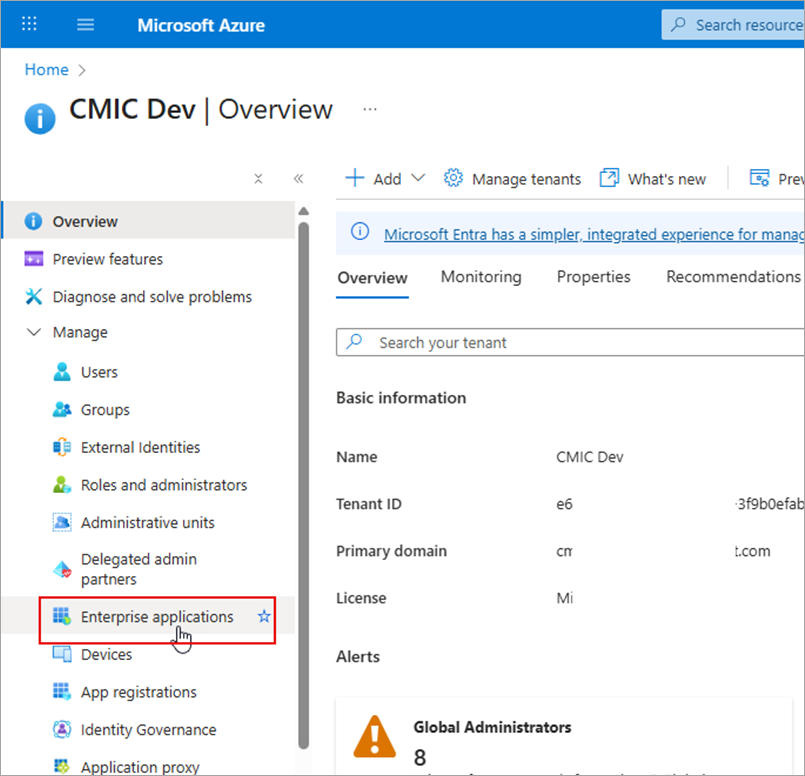
Under the Manage menu section, navigate to Enterprise Applications.
-
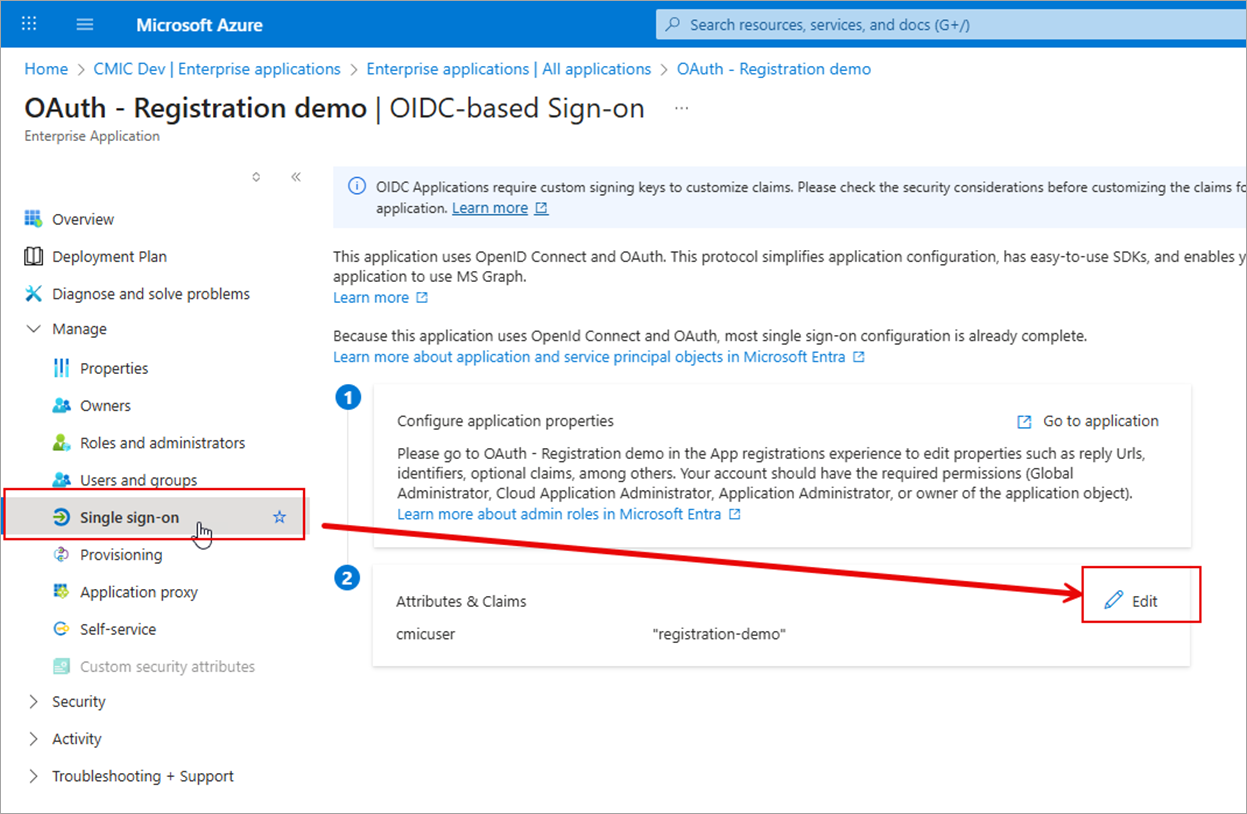
Find the application to update and click Single Sign-on.
-
Click [Edit] on the Attributes & Claims section.
-
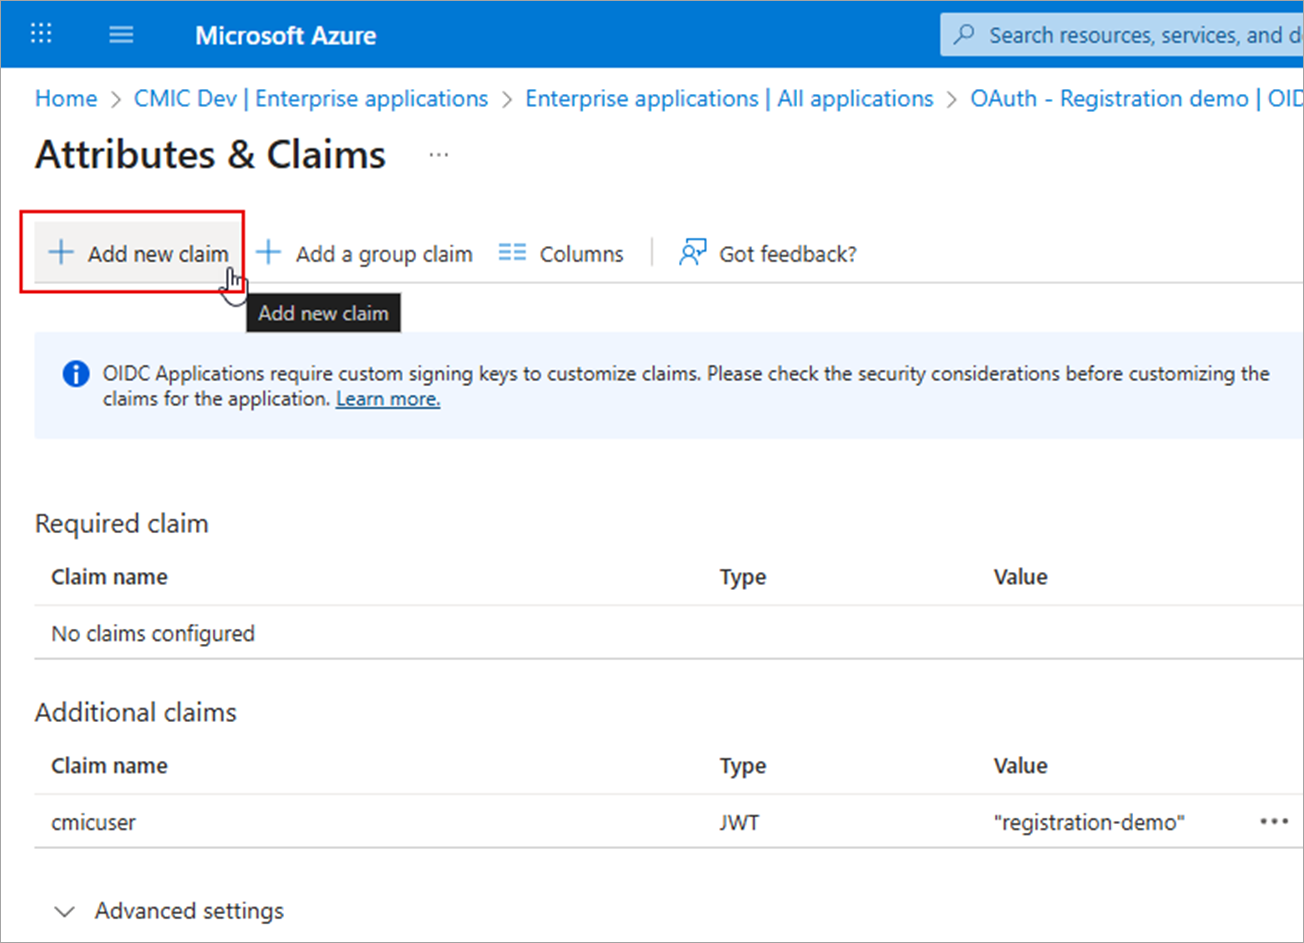
Click [Add new claim].
-
Set the Claim Name field to "cmicuser".

-
For Enterprise, set the Source Attribute field to your CMiC Service Account username.
-
For Cloud, set the Source Attribute field to your CMiC tenant and Service Account username (e.g. tenant||serviceaccount).
NOTE: Do not add quotes. Just enter the value and select from the drop-down menu.
-
Navigate back to the App Registration and select the application.
-
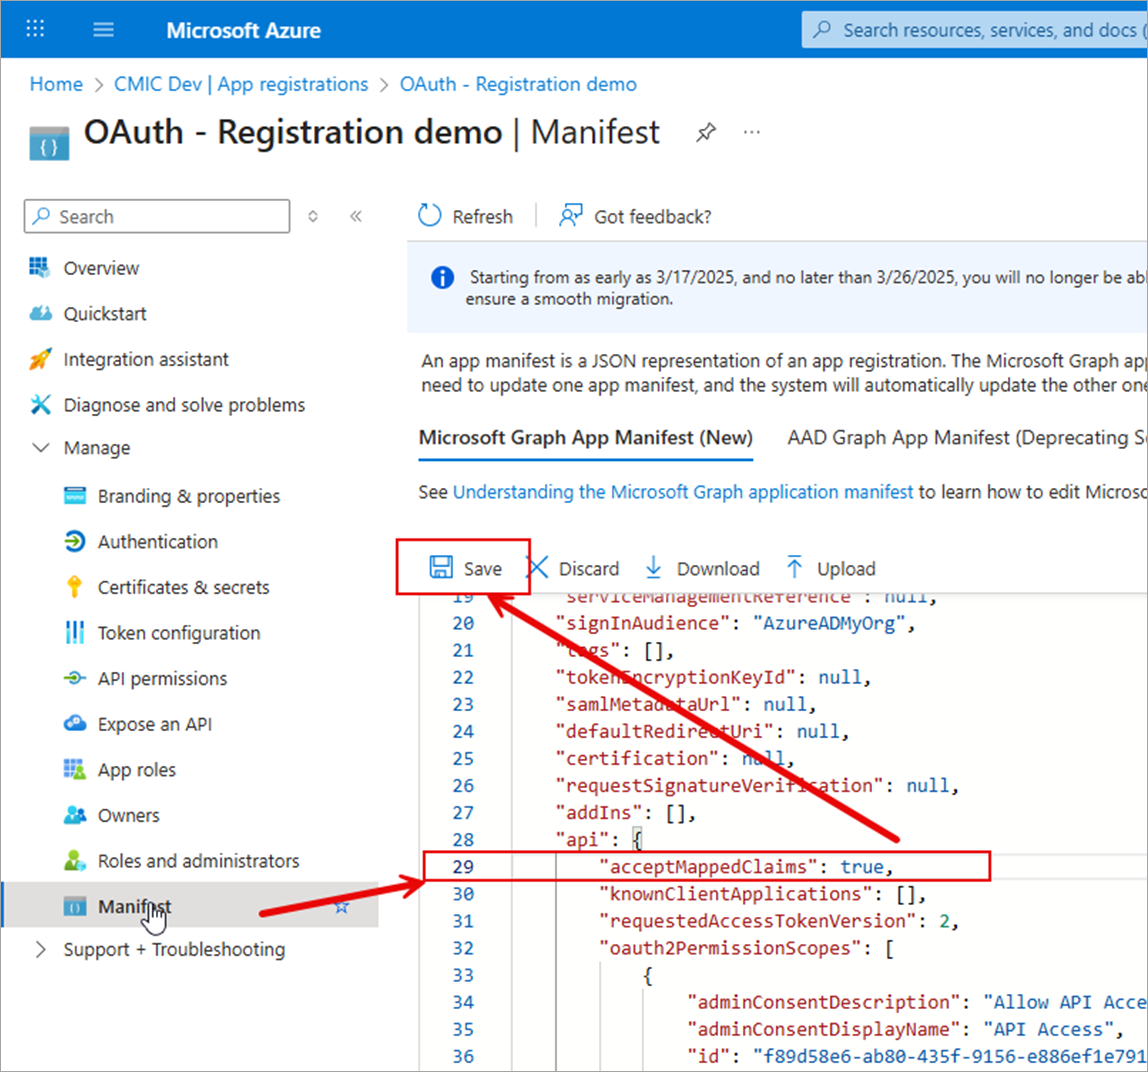
Navigate to the Manage menu section and select Manifest.
-
Update acceptMappedClaims to "true".
-
Click [Save].
After the above setup is completed, getting a token with the Client Credentials Flow should have an additional “cmicuser” claim with your setup.
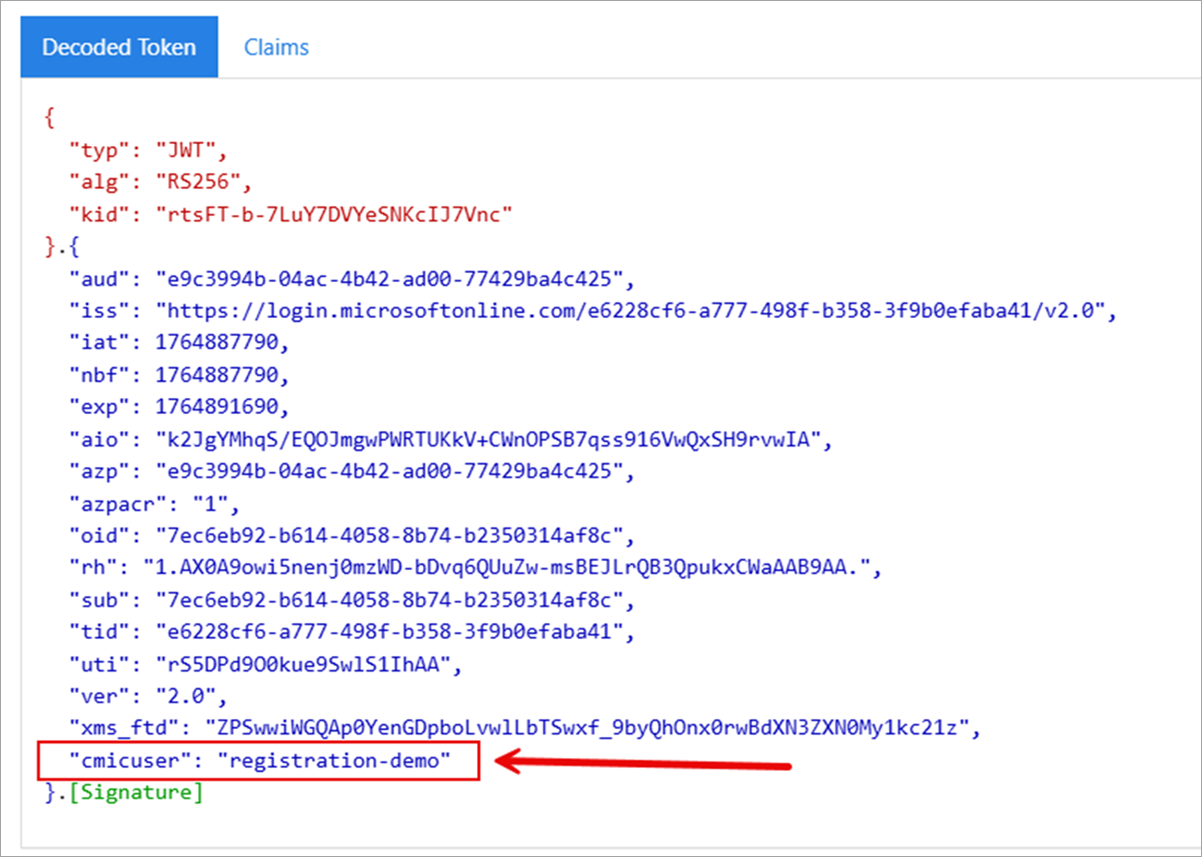
Analyzing Token
There are different sites available to view the claims in a token:
Troubleshooting
AADSTS50146: This application is required to be configured with an application-specific signing key. It is either not configured with one, or the key has expired or is not yet valid.
Check the Manifest to ensure that you have set acceptMappedClaims to "true". See Setup Custom Claim.
AADSTS501461: AcceptMappedClaims is only supported for a token audience matching the application GUID or an audience within the tenant's verified domains. Either change the resource identifier, or use an application-specific signing key.
Check the Manifest to ensure that you have set requestedAccessTokenVersion to "2". See Step 4 - Manifest.
AADSTS1002012: The provided value for scope api://e9c3994b-04ac-4b42-ad00-77429ba4c425/.defaul is not valid. Client credential flows must have a scope value with /.default suffixed to the resource identifier (application ID URI).
Check that the application using the OAuth Client Credentials Flow is set to the right scope. It must end with "/.default".
AADSTS50196: The server terminated an operation because it encountered a client request loop. Please contact your app vendor.
This is an unknown error that could be due to the change not being live yet, or it's possibly due to how requests are being made.