Overview
This screen is used to enter and view requisitions for items used on projects and jobs. Requisitions can include as many items as desired.
Requisition Log

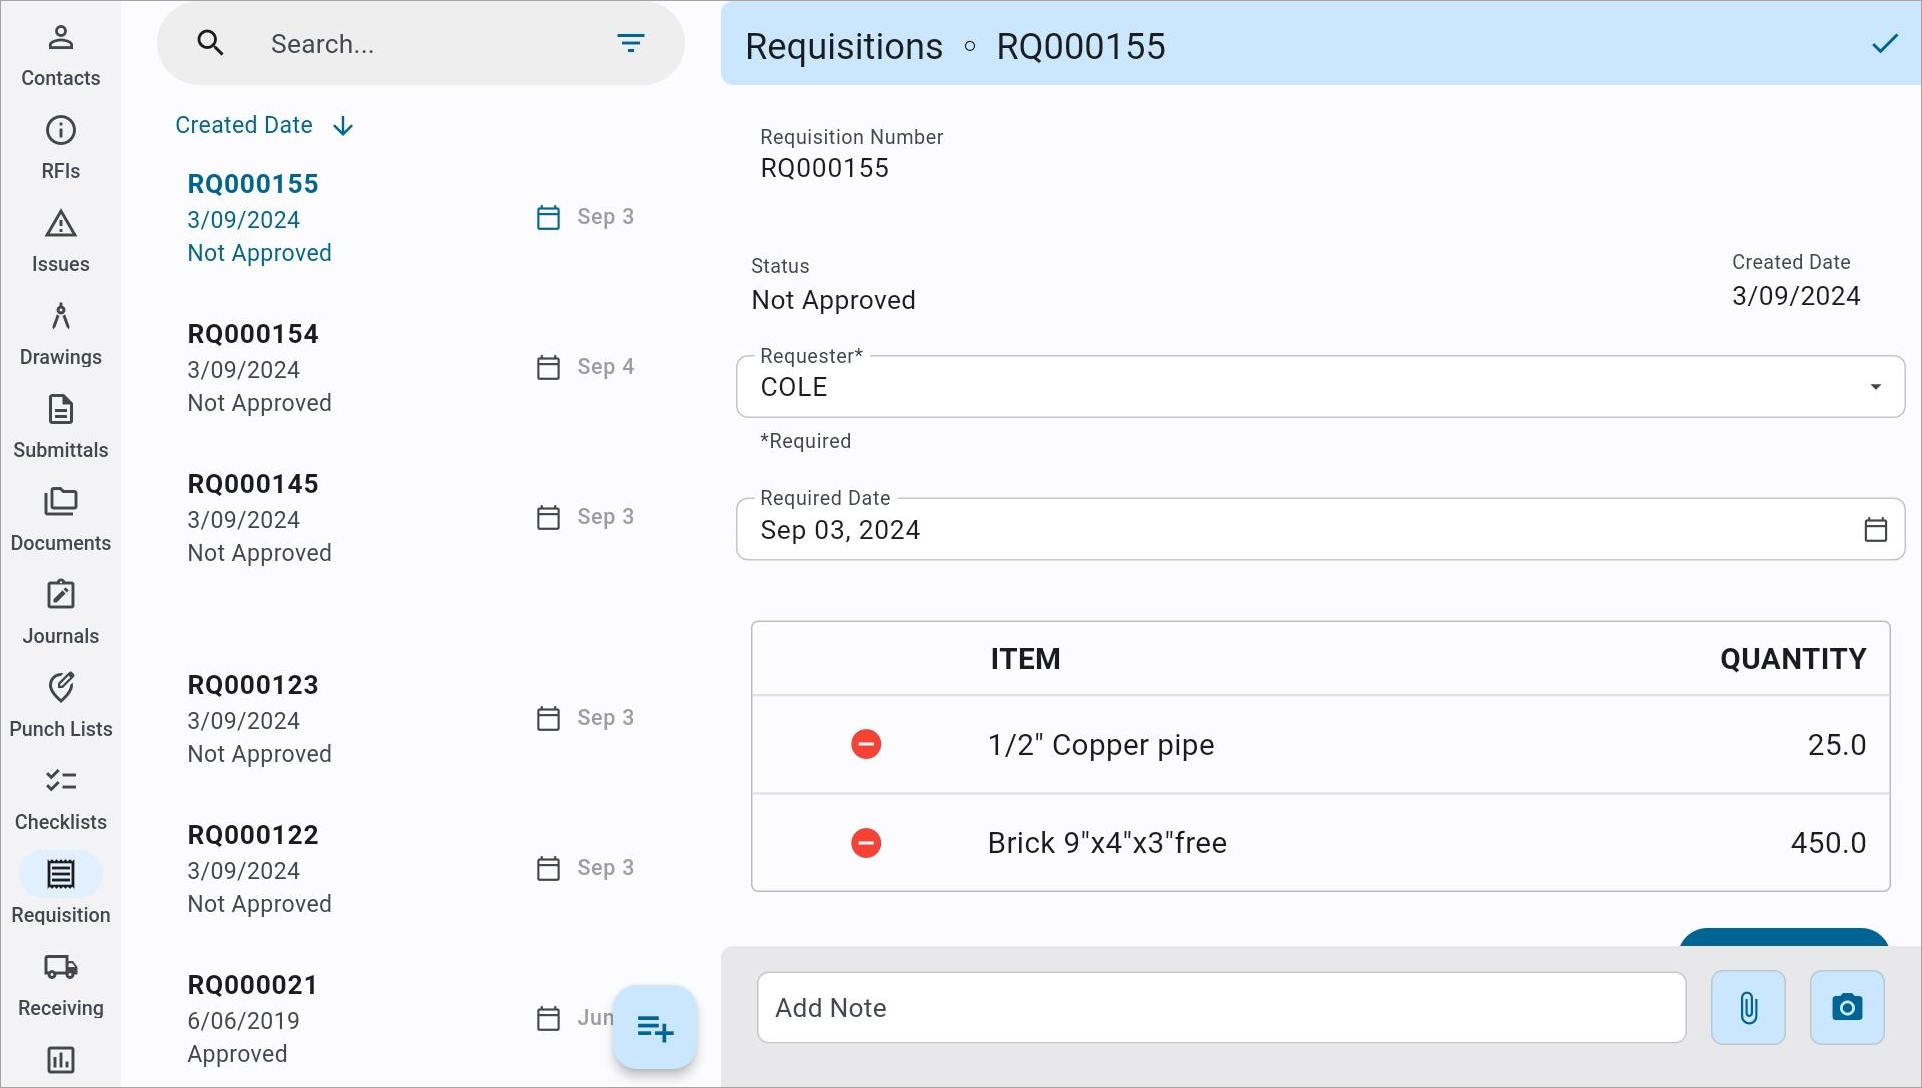
The Requisition Log screen
Press the Requisition icon (![]() ) in the Construct PM menu to launch the Requisition log screen. Here, you can view previously entered requisitions and add new items by pressing the Add New icon (
) in the Construct PM menu to launch the Requisition log screen. Here, you can view previously entered requisitions and add new items by pressing the Add New icon (![]() ) or remove items by pressing the Remove icon (
) or remove items by pressing the Remove icon (![]() ).
).
Search
Press the Filter icon (![]() ) in the search bar to filter the search results. Requisitions can be filtered by author (show mine only) and status.
) in the search bar to filter the search results. Requisitions can be filtered by author (show mine only) and status.
Sort
Press the icon that reads "Created Date" to sort requisitions by created date, required date, or status. Press the arrow next to the sort option to sort in ascending or descending order.
Entering a New Requisition
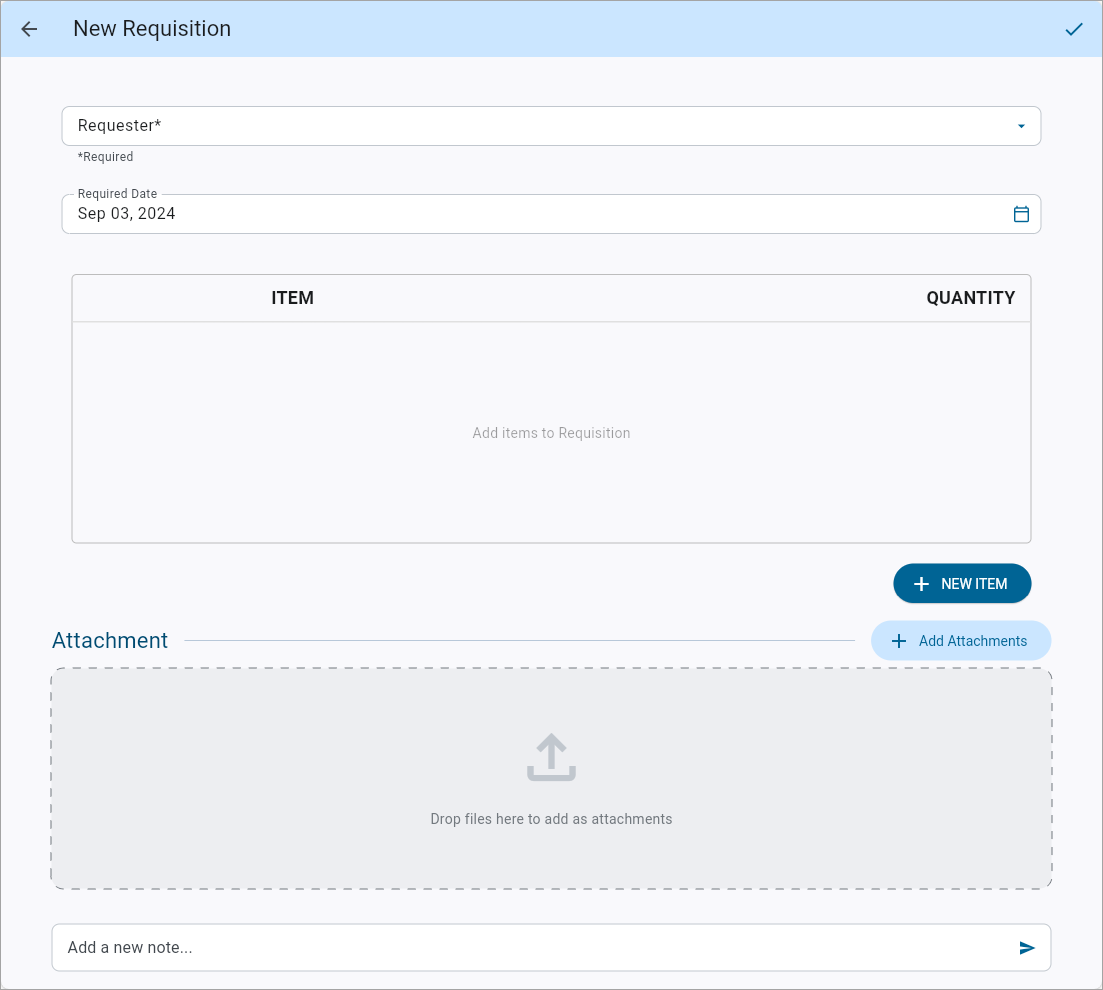
To enter a new requisition, press the Add New icon (![]() ) found on the Requisition log screen. This brings up the New Requisition screen, as shown below. Once all items have been entered in the Requisition record, press the Save icon (
) found on the Requisition log screen. This brings up the New Requisition screen, as shown below. Once all items have been entered in the Requisition record, press the Save icon (![]() ) at the top of the screen.
) at the top of the screen.

The New Requisition screen
Requester
Select the person making the request. This field defaults to the currently logged-in user.
Required Date
Select the date by which the requisition should be delivered.
Items
This table displays the items involved in the request. To add a new item to this table, press the [New Item] button. For more information, please refer to [New Item] – Button below.
Attachments
Press the [Add Attachments] button in this field to add an attachment to the requisition. The user can either take a new photo with the device's camera, attach a file from the device library, or attach a document or drawing already saved in Construct PM. A counter will indicate the number of attachments on the record.
Notes
Enter any additional notes for the requisition here.
[New Item] – Button

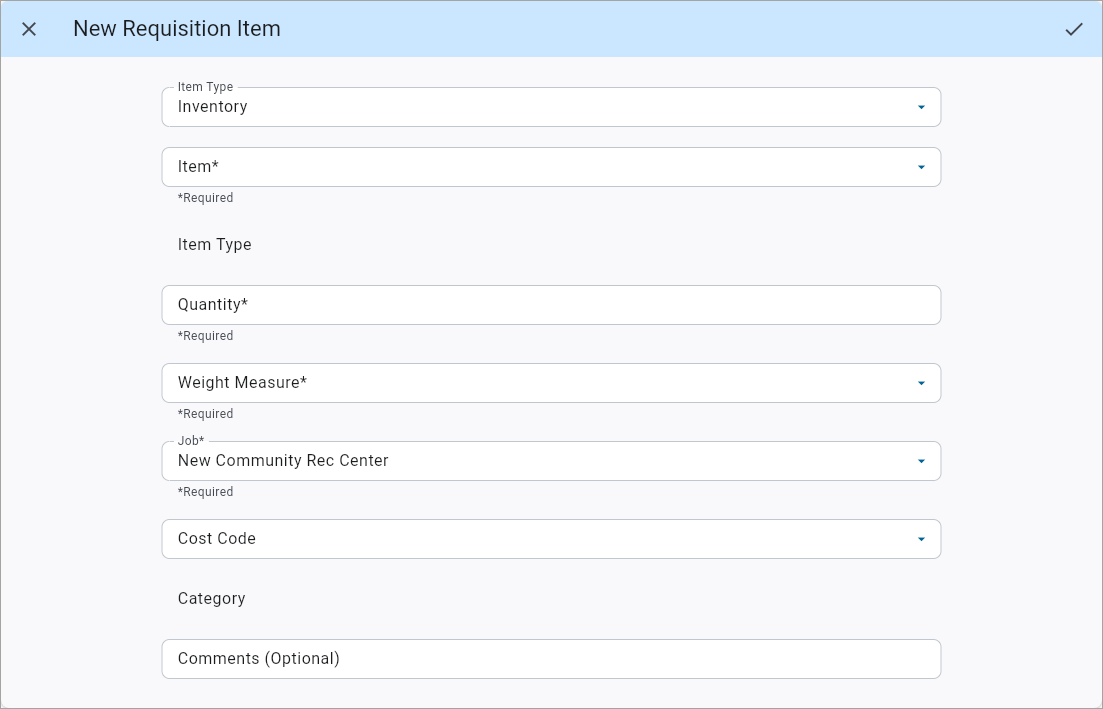
The New Requisition Item screen
Item Type
Select the type of the item being requested. Select Inventory or Non-Stock to populate the Item field with codes of that type. Select Free-form to enter the Item Code and Item Name manually, rather than selecting them from values in the LOV.
Item
Select the item code.
Type
This field only appears for Inventory type items. This field will be entered automatically depending on the value entered in the Item field.
Quantity, Weight Measure
Select the quantity and the unit of the item being requested.
Job
Select the job on which the item will be used. This is the only required field for this screen. Only jobs and subjobs appear in the Job field as the Requisitions program is built on the Field application.
Cost Code
Select the cost code for the item.
Category
Select the category for the item. This field is only available when a value has been entered in the Cost Code screen.
Comments
Enter any additional comments about the item in this field.