Overview
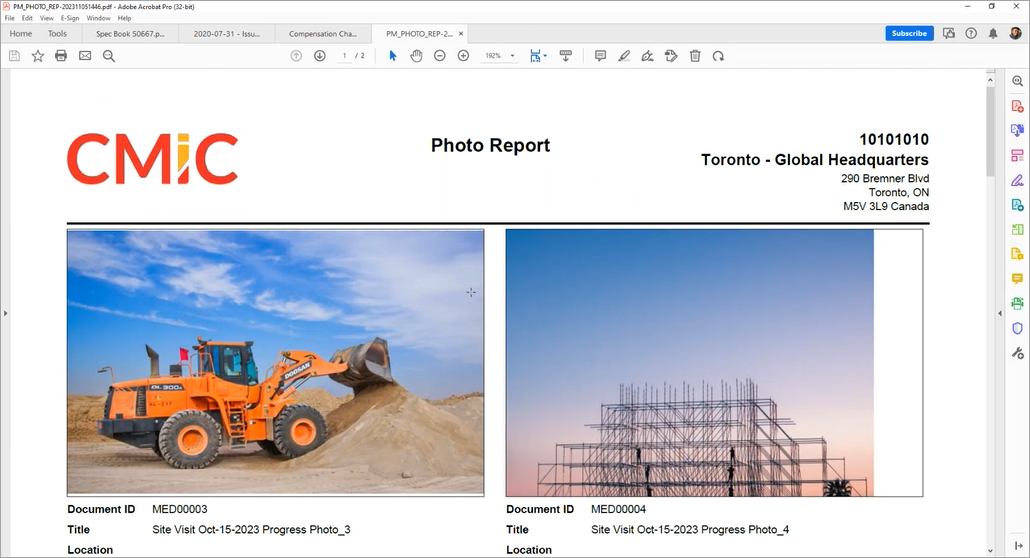
Sample of Construct PM Photo Report
Photo Reports are used to assemble and display a selection of project photos in a PDF file. Each of the photos is laid out in an organized fashion and contains relevant details such as document ID, title, and location. This report is a useful way to monitor work progress by reviewing photo documentation over the course of a project. When reviewing the report, clicking on any of the photos will automatically launch Construct PM and open the selected record.
Creating Photo Reports on Web Deployment
Photo Reports can be created from a drawing sheet or a document. Both of these options are described in more detail below.
Create Photo Report From Drawings

Navigate to Drawings and open a drawing sheet. If the drawing sheet contains photo annotations, they will appear on the drawing as a Photo icon ( ). The drawing sheet shown above contains several photo annotations and each annotation is tied to a photo.
NOTE: Photo annotations are added to a drawing using the Photo icon on the Annotation toolbar.
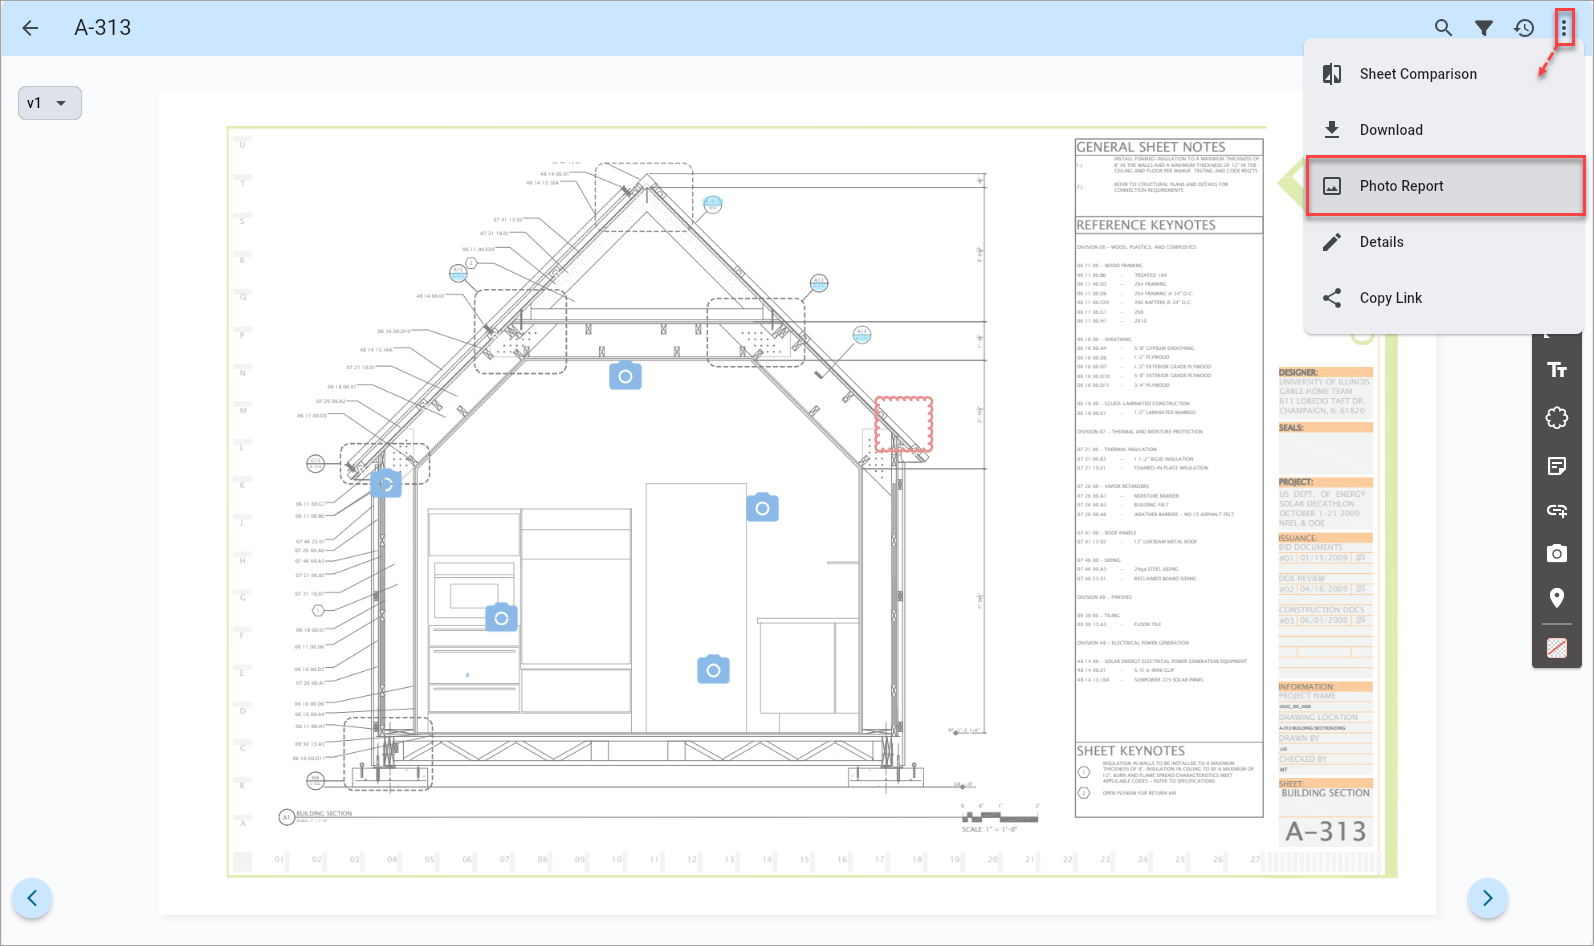
Click on the Menu icon ( ) to open a list of available menu options. Select "Photo Report" in the drop-down menu.
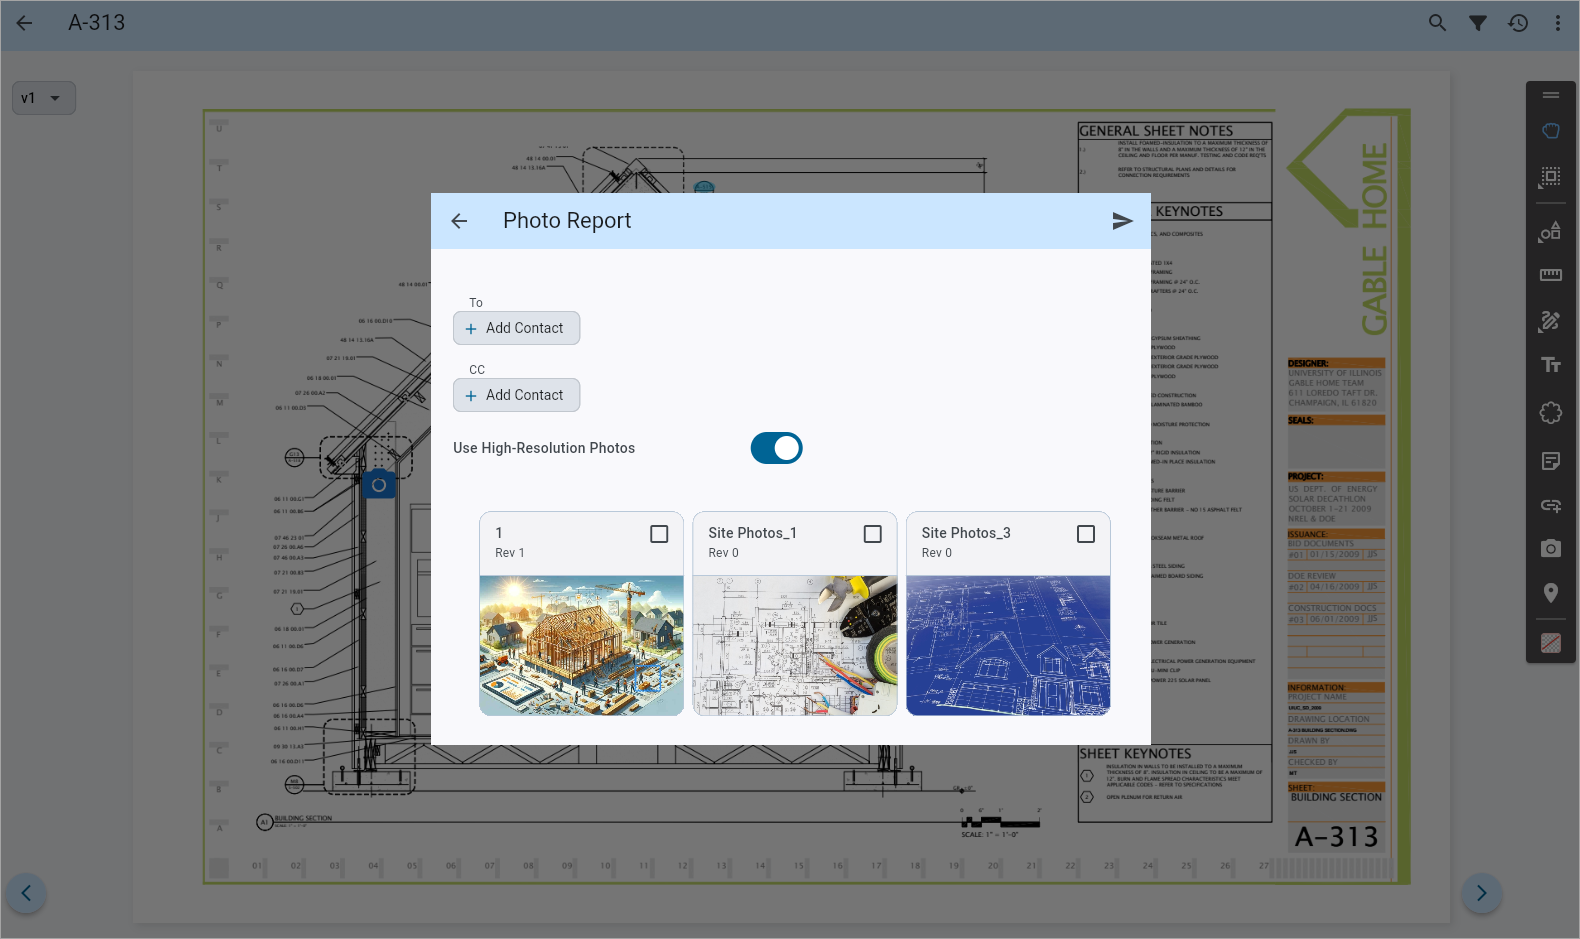
In the Photo Report pop-up window, a preview of all of the photos within the drawing sheet will be conveniently displayed. From the list of preview photos, select which individual photos to be included, or leave all of them deselected to include all them in the report. By default, if no individual photos are selected, all of them will be included in the report.
![Screenshot of Photo Report pop-up with [Add Contact] button highlighted.](../../../Resources/Images/Mobile_Field/MOBILEFIELD_PhotoReport4_p22.png)
Press the [Add Contact] button to open the Select Contact pop-up window.
![Screenshot of Select Contact pop-up launched from [Add Contact] button](../../../Resources/Images/Mobile_Field/MOBILEFIELD_PhotoReport5_v70.png)
In the Select Contact pop-up window, select any project contacts to be added as recipients of the report. Use this same process to add any CC contacts.
The Use High-Resolution toggle allows users to switch between low and high-resolutions photos. Depending on the selected option, the report will display either low-resolution or high-resolution thumbnails when printed. By default, the setting is configured to use high-resolution images.
When finished selecting the project contacts, click on the Send icon (![]() ) to share the Photo Report.
) to share the Photo Report.
The photo report will be sent as a link accessible directly within the email. This allows users to share larger reports without encountering file size limitations, especially when including a high volume of photos.
Create Photo Report From Documents
Navigate to Documents and open a document folder.
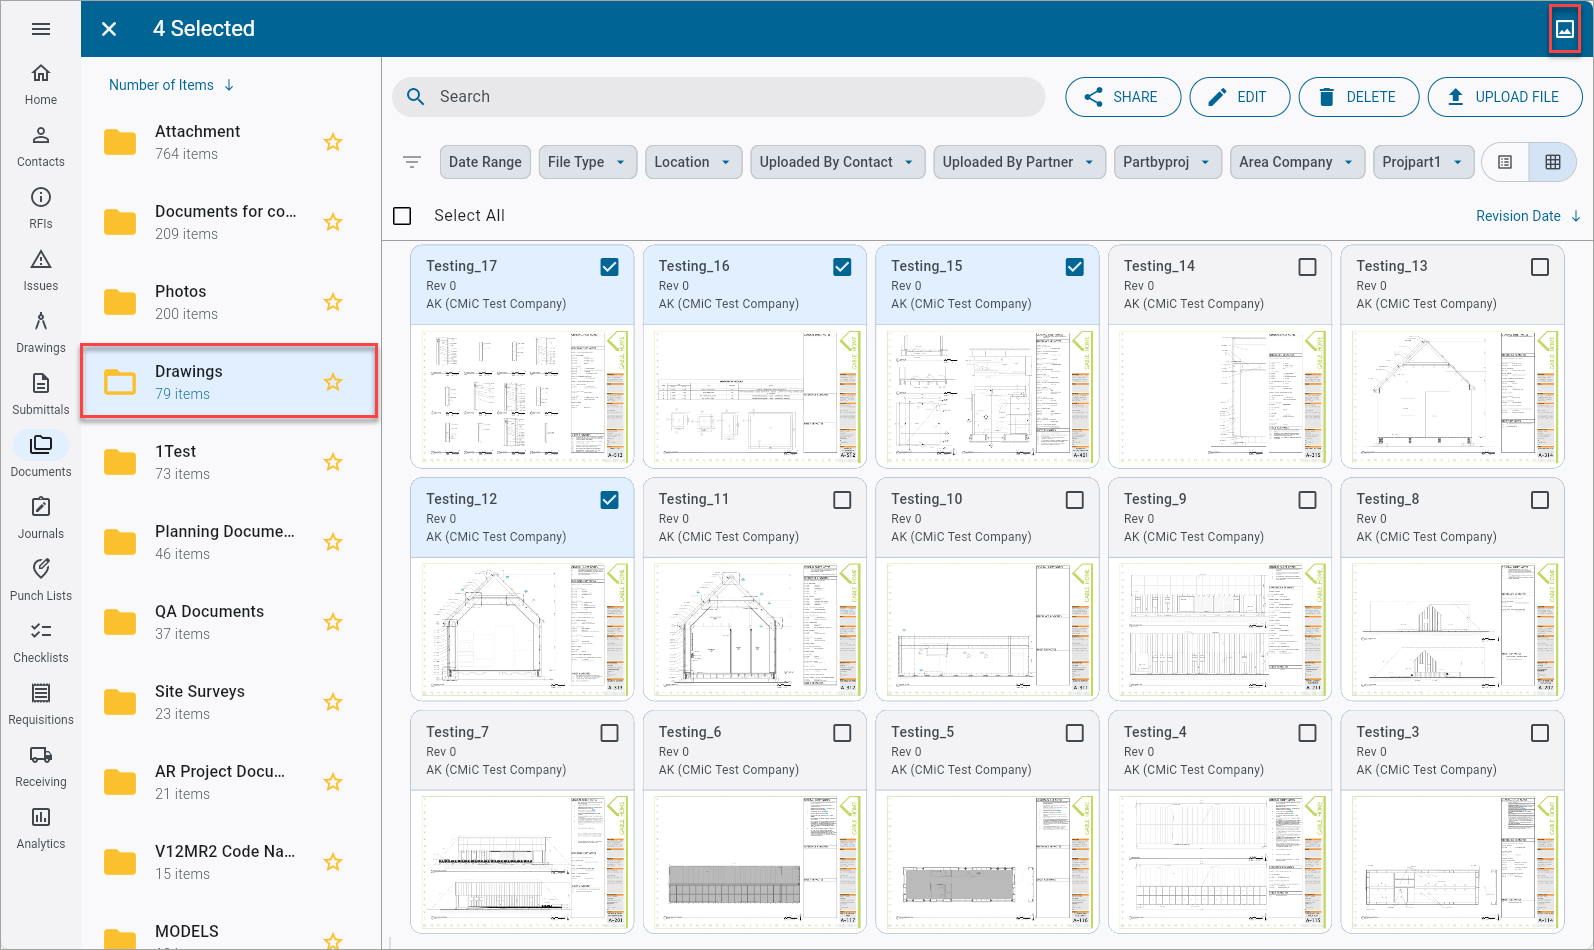
Select an individual document or use the 'Select All' box to select all documents.
Either of these actions will activate the screen's selection mode and display the Photo Report icon (![]() ) at the top of the screen.
) at the top of the screen.
![Screenshot of Photo Report pop-up with [Add Contact] button highlighted.](../../../Resources/Images/Mobile_Field/MOBILEFIELD_PhotoReport7_p22.png)
Click the Photo Report icon to launch the Photo Report pop-up window. In the Photo Report pop-up window, press the [Add Contact] button to open the Select Contact pop-up window.
Similar to the process described above for drawings, in the Select Contact pop-up window, select any project contacts to be added as recipients of the report. Use this same process to add any CC contacts.
When finished selecting the project contacts, click on the Send icon (![]() ) to share the Photo Report.
) to share the Photo Report.