Overview – Jasper Report Parameters Customization

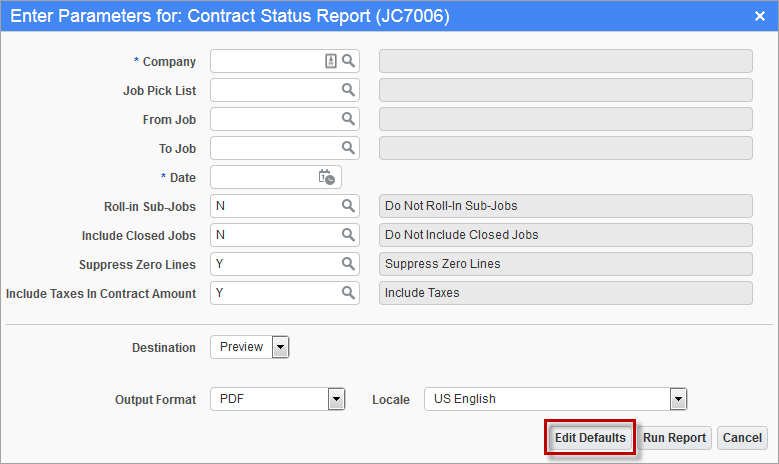
Pgm: JC7006 – Contract Status Report; standard Treeview path: Job Costing > Reports > Contract Status Report
This
For example, if there is only one report with a name GL1000, the Report Definition screen will be opened. If there are multiple reports with names GL1000, GL1000A, GL1000_CSV, etc., then that button will launch the Search Reports pop-up window to select the required report. An example of each of these screens is shown in the sections below.
Access to the [Edit Defaults] button is granted via a configuration privilege. Please refer to the Security section below for details.
Security – Allow Users to Edit Report Parameters

Pgm: SDUSRMNT – User Maintenance; standard Treeview path: System > Security > Users > User Maintenance
To grant a user access to the [Edit Defaults] button, the user needs to be granted the ‘UIREPPRMMD – UI Report: Allow User To Modify Report Parameters Definition’ configuration privilege, as shown above.
The ‘UIREPPRMMD’ configuration privilege can only be granted at the site/client level, and it is not necessary to enter a privilege level in the Edit Privilege Levels section, as it is automatically set to the site/client level.
Report Definition (Edit Report Parameters) – Screen

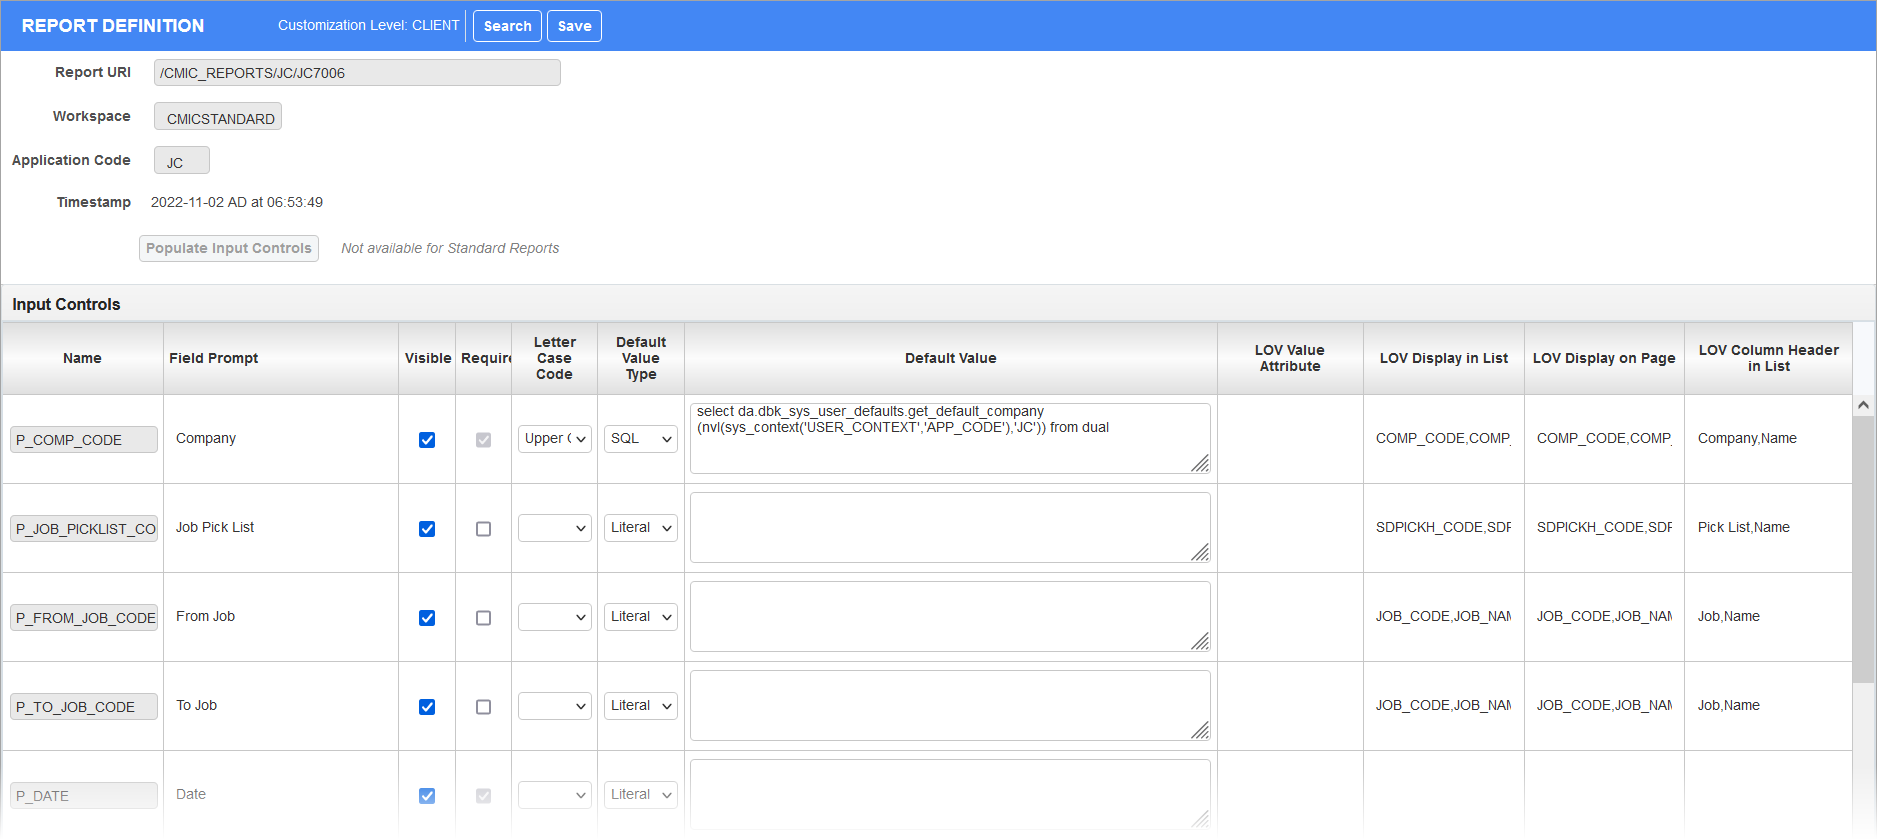
Report Definition screen
Shown above is a screenshot of the Report Definition screen used to edit the report parameters on the Enter Report Parameters screen for the Contract Status Report in Job Costing. This screen will be automatically launched when the [Edit Defaults] button is pressed on a report where only one report URI exists.
NOTE: Any changes made to a report’s Enter Report Parameters screen are saved at the site/client level.
Report Definition – Section
The following are details about the fields and buttons in this section.
[Search] – Button

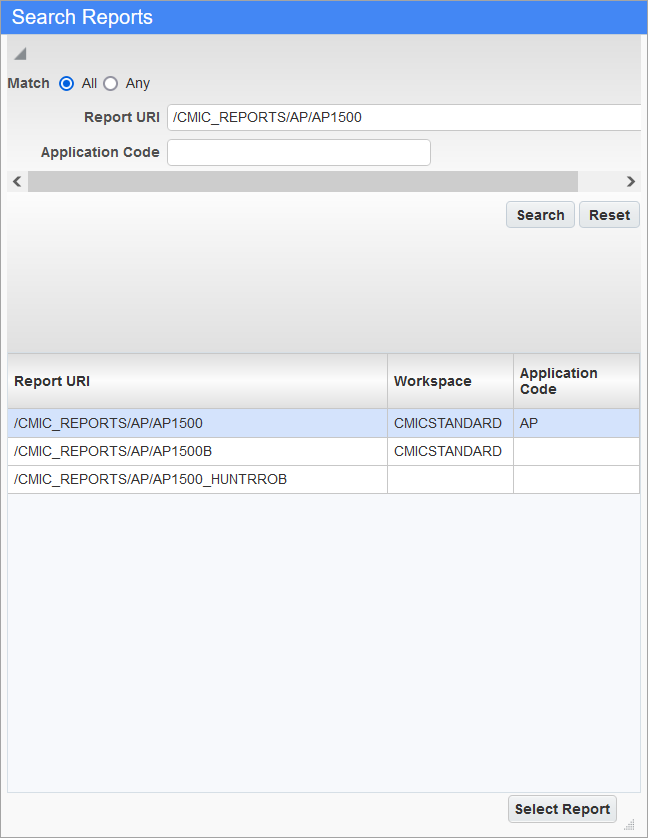
Search Reports pop-up window
The Search Reports pop-up window is used to select the desired report URI.
Use the Match, Report URI, and Application Code fields, and the [Search] button to search for the desired URI. All matches will be listed under the Report URI column.
Once the desired URI is found, select it and click [Select Report].
NOTE: This pop-up will be automatically launched when the [Edit Defaults] button is pressed on a report where multiple report URIs exist.
Report URI
Uniform Resource Identifier (URI) for selected report. To select a different URI, use the [Search] button.
Workspace
Workspace in which report is stored (a Workspace is a container to group and store reports).
Application Code
Enterprise module (GL, AP, AR, JC …) in which the report is available.
[Populate Input Controls] – Button
Click to populate the Input Controls section with the selected report’s parameters.
Input Controls – Section
The following are details about the fields and buttons in this section.
Name
Name of report parameter.
Visible – Checkbox
If checked, parameter is visible.
Required – Checkbox
If checked, parameter is required to run the report.
Letter Case Code
Select if text is to be lower or upper case.
Default Value Type
If “Literal” is selected, a literal value is entered in the Default Value field. If “SQL” is selected, a SQL statement is entered in the Default Value field (result must be a single value).
Default Value
Default value for the parameter.
LOV Value Attribute
NOTE: This is advanced functionality and users should consult with their CMiC representative before modifying any values.
This field should be left empty.
LOV Display in List
NOTE: This is advanced functionality and users should consult with their CMiC representative before modifying any values.
This is a comma-delimited list of columns to display in the order listed with no spaces. It is the list of column names as SQL knows them. For example, COMP_CODE,COMP_NAME.
LOV Display on Page
NOTE: This is advanced functionality and users should consult with their CMiC representative before modifying any values.
This is a comma-delimited list of columns to display in the order listed with no spaces. It is the list of column names as SQL knows them. For example, COMP_CODE,COMP_NAME.
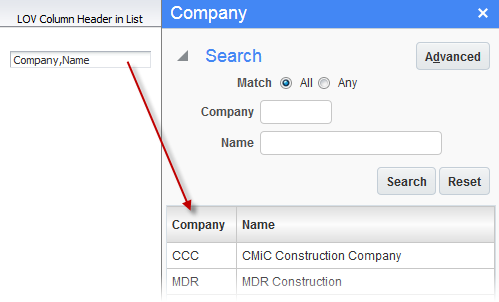
LOV Column Header in List

NOTE: This is advanced functionality and users should consult with their CMiC representative before modifying any values.
Column headers for parameter in LOV pop-up window; use a comma to separate the titles for each column.
This is a comma-delimited list of columns to display in the order listed with no spaces. This is the list of user friendly names that the user wants to see. For example, Company,Name.
Company Logo on Jasper Reports
The URL for the company logo to use in Jasper reports is set in the Company Detail pop-up window (program: COMPFRM), launched by clicking the [Company Detail] button at the bottom of the Company Setup screen (program: COMPSETUP; standard Treeview path: GL > Setup > Company Setup).