PCI Detail records can be imported into an existing PCI provided the PCI Header has already been created. The details can be imported from Excel (or a text file). Imported columns include WBS fields and Classifiers.
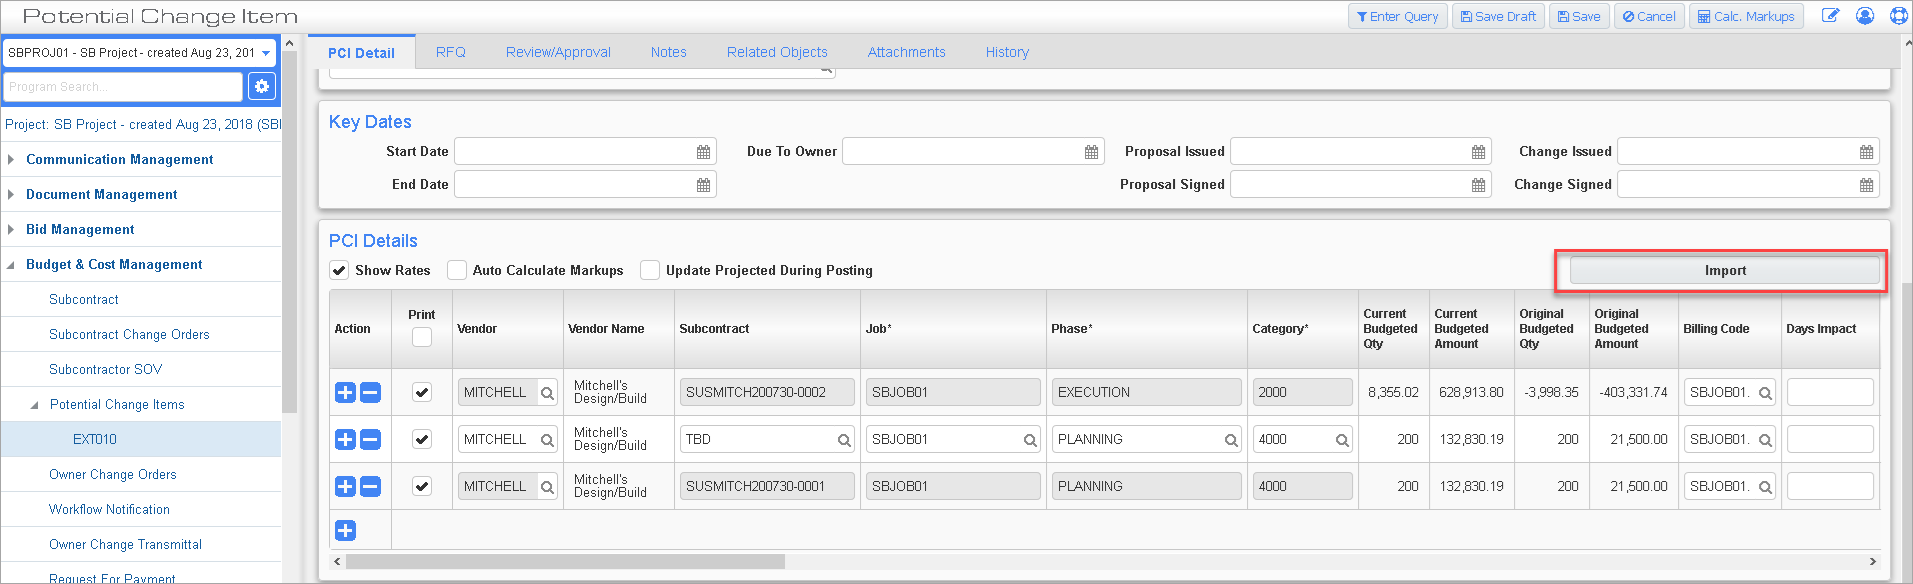
The [Import] button is available on the PCI Details section of an unposted PCI in Edit mode, where a user can import details after passing through all validations that currently exist in the PCI details.
The PCI Import functions in much the same way as other PM imports. Below is an outline of the steps and a description of the Validation screen.
Import Process
Pre-requisites
-
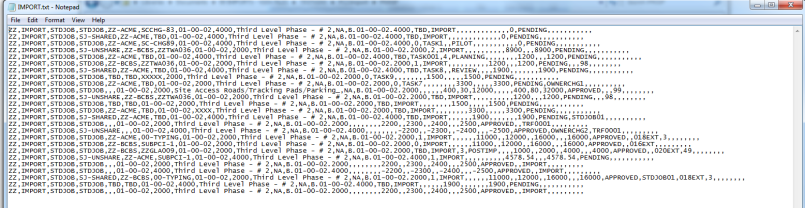
Prepare a .txt or .csv file with the details to be imported, using the layout guide.
-
For numeric codes, leading zeroes are usually removed in a .csv file, so make sure to adjust these appropriately before.
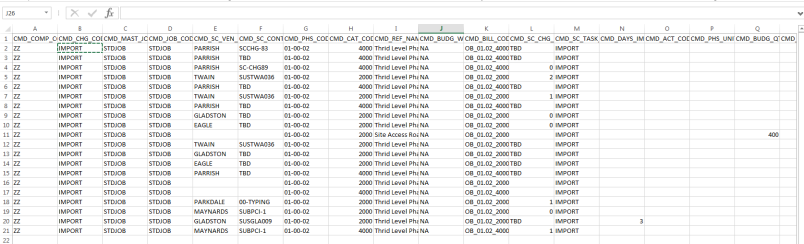
NOTE: The file must be .TXT or .CSV. Also note that if the file is opened using Excel, it may lose some of its original formatting. It is preferable to open and edit using Notepad. For example, if the value of a field is “01”, editing in Excel will possibly change it to ‘1’.
Example Input:
Procedure
Create or open up the PCI record that the details will be imported into.
![Screenshot of CM Detail Import launched from [Import] button on PCI Detail tab.](../../../../Resources/Images/Import_Utilities/IMPORT_PM_PCIDetailImport.png)
Click the [Import] button in the detail section of the PCI, to display the pop-up window where you will select the .txt or .csv file to be imported.
Check the 'Delete existing imported records' box to remove any temporary data previously uploaded using this import tool. This option does not delete or overwrite any existing records in the system.
Next, click [Upload] to bring the imported records to the Validation screen:
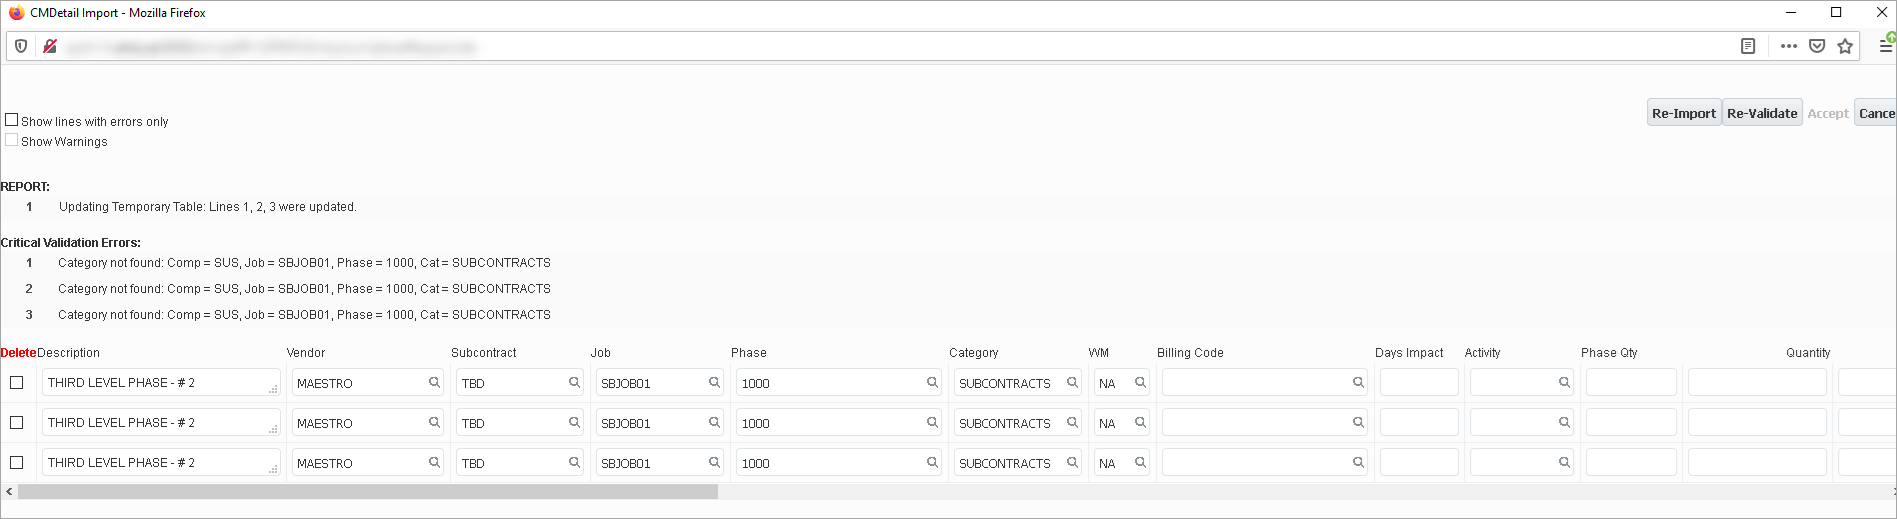
The initial validation will report any errors. By default, only records with errors are displayed on the Validation screen.
The ‘Show lines with errors only’ checkbox, can be unchecked to display all records – those with and without errors.
Proceed to make corrections and changes on this screen.
Click the [Re-Validate] button to re-validate the corrections and changes each time they are made. Changes include any records selected for deletion.
When there are no more errors, the [Accept] button becomes enabled.
Click [Accept] to pull the validated records into the PCI Detail section.
NOTE: If a value is entered for any WBS field that is related to the PCI Code, the value will be ignored, and that WBS field will be read-only. This is due to a feature in CMiC which allows a WBS Code to be linked to the PCI Code, for certain requirements. A message has been included in the Import Validation screen to inform the user.
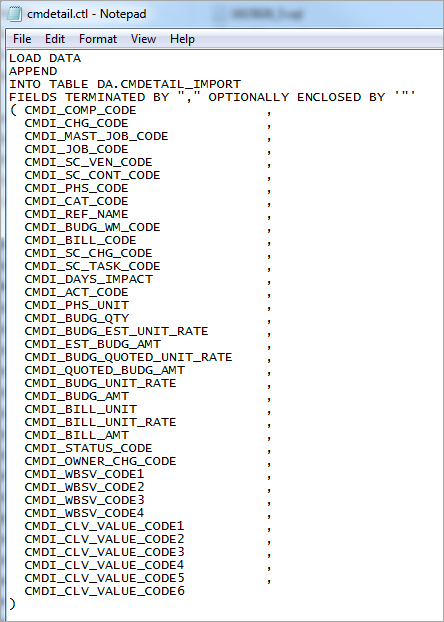
ASCII File Layout – PCI Details Import
Control File = CMDETAIL.ctl
| Column Name | Description | Required | Type | Length |
|---|---|---|---|---|
| CMDI_COMP_CODE | A valid CMiC company code. | Yes | Varchar2 | 10 |
| CMDI_CHG_CODE | PCI Code (should match with code from PCI Header record). | Yes | Varchar2 | 10 |
| CMDI_MAST_JOB_CODE | A valid CMiC job code. | Yes | Varchar2 | 10 |
| CMDI_JOB_CODE | This is the job in the detail of the change order. It may be a sub-job of the job in the header. | Yes | Varchar2 | 10 |
| CMDI_SC_VEN_CODE | Subcontract Vendor Code - required if a subcontract is related to the change. | No | Varchar2 | 8 |
| CMDI_SC_CONT_CODE | Subcontract Code - required if a subcontract is related to the change. | No | Varchar2 | 20 |
| CMDI_PHS_CODE | Must be a valid phase code for the job. | Yes | Varchar2 | 16 |
| CMDI_CAT_CODE | Must be a valid category for the job. | Yes | Varchar2 | 16 |
| CMDI_REF_NAME | This field populates the Long Description column displayed in the PCI Details. | No | Varchar2 | 4000 |
| CMDI_BUDG_WM_CODE | A valid WM code must be entered. | No | Varchar2 | 2 |
| CMDI_BILL_CODE | Bill Code – required if External or OBC class PCI and a Job Billing type job, otherwise it is optional. | No | Varchar2 | 50 |
| CMDI_SC_CHG_CODE | Subcontract change code - required if a subcontract is related to the change. | No | Varchar2 | 12 |
| CMDI_SC_TASK_CODE | Subcontract change task code - required if a subcontract change code is entered. | No | Varchar2 | 16 |
| CMDI_DAYS_IMPACT | The impact of the change in Number of Days. | No | Num | 10 |
| CMDI_ACT_CODE | Activity Code | No | Varchar2 | 10 |
| CMDI_PHS_UNIT | Phase Quantity - leave blank if not required. | No | Num | 16,8 |
| CMDI_BUDG_QTY | Budget Quantity related to Change order – may be left blank if not applicable. | No | Num | 16,8 |
| CMDI_BUDG_EST_UNIT_RATE | Estimated Rate | No | Num | 16,4 |
| CMDI_EST_BUDG_AMT | Estimated Amount | No | Num | 18,2 |
| CMDI_BUDG_QUOTED_UNIT_RATE | Quoted Rate | No | Num | 16,4 |
| CMDI_QUOTED_BUDG_AMT | Quoted Amount | No | Num | 18,2 |
| CMDI_BUDG_UNIT_RATE | Budgeted (Final) Rate | No | Num | 16,4 |
| CMDI_BUDG_AMT | Enter the Budget (Final) Amount | No | Num | 18,2 |
| CMDI_BILL_UNIT | Billing units are added here. It is optional. | No | Num | 10,3 |
| CMDI_BILL_UNIT_RATE | Billing Rate | No | Num | 18,4 |
| CMDI_BILL_AMT | Required if External or OBC class PCI and a Job Billing type job- if left blank it will be 0. | No | Num | 18,2 |
| CMDI_STATUS_CODE | Change Order Status – must be a valid CMiC change order status code; *if left blank it will be updated with the status from the header on editing the PCI. | Yes* | Varchar2 | 10 |
| CMDI_OWNER_CHG_CODE | Owner Change Order Number if required. | No | Varchar2 | 20 |
| CMDI_WBSV_CODE1 | WBS Code 1 Value | No | Varchar2 | 10 |
| CMDI_WBSV_CODE2 | WBS Code 2 Value | No | Varchar2 | 10 |
| CMDI_WBSV_CODE3 | WBS Code 3 Value | No | Varchar2 | 10 |
| CMDI_WBSV_CODE4 | WBS Code 4 Value | No | Varchar2 | 10 |
| CMDI_CLV_VALUE_CODE1 | Classifier Value 1 | No | Varchar2 | 16 |
| CMDI_CLV_VALUE_CODE2 | Classifier Value 2 | No | Varchar2 | 16 |
| CMDI_CLV_VALUE_CODE3 | Classifier Value 3 | No | Varchar2 | 16 |
| CMDI_CLV_VALUE_CODE4 | Classifier Value 4 | No | Varchar2 | 16 |
| CMDI_CLV_VALUE_CODE5 | Classifier Value 5 | No | Varchar2 | 16 |
| CMDI_CLV_VALUE_CODE6 | Classifier Value 6 | No | Varchar2 | 16 |
The following screenshot shows an example of the Control File.