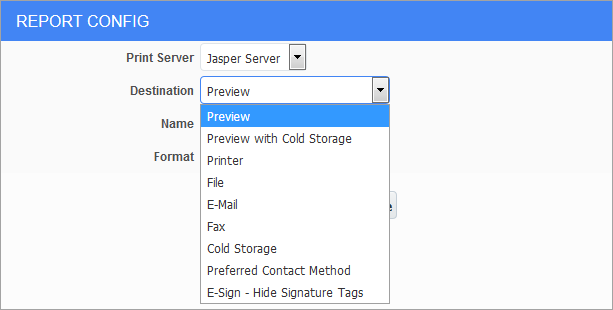
When printing any report within the system, the user may select to cold store the report. This is done on the Report Parameter screen.
There are two new options available “Preview with Cold Storage” and “Cold Storage”.
The “Preview with Cold Storage” option will display the report in PDF format and save the report to cold storage, while the “Cold Storage” option does not display the report to the user, it just saves it to cold storage.
JSP – Report Configuration Screen
Sample of RFI – [Print Report] button pop-up window
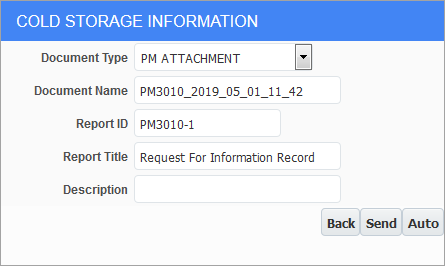
If either of the two cold storage options are selected, a second screen will display.

The cold storage information that can be entered is:
Document Type: This is a drop-down list of valid document types. The document type must have been previously defined and is limited to those document types that are linked to cold storage via either their setup or by virtue of being a PM document.
Document Name: This field is prepopulated with the name of the report and the date and time – as an example PM3010_2019_04_24__11_45_14 – This can be changed to anything – but it cannot contain special characters such as “/” or “|”. This is the actual name of the PDF file that will be created.
Report ID: This field is prepopulated with the CMiC report code, but this may be changed as required.
Report Title: This field is prepopulated with the CMiC report name but may be changed as required.
Description: This is a free form field that can be used to describe the report. This description should somehow link the report to something in the system such as a vendor code or a job code if appropriate – then the image search function will be able to find the report as a related image.