Whenever a new PM document type is created the system will automatically create the related required data to handle cold storage for the document type. All pre-existing document types will have had this same information created during the installation of this cold storage functionality.
Cold storage for PM documents done by simply activating already created Imaging document types and flysheets and assigning them to an active cold storage document source.
Step 1: (Optional) Create PM Document
-
Open the System > Global Tables > Maintain Data Process > Document Options node.
-
Create a new PM Document Type by clicking the [Add New] button.
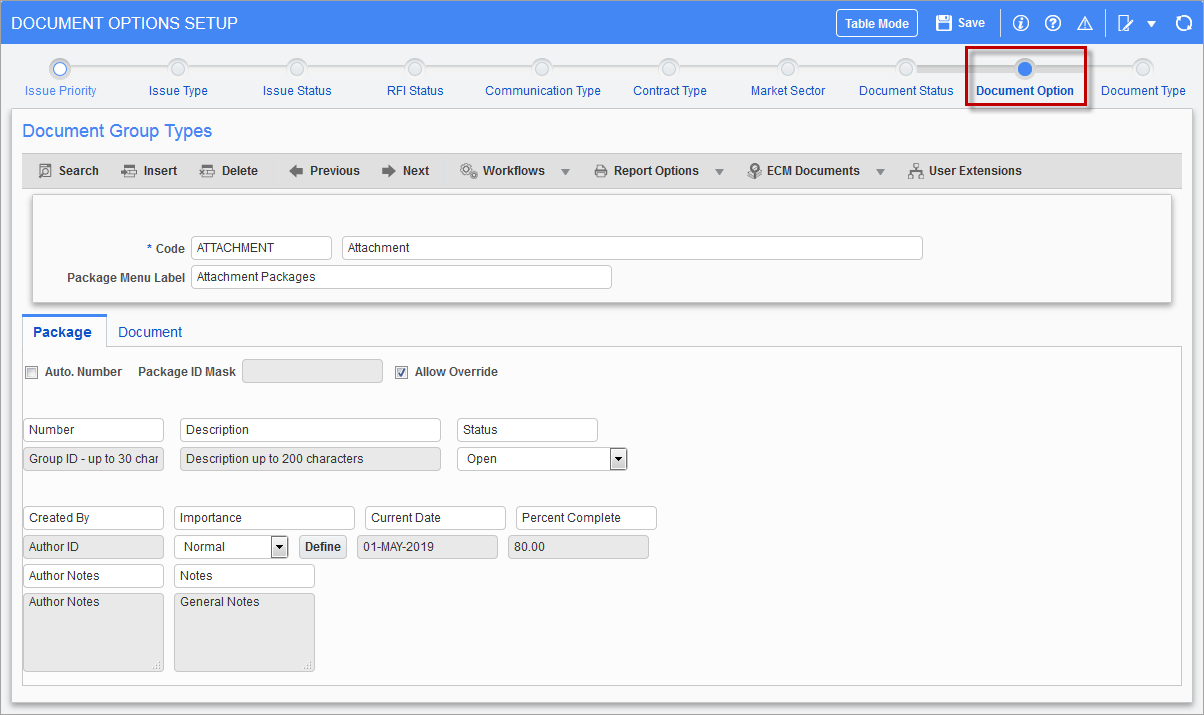
Pgm: PMOPTFM – Document Options Setup; standard Treeview path: System > Global Tables > Maintain Data Process – Document Options node
-
Update the Documents tab with the required fields and save the changes.
The system will automatically insert a matching document type and flysheet definition into the Imaging module with the status of “Active”. All pre-existing document types will have had this same information created during the installation of this cold storage functionality.
Step 2: Verify and Activate the Fly Sheet
-
Open Imaging > Setup > Flysheets on the Treeview.
-
Check the 'Show Inactive Flysheets' checkbox then query the data.
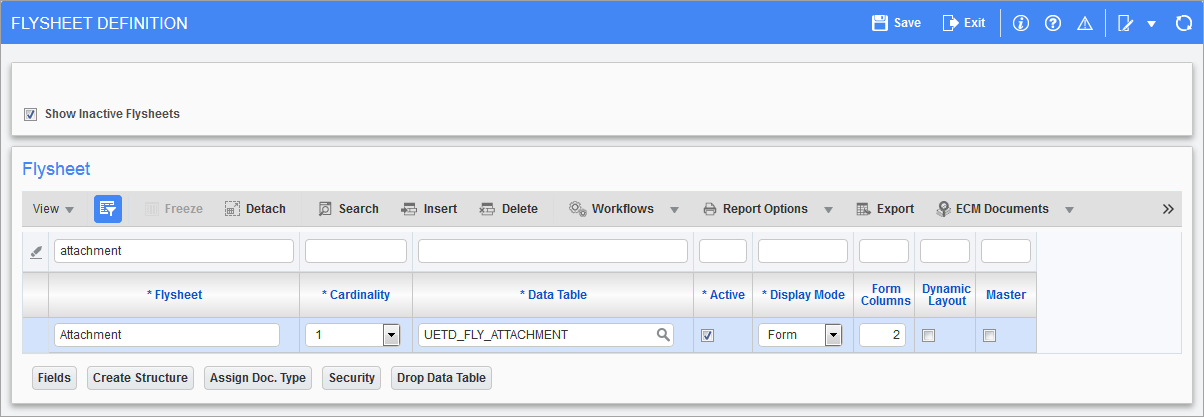
Pgm: IMGFLYFM – Flysheet Definition; standard Treeview path: Imaging > Setup > Flysheets
-
Use the [Fields] button to open up the details of the flysheet.
The system will have created the flysheet definition to match the active fields on the document type. Review the definition and add fields if required – fields removed here only affect Image Manager.
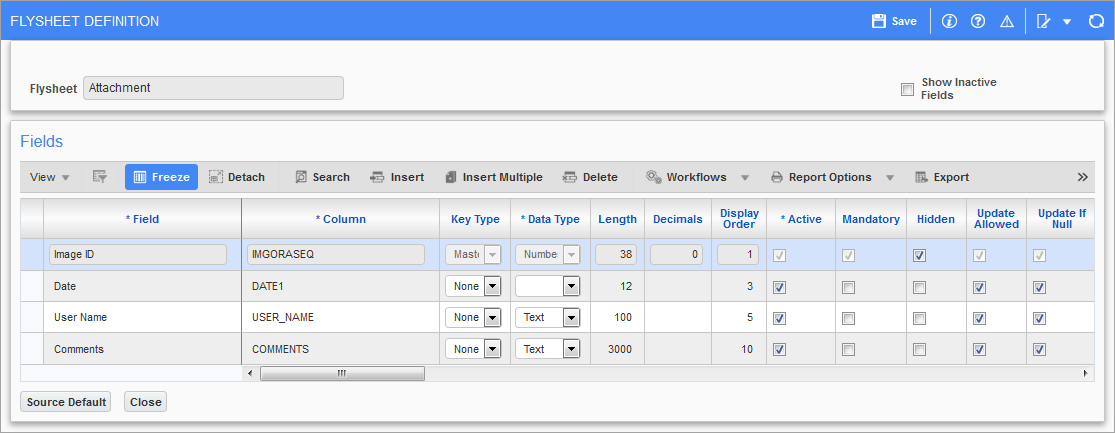
Pgm: IMGFLYFM – Flysheet Definition; standard Treeview path: Imaging > Setup > Flysheets – [Fields] button
-
Save and return to the main Flysheet Definition screen.
-
Create the flysheet by using the [Create Structure] button.
-
Add security as required to the flysheet via the [Security] button.
-
Save and exit.
Step 3: Activate Document Type
-
Open Imaging > Setup > Document Types on the Treeview.
-
Check the 'Show Inactive Document Types' checkbox then query the data.
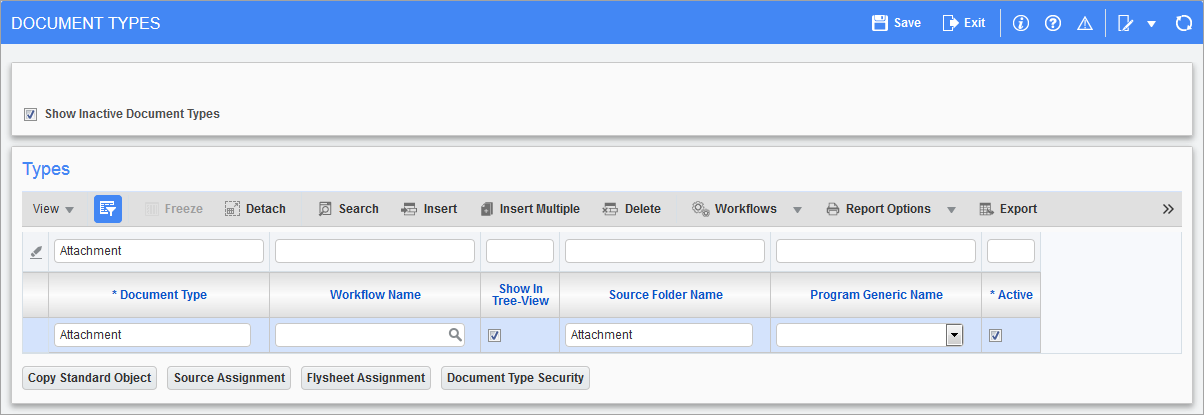
Pgm: IMGDOCTP – Document Types; standard Treeview path: Imaging > Setup > Document Types
-
Check the 'Active' box. For the created cold storage trigger to appear in the Auto Cold Storage Definitions screen in CMiC Field, the associated Imaging document type must be marked as active and the 'Show in Treeview' box must be checked as well.
-
Apply security to the document type via the [Document Type Security] button as required.
-
Apply the cold storage source to the document type via the [Source Assignment] button.
-
Apply the flysheet to the document type via the [Flysheet Assignment] button.
-
Save and exit.