Overview
The current functionality of the Joint Payee field in Accounts Payable is a free-form field where users can input information for the Joint Payee.
Imaging is now integrated with Accounts Payable to enable users to specify a Joint Payee as a named party from the Business Partner LOV. This LOV will display the code and name, but will return the name to the screen after selection.
To preserve the existing functionality for other customers who use free form, the 'Enable Joint Payee Validation' checkbox in the Financials tab of the System Options screen allows for flexibility in validating the Business Partner name against the Business Partner LOV.
Setup Required
-
System Options > Financials Tab
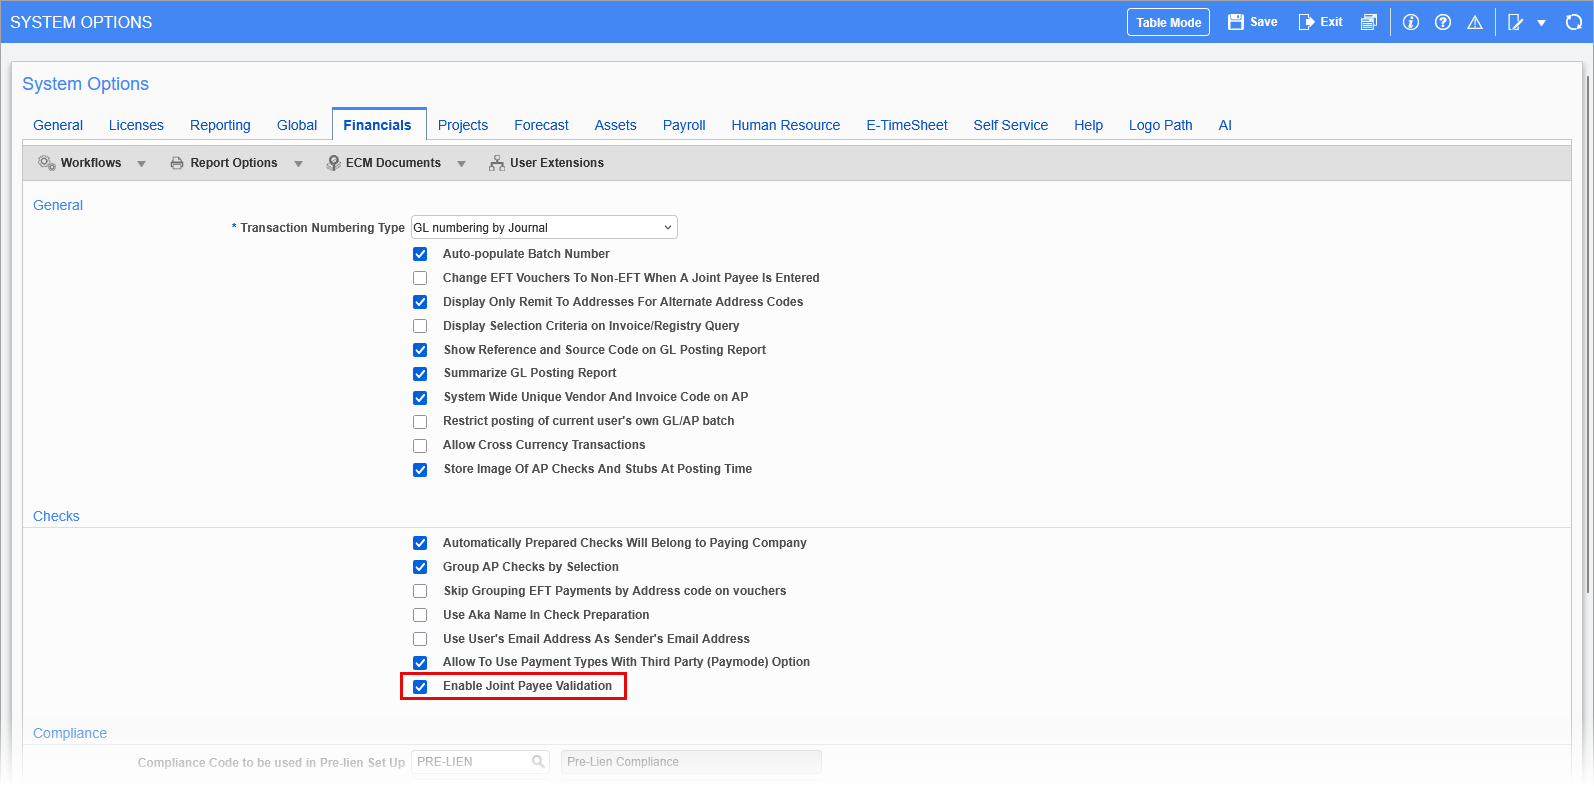
The Joint Check Processing functionality is controlled by the 'Enable Joint Payee Validation' checkbox in the Financials tab of the Systems Options screen. This checkbox is hidden by default, but can be enabled via the Lite Editor.
If the box is checked, users must select the Joint Payee from the LOV. The validation ensures that the selection is a valid business partner. If the user types in a name/code the validation will fail and display an error. If the box is unchecked, users can either type in a free form Joint Payee name or select from the LOV. The Joint Payee name is not validated against the business partner list.
-
Imaging Setup
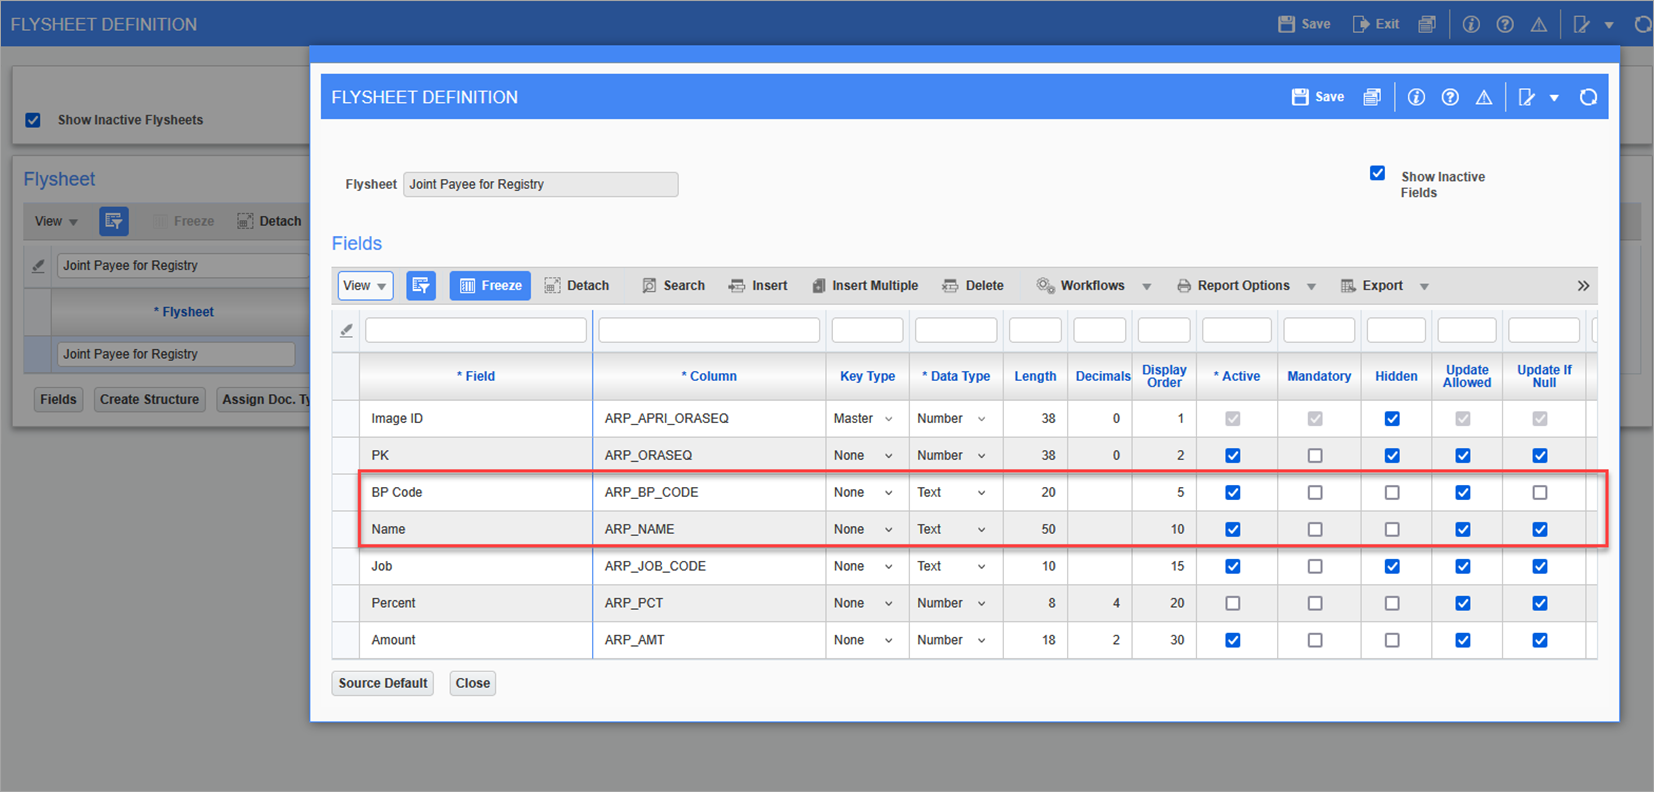
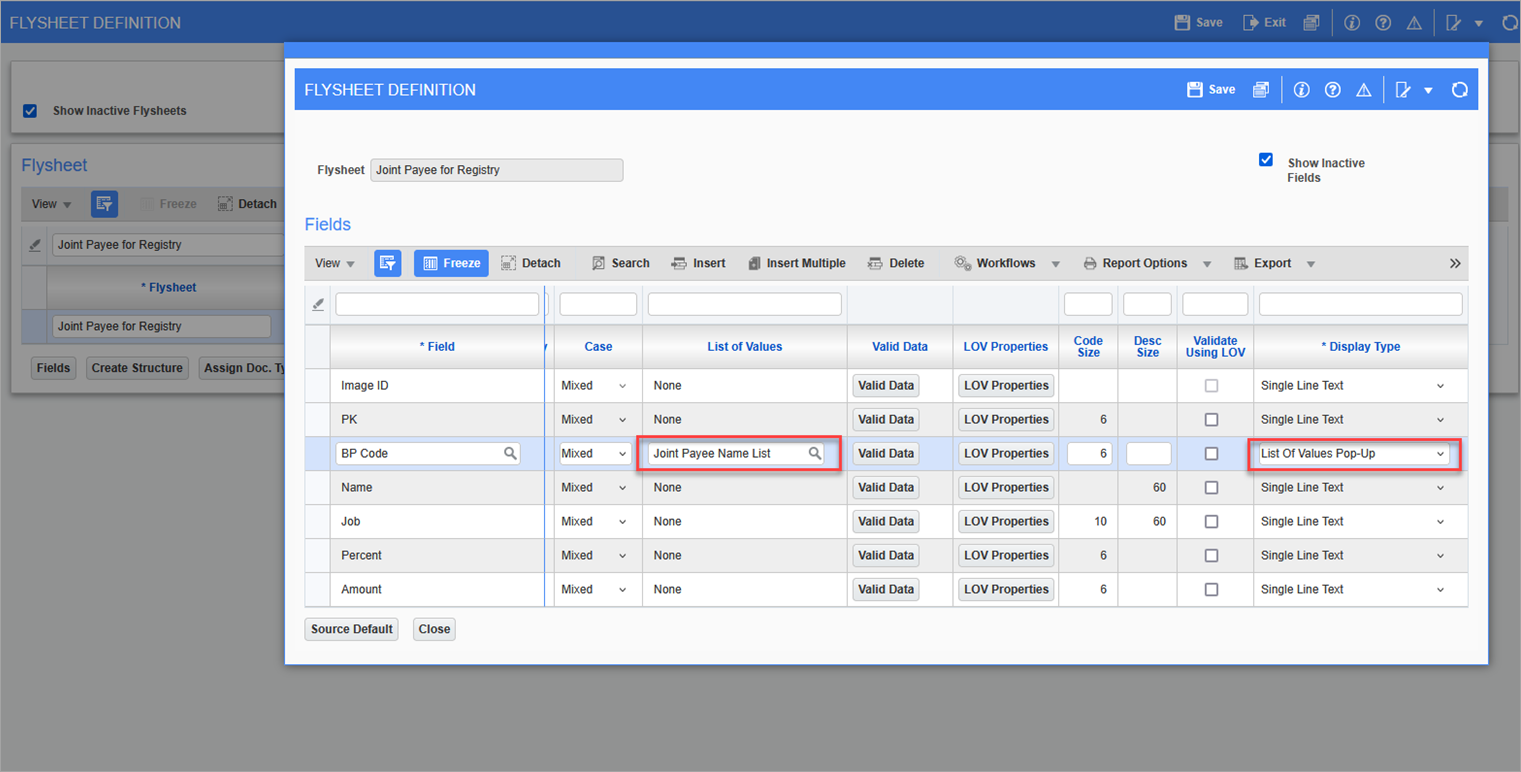
The flysheet for Joint Payee for Registry (RAD_APREGPAYEE_V) has two fields highlighted in the screenshots below that need to be set up as shown:
-
Set the BP Code to be the LOV selection "Joint Payee Name List".
-
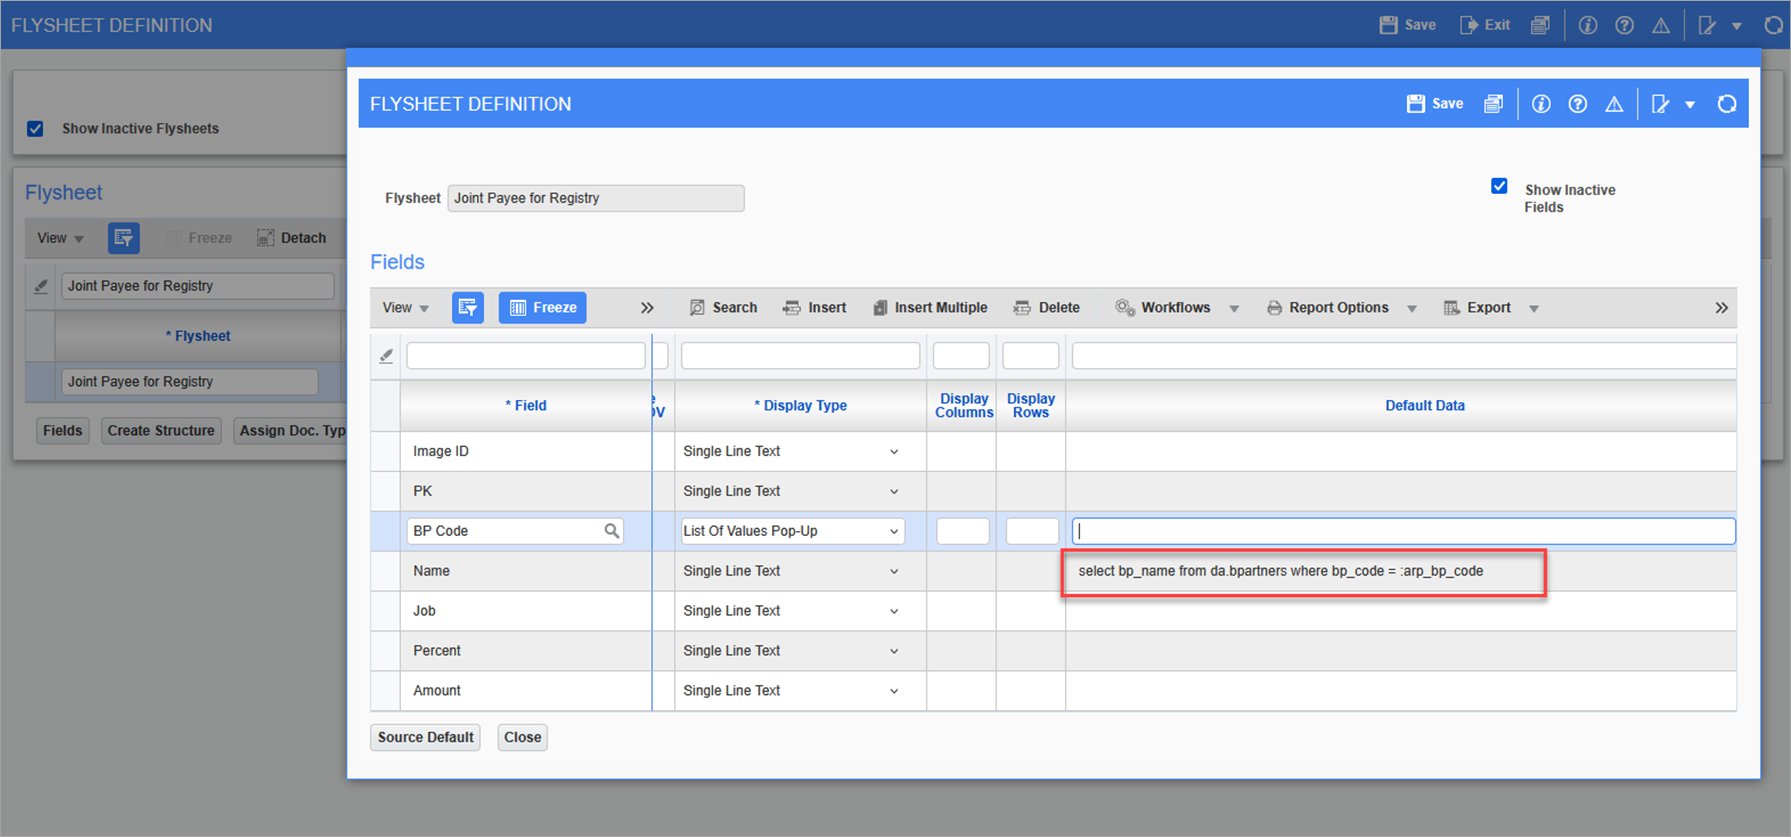
Set the BP Name field with the value shown in the Default Data column.
Value = select bp_name from da.bpartners where bp_code = :arp_bp_code
-
-
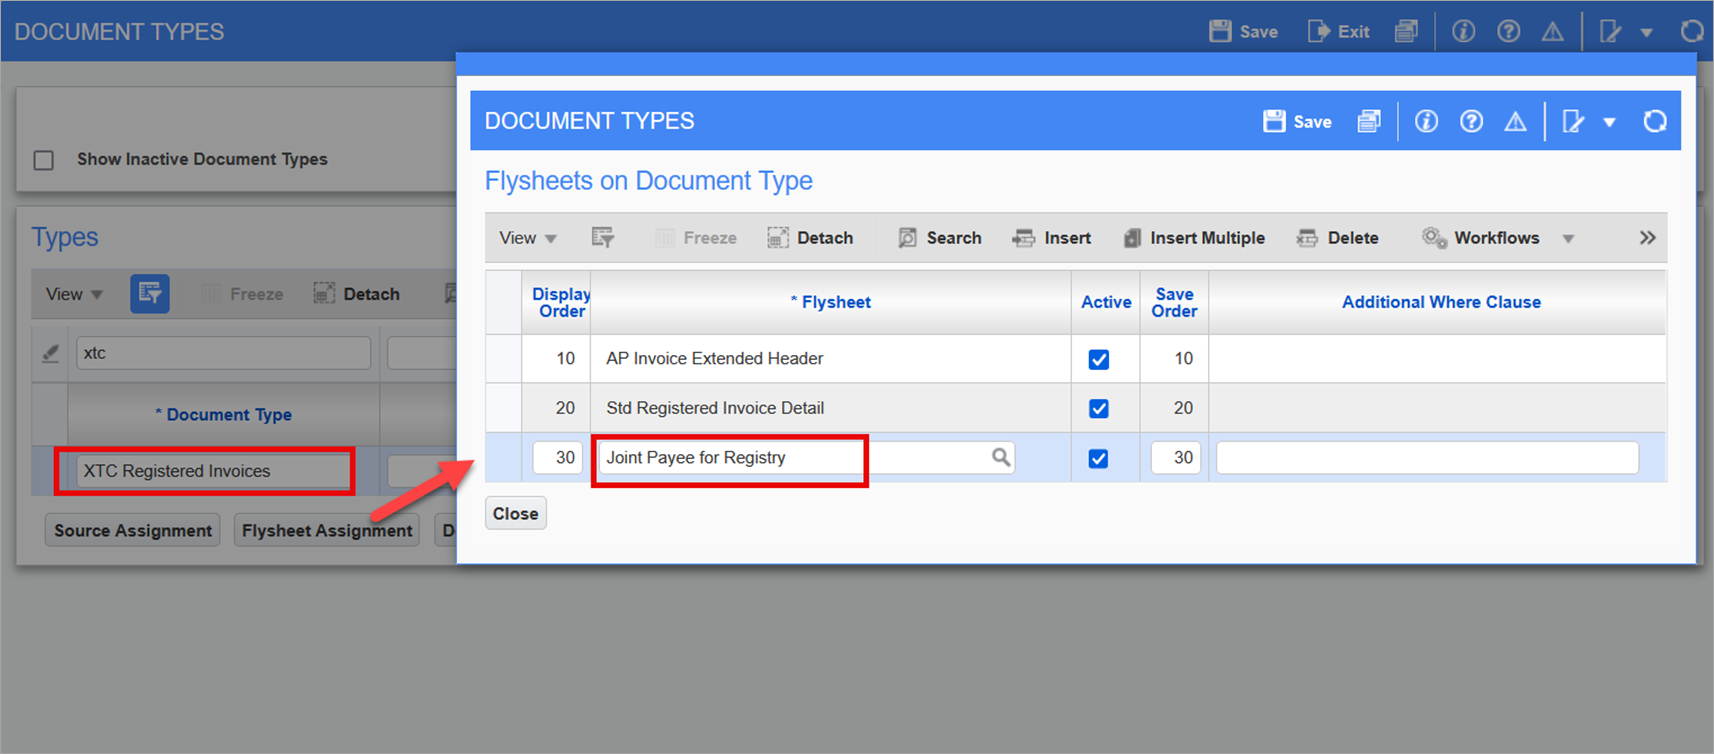
Add the flysheet to the relevant Imaging document type (Registered Invoice).
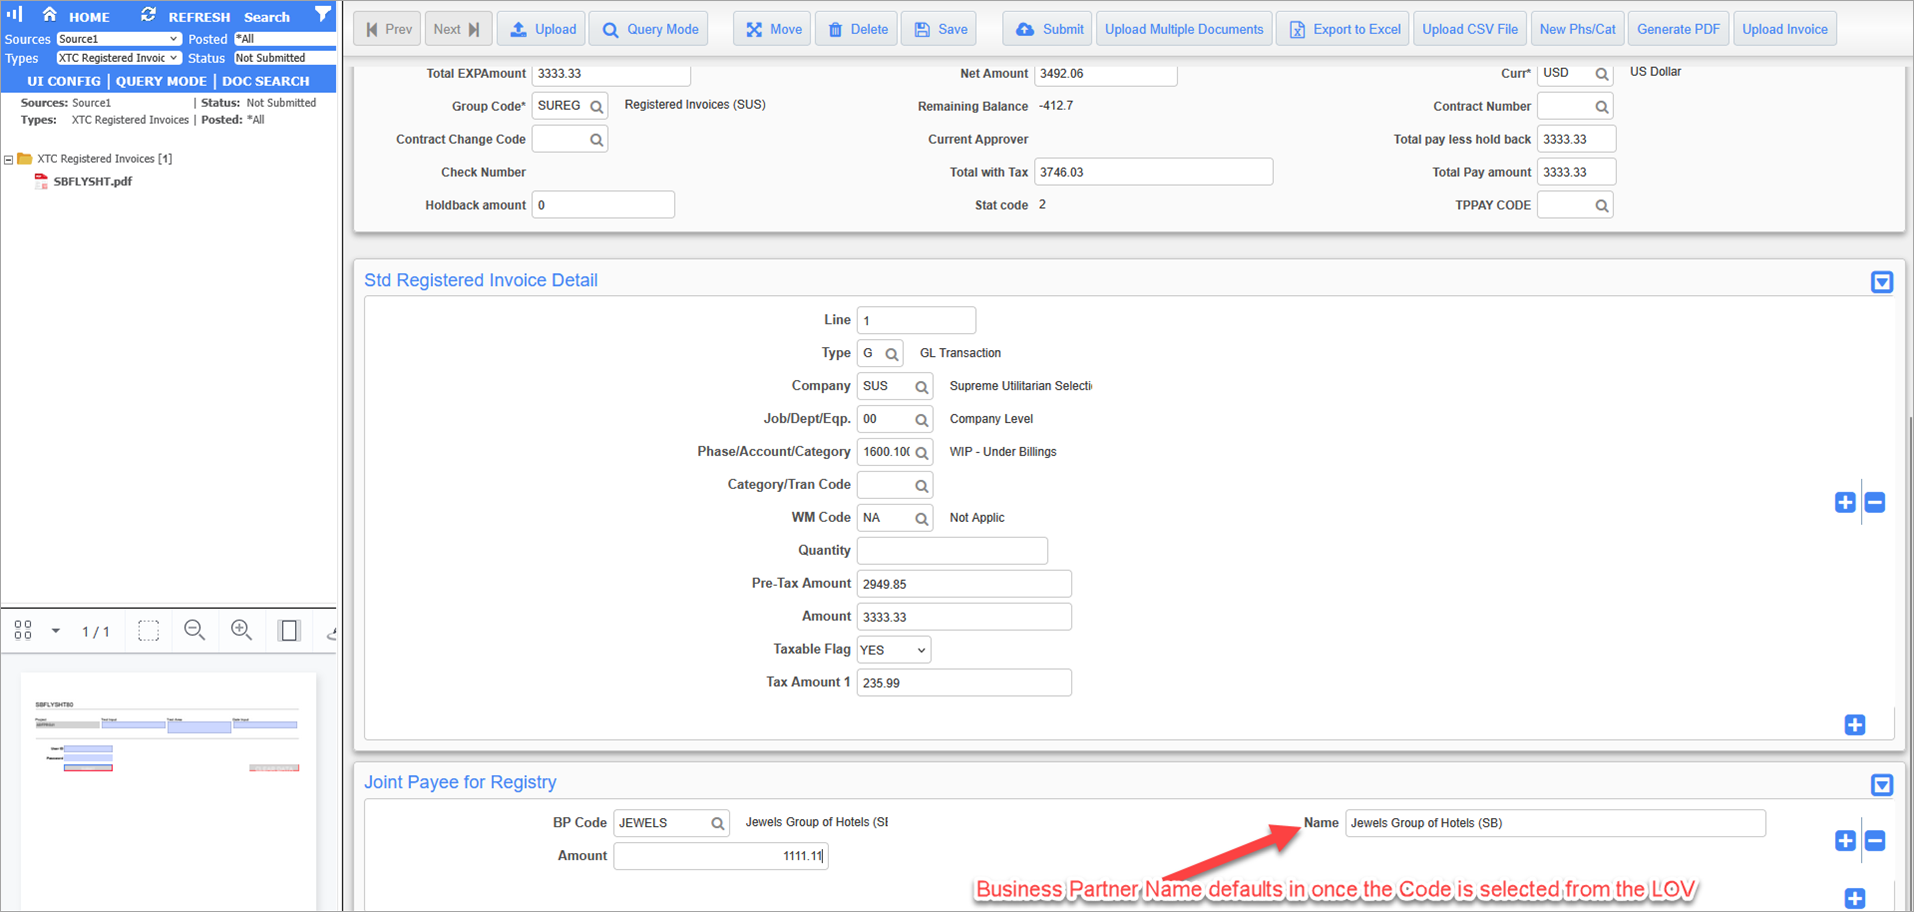
Joint Payee for Registry (RAD_APREGPAYEE_V)
Example:
Processing
-
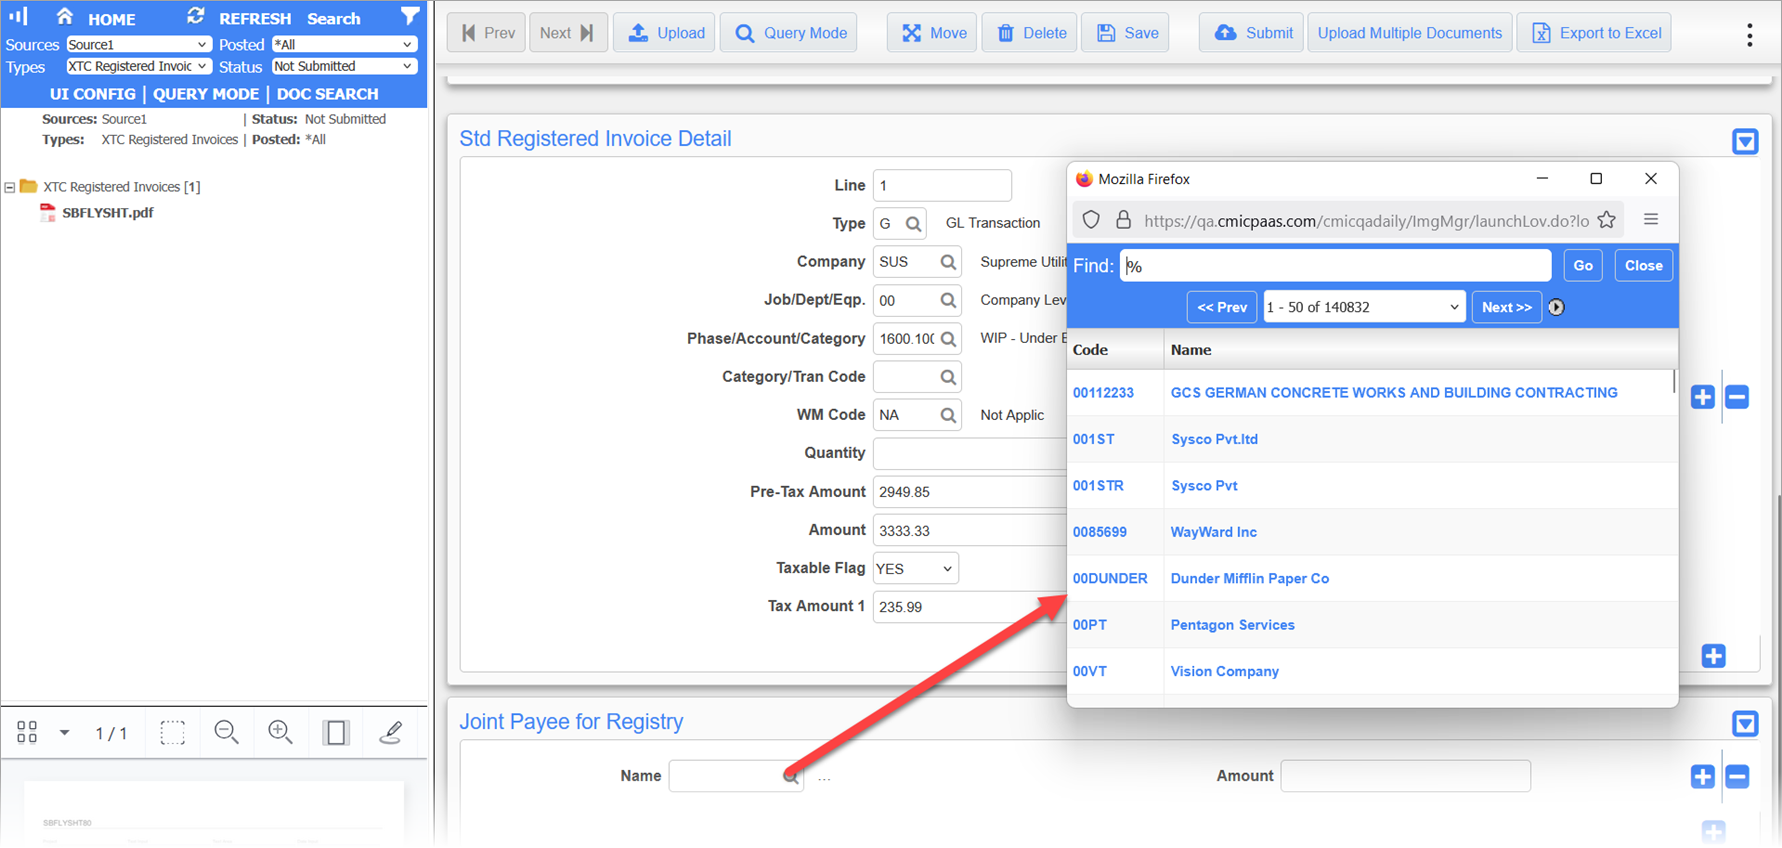
Proceed with using the document type in Image Manager.
-
If the user types in a Joint Payee that is not in the LOV and saves the changes, a message is displayed:

-
The LOV opens to the Business Partners screen and displays the Code and the Name.
-
The LOV allows the user to select the Joint Payee from the Business Partner LOV and validates on saving.
NOTE: In the Joint Payee Flysheet, the Default Name cannot be updated once the flysheet is saved. The user will need to delete and add a new Joint Payee record.

-
-
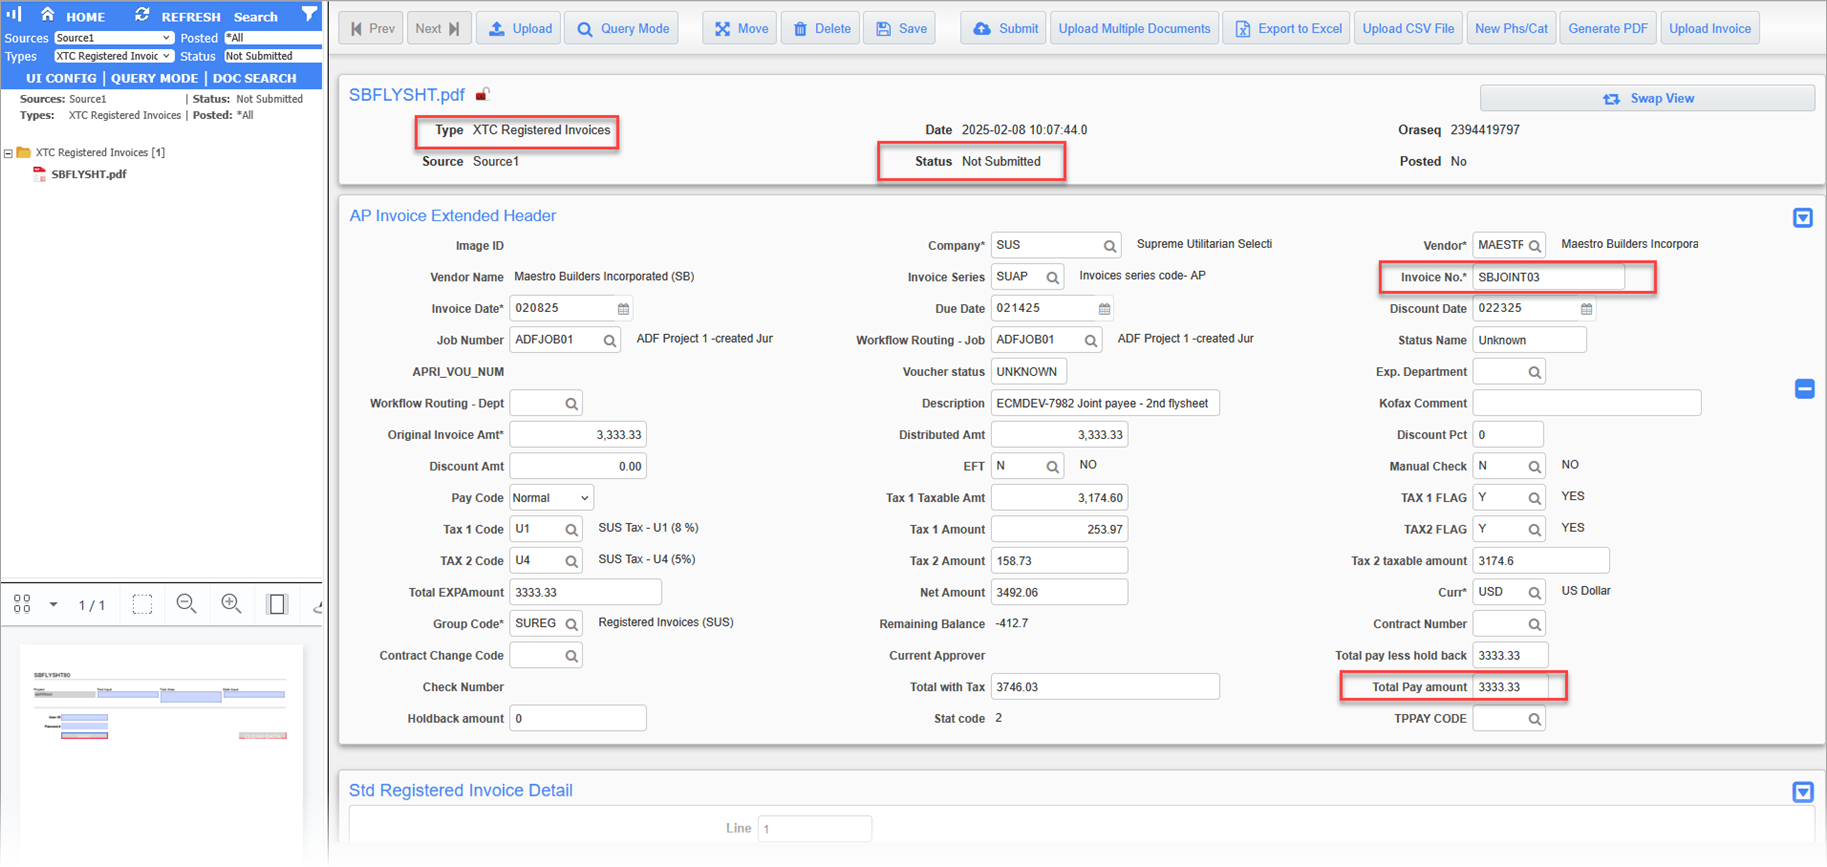
Submit the invoice.
-
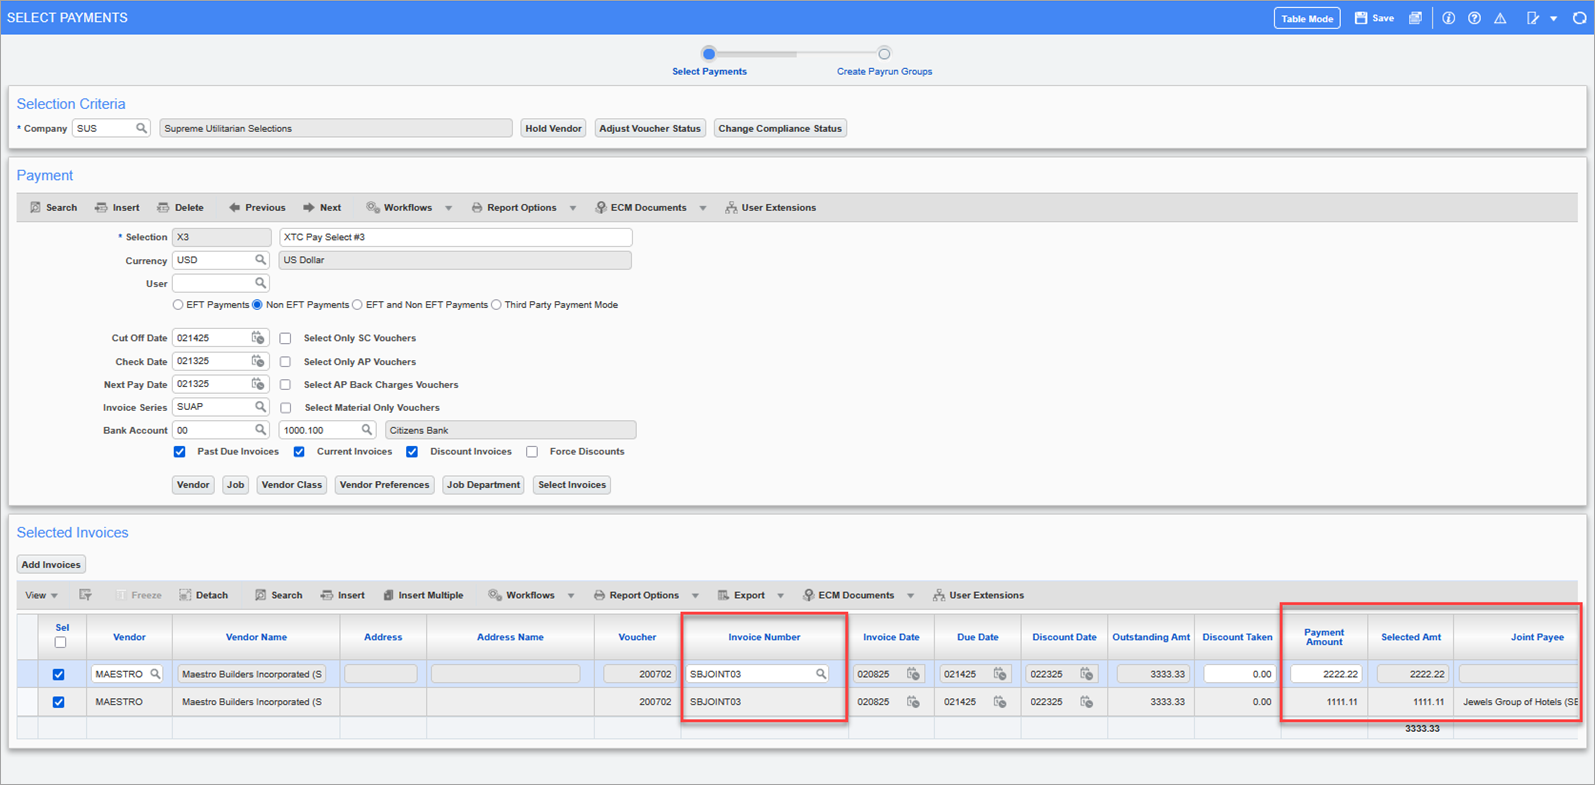
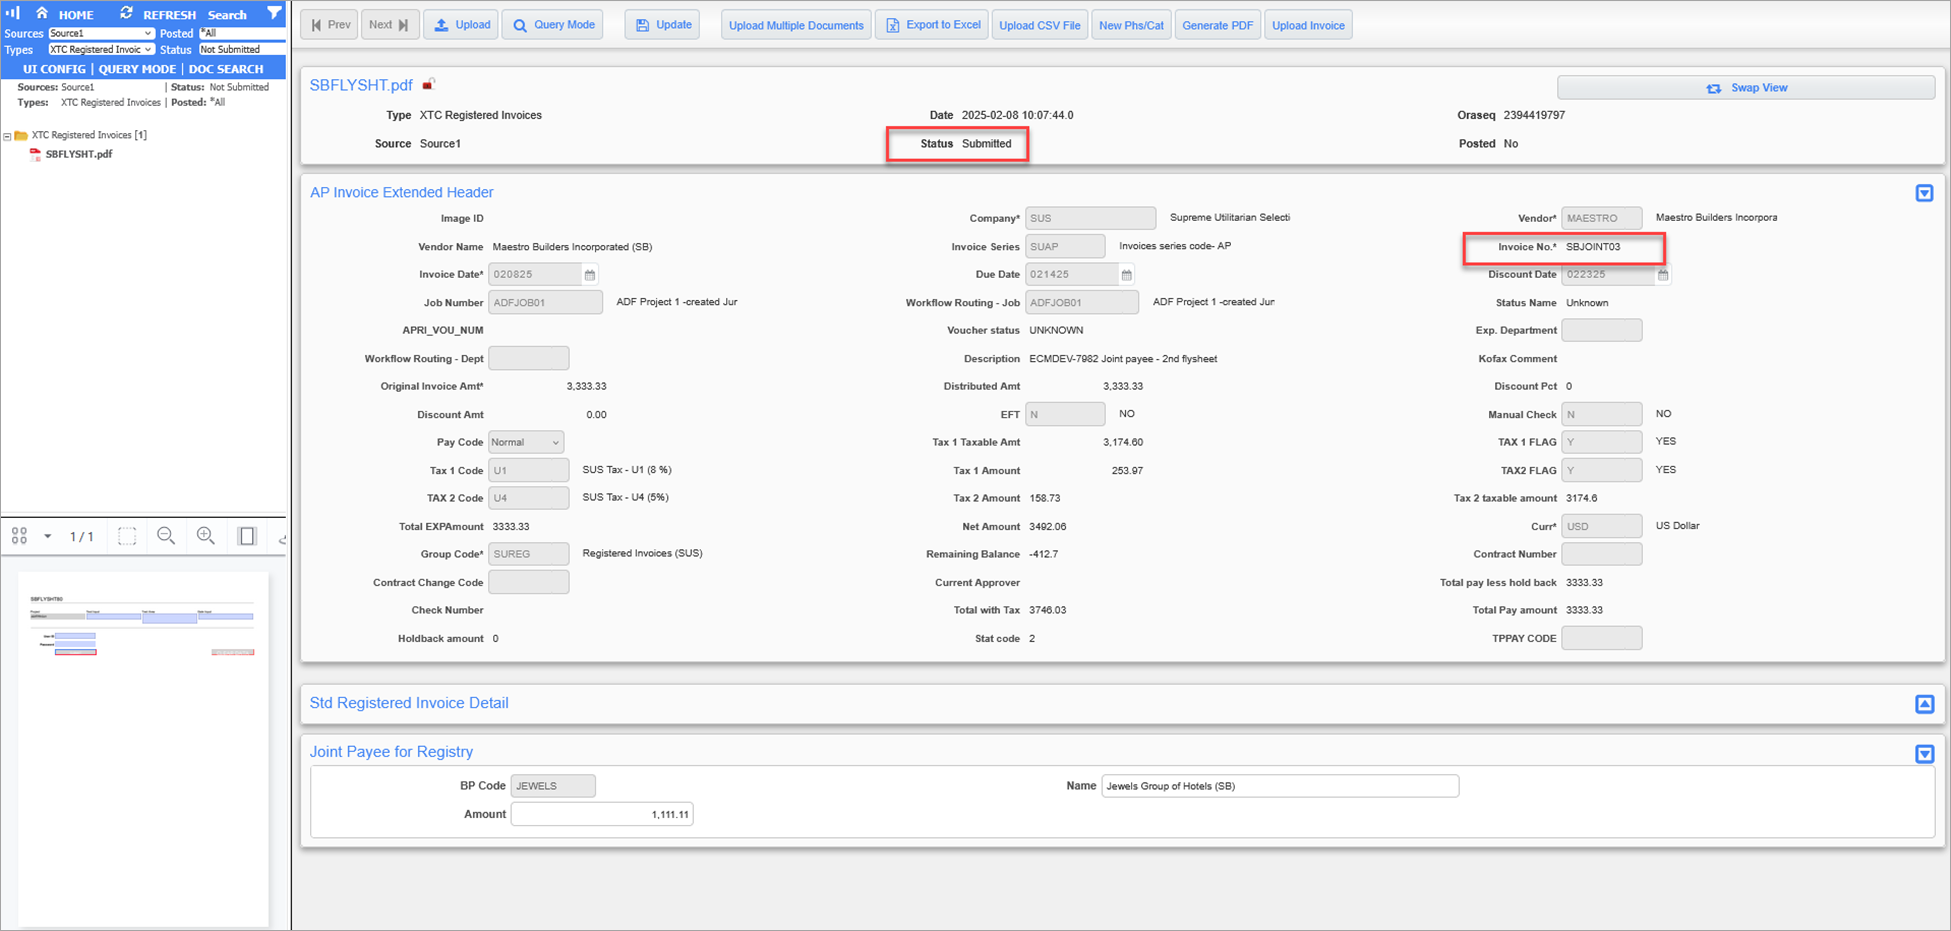
Viewing the submitted record in the AP Registered Invoices screen.
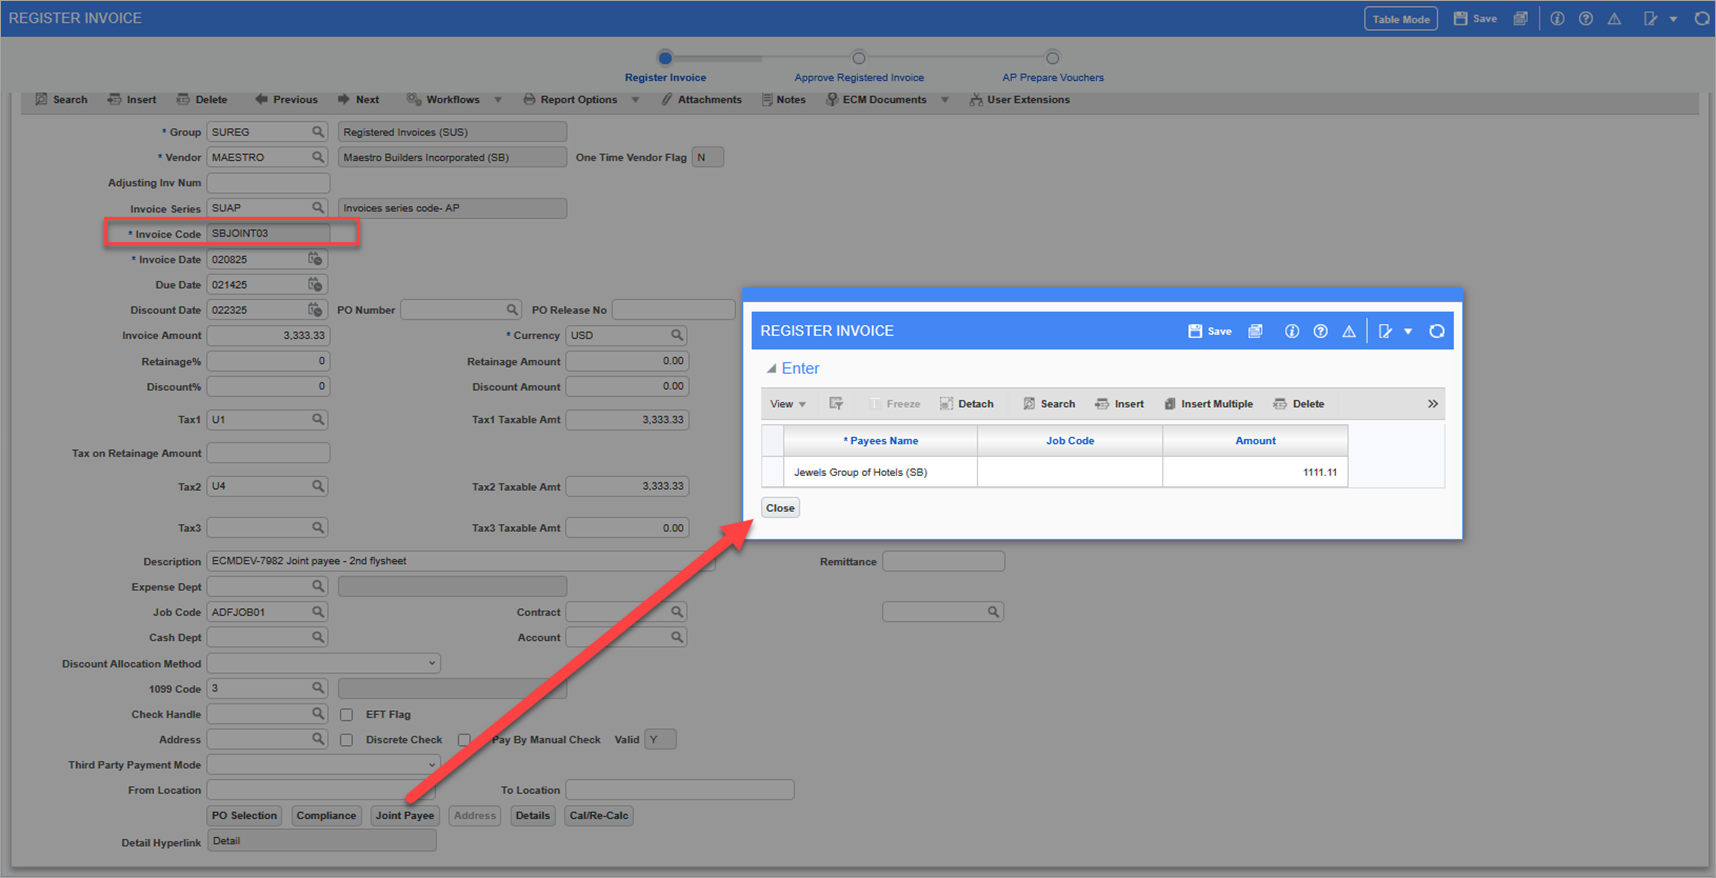
-
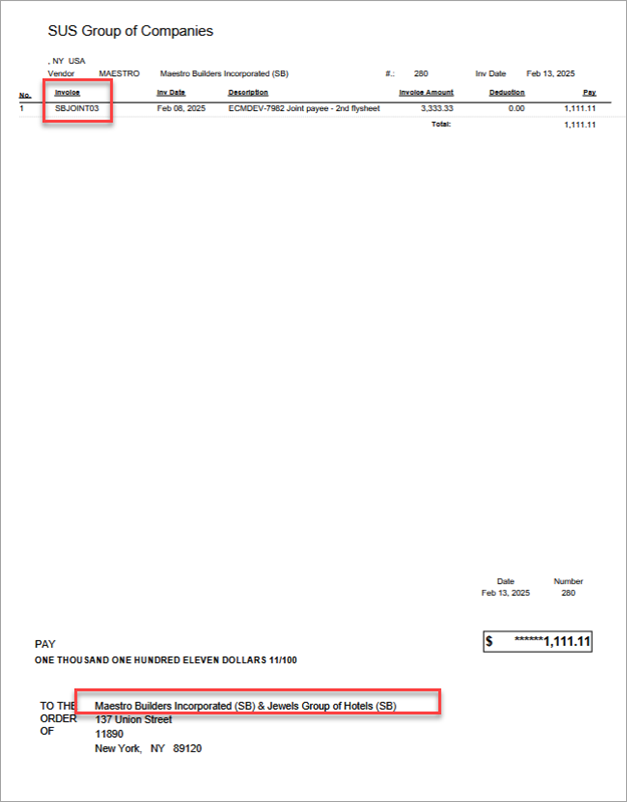
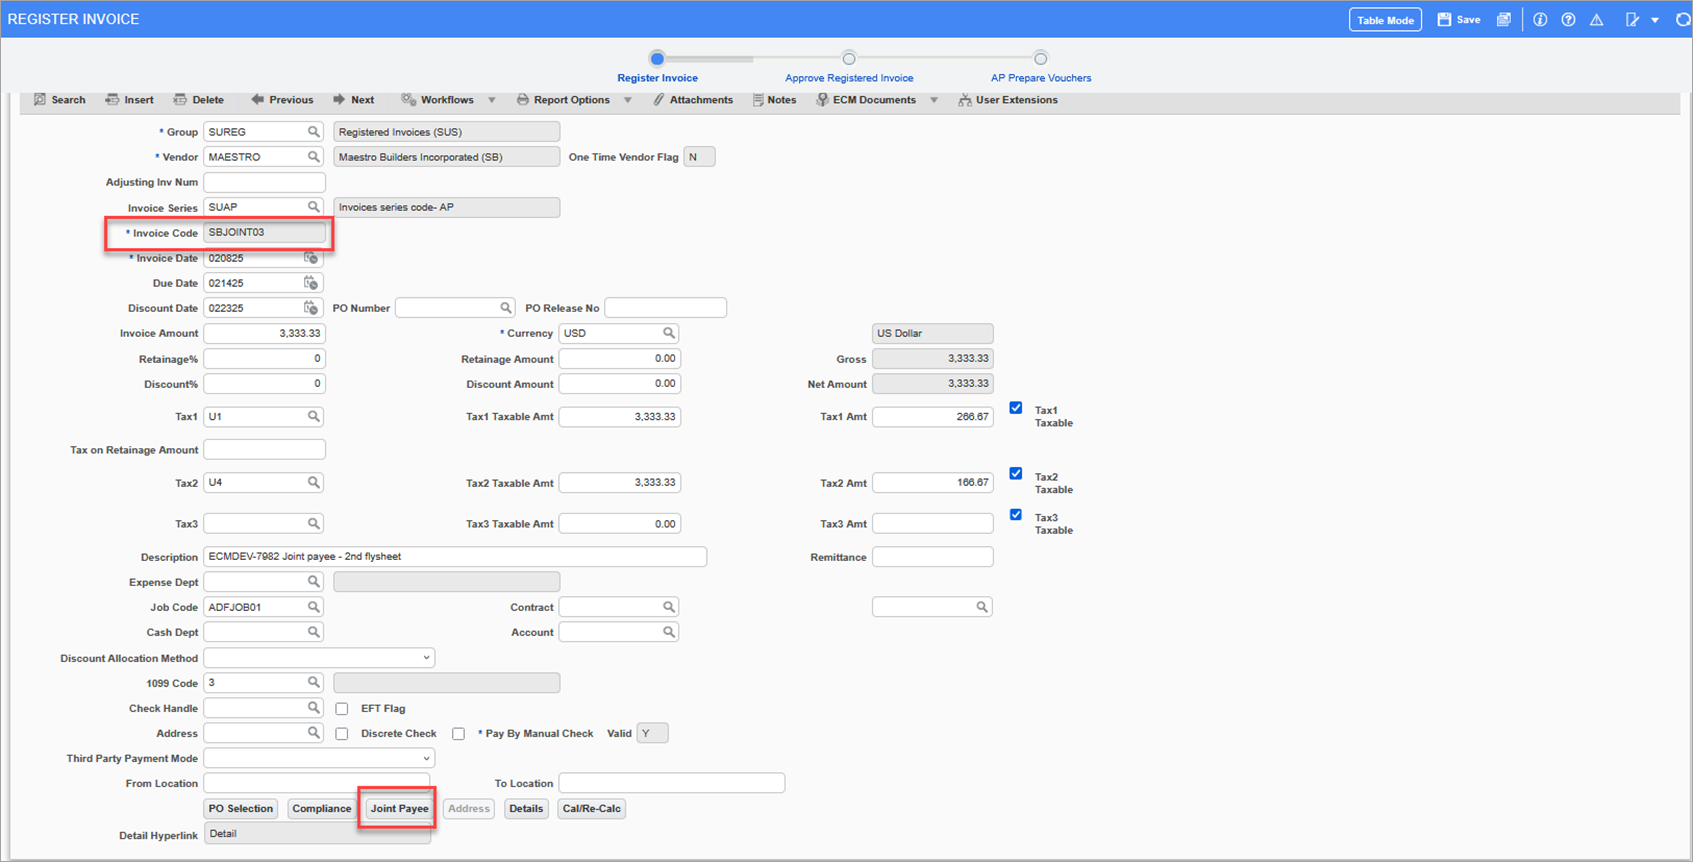
Approve the invoice, prepare the voucher, and carry it through the Payment Selection and Check Printing processes.