Overview
Greenshades Online - Year-End Forms
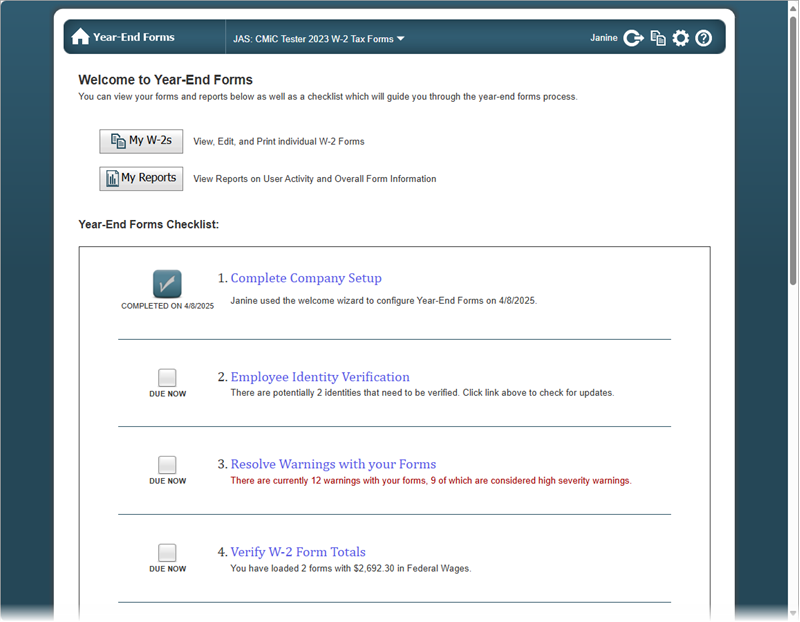
The Greenshades Online Year-End Forms screen allows users to manage their forms and provides a checklist to guide users through the year-end forms process, as outlined below.
To learn more about Greenshades year-end processing, please refer to Greenshades - Year End Processing Webinar (2023 - 2024).
Process
At any time during the process, press the [Year End Forms] button in the top left of the screen to return to the Year-End Forms home screen.
-
Complete Company Setup
This step allows users to configure Year-End Forms. This step may have been completed as part of the Greenshades - Create Year-End Forms - Tax Filing Center.
-
Employee Identity Verification
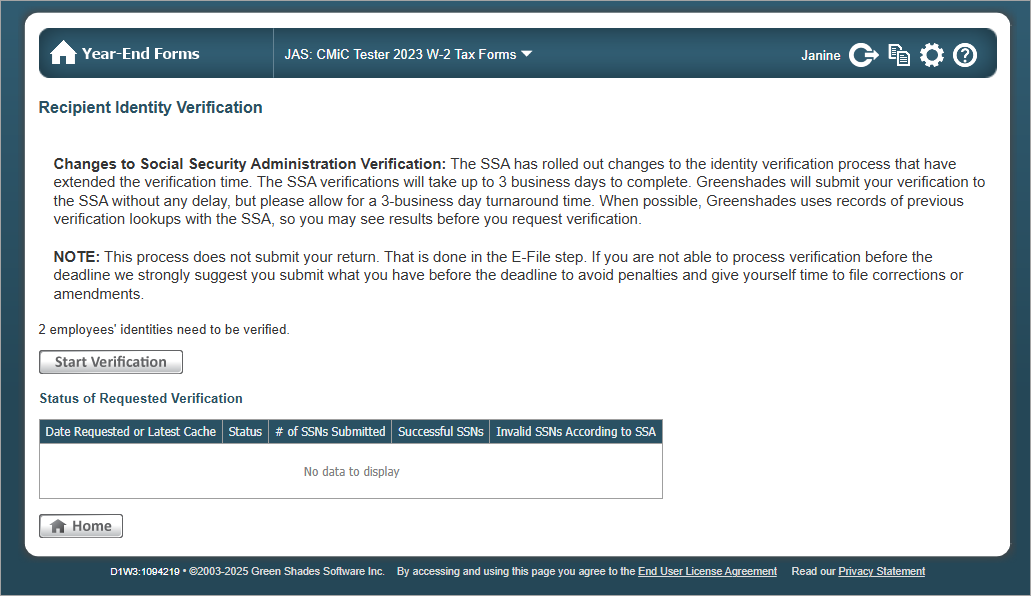
This step (optional) allows users to verify employee identification and SSNs with IRS records. Press the [Start Verification] button to submit the employees identifies for verification against Social Security Administration (SSA) records. Users will receive an email upon submission and can check the status of the request at any time by returning to this step to view the status grid.
Please note that Greenshades bills users for any SSNs verified as incorrect.
NOTE: This process may take up to three business days to complete. If the process takes longer, please contact Greenshades Online support.
-
Resolve Warnings with your Forms
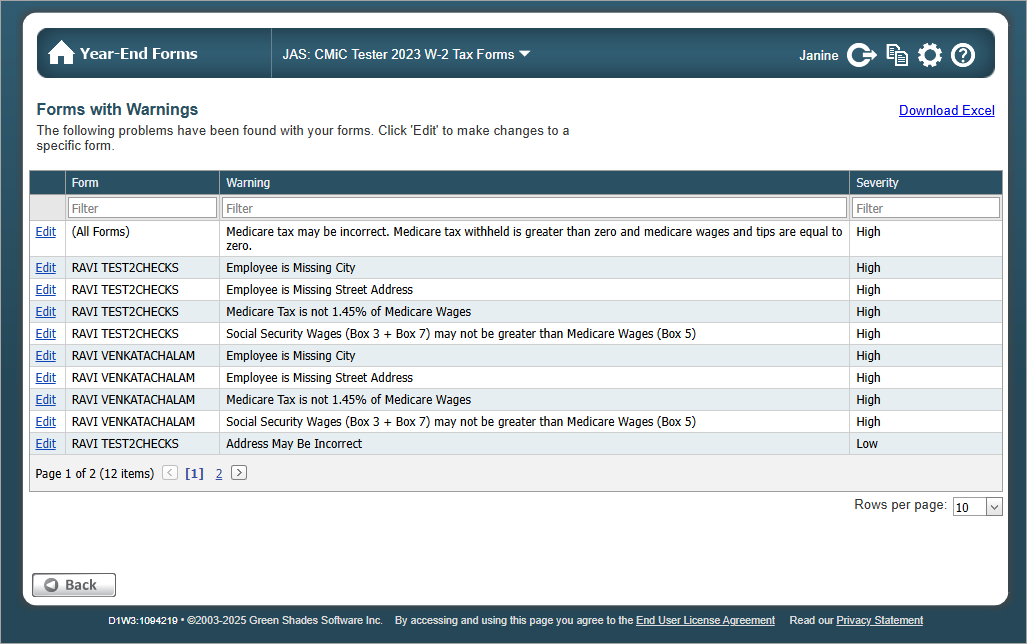
This step allows users to view and resolve warnings with the form. Warnings are ranked by severity (high to low). Warnings of high severity require immediate attention. It is recommended that all warnings are resolved before proceeding to the next step of the process.
NOTE: Although edits can be made within Greenshades, to maintain the integrity of Enterprise data, it is recommended that any data related edits are done within Enterprise. After, the data can be re-built, re-exported, and re-imported into Greenshades for processing.
-
Verify Form Totals
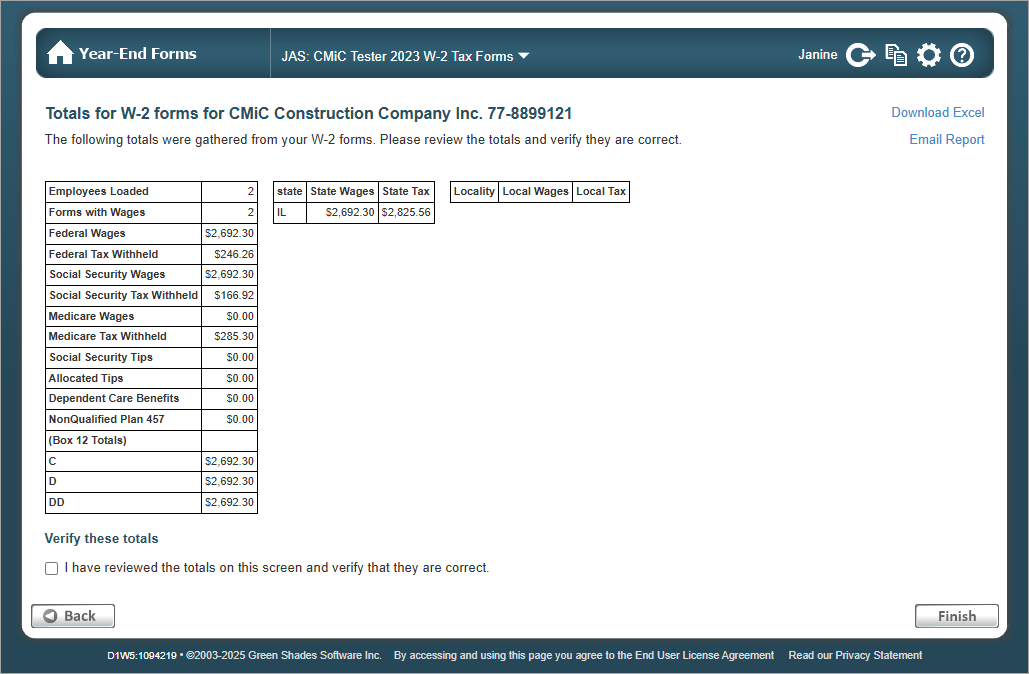
This is a required step and allows users to reconcile the data entered with tax reports from CMiC.
Please note that this screen is display-only, and totals or batch content cannot be edited here.
When done, check the 'I have reviewed the totals on this screen and verify that they are correct' box and press [Finish].
-
Manage Employee Access
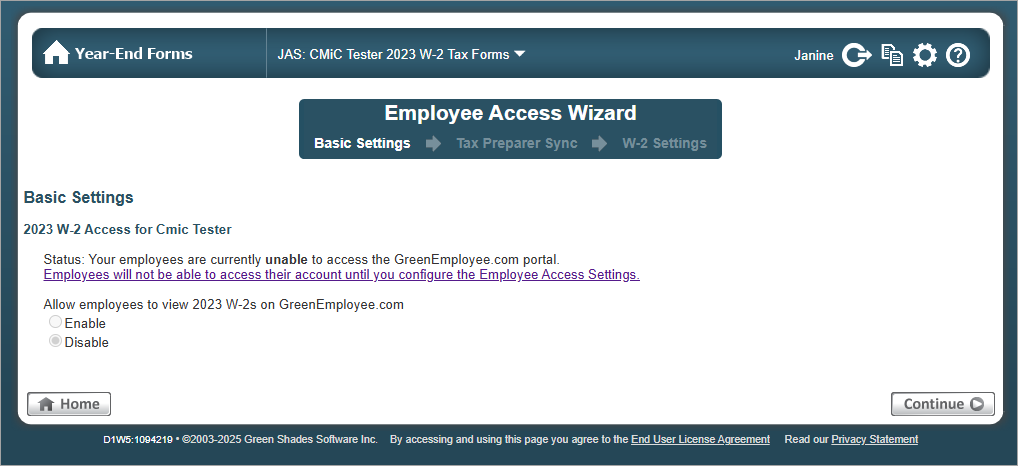
This step allows users to enable/disable employee access to their forms on the online portal.
NOTE: Employee access to the online portal must first be configured in the Employee Access screen in Greenshades. If employees are not granted access, skip this step.
If employees are granted access, use the Employee Access Wizard to enable/disable access to the form, configure tax preparer sync (e.g., to sync the forms with tax preparation programs), and set up some basic form settings (e.g., form layout, edit privileges, etc.).
-
Email Employees with links to W-2 Forms
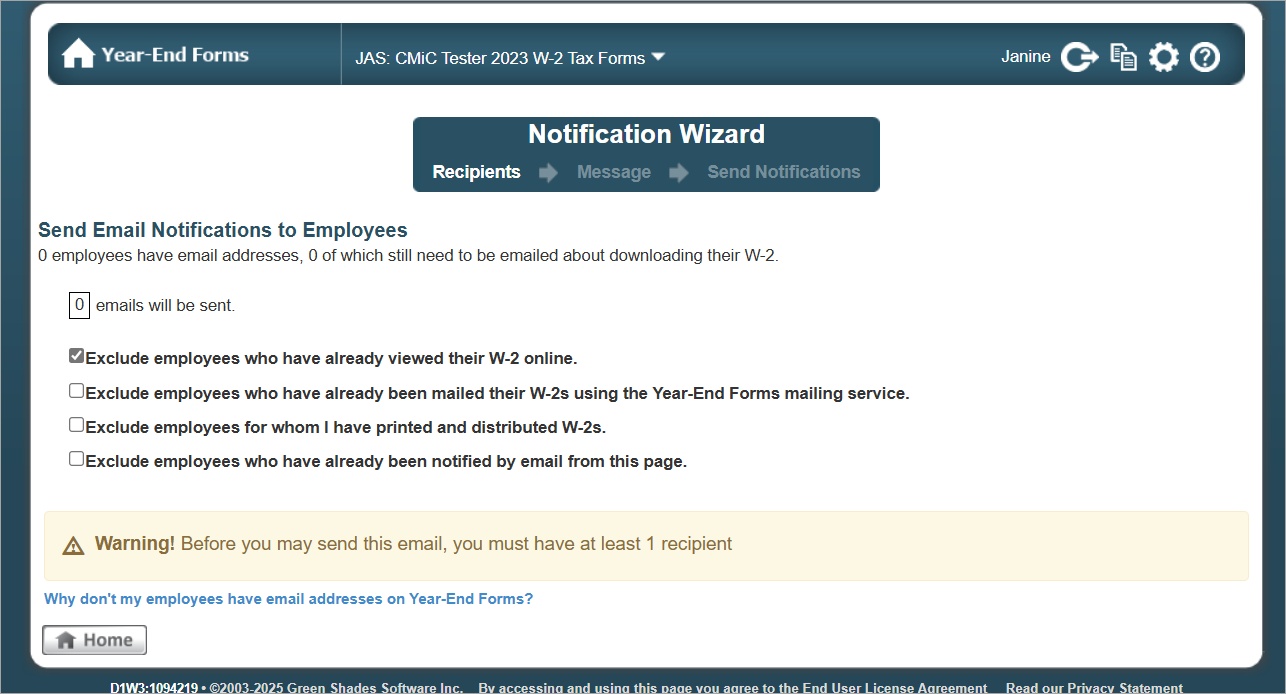
This step allows users to configure email notifications for employees with access to the online portal.
NOTE: Employee access to the online portal must first be configured in the Employee Access screen in Greenshades. If employees are not granted access, skip this step.
The Notification Wizard allows users to set up email message and notification for employees if their email address exist on the profile and is being populated in the XML file when generating the file out of CMiC.
-
Distribute any remaining W-2s to your Employees.
This step allows users to distribute remaining forms (i.e., forms not emailed) to employees. Users can select to:
-
Have Greenshades mail the form (billable service).
-
(Recommended) Distribute the remaining forms by downloading and printing the forms as PDFs to mail/hand out to employees.
Mail Service Status Page
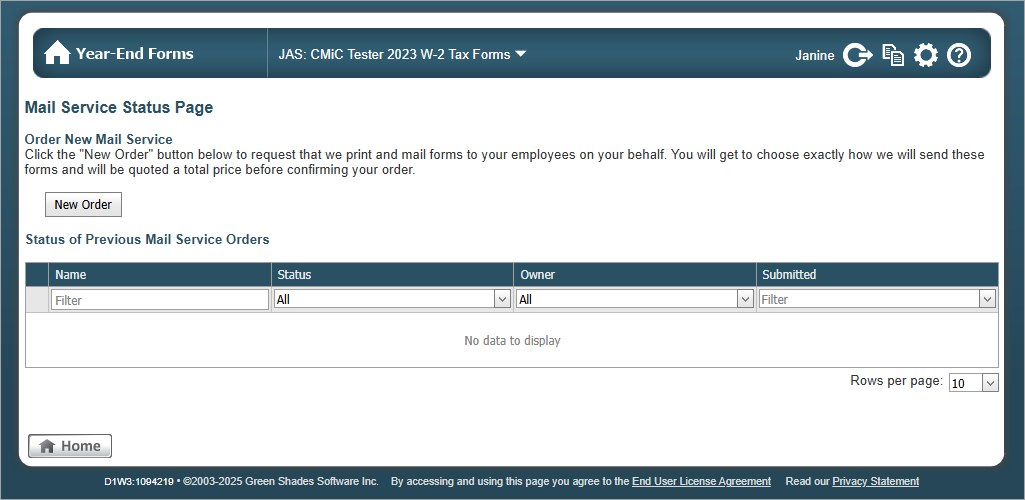
Press the [New Order] button to select forms to mail. The Mail Service wizard allows users to select forms, view totals, select delivery options, and to review and download the forms. For more information, please refer to Mail Service Wizard.
Self-Distribute Batch Status Page
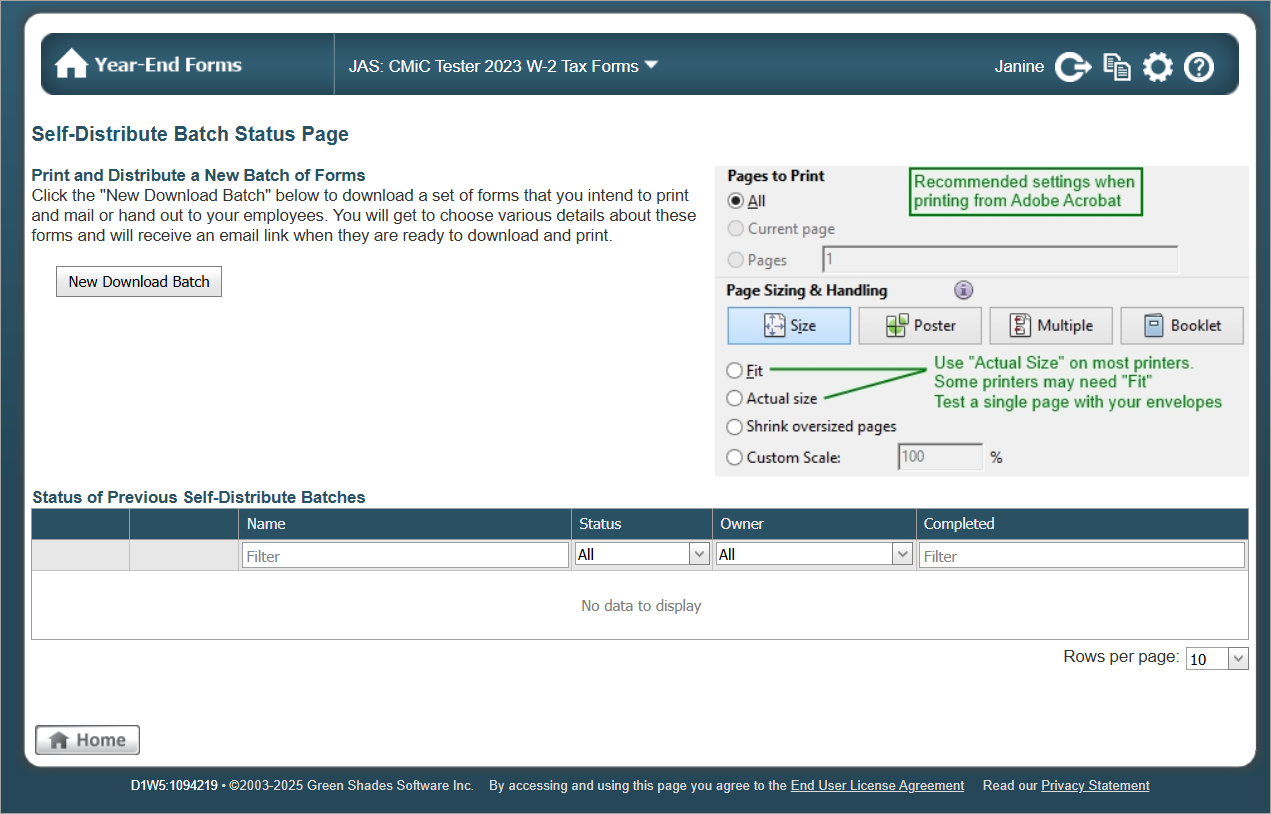
Press the [New Download Batch] button to download a set of forms to mail/print. The Download and Print wizard allows users to select forms, view totals, select delivery options, and to review and download the forms. For more information, please refer to Download and Print Wizard.
-
-
E-File Options
CMiC recommends skipping this step and E-filing through the CMiC filing Center. For more information, please refer to Greenshades - Create E-File Returns.
Additional Information
Download and Print Wizard
The Download and Print wizard allows users to select forms, view totals, select delivery options, and to review and download the forms.
Choose Forms
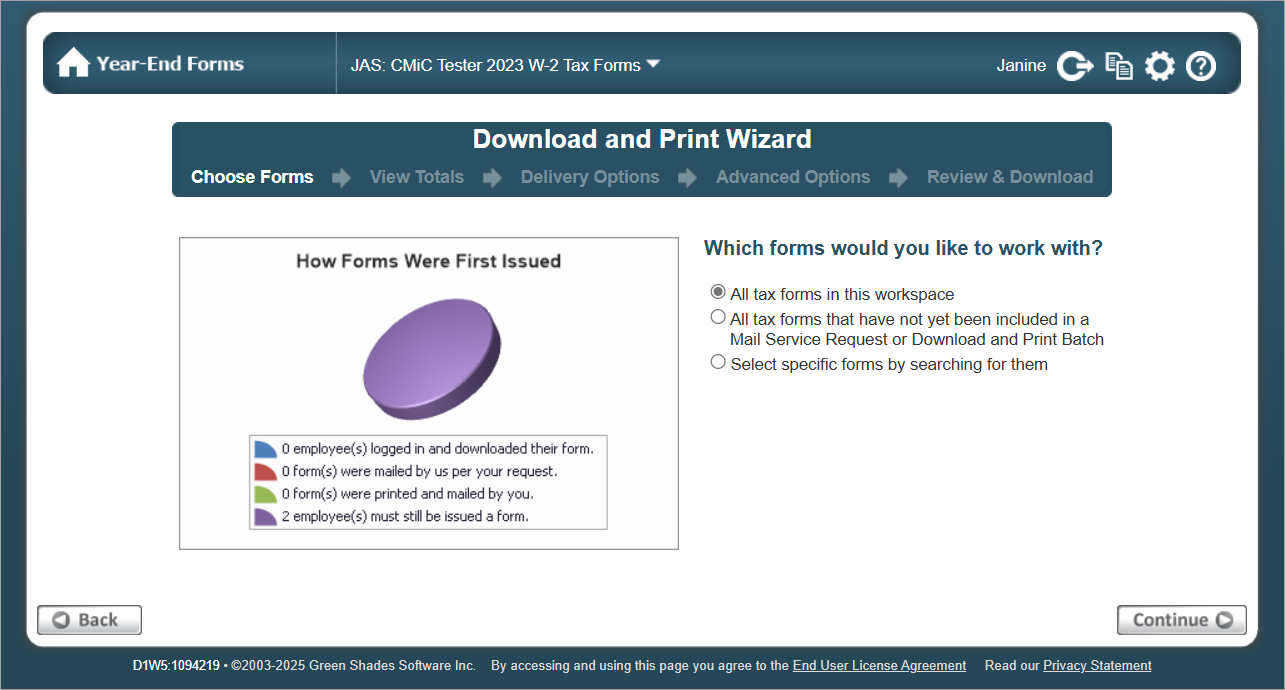
In the first step of the wizard, select which forms to work with and press [Continue].
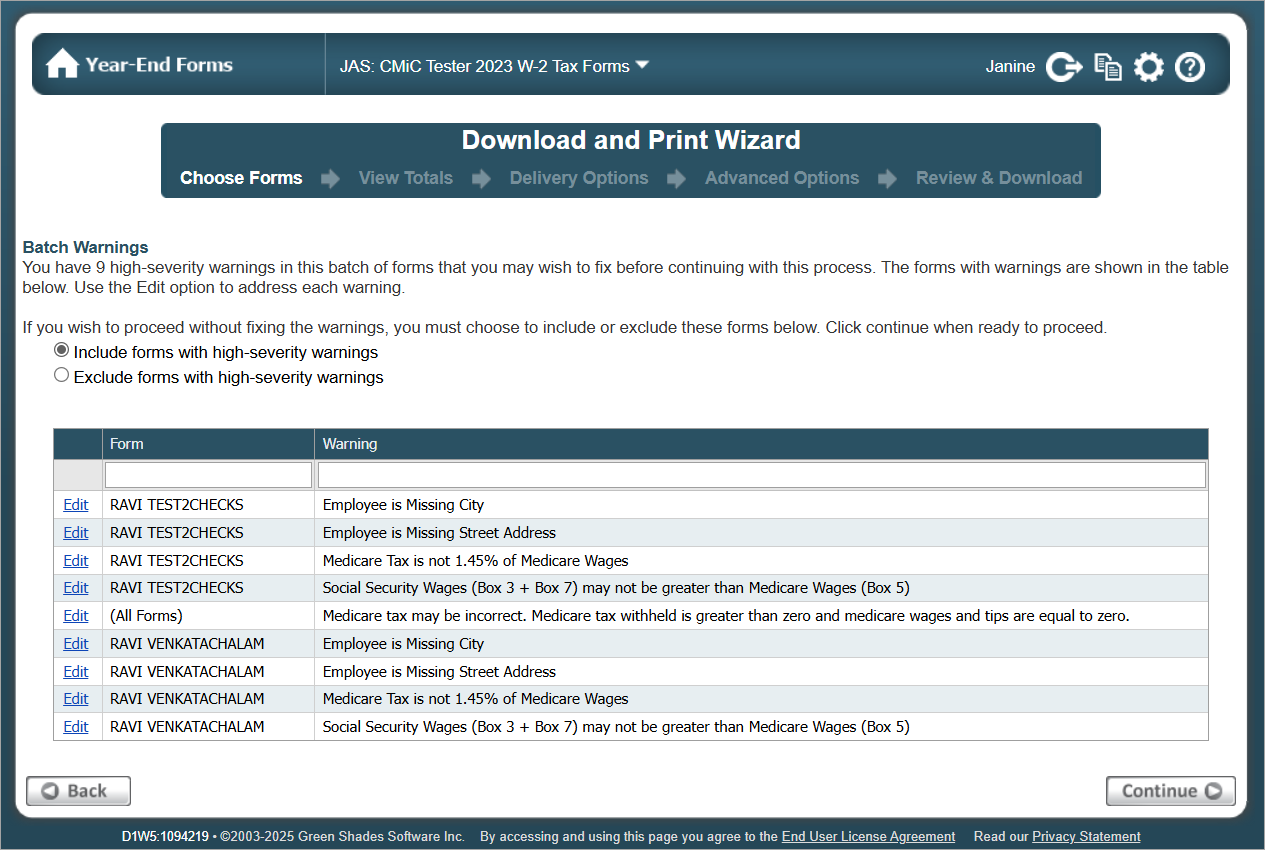
Select whether to include or exclude forms with warnings. CMiC recommends resolving all high-severity warnings before producing forms. Please refer to Resolve Warnings with your Forms for more information.
View Totals
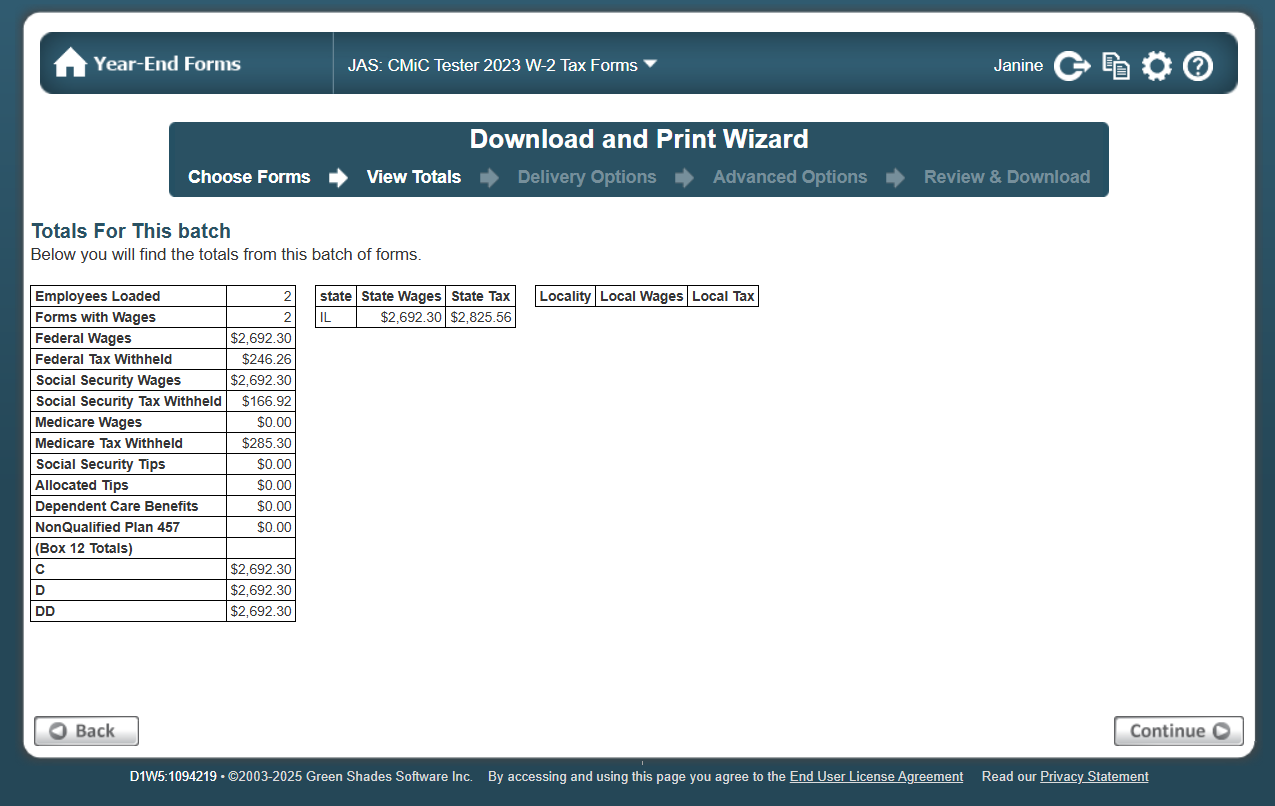
Verify the totals and press [Continue].
Please note that this screen is display-only, and totals or batch content cannot be edited here.
Delivery Options
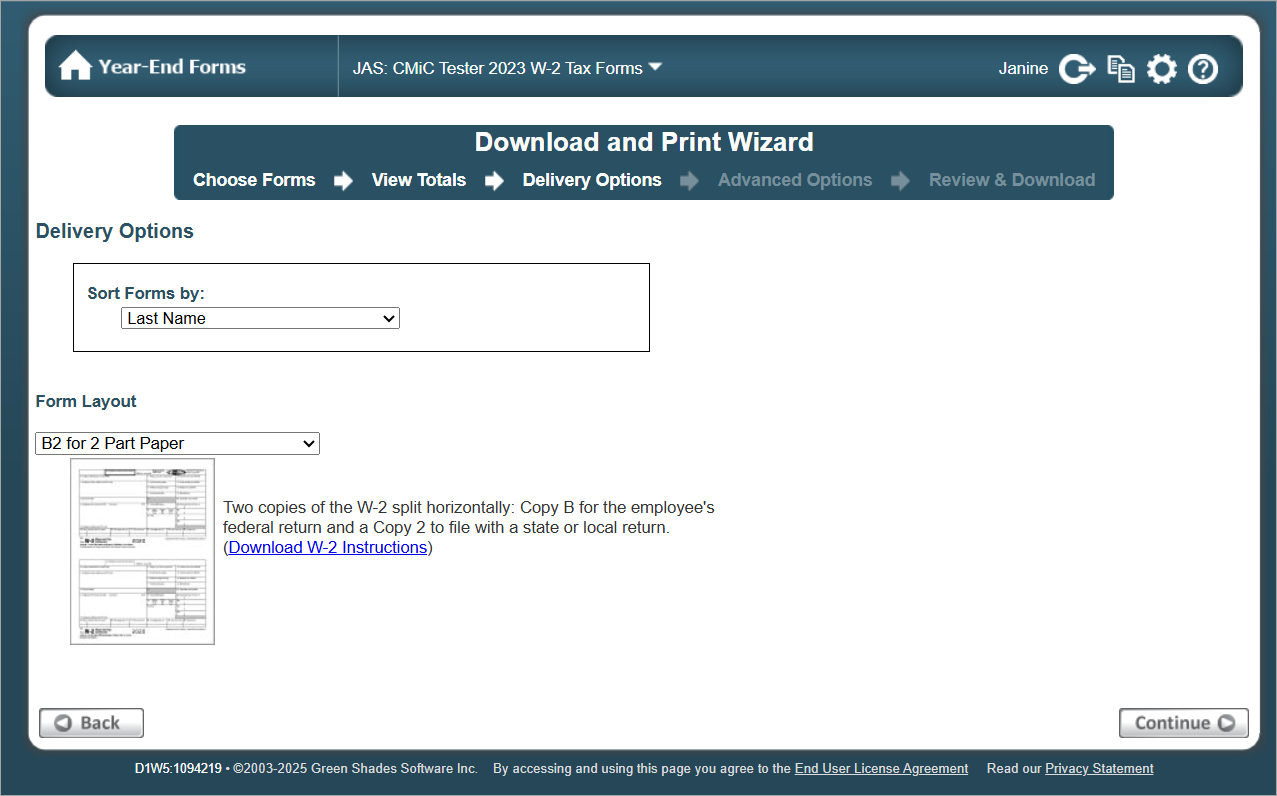
Select how to sort the forms and the form layout and press [Continue].
Advanced Options
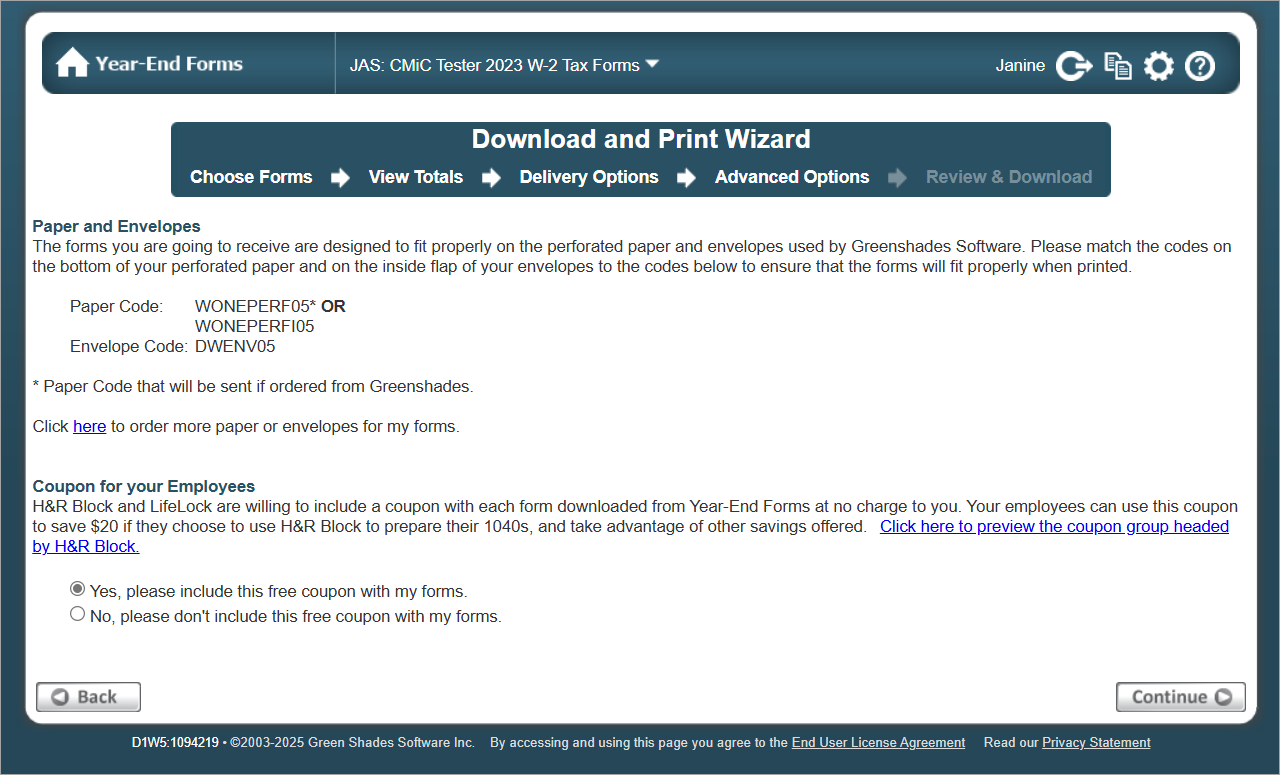
The Advanced Options screen provides information about the paper and envelopes used by Greenshades if users have selected to have Greenshades mail the forms. Additional content, such as coupons, may be added to the forms as well. Press [Continue] when done.
Review and Download
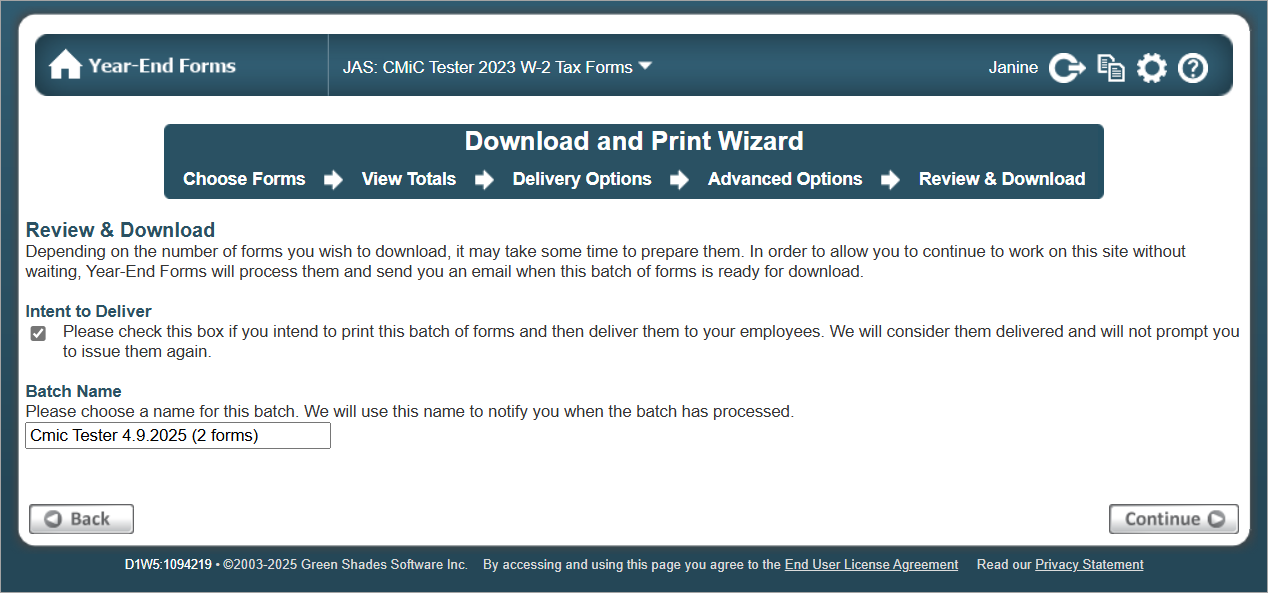
If the company creating W-2 forms through Greenshades wishes to deliver them to their own employees, check the ‘Intent to Deliver’ box and enter the batch name. If this box is checked, Greenshades will consider the batch delivered and will not prompt the issue further. Press [Continue] when done.
If the process requires additional time, users can continue working on the site and will be notified via email when the process is completed and the batch is ready for download. A link will be provided to download the PDF.
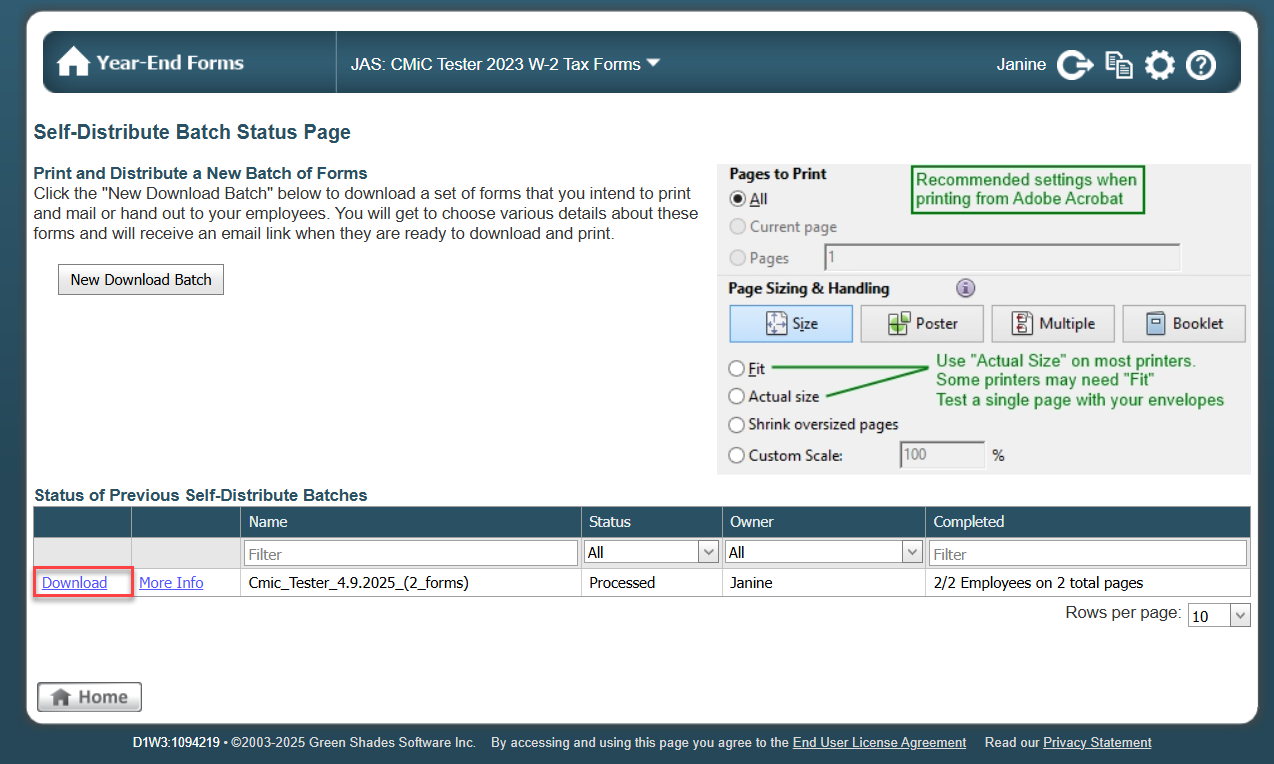
Users can also view the status of the batch in the Self-Distribute Batch Status Page. Press the Download link to download the PDF. An example of a completed form, ready for printing, is shown below.
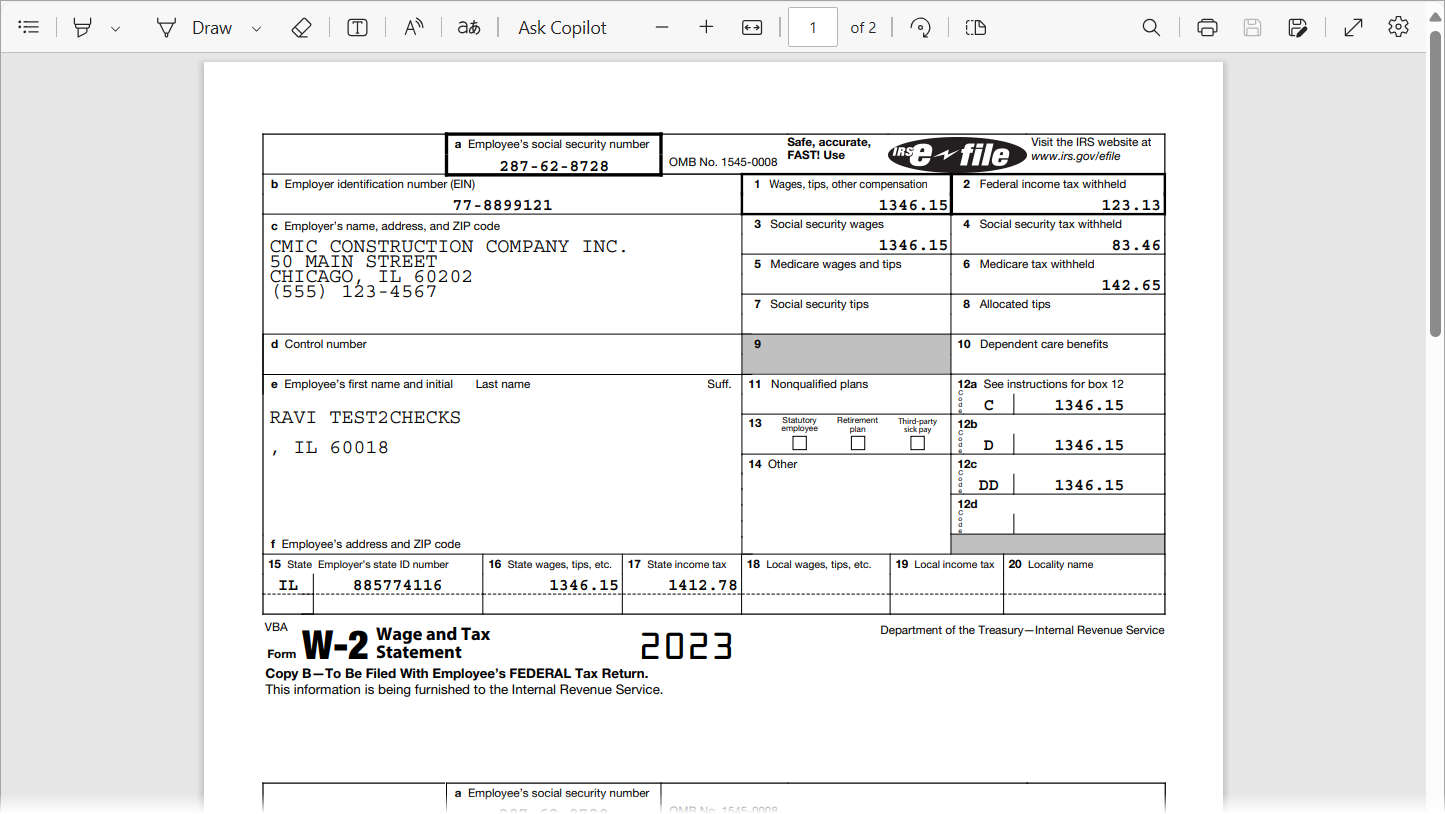
Sample W-2 PDF
Mail Service Wizard
The Mail Service wizard allows users to select forms, view totals, select delivery options, and to review and mail the forms. This wizard shares many of the same screens as the Download and Print Wizard, with the exception of the following screens.
Delivery Options
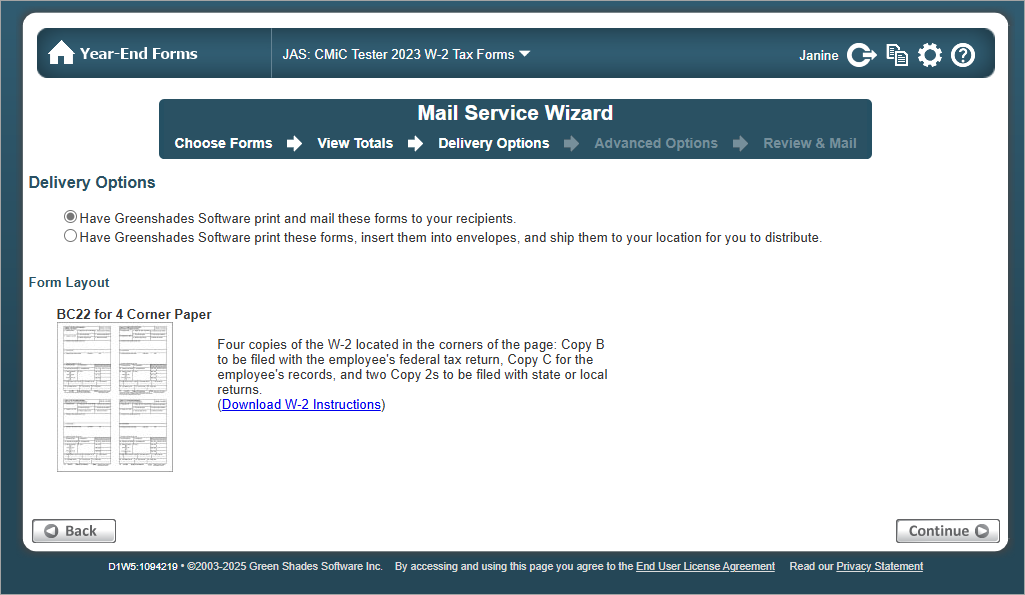
Select whether to have Greenshades print and mail the forms or to have Greenshades print and send the forms to the company to distribute (e.g., box and ship). Please note, prices vary depending on the date the forms are submitted for printing.
Advanced Options
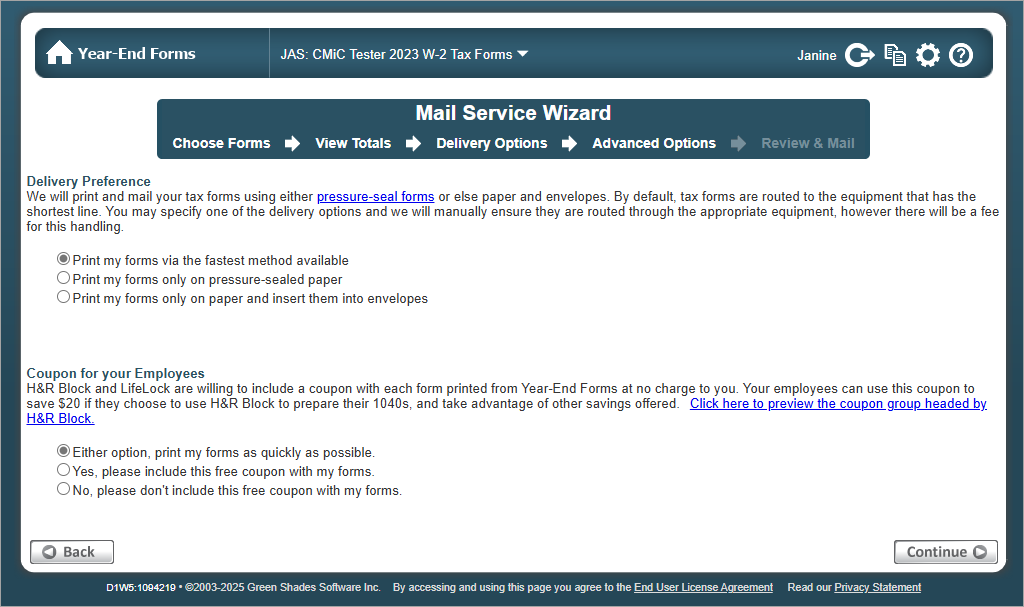
The Advanced Options screen allows users to set delivery preferences. Additional content, such as coupons, may be added to the forms as well
Review and Mail
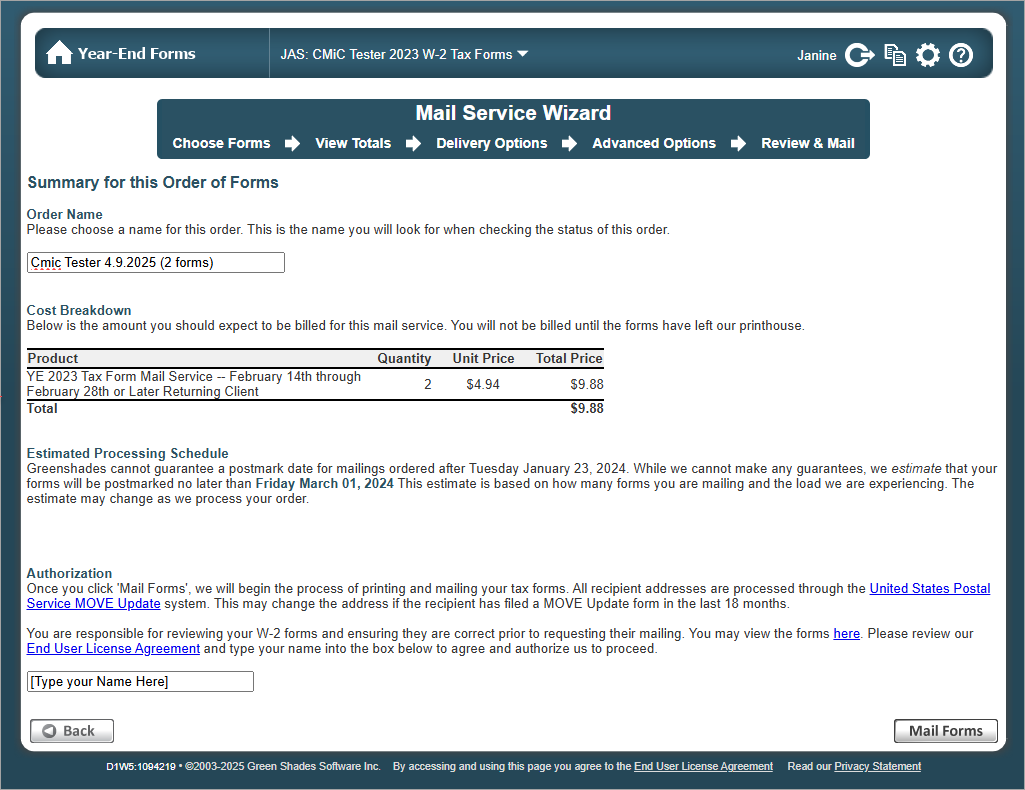
The Review and mail screen provides users with a cost breakdown for the forms selected to be mailed, as well as an estimated processing schedule.
Enter a name for the order in the Order Name field and sign the Authorization text box to authorize the mailing of the forms. Press the [Mail Forms] button when done.
Users can also view the mailing status on the Mail Service Status Page.