
Pgm: GLCPALC – Allocate Cost Pool; standard Treeview path: General Ledger > Transactions > Allocate Cost Pools
This screen will create an unposted batch of transactions within the Job Costing module for all of the accounts pre-defined in the Cost Pool Allocations screen (standard Treeview path: GL > Setup > Local Tables > Cost Pool Allocations).
Company
Enter/select the home company code of the allocation code. This is a mandatory field.
Cost Pool Code
Enter/select the cost pool code that transactions are to be created for.
Cost Pool Start Date, Cost Pool End Date
Enter the starting and ending dates to use to accumulate the dollars for both the accumulate and prorate by accounts. These are mandatory fields. The module will default the current period starting and ending dates for the company.
Transaction Date
Enter the posting date for the transactions. The module will default the period ending date into this field, however this may be changed to any valid date.
Journal
Enter the journal code to which the cost pool allocation transactions are to be posted. This is a mandatory field.
Reference, Description
Every transaction created can carry a reference code and a reference description; enter what should be seen in these fields on the posted transactions. The Reference field will get the cost pool code and the Reference Description will be the name of the cost pool.
Print Schedule G Reports Immediately – Checkbox
If checked, this will produce the three Schedule G reports required. Schedule G reports will be available on non-levy method cost pools and non-J-type cost pool/allocation proration rule transactions. Selecting the cost pool code that has their Prorated By Type and Prorated To Type fields set to “G” enables the checkbox.
[Allocate Cost Pool] – Button
Once all the data is correct on the screen, press the [Allocate Cost Pool] button to activate the process.
The message line at the bottom of the screen will display the Batch number, the transaction number, and the dollar value of the cost pool once the procedure is complete.
[Print Schedule G Reports] – Button
This button will become enabled once the [Allocate Cost Pool] button has been clicked. This will open the Report Configuration pop-up window to run the Schedule G report.
Cost Pool Allocation Edit List
To review the transactions created by the Allocate Cost Pools screen, the Print Edit List screen must be used on the process train located under Job Costing > Transactions > Enter Cost Transactions.
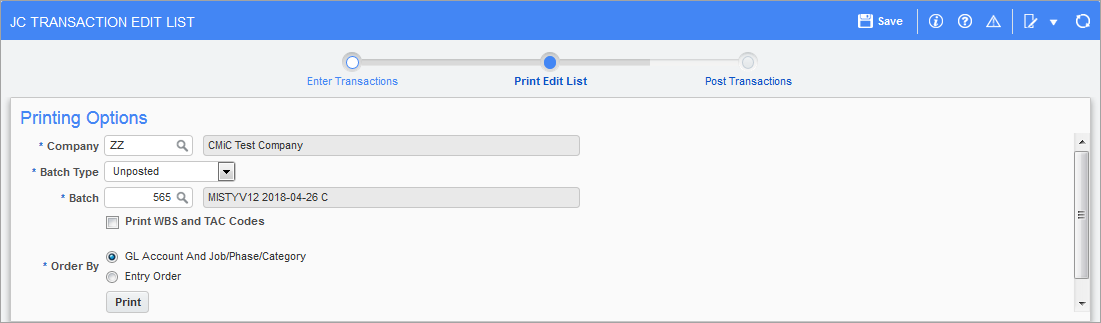
Pgm: JCTRNLIST – JC Transaction Edit List; standard Treeview path: Job Costing > Transactions > Enter Cost Transaction – Print Edit List node
This report will show all the transactions created by the allocation routine.
Editing Cost Pool Allocations
Once the allocations have been created, the user may wish to change the amounts, delete lines, or change accounts. This may be done via the Job Costing Enter Cost or Billing Transaction screen. Any changes made to the allocation will not affect the current cost pool allocations setup and are therefore one-time changes. If a cost pool allocation needs to be changed on a permanent basis, the Cost Pool Allocations setup screen must be edited in the General Ledger module.
Posting Cost Pool Allocations
Once the edit list has been verified, posting the Cost Pool Allocations is done via the Job Costing Batch Posting screen. In most cases, if overheads for JC are being used, make sure that the ‘Post Overhead Transaction’ checkbox is unchecked when posting this type of batch.

Pgm: JCPSTFM – Batch Posting; standard Treeview path: JC > Transactions > Enter Cost Transactions – Post Transactions node