Setup
This
Step 1: Access Account Maintenance Screen
From the GL menu, open Maintain Accounts under the Setup submenu.
![]()
Step 2: Create Inter-Company Account
Find or create the inter-company account then use the Edit icon to swap to table mode.
![]()
Pgm: ACCFRM – Maintain Accounts; standard Treeview path: General Ledger > Setup > Maintain Accounts
Step 3: Check Inter-Company Account Checkbox
Check the Inter-Company Account box and click the [Save] button to save the change. If this field is not visible use the Lite Editor to add the field.
![]()
Pgm: ACCFRM – Maintain Accounts; standard Treeview path: General Ledger > Setup > Maintain Accounts
Step 4: Access Company Maintenance Screen
Open the Maintain Companies screen from the General Ledger Setup submenu.
![]()
Select one of the companies, then press the [Company Detail] button.
![]()
Pgm: COMPFRM – Company Setup; standard Treeview path: General Ledger > Setup > Local Tables > Maintain Companies
Step 5: Click on [Inter-Company Setup]
![]()
Pgm: COMPFRM – Company Setup; standard Treeview path: General Ledger > Setup > Local Tables > Maintain Companies
Step 6: Insert Details
Insert a new row and enter the company code, department, and account. This specifies which department and account will be used as the transfer department and account for inter-company transactions between these two companies.
![]()
Step 7: Repeat Preliminary Steps for Second Company
Return to Maintain Companies and select the second company then repeat the process. Open the Company Detail pop-up window, then press the [Inter-Company Setup] button.
![]()
Pgm: COMPFRM – Company Setup; standard Treeview path: General Ledger > Setup > Local Tables > Maintain Companies
Insert a new row and enter the company code, department, and account then click the [Close] button to close the window. The setup is now complete.
![]()
Pgm: COMPFRM – Company Setup; standard Treeview path: General Ledger > Local Tables > Maintain Companies > Inter-Company Setup pop-up window
Entry
Inter-company transactions can be entered in a variety of screens, including Invoice Entry and Job Costing Transaction Entry. Before inter-company transactions can be entered and posted, the Inter-Company Setup must have been completed.
In this quick guide, the Job Costing Transaction Entry screen is being used to enter a G-type transaction, but it can also be done using any transaction type. The process is as follows.
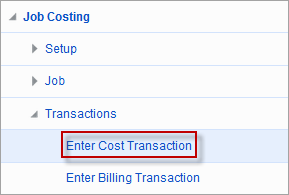
Step 1: Access Transaction Entry Screen
Open the Enter Cost Transaction screen from the Transactions submenu of Job Costing.
Step 2: Enter the Transaction Details
Enter the Transaction section as normal. In the Detail section of the screen, enter the distribution to more than one company by selecting the company code and then entering the details. Click [Save] when finished.
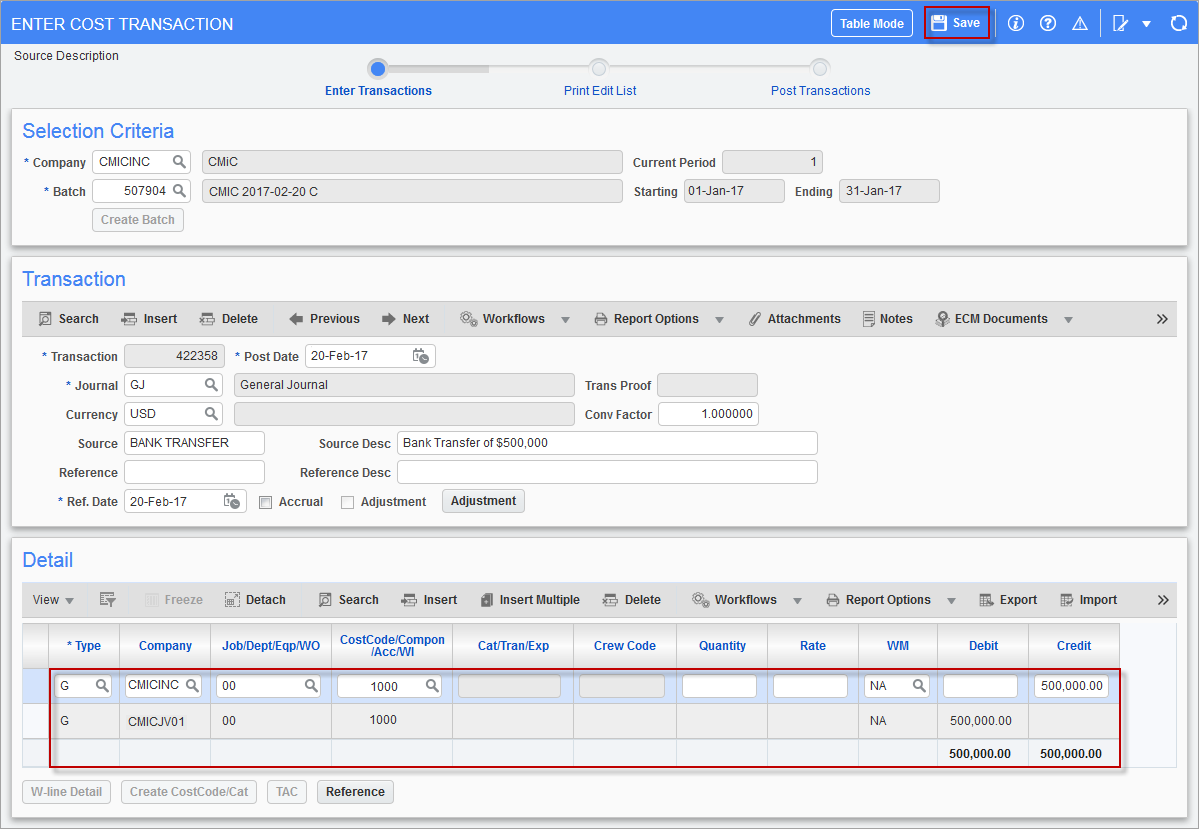
Pgm: JCTRNENT – Enter Cost Transaction; standard Treeview path: Job Costing > Transactions > Enter Cost Transaction
The Transaction Edit List does not include any automatically generated inter-company transactions as these are created during the posting process.
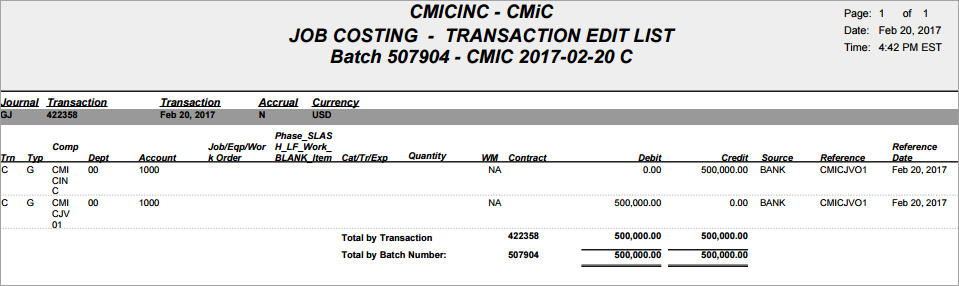
Sample JC Transaction Edit List
Step 3: Post Batch
Post the batch and the system creates and posts the inter-company transactions.

Sample GL Posting Report