NOTE: This Outlook Add-in was released in Patch 19.
Overview
CMiC for Outlook is a dynamic software add-in that integrates with Microsoft Outlook. It is designed to work in tandem with CMiC's Construct PM and Imaging module, and converts emails into project records, such as Issues, RFIs (Request for Information), and Communications. This tool caters to professionals seeking to optimize their document management and project management processes.
Prerequisites
-
To enable secure access and seamless integration of the Outlook add-in, your API/Mobile server must be configured to support OAuth 2.0 authentication. See Enterprise Content Management - Outlook Add-in Setup with OAuth 2.0 Authentication for detailed steps.
-
Before users can successfully log in to the CMiC for Outlook add-in, it's essential to enable OPTIONS on the API/Mobile server.
NOTE: This prerequisite is for Enterprise clients only.
Please follow these steps to ensure a smooth login experience:
-
Access the
-
Carefully read through the provided instructions to understand the process of enabling OPTIONS on your API/Mobile server.
-
Configure the necessary settings on your API/Mobile server according to the guidelines outlined in the documentation.
NOTE: Enabling OPTIONS on your API/Mobile server is crucial for successful use of the add-in.
-
Installing the Add-In from the Microsoft Store
-
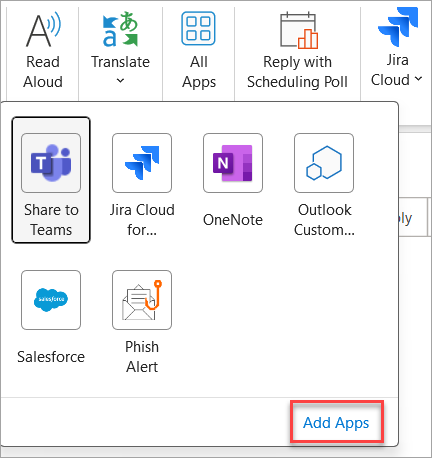
The CMiC for Outlook Add-In can be installed from the [All Apps] button found on the top ribbon or left navigation menu of the Outlook app.

-
After clicking [All Apps], select the Add Apps link to open the More Apps pop-up window.
-
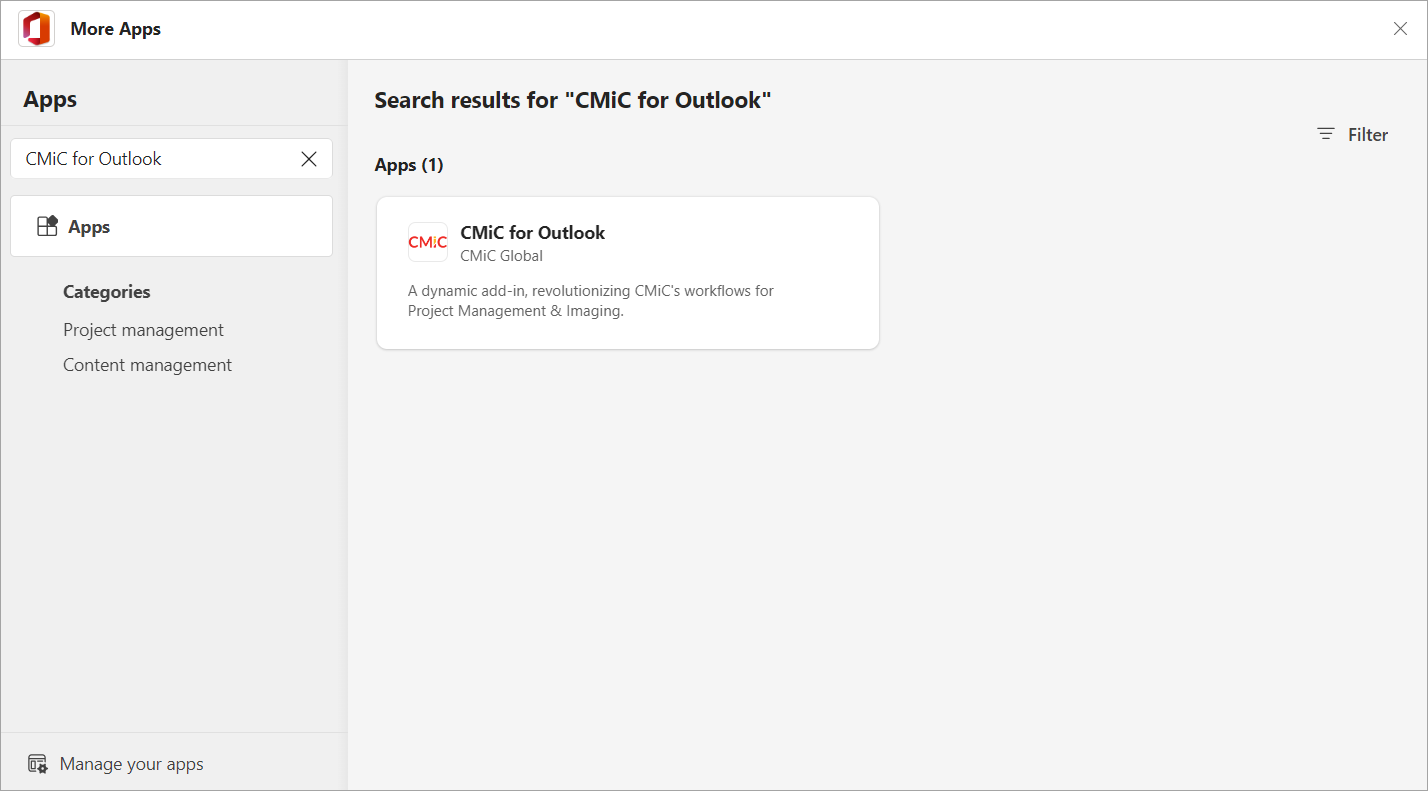
Enter "CMiC for Outlook" in the Search bar found on the top left corner of the More Apps window, then hit the Enter key to search. The CMiC for Outlook app will be listed in the Search Results window.
-
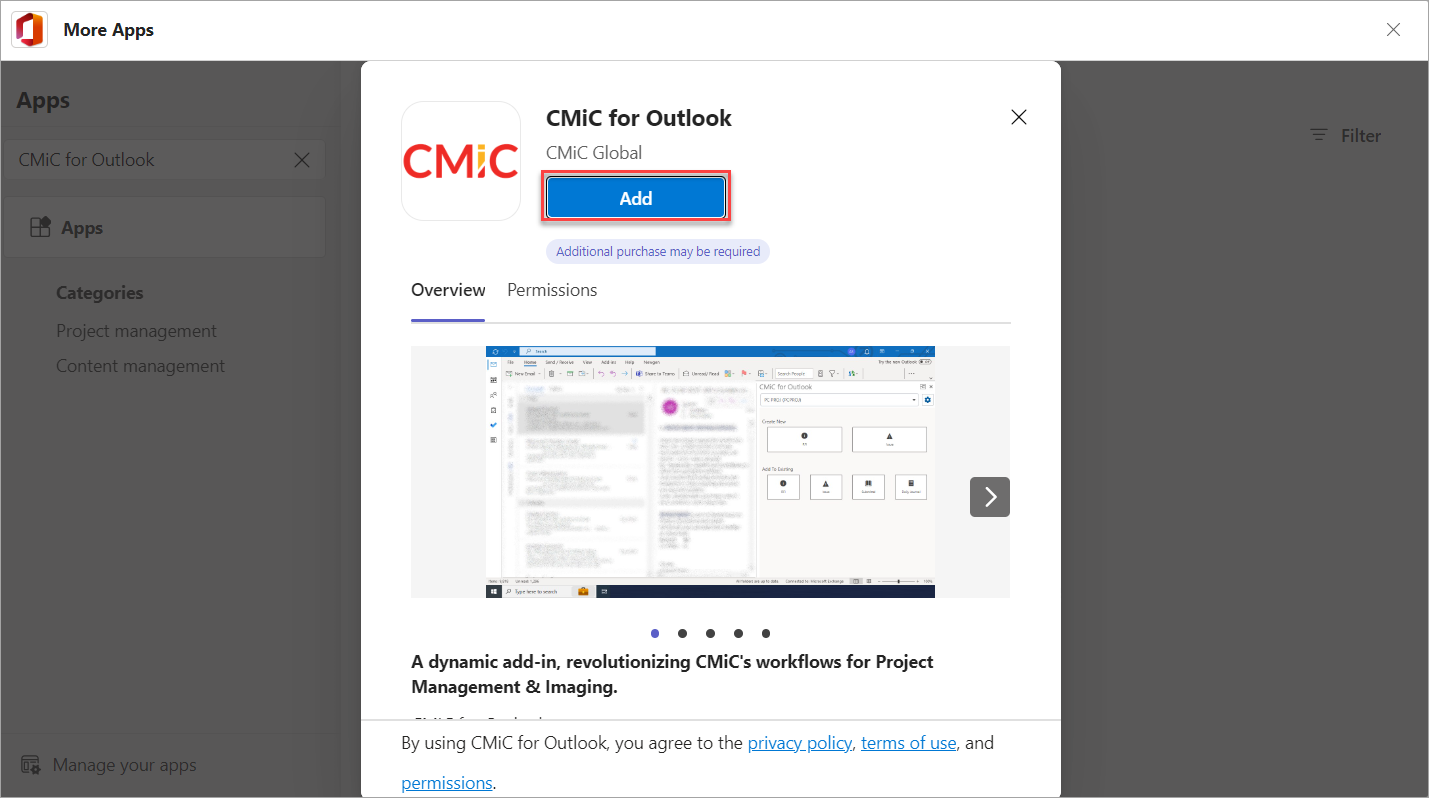
Click on the app and from the CMiC for Outlook pop-up window, click the [Add] button.
-
After it finishes installing, restart Outlook to see the add-in available on the top ribbon of Microsoft Outlook.

OAuth 2.0 vs Basic Authentication Login
Cloud Customers
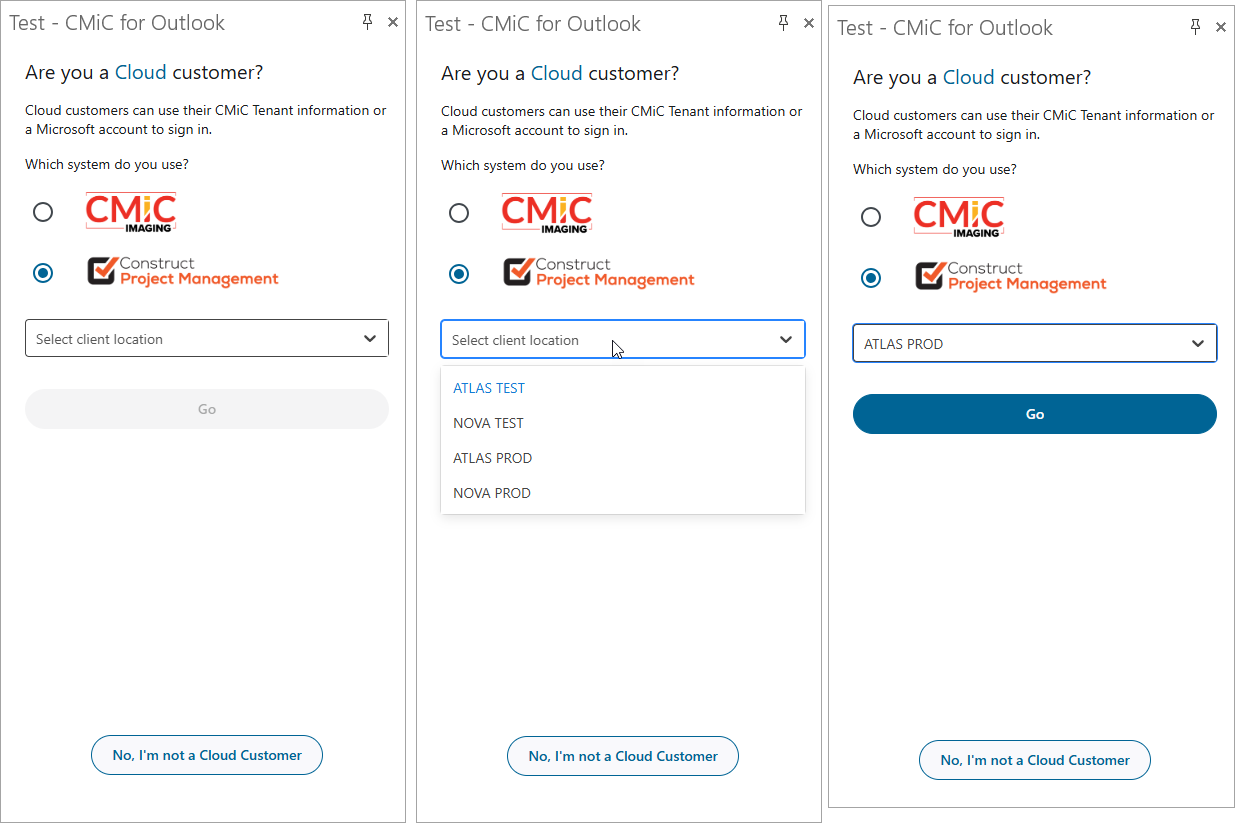
For Cloud Customers, authentication is handled exclusively via OAuth 2.0.
-
Select your environment from the drop-down list.
-
Tap the [Go] button.
-
You will be automatically logged in using your already authenticated Microsoft credentials in Outlook.
There is no need to enter your username or password manually as the system uses your existing Microsoft session.
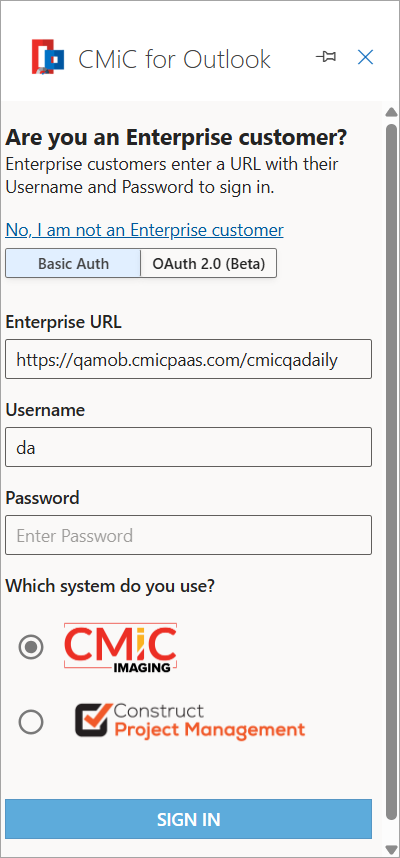
Enterprise Customers - OAuth 2.0 Authentication
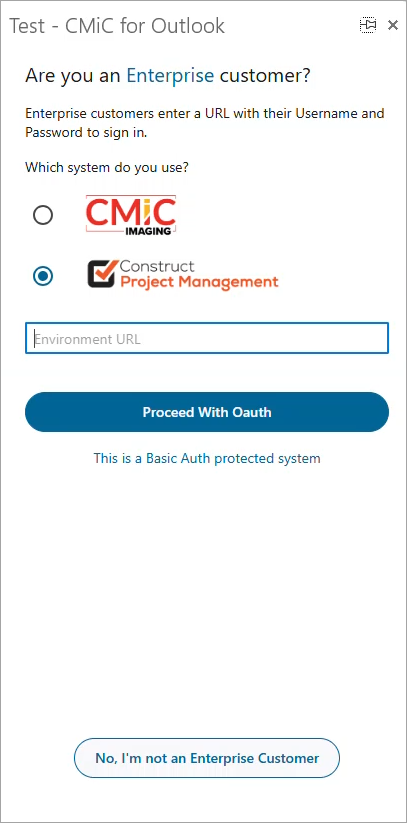
If your API/Mobile server is protected by OAuth 2.0:
-
Enter the appropriate environment URL.
-
Tap the [Proceed with OAuth 2.0] button.
-
You will be automatically logged in using your authenticated Microsoft credentials in Outlook.
This method ensures secure and seamless access using your organization's Microsoft login.
Basic Authentication
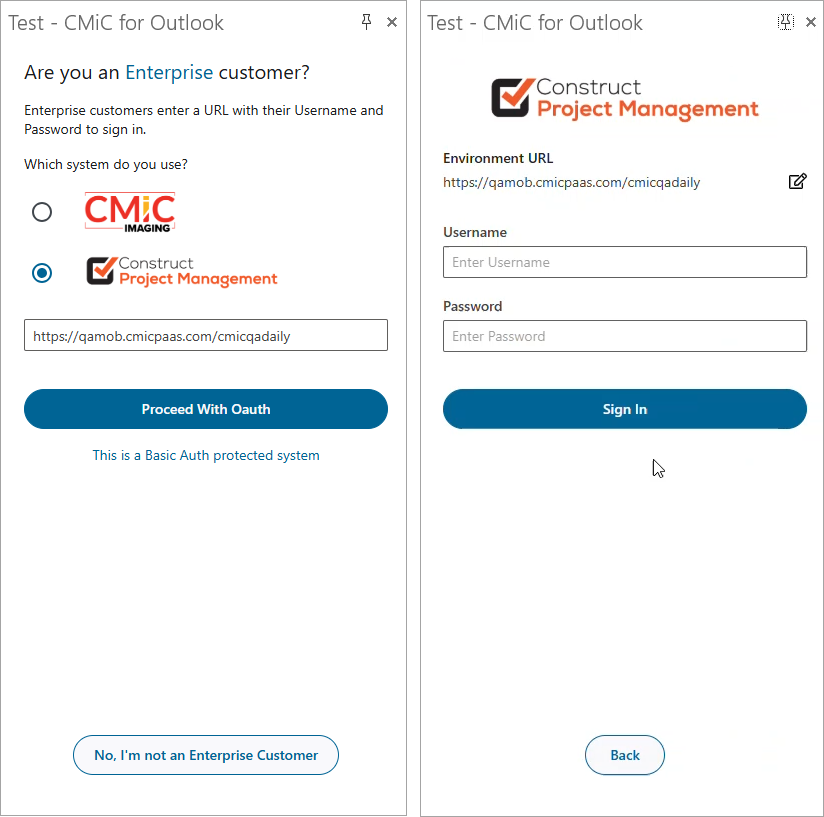
If your API/Mobile server uses Basic Authentication (username and password):
-
Enter the appropriate environment URL.
-
Tap the option labeled, "This is a Basic Auth protected system."
-
Enter your username and password when prompted.
This method is only applicable for environments that do not support OAuth 2.0.
Pinning the CMiC For Outlook Add-in

Users can pin the add-in to Outlook by clicking the Pin CMiC for Outlook ( ) icon so that the panel stays visible when navigating between different emails. If the add-in is unpinned (the Unpin CMiC for Outlook (
 ) icon is displayed), then navigating to a different email will automatically close the add-in and not save any changes.
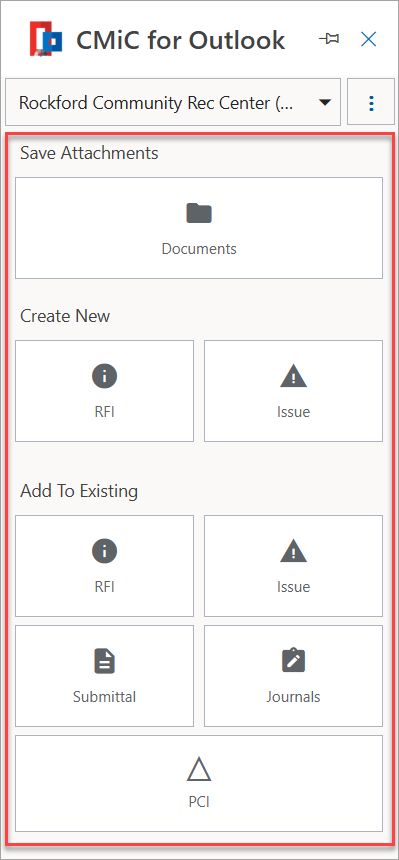
Construct PM
When a user signs in to Construct PM, they are connected to their most recent project or they can choose to select a project from the drop-down menu.
NOTE: The drop-down menu only shows the list of recent projects. To search for a project in the latest version of the app, the user needs to type in a few characters of the project name for it to show up in the list.
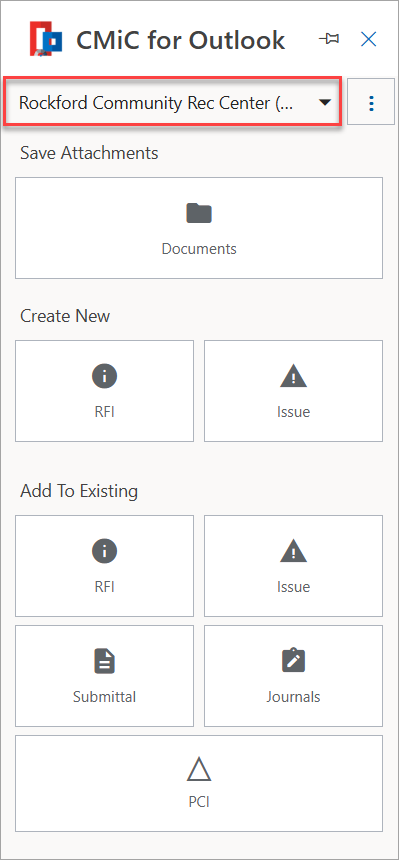
Once a project is selected in the home page, a user can save email attachments as documents, create a new RFI or Issue, or add to existing PM items, such as RFIs, Issues, Submittals, Journals, and PCIs.
Create a New RFI or New Issue
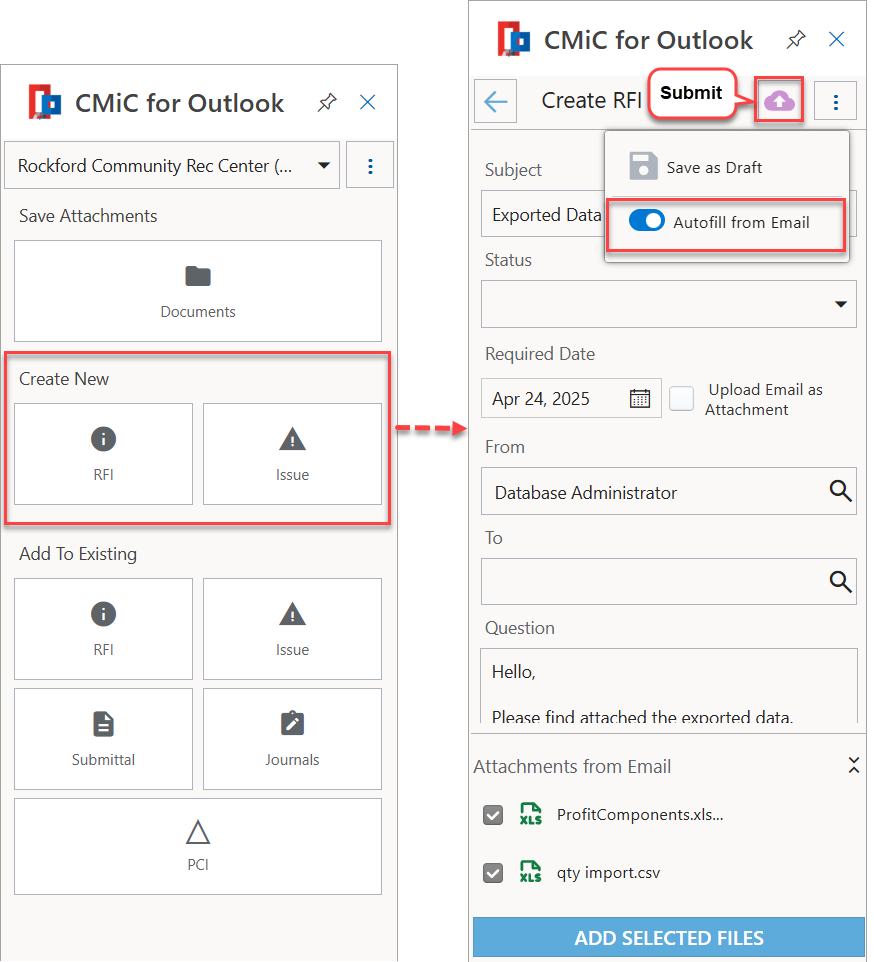
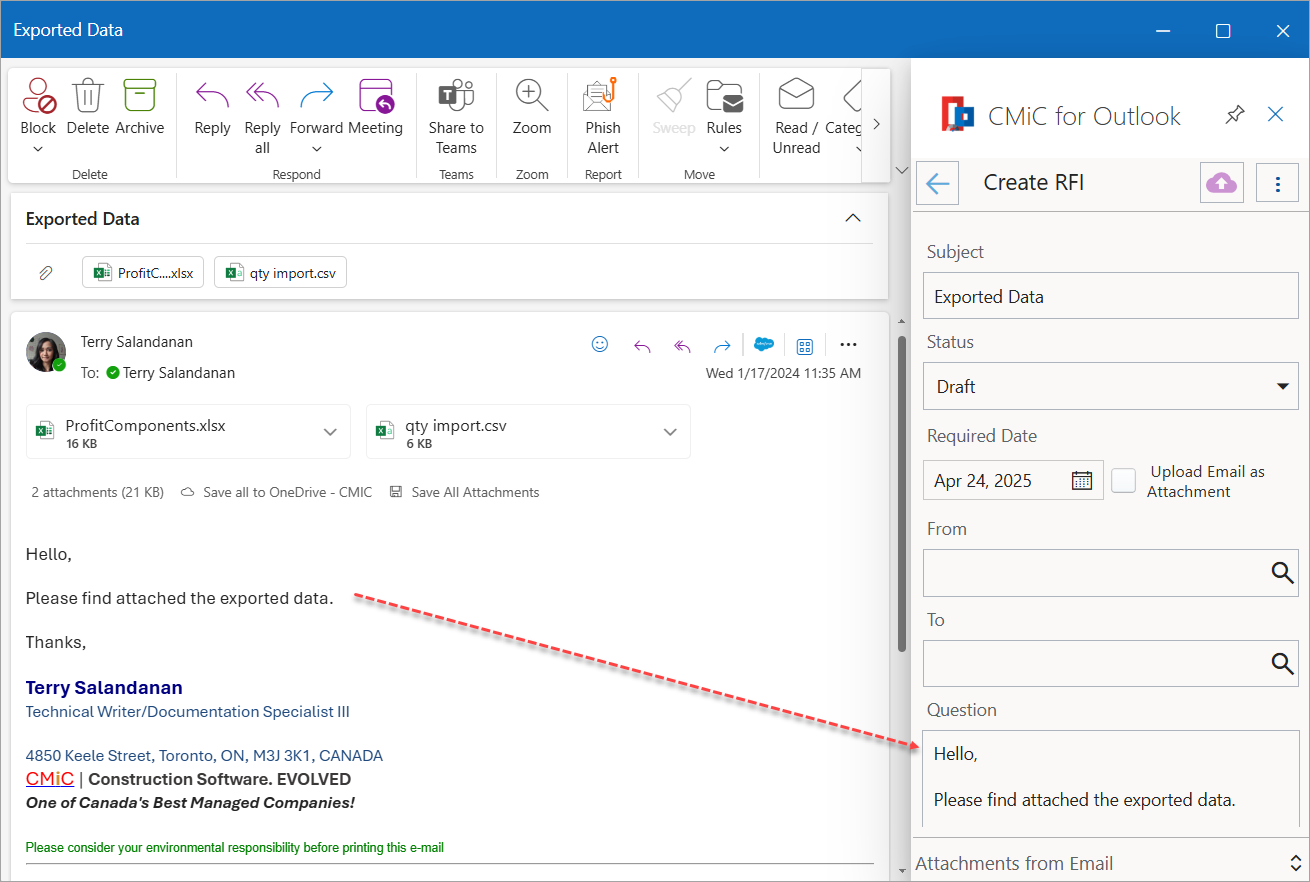
The process is similar when creating either a new RFI or a new Issue. Select either the [RFI] or [Issue] button under the Create New section to create a new RFI or issue. The "Autofill from Email" option, found under the Menu ( ) icon, automatically enters the Subject and Question field details from the selected email. The rest of the fields can be manually updated.
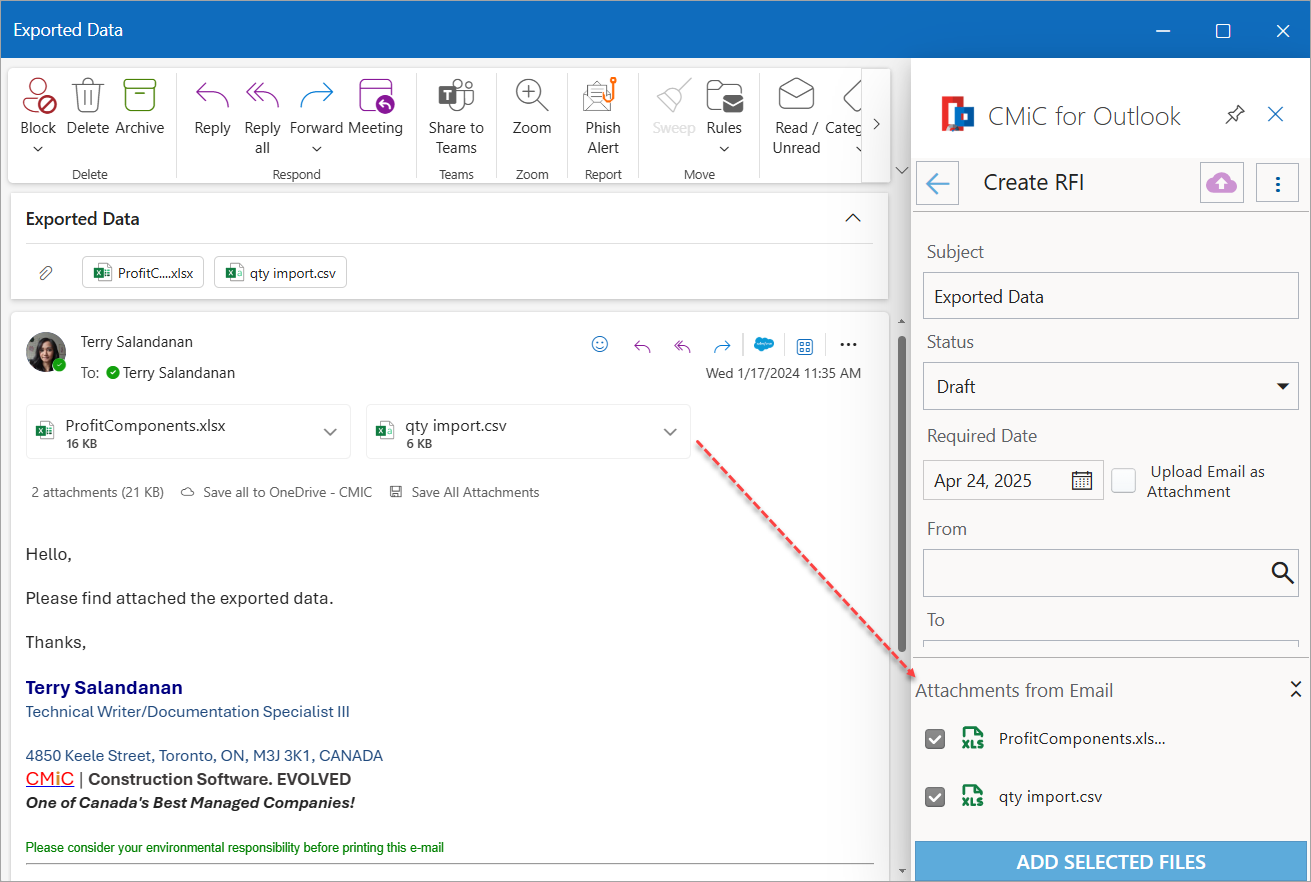
Users can also add the attachments in the email to the RFI by checking the box next to the desired attachment(s) found under the Attachments From Email section, and clicking the [Add Selected Files] button. When ready to submit the RFI or issue, click the Submit ( ) icon to create a new RFI or issue in Construct PM.
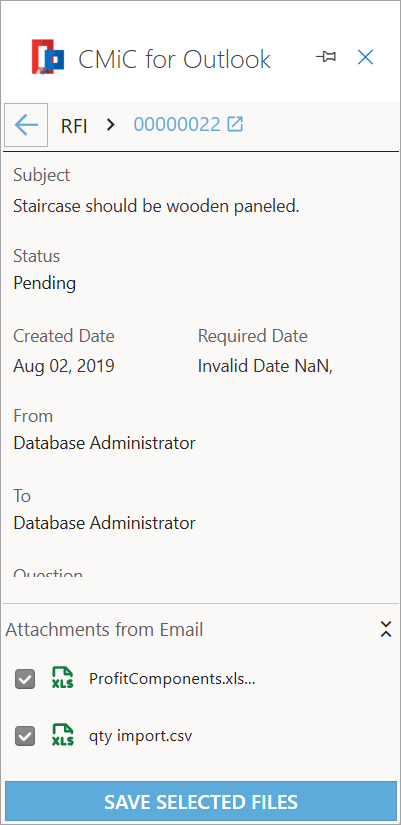
Add to Existing RFI, Issue, Submittal, Journals, and PCIs
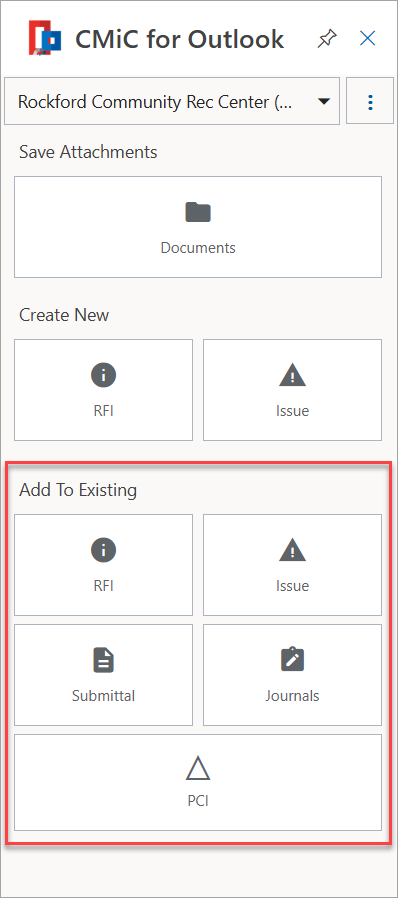
Selecting one of the options under the Add to Existing section displays a list of corresponding RFIs, Issues, Submittals, Journals, or PCIs.

Users can select and drill-down into one of the records to view its details. On the Record Details screen, users can check the box next to the desired attachment(s) found under the Attachments From Email section, and click the [Save Selected Files] button to upload them into the selected record.
Save Attachments as Documents
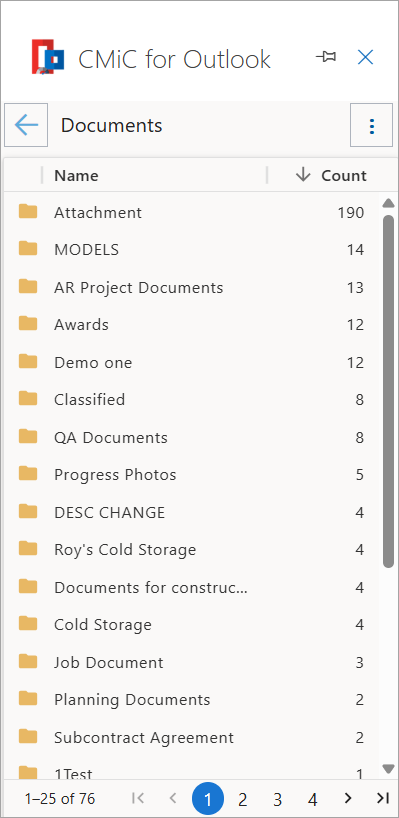
The attachments from an email can be saved as documents so they can be used in other PM objects (PCI, subcontracts, notices, etc.) as attachments.

To upload attachments from an email, navigate to the desired email in Outlook, select a folder from the Documents screen to open a catalog of documents of that type, check the box next to the desired attachment(s), then click the [Save Selected Files] button.
Users can also select a document in the folder to view any revision(s) made to that document, as shown in the screenshot below.

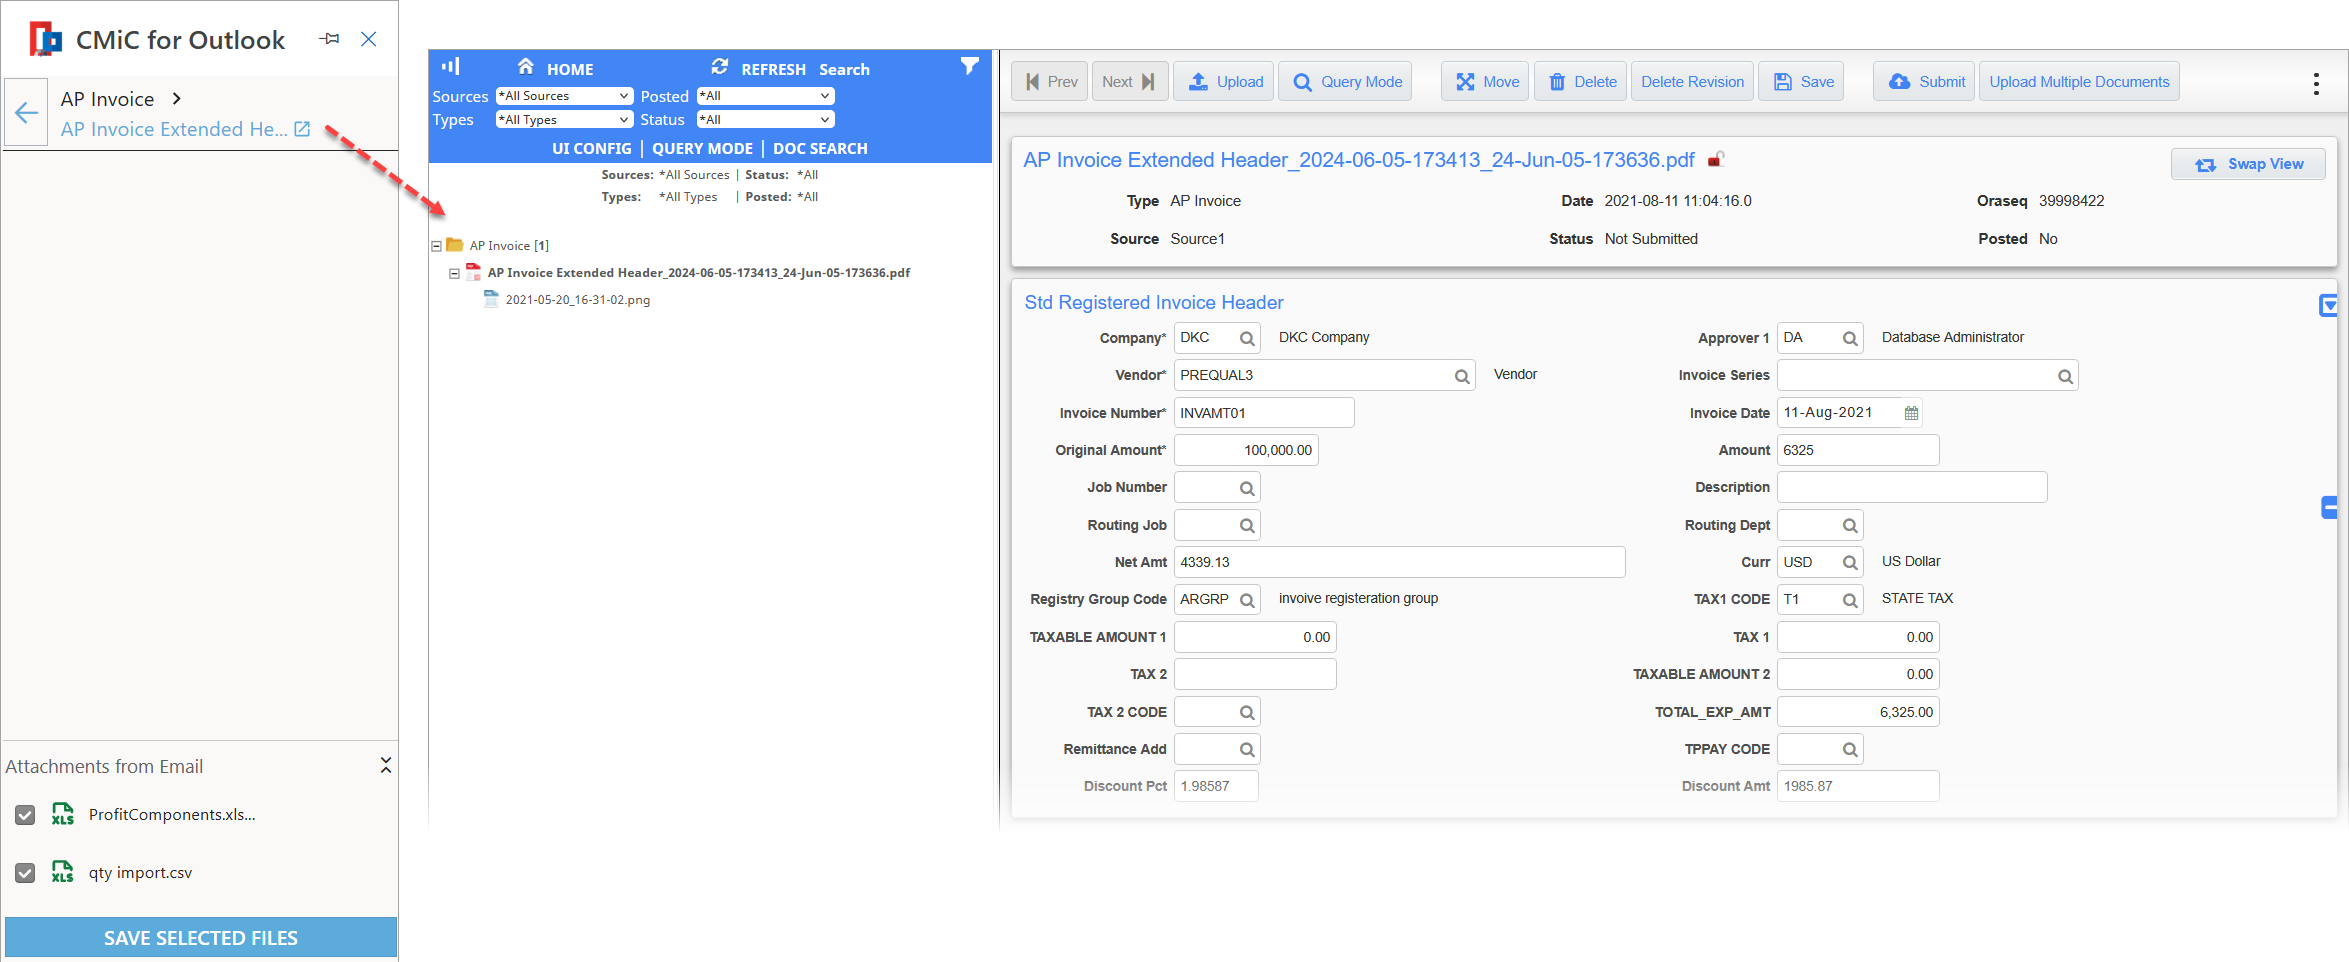
Imaging
CMiC for Outlook connects with CMiC's Image Manager module. Users can instantly upload email attachments to the Image Manager, facilitating real-time management of electronic invoices. This feature enhances document management, simplifying the process of storing and accessing critical project documents and ensuring your documentation is always up-to-date and readily available.
After entering your credentials to log in, an Imaging source can be selected from the drop-down menu.

The list displays document types that the user has upload security for.

Users can navigate to an email with the desired attachments in Outlook and in the CMiC for Outlook add-in, a document type can be selected from the list. The screen for the selected document type will contain a list of files that have been uploaded for that document type. On the bottom of the add-in panel, choose the attachments to be saved, and click the [Save Selected Files] button to upload the attachments to the document type. If needed, users can double-click on the file name under the Attachments from Email section and rename it before uploading.
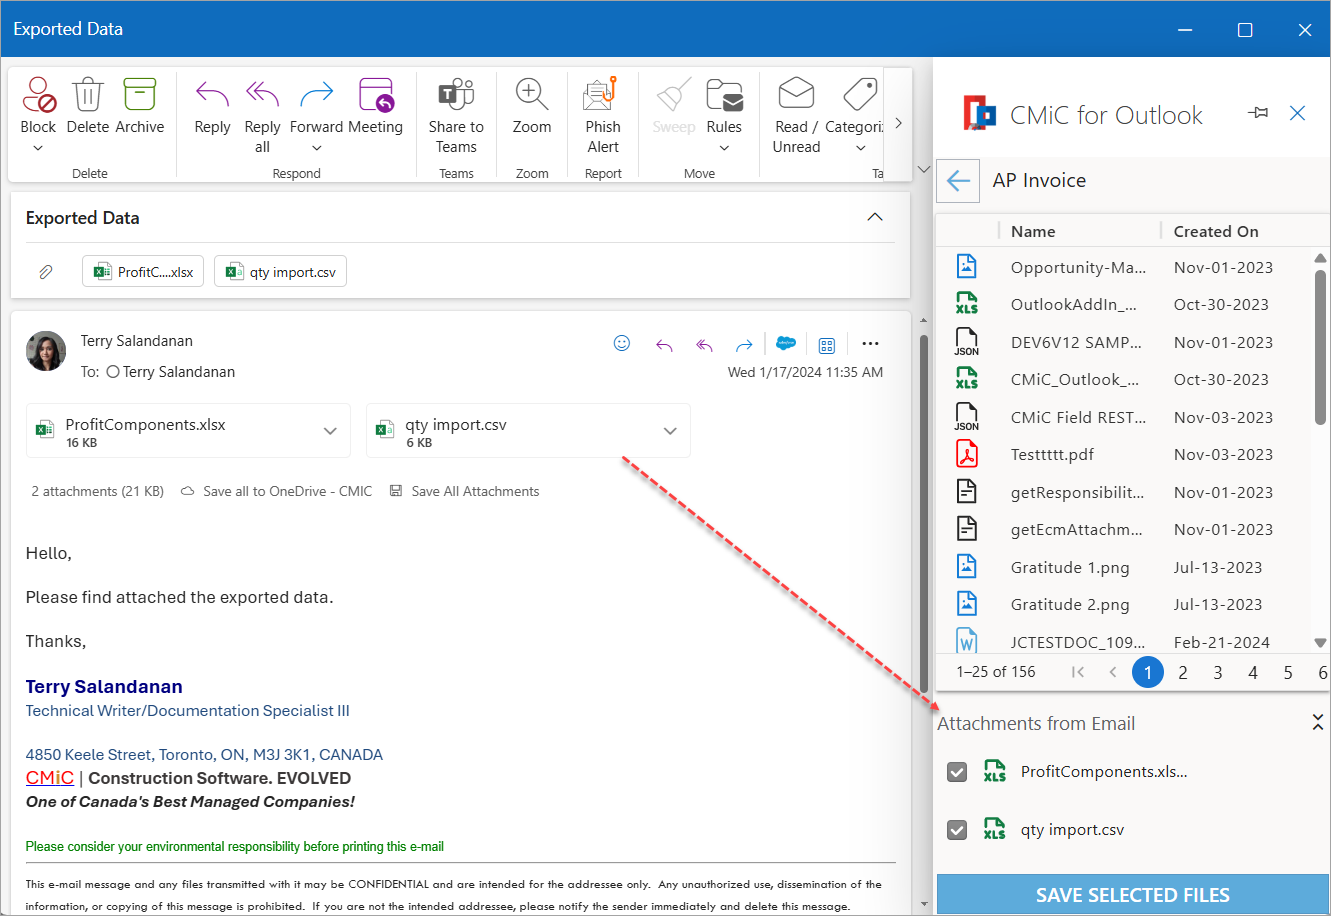
From the list of files, a file can be selected to access a link that redirects the user to the file on Image Manager, as shown in the screenshot below.
Getting Help
If you experience issues or have questions about using CMiC for Outlook, please contact your Account Manager or open a Support Case.