Enterprise Content Management - Retrieving Documents Related to Records in CMiC from Image Manager
Overview
Searches can be created within the accounting screens in CMiC that will allow a user (with the proper security access) to retrieve images related to the transaction being viewed. The search criteria that is used can be designed to retrieve one or more images along with their associated flysheet information.
The search setup is most useful from query screens, but can be setup from any screen that has the
Each accounting screen has its own [ECM Documents] button where the "Define ECM Searches" option in the drop-down menu can be selected to create a new image search.
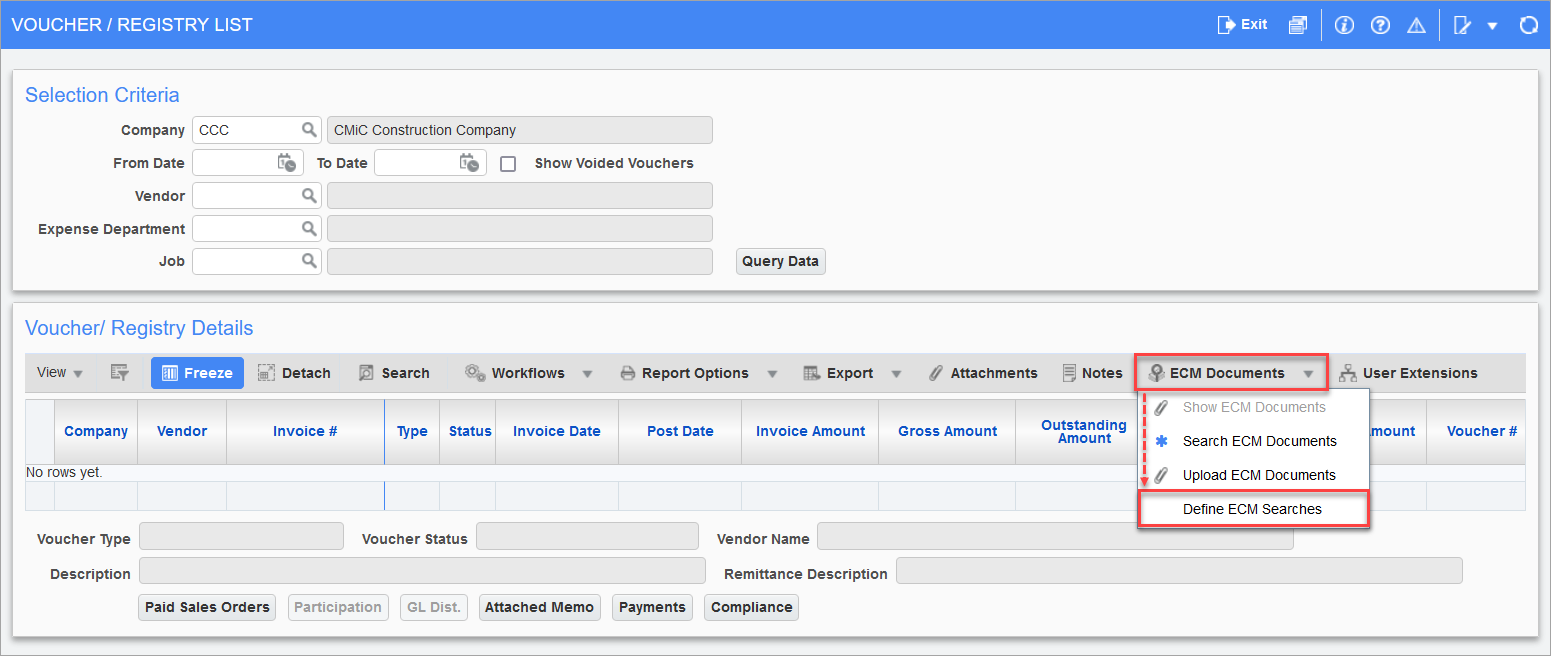
Choosing this option will open the Image Search Setup screen where users can set up the search criteria. The search that is set up here will be specific to the screen where the Image Search Setup screen was launched. In the above screenshot, the Voucher/Register List screen in Accounts Payable is used so the image search is specific to this screen only.
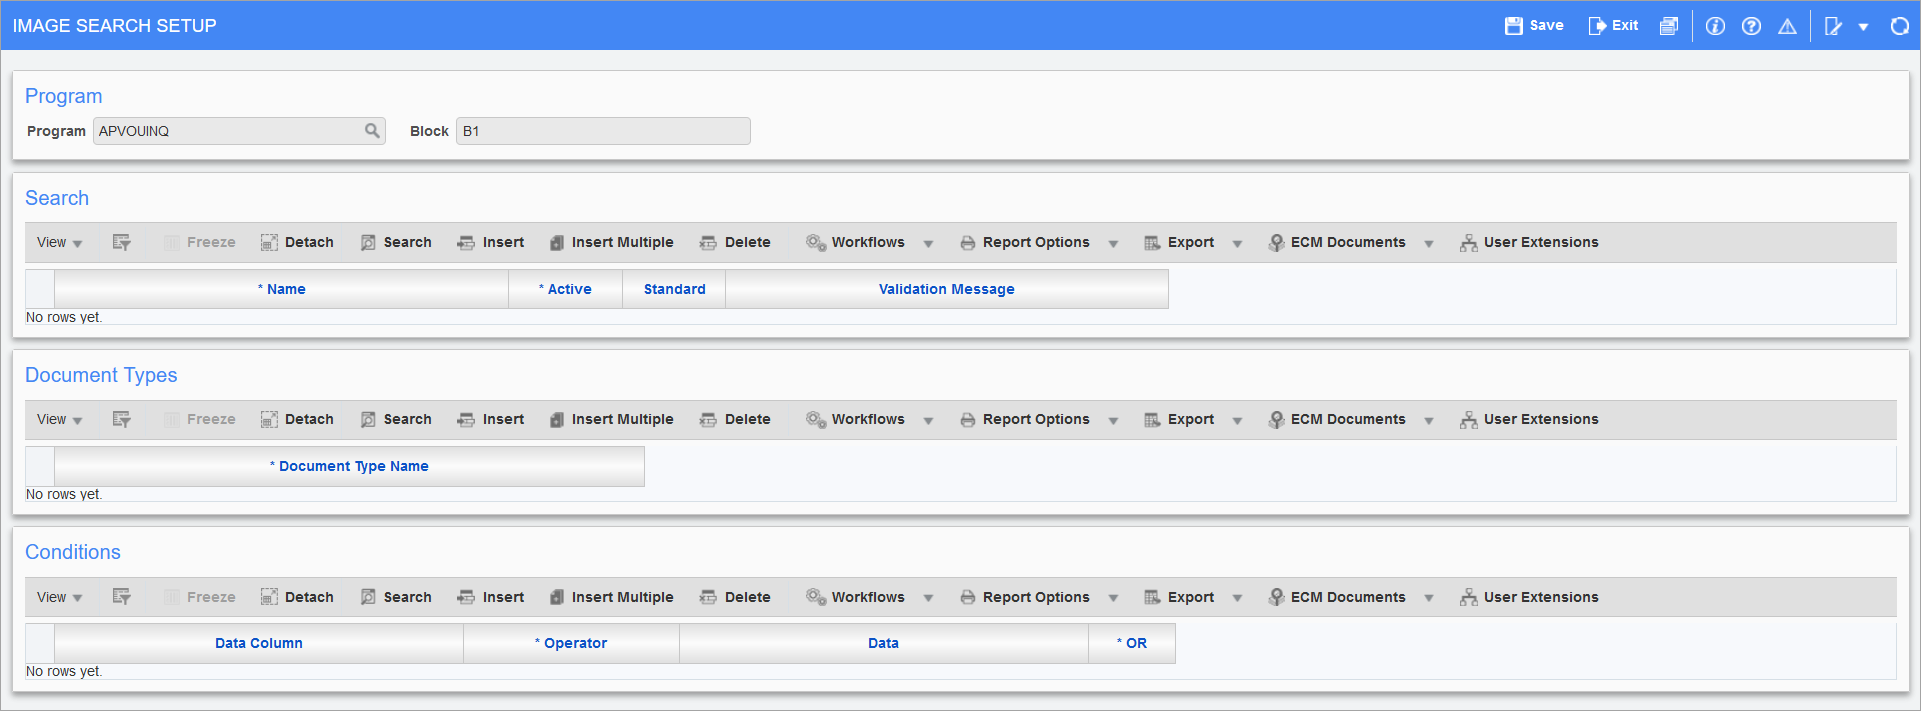
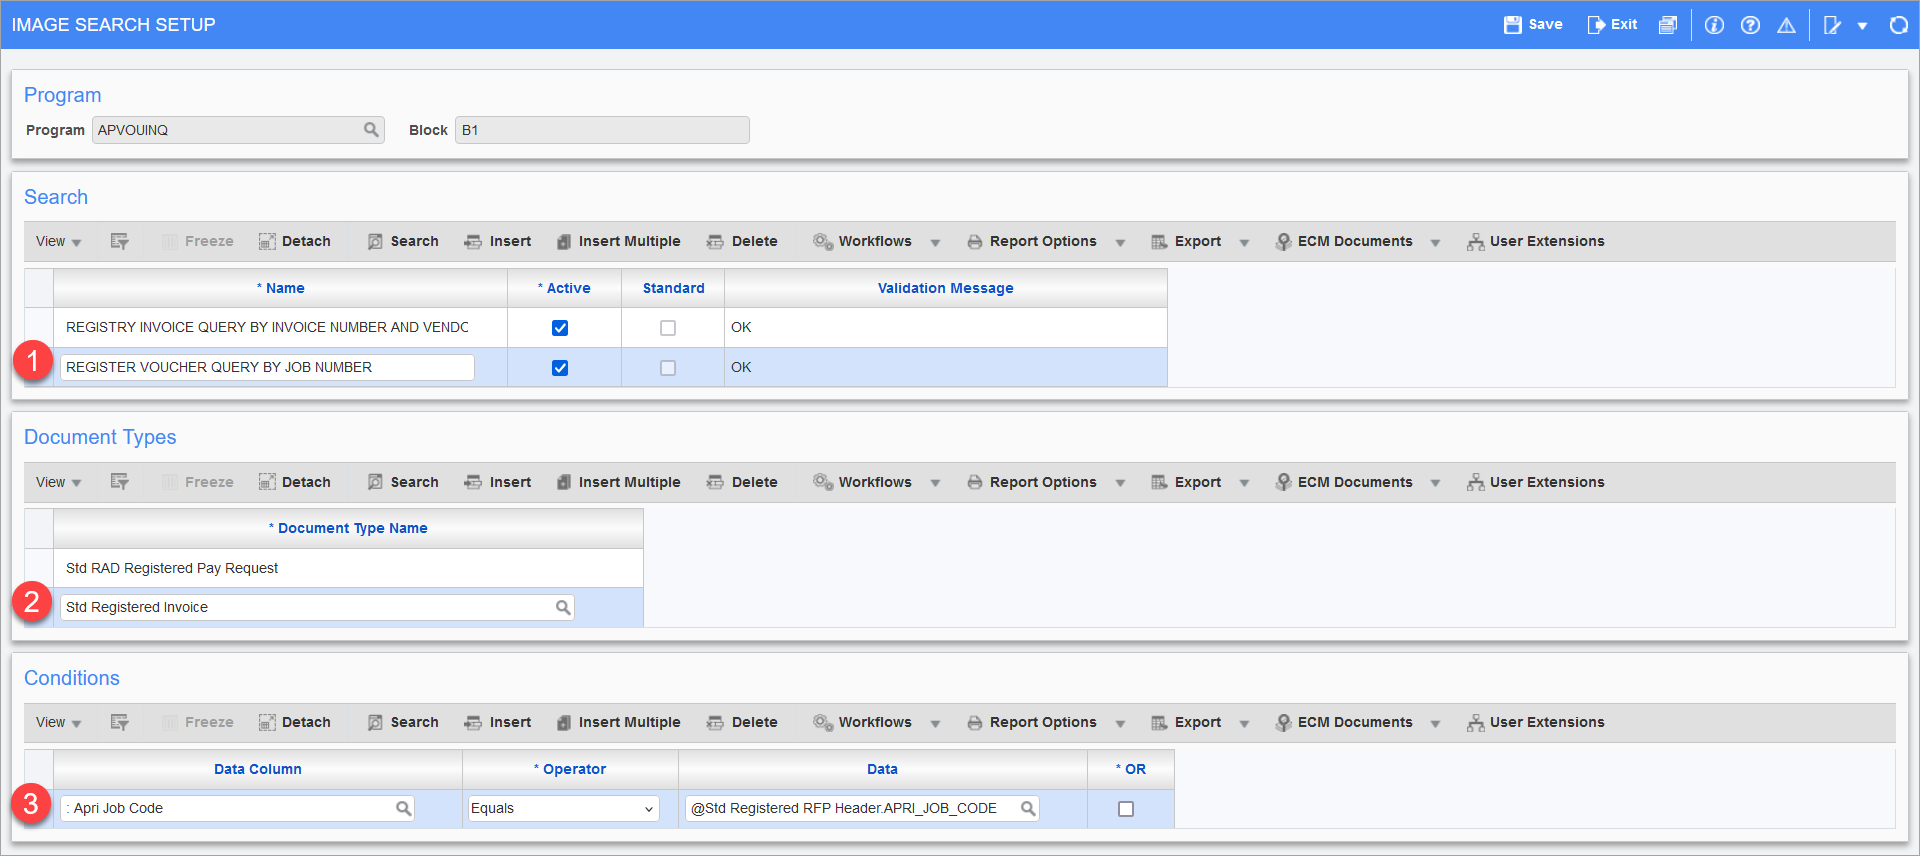
There are three sections that will need to be setup for the search to work.
-
Search: This area is where a description is entered for the search that is created. This should be as descriptive as possible to include the name of the screen and the search criteria that will be used since this information will be used later.
-
Document Types: The Imaging document types that will be used as part of the search are entered in this section.
-
Conditions: This is where you will setup the fields that will be used to create the search from the screen that you launched the Image Search Setup screen from, and the flysheets associated with the document type(s) that you chose in the Document Types section.
Below describes step-by-step processes of setting up an image search through the accounting screens designed to retrieve one invoice and another designed to retrieve a range of invoices.
Ensure that you are a user in the STANDARD Imaging group before starting this. See the Security section for details on Group Security setup in the Imaging module.
Process to Retrieve a Single Invoice
The example below illustrates how to create a search to retrieve a single invoice for the Voucher/Registry List screen. The most common search criteria for this is to use a combination of the vendor number and invoice number to create a unique single invoice result.
-
Click the [Insert] button on the block toolbar of the Search section and enter the description for the search. Check the 'Active' box, then click [Save].

-
Click the [Insert] button on the block toolbar of the Document Types section, then click on Search (
 ) icon for the Document Type Name column which will open a LOV for document types that you have access to. In this example, the "Std Registered Invoices" option is selected from the LOV. Click [Save] to save the changes.
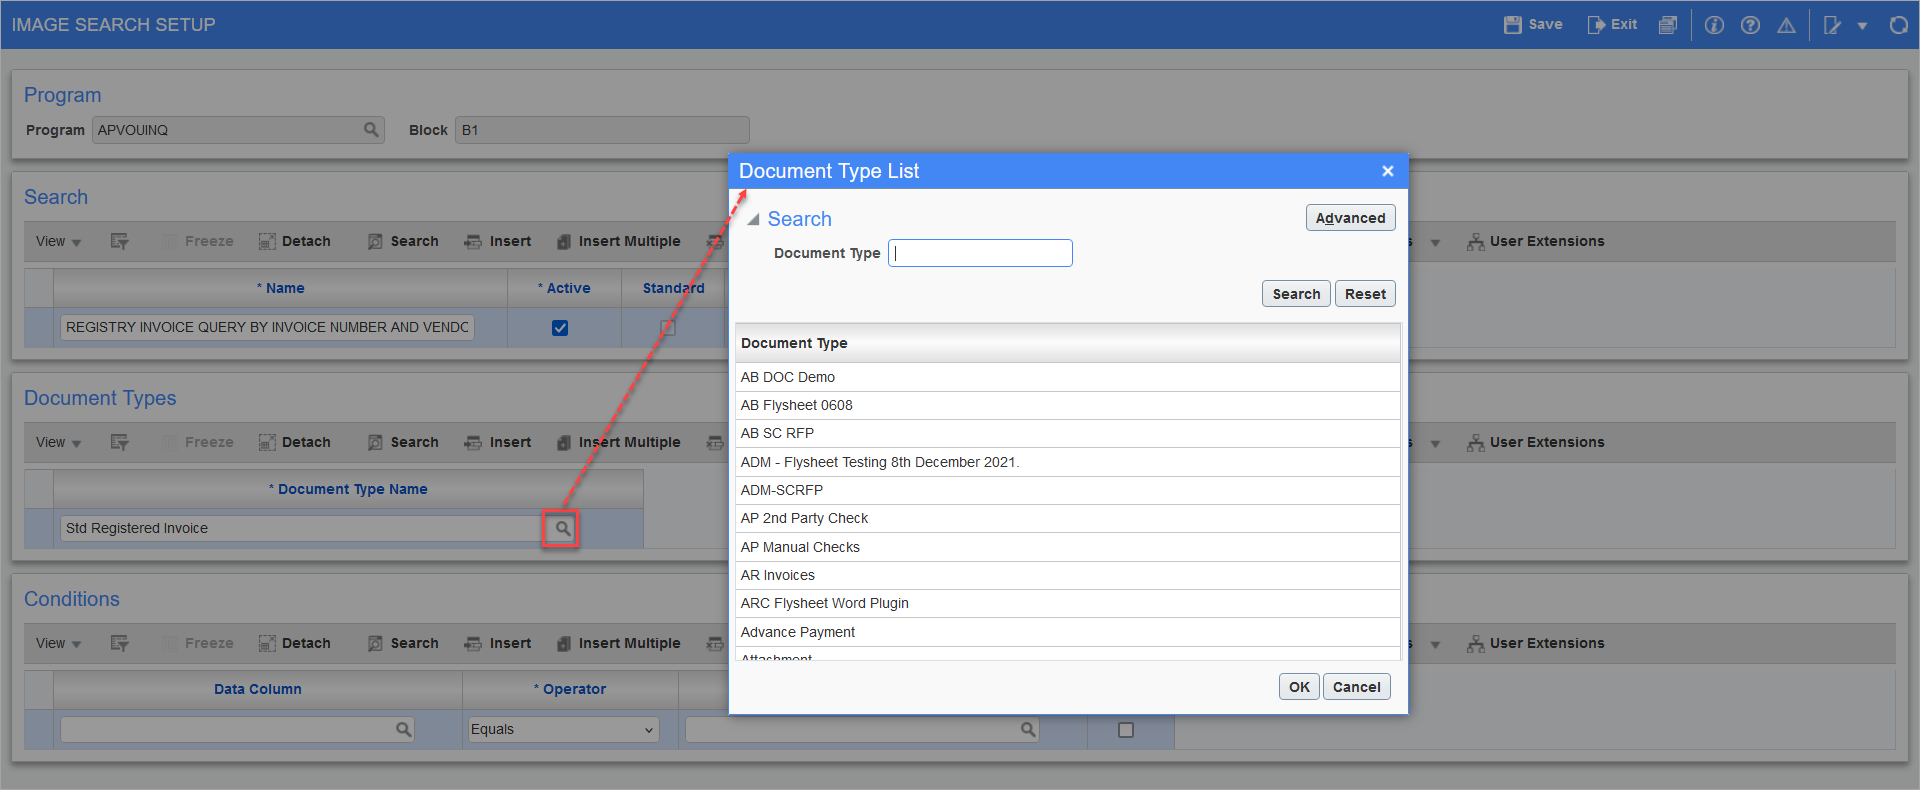
-
Click the [Insert] button on the block toolbar of the Conditions section. This will present you with three columns that will need values entered to setup the criteria that the search will use.
-
The Data Column will be where you will enter in the field name from the Voucher/Register List screen. This is where the search will get the value it is going to use for the search (e.g. vendor number). Invoice numbers are generally referred to as "INVCODE" or "REFCODE" in the system. Vendor codes are generally "VENCODE", "SOURCECODE", or "SRCCODE".
Click on the Search (
) icon for the Data Column to open the LOV. This is going to produce a very large list of values but we are concerned only with the fields that have "BLOCK FIELD” listed under the Source Type column. The block fields are the fields that are available on the screen where the Image Search Setup screen was accessed. In this example, we are using the Voucher/Registry List screen. When the search is executed we want it to pull the vendor and invoice number from the Voucher/Registry List screen and find any imaged invoice that has the same combination.
The List of Values produced will contain "VenCode" and "InvCode". For this example, pick "Vencode" first.

-
The Operator column will almost always be the "Equals" option, which is selected from the LOV. Advanced users can use any of the other operators included, but in this example, select the "Equals" option.

-
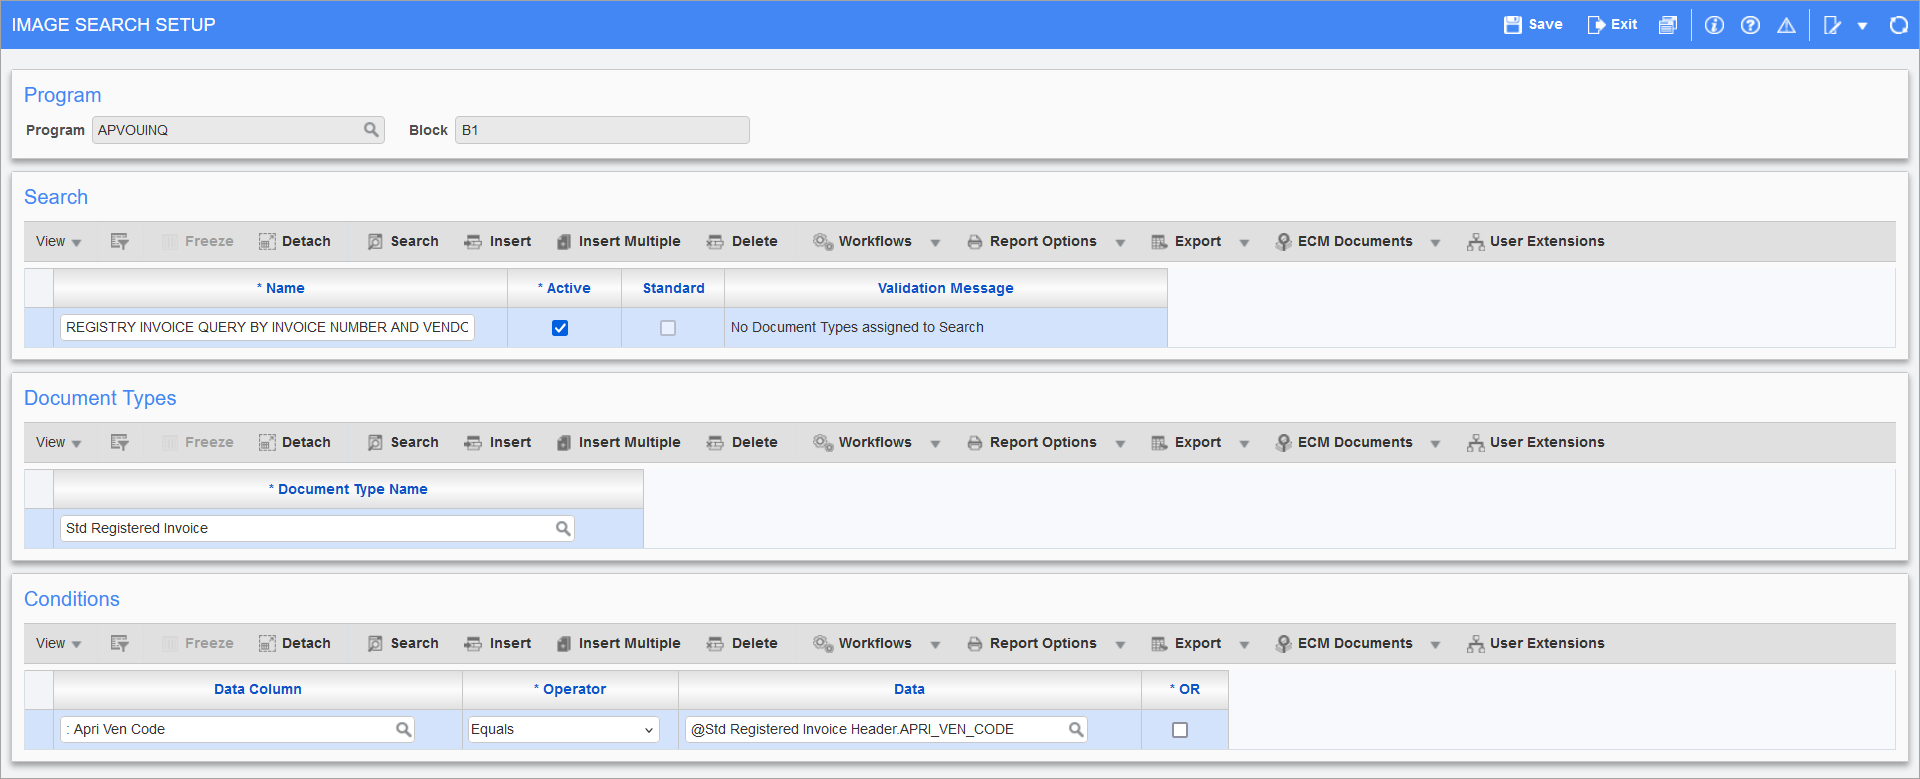
The Data column will be where you will specify which flysheet field the search should look at to match the information that will be retrieved from the Data column when the search is executed. It will need to find the corresponding vendor flysheet field.
Click on the Search (
) icon to open the LOV and scroll down to find the header flysheet which is the one that contains the Vendor field (the Description column contains "VEN_CODE"). 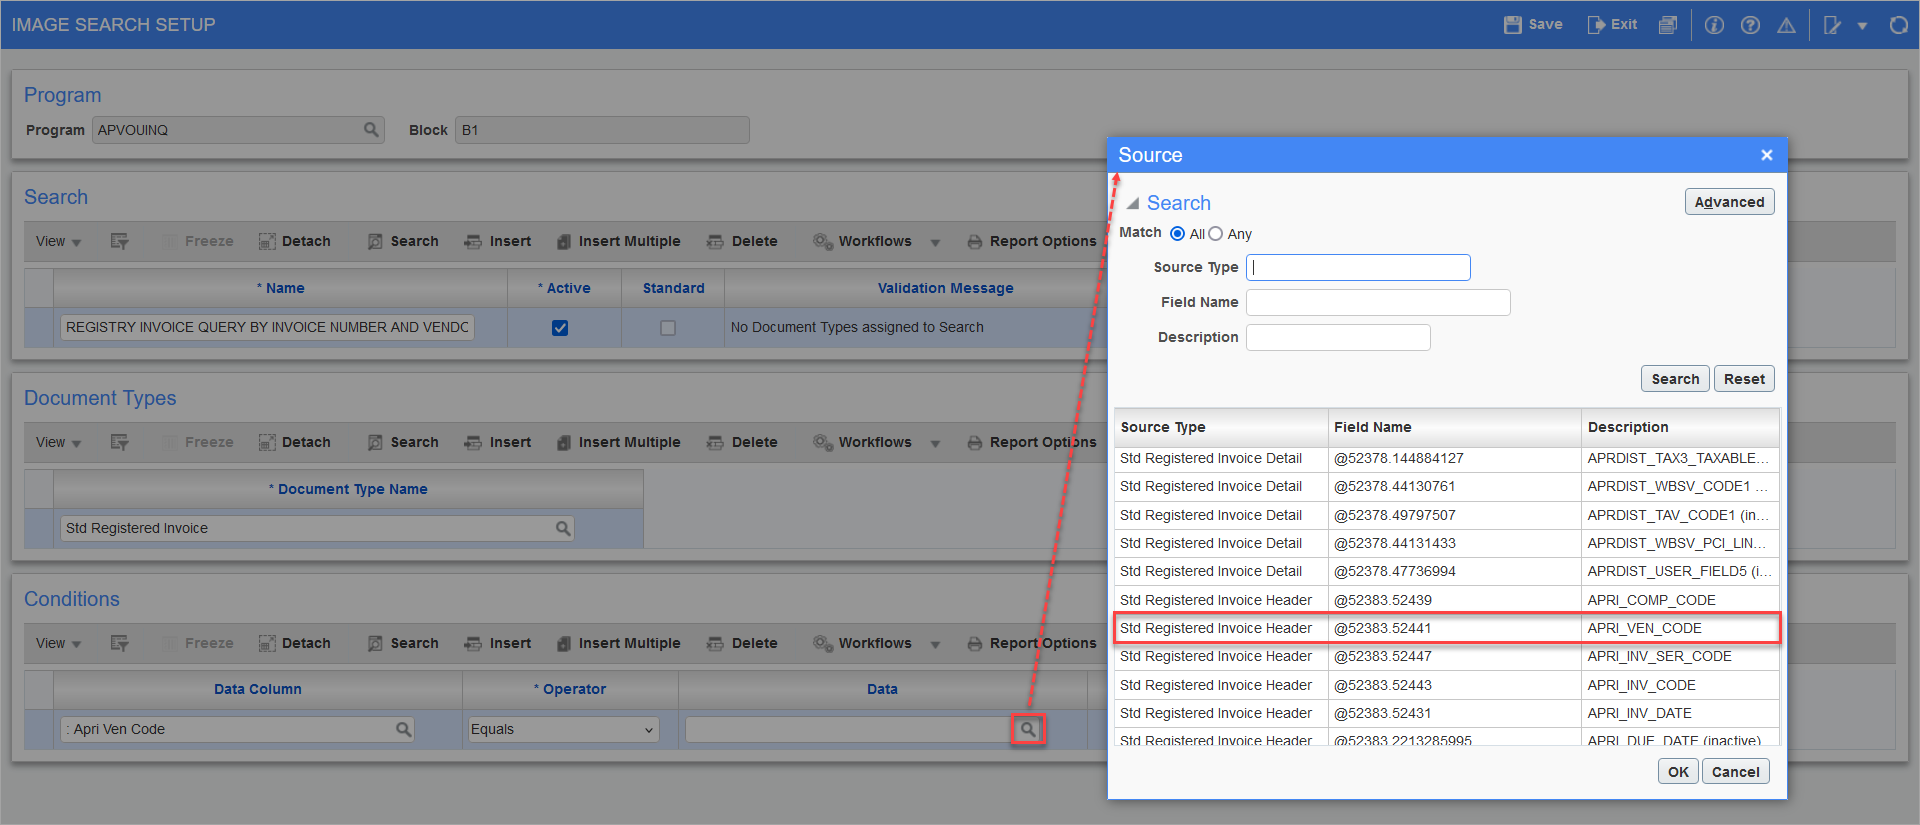
The setup should follow the screenshot below.
-
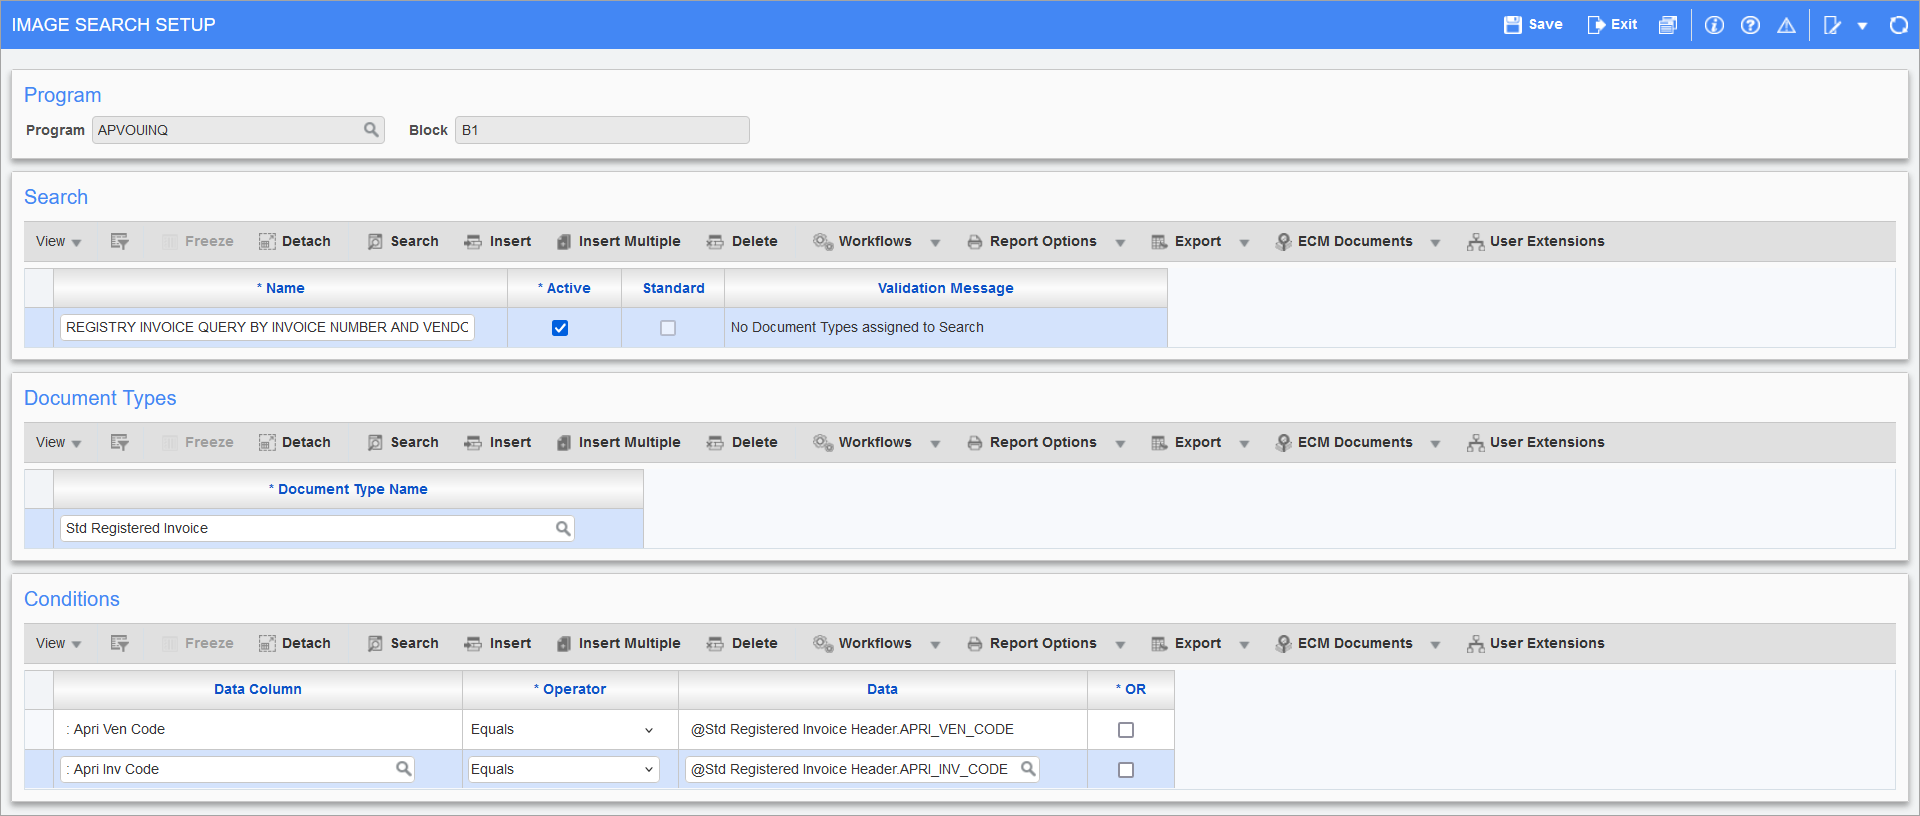
Repeat Steps A to C to add conditions for the invoice number (the Description column contains "INV_CODE"). The completed setup for the first document type looks like the following screenshot. Click [Save].
-
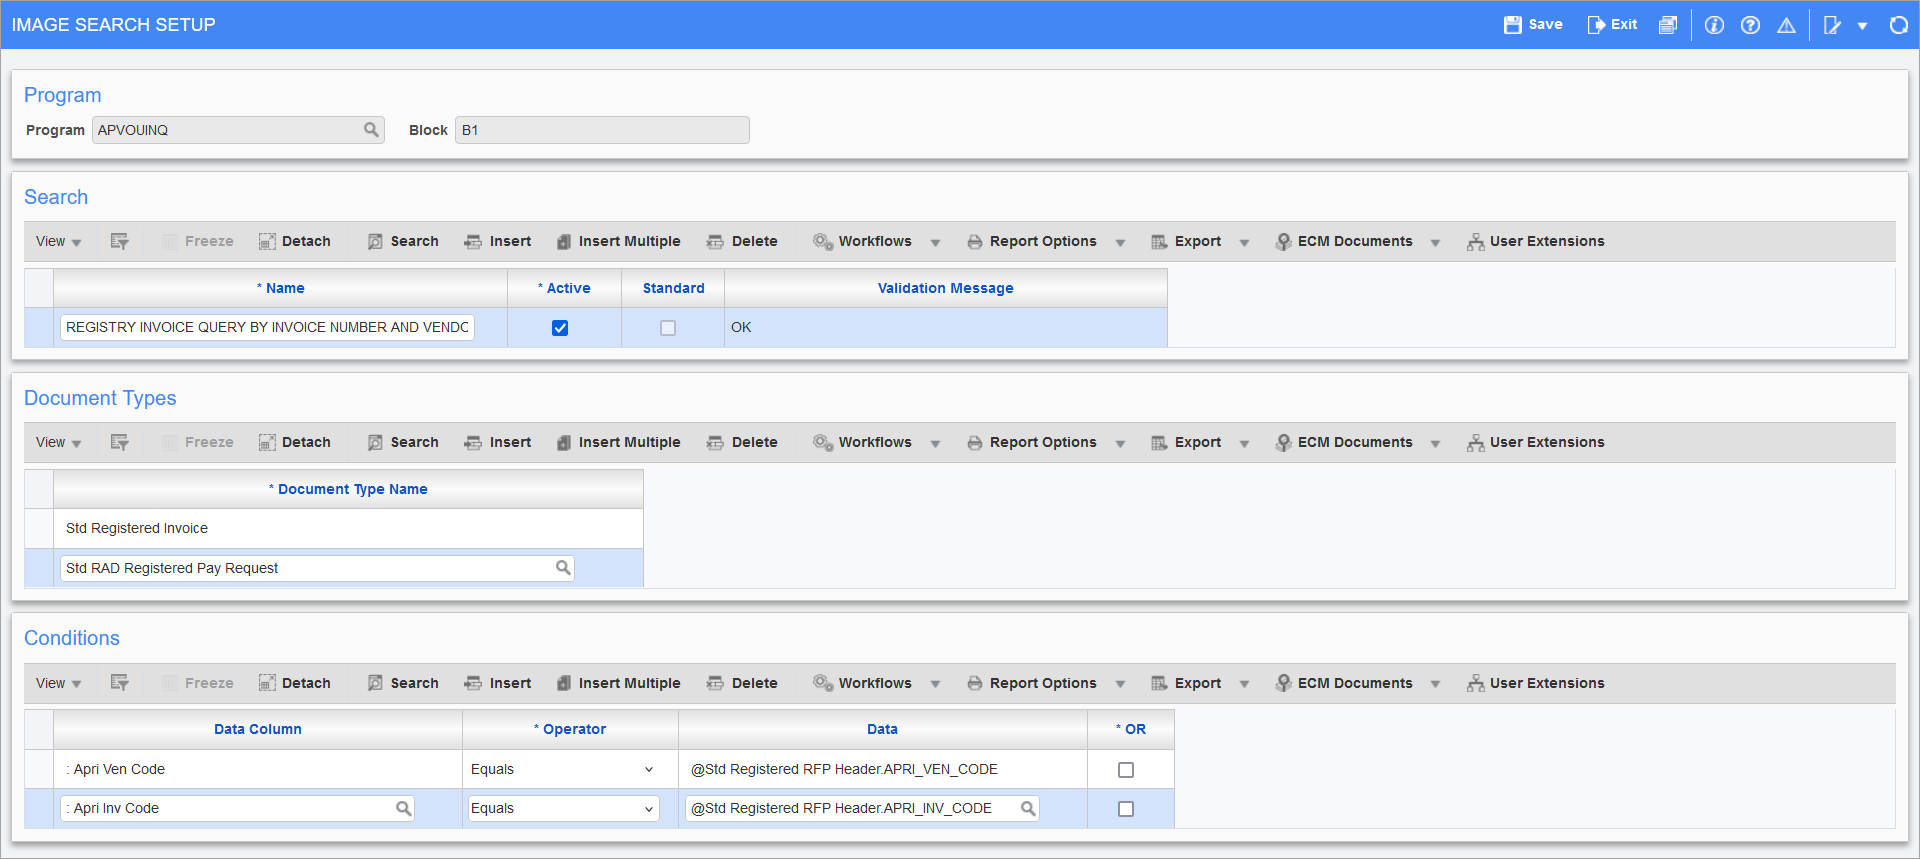
To complete the search, we need to add the "Pay Request" document type under the Document Types section and setup search conditions under the Conditions section by repeating the above steps. The setup will look like the following screenshot. Ensure that you save at each step.
-
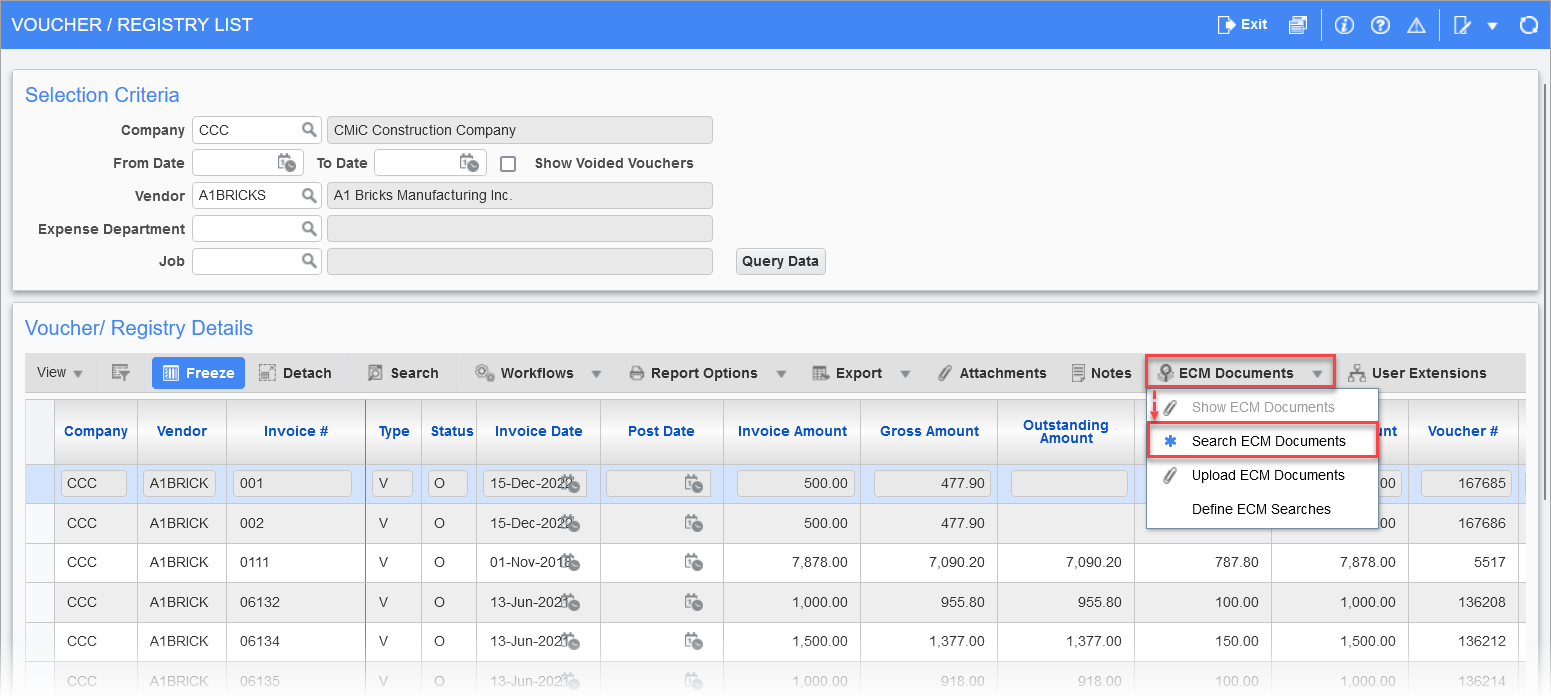
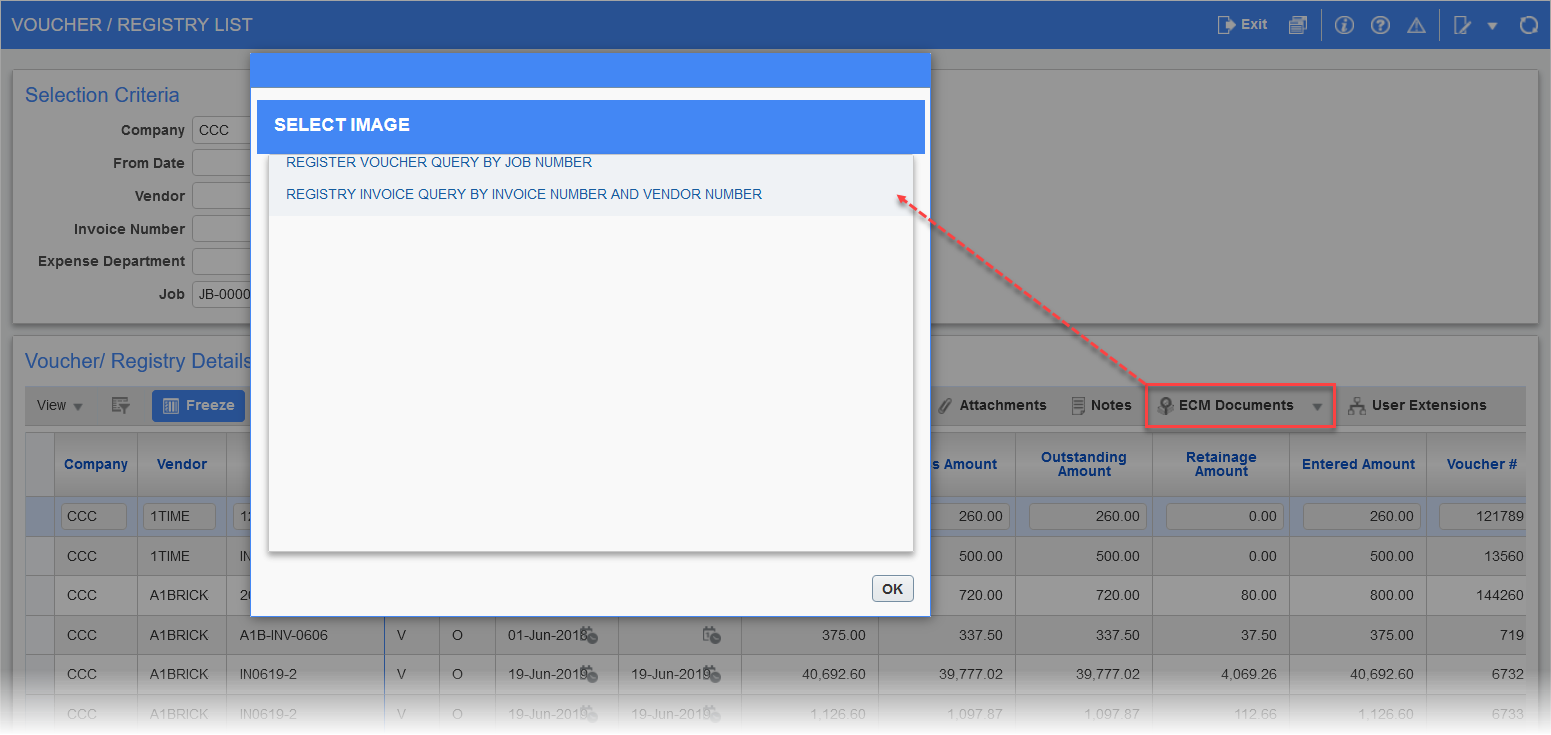
Once you have data queried in the Voucher/Registry List screen, you can click the [ECM Documents] button or choose the "Search ECM Documents" option from the drop-down menu and the search will execute. If there is a match between the invoice that you have chosen and Imaging, then the Image Manager will open and display the result. If not, the system will inform you that there are no related images.
-
Process to Retrieve a Range of Invoices
More than one search can be created in a screen to produce different results. In the example above, the setup was to retrieve one invoice based on a vendor and invoice number match.
In the steps below, the search looks at the job code in the Voucher/Registry List screen so that the search will retrieve all invoices in Imaging that have a matching job number.
-
Insert a new record under the Search section, enter a name for the search, and check the 'Active' box. Click [Save].
-
Insert a new record under the Document Types section and select a document type from the Document Types LOV. In this example, "Std Registered Invoice" is selected. Click [Save].
-
Insert a new record under the Conditions section and enter the following information:
-
Data Column: The Job Code block field (e.g. ": Apri Job Code")
-
Operator: Equals
-
Data: Select the header flysheet which contains the Job Code (e.g. "@Std Registered RFP Header.APRI_JOB_CODE")
Click [Save].
-
-
If the user has security access to both searches, then the system will ask which search to run when the [ECM Documents] button is clicked. The name of the search will appear allowing the user to know which one they are running.
Security
Security setup is needed in the Groups screen of the Imaging module to allow a group to run the search. The STANDARD group will have the search automatically added to it. For all other groups, the search must be assigned.
-
Highlight the group you wish to add the search to.
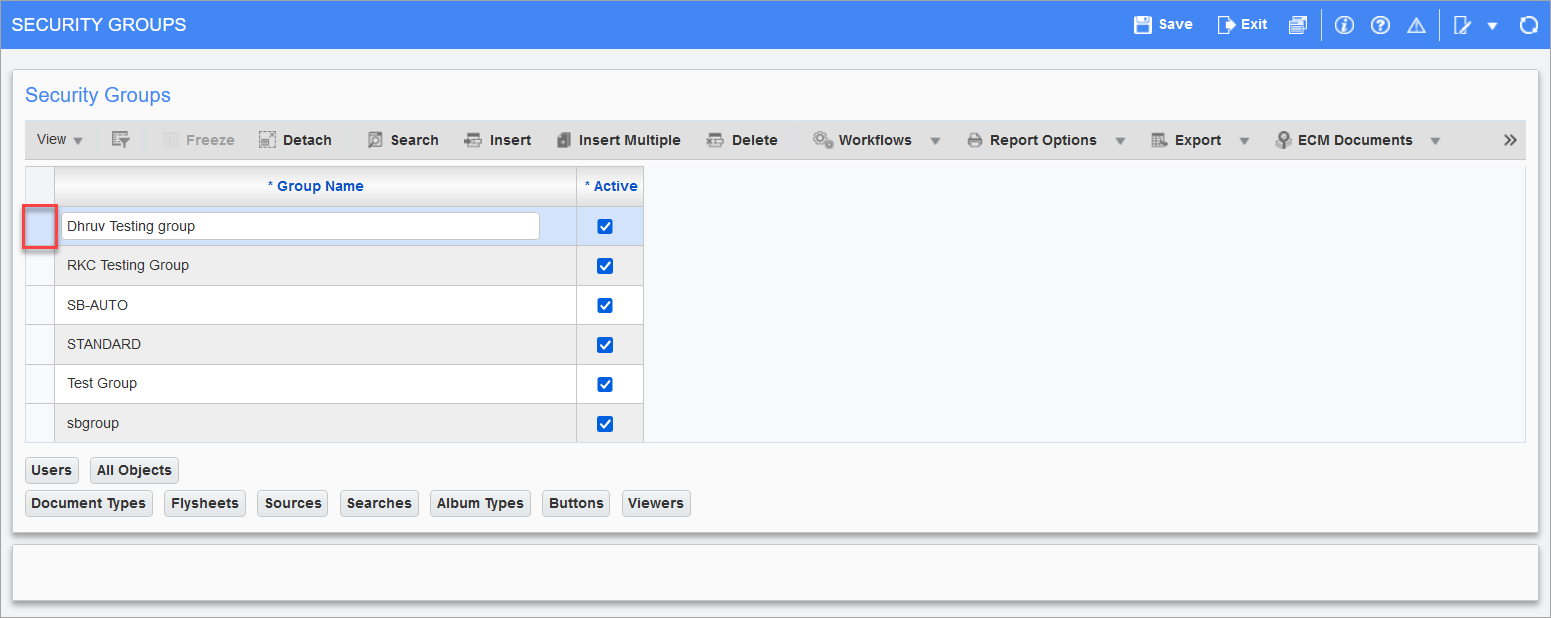
Pgm: IMGGRP – Security Groups; standard Treeview path: Imaging > Utilities > Security > Groups
-
Click on the [Searches] button.
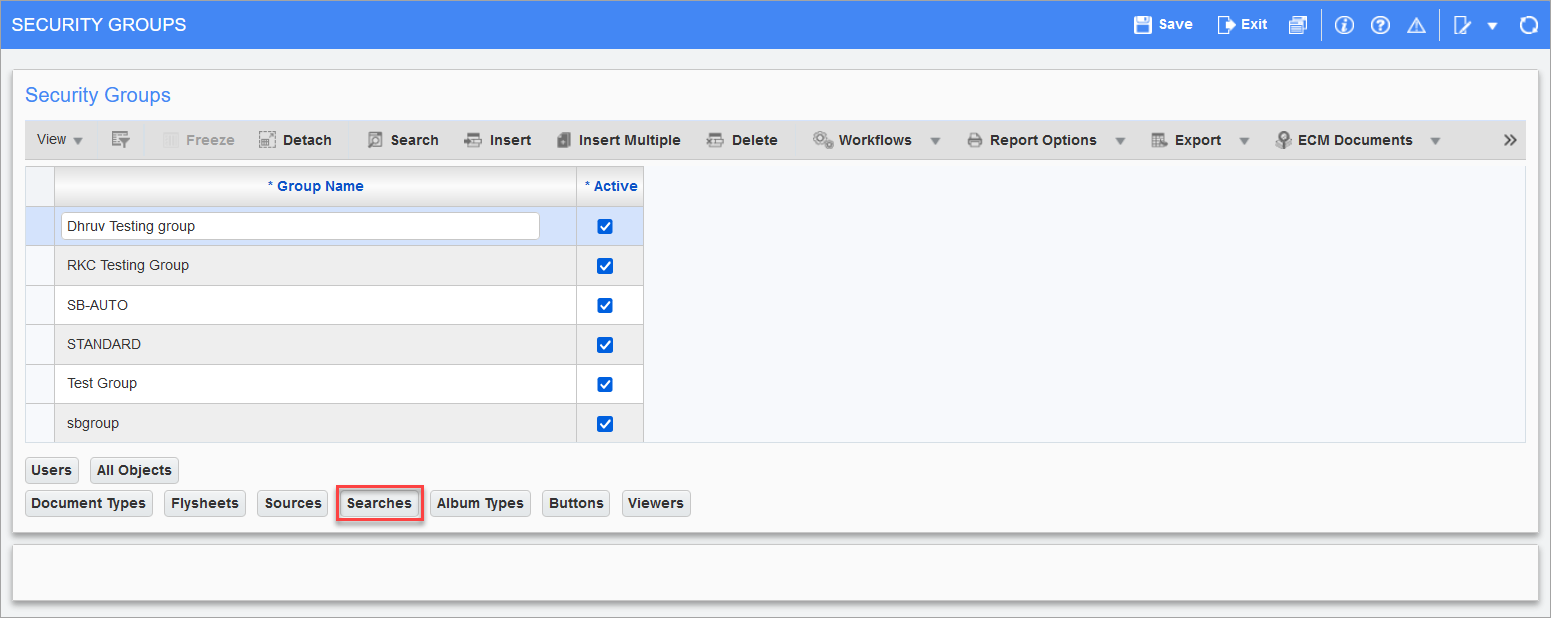
Pgm: IMGGRP – Security Groups; standard Treeview path: Imaging > Utilities > Security > Groups
-
Click the [Insert] button on the block toolbar to insert a new record, then click on Search (
) icon for the Object Name column.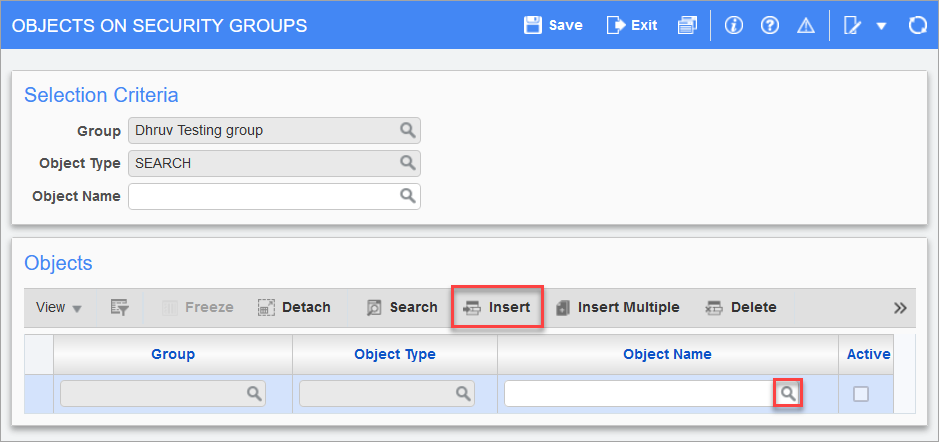
Pgm: IMGSEC – Objects on Security Groups; standard Treeview path: Imaging > Utilities > Security > Groups - [Searches] button
-
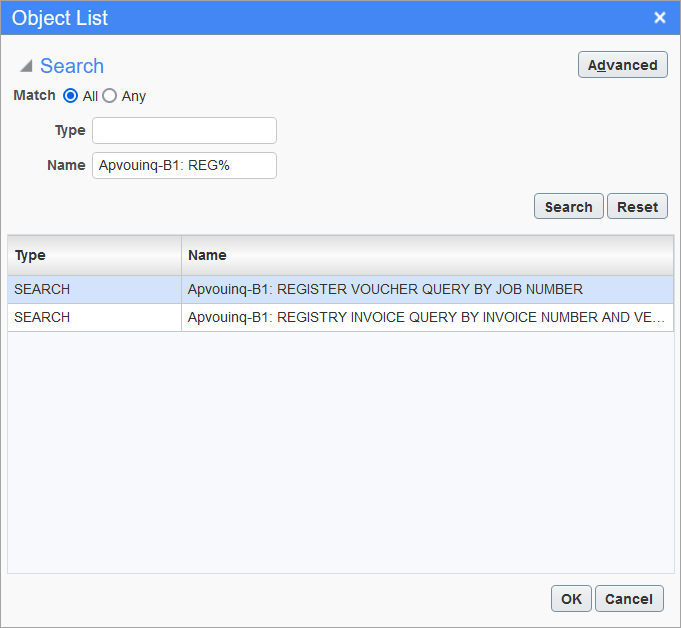
The list of searches will appear (by description). Select the desired image search from the LOV, then click [OK].
-
Click [Save] to assign it to the group.
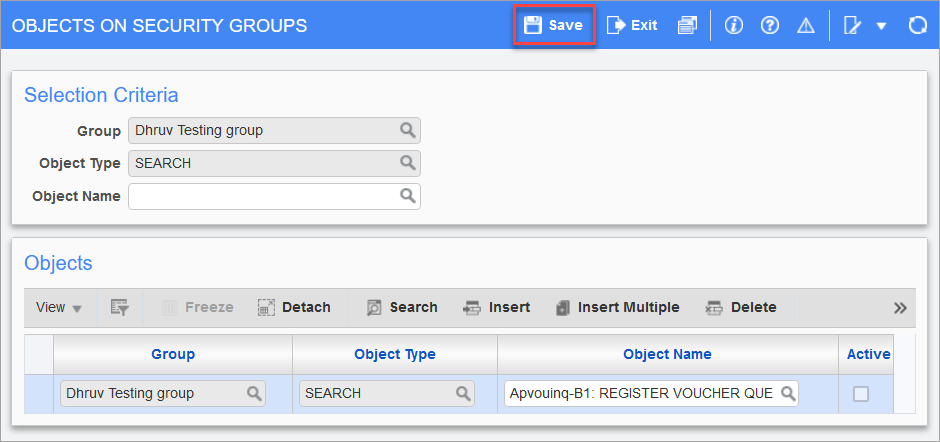
Pgm: IMGSEC – Objects on Security Groups; standard Treeview path: Imaging > Utilities > Security > Groups - [Searches] button