DocuSign Integration - DocuSign Setup
Step-by-Step Process
-
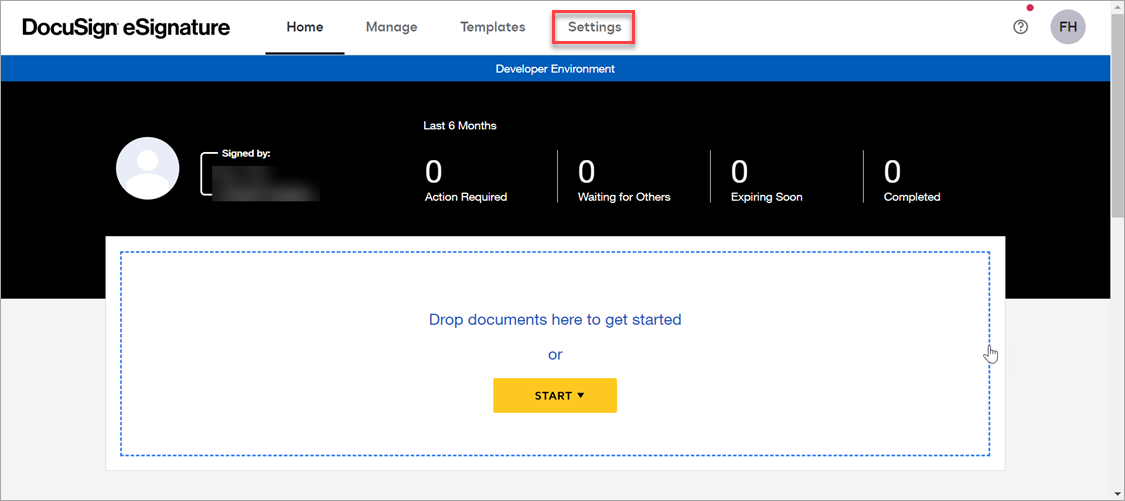
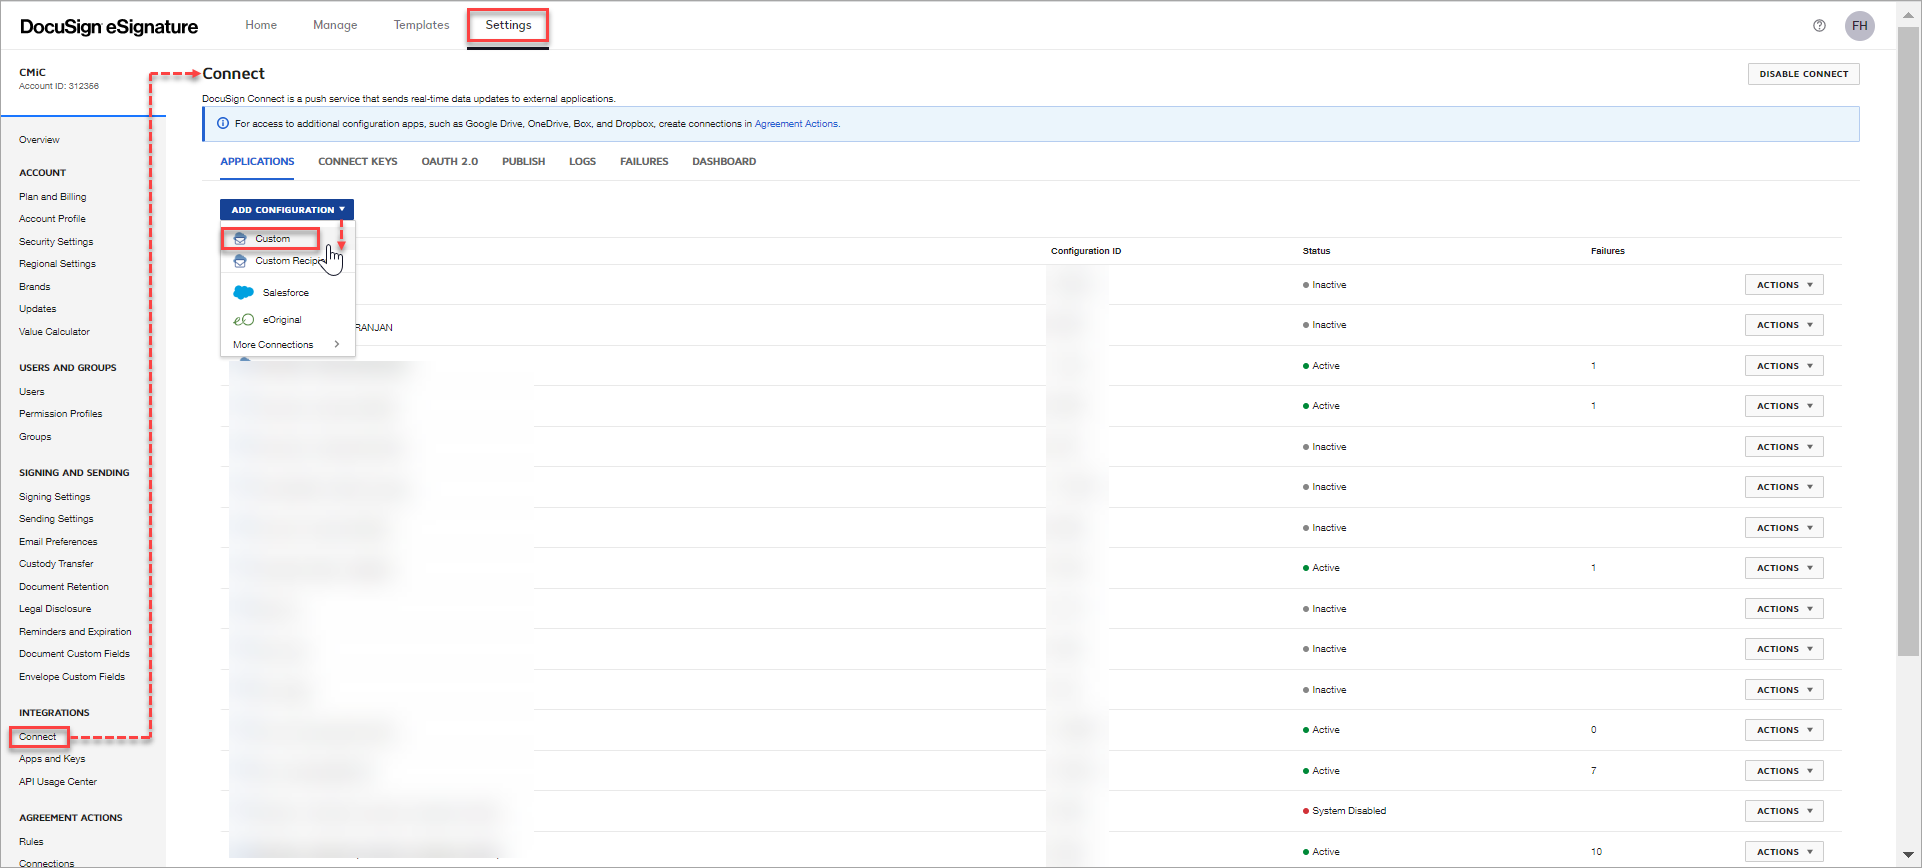
Log in to DocuSign and click on the Settings tab to open the Account Administration screen.
-
-
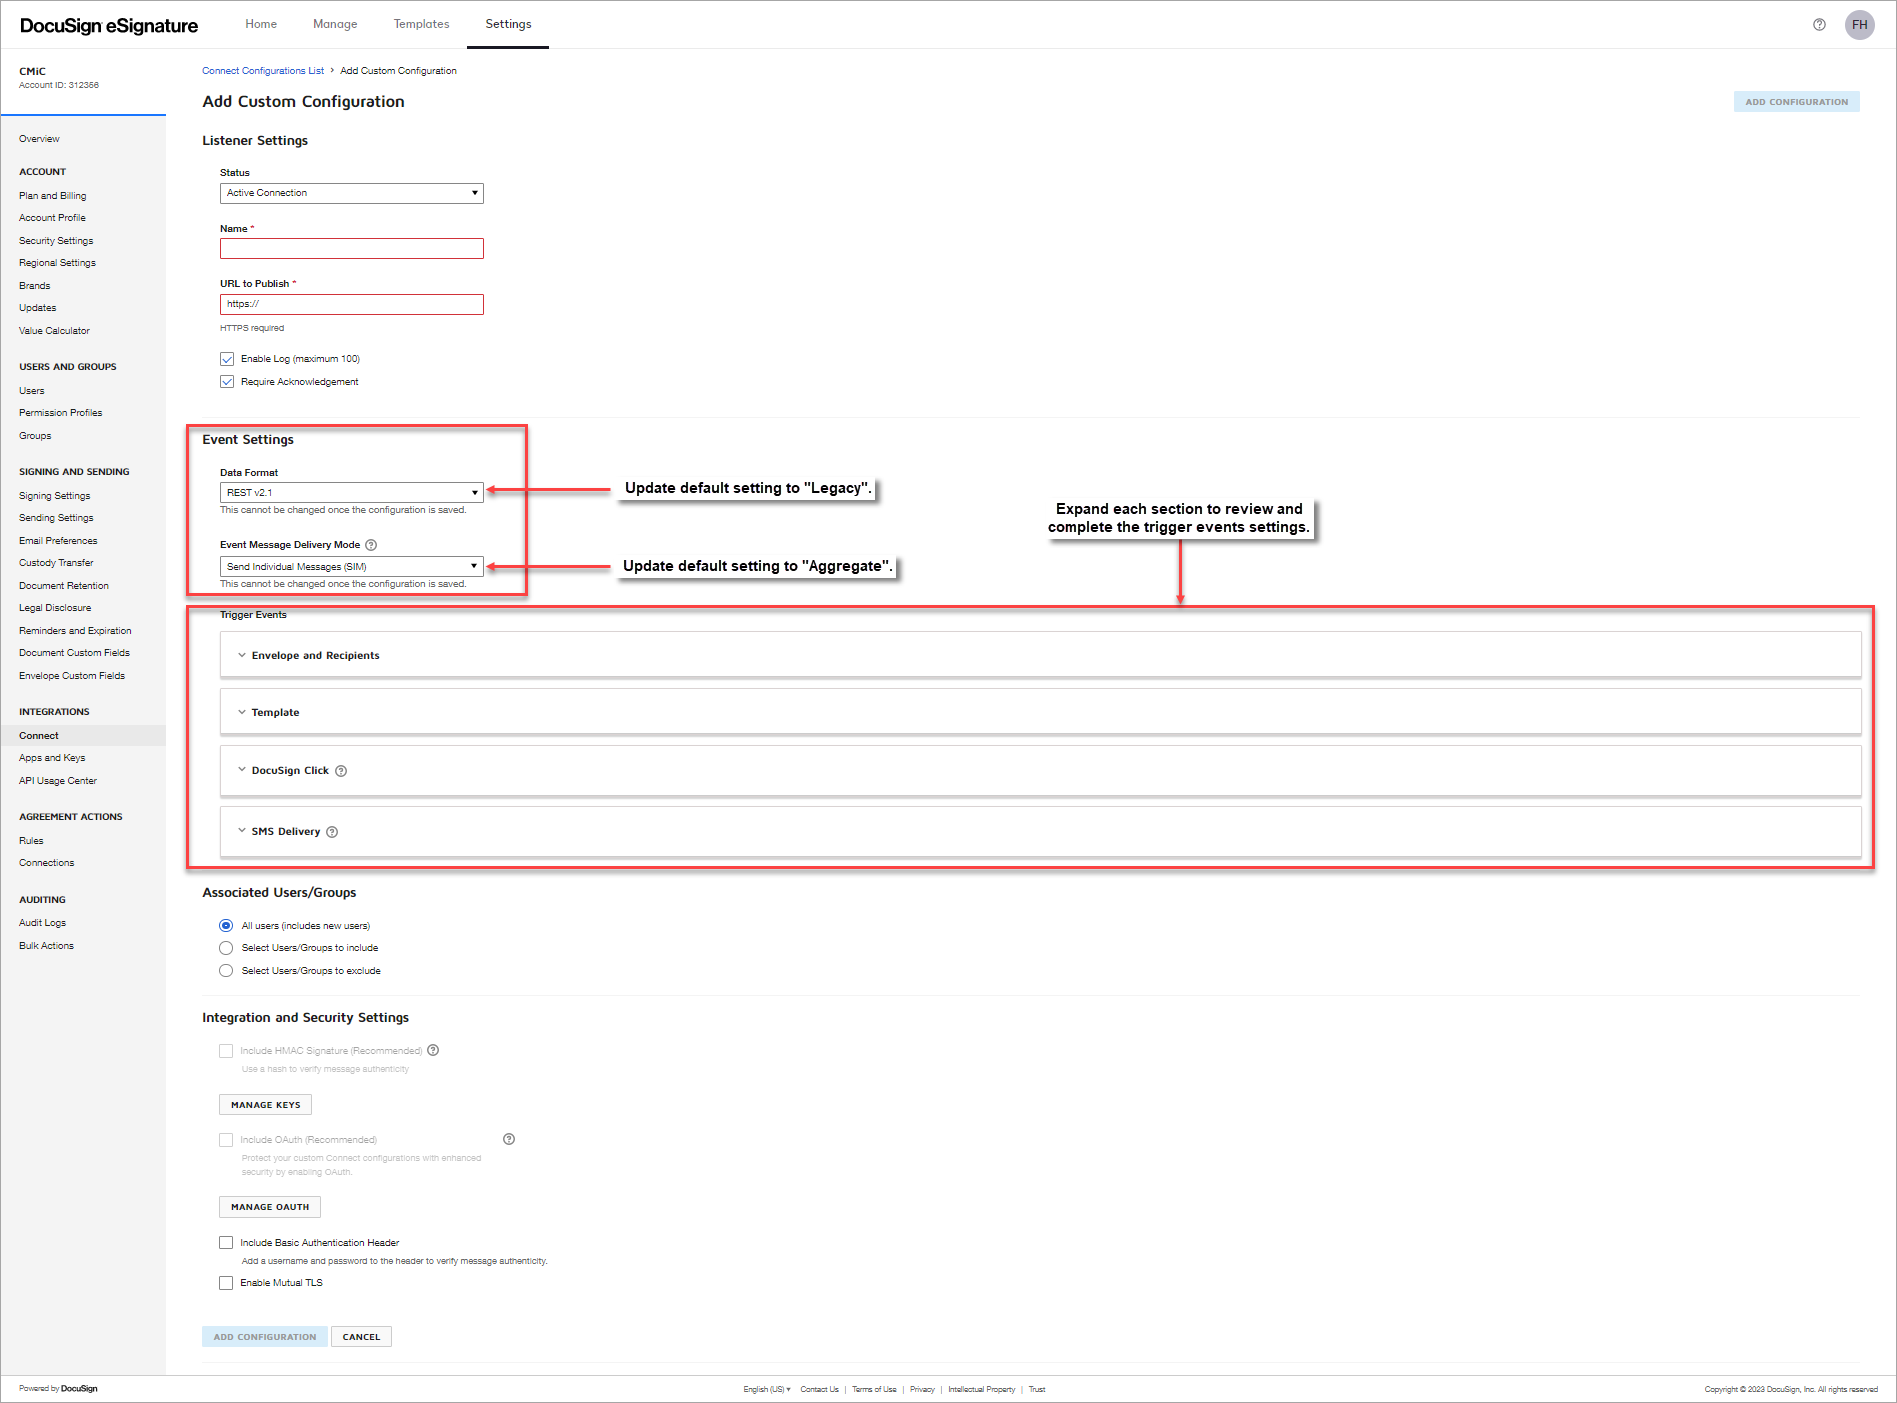
Under Event Settings, update the default settings as follows:
-
Data Format: Select "Legacy" from the drop-down menu.
-
Event Message Delivery Mode: Select "Aggregate" from the drop-down menu.
-
-
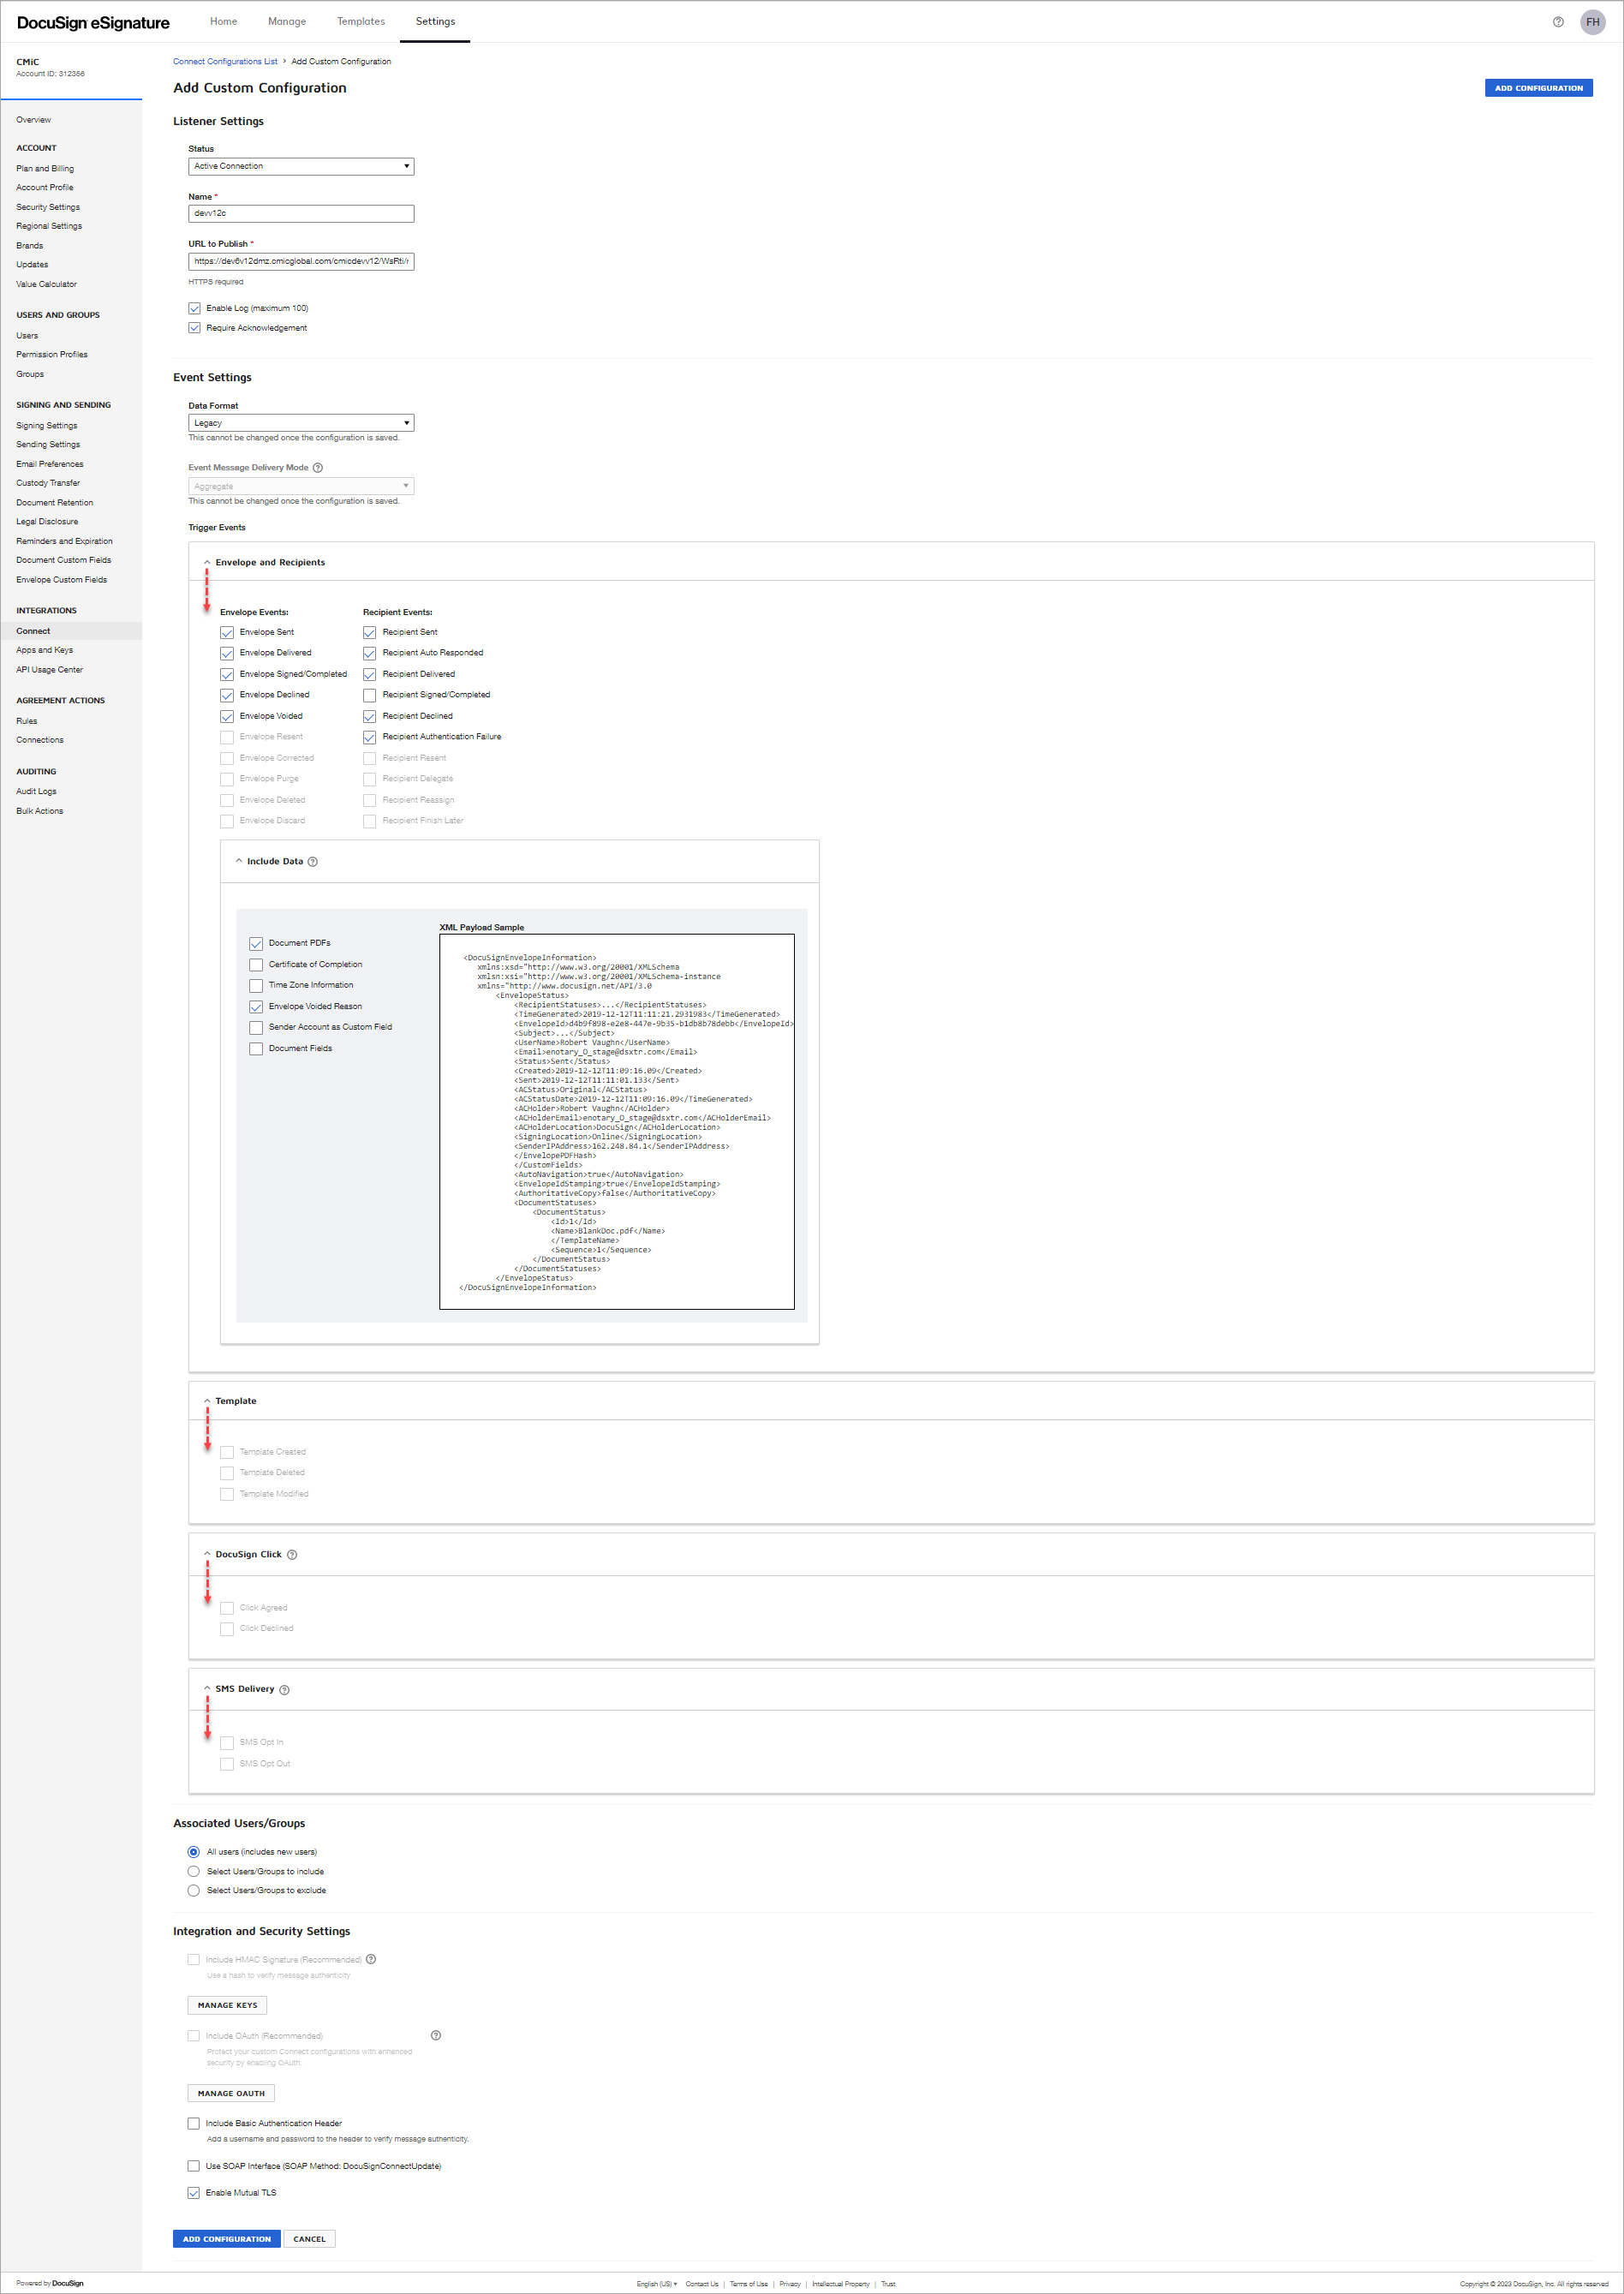
Under the Trigger Events, expand the sections to complete the options and settings, as shown in the screenshot above.
Important Configuration Values
URL to Publish to - This is the URL to CMiC RTI. An example of this would be:
https://dev4v12ssl.cmic.ca/cmicdevv12/WsRti/receive/v1/docusignstatus_list?_cmicLinkIdentityCode=DOCUSIGN&_cmicReceiveAdapterIdentityCode=DOCUSIGNIRA&_cmicTransmitAdapterIdentityCode=DOCUSIGNETA
NOTE: DocuSign will only send status updates to an SSL server (where the URL starts with “https” as opposed to "http").
You can figure out the URL to use by logging in to CMiC Field. If the CMiC Field URL is:
https://dev4v12.cmic.ca:7785/cmicdevv12/SdMenu/
remove "SdMenu/" and replace it with the text below:
WsRti/receive/v1/docusignstatus_list?_cmicLinkIdentityCode=DOCUSIGN&_cmicReceiveAdapterIdentityCode=DOCUSIGNIRA&_cmicTransmitAdapterIdentityCode=DOCUSIGNETA
which would give you:
https://dev4v12.cmic.ca:7785/cmicdevv12/WsRti/receive/v1/docusignstatus_list?_cmicLinkIdentityCode=DOCUSIGN&_cmicReceiveAdapterIdentityCode=DOCUSIGNIRA&_cmicTransmitAdapterIdentityCode=DOCUSIGNETA
NOTE FOR CLOUD CUSTOMERS: For Cloud customers the URL should also include the client ID. For example:
https://atlas.cmiccloud.com/cmicprod/WsRti/receive/v1/docusignstatus_list?_cmicLinkIdentityCode=DOCUSIGNCMICCLOUD&_cmicReceiveAdapterIdentityCode=DOCUSIGNIRA&_cmicTransmitAdapterIdentityCode=DOCUSIGNETA&_cmicClientID=CMICCLOUD
Where "cmicLinkIdentityCode=DOCUSIGNCMICCLOUD" and "&cmicClientID=CMICCLOUD" is the client ID for Cloud appended at the end of the URL.
If you set up RTI Maintenance in the previous steps exactly as shown, then the text above is correct. Otherwise, if any of the link or adapter codes are different, that will have to be reflected in parameters passed in the URL.
-
Name - The name should reflect the environment being configured (DEV, TEST, PROD, etc.).
-
Allow Envelope Publish - Must be checked in order to send the status updates to CMiC RTI.
-
Include Documents - Must be checked in order for CMiC RTI to receive the signed document.
-
Send information on these envelope events - Select all to retrieve all events related to the envelope.
-
Select users to integrate - Select "All users integrated", otherwise select each specific user.
Accept all other default settings or speak to your CMiC or DocuSign representative.
DocuSign Custom Anchor Tags
DocuSign provides the ability to create custom anchor tags that you can then put into your documents. These anchor tags are used to indicate where signatures or initials are required, to enter dates and names automatically, and more. Below is a brief description of how you can set up your own custom anchor tags. For full details, please refer to DocuSign documentation.
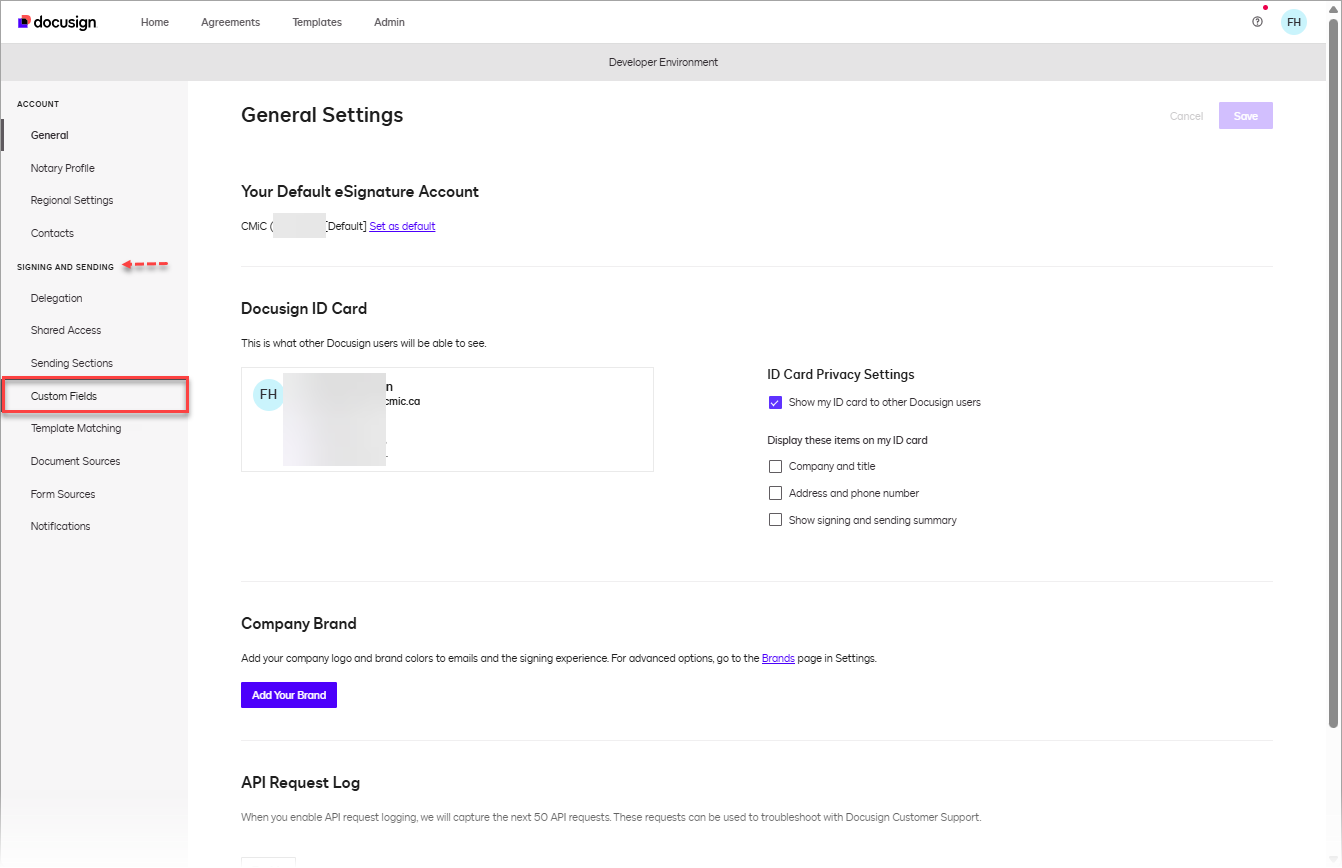
Sign in to DocuSign and go to My Preferences.
Under Signing and Sending, select Custom Fields.
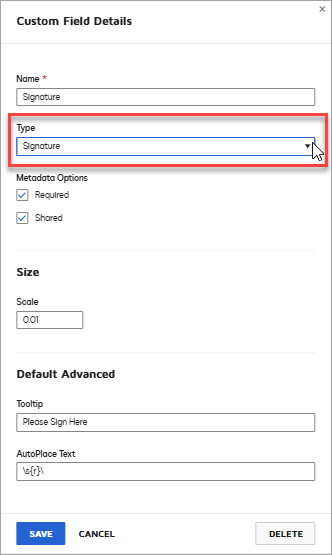
When adding a new tag, set the Label and Tool Tip values as desired. In Type, select the appropriate value for this tag. In the example below, the tag will be used to indicate where a signature is required, therefore the "Signature" option is selected for the Type field. In the Anchor field, type the value that will appear in your documents to indicate where this tag should be placed when viewed in DocuSign. You can enter any text you wish, but it should be unique enough that it will not be duplicated elsewhere in your document. In this example, the value entered is \s{r}\. The {r} is used to indicate the signature number. Therefore, wherever values such as \s1\ or \s2\ appear in your document, DocuSign will indicate that a signature is required at that location.
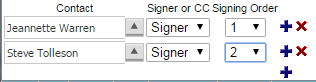
Once the custom tags have been created in DocuSign, they can be added to your documents. In the example below, the values enclosed in backward slashes (\s1\, \fn1\, etc.) were added to the document (in a font color of white so as not to be seen) in the various locations where signatures or other values are required. The \s1\ anchor will indicate where the 1st recipient, as sent from the CMiC dialogue, will be required to sign. The \s2\ anchor will indicate where the 2nd recipient, as sent from the CMiC dialogue, will be required to sign. Custom tags were also created for Full Name (\fn{r}\) and Date Signed (\ds{r}\), these values are populated automatically by DocuSign.
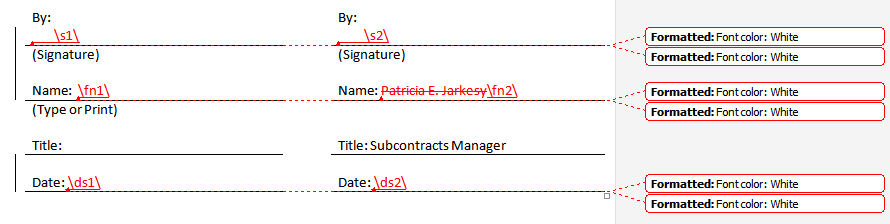
Below is a screenshot of the section of the CMiC dialogue in which you select the contacts to whom the document will be sent for signature. Using this example and the sample document above, Jeannette Warren would be required to sign at \s1\ because Signing Order 1 is selected for her in the CMiC dialogue. Subsequently, Steve Tolleson would be required to sign at \s2\.
Multiple DocuSign Accounts
CMiC’s DocuSign integration supports Single Account authentication. If you have multiple accounts for your company with DocuSign, you will need to follow the steps below for each of your accounts.
-
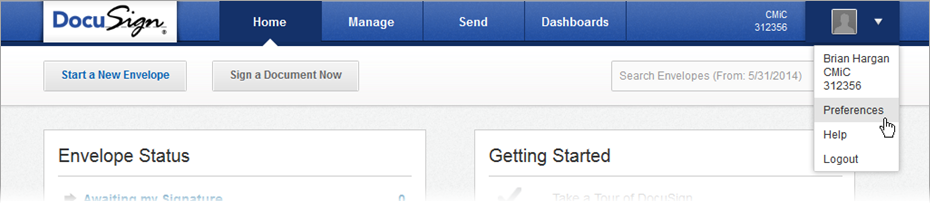
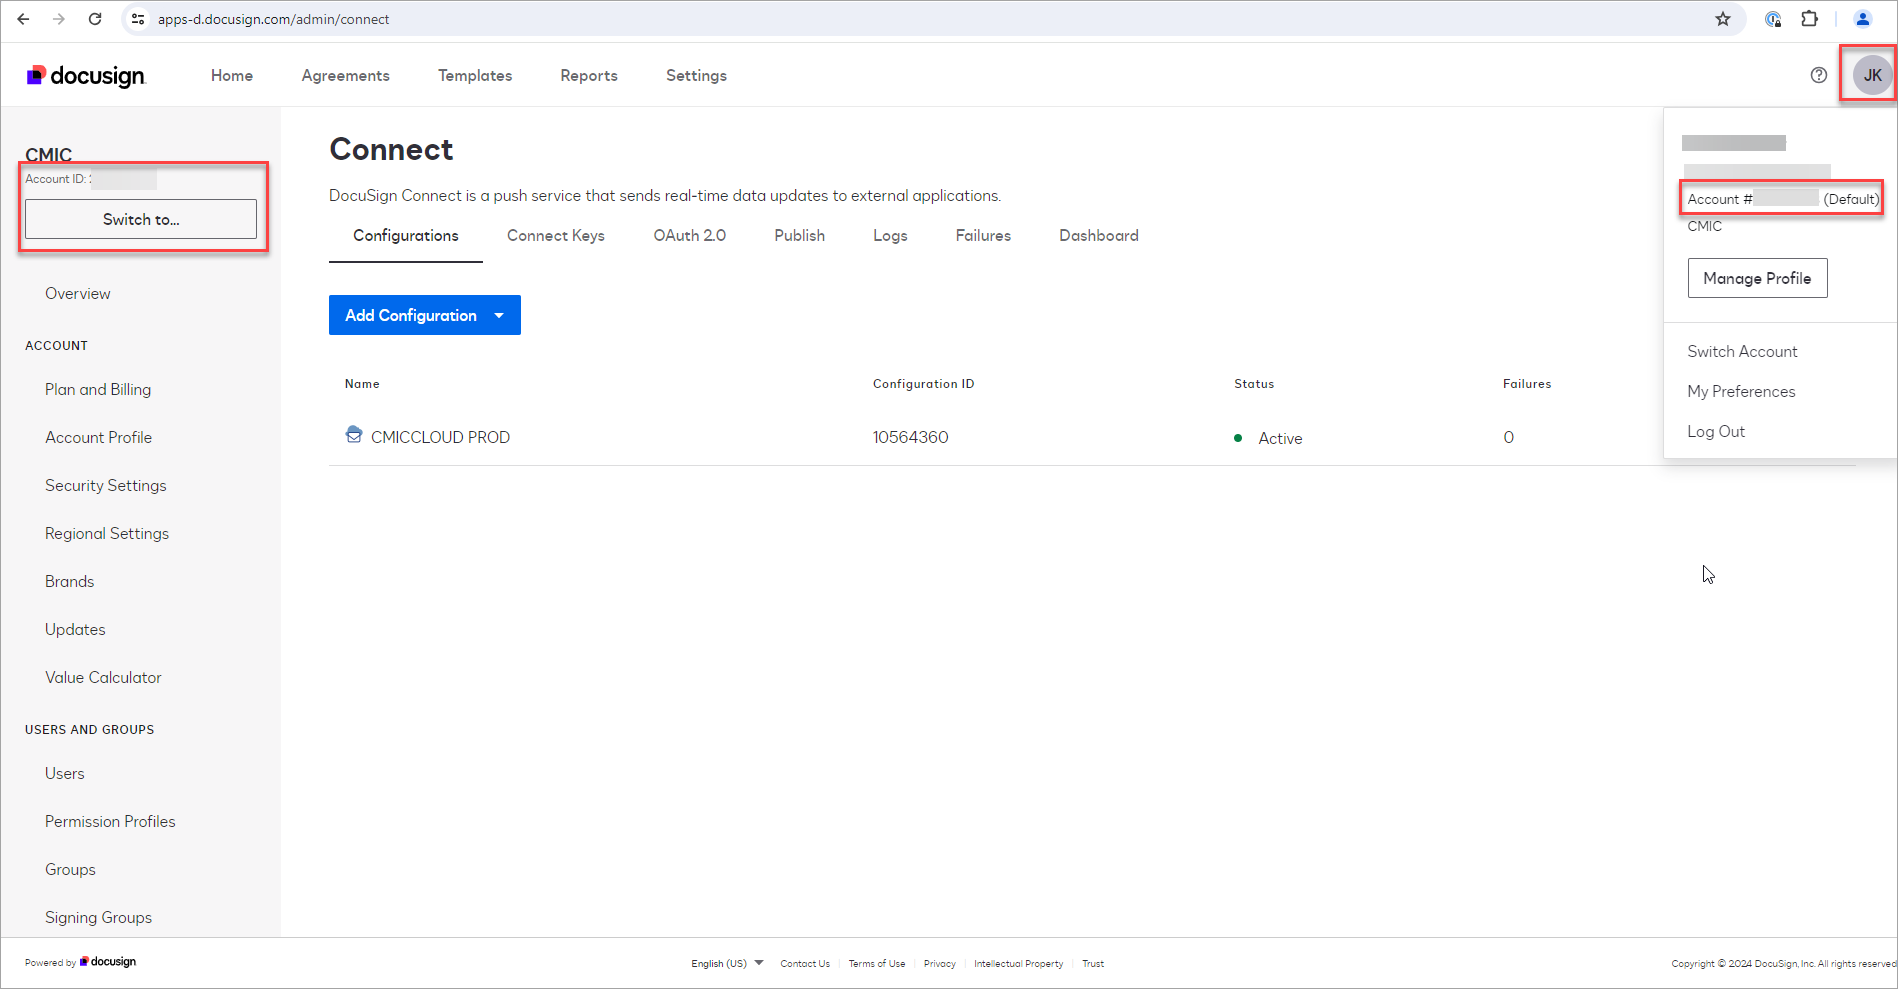
If you are unsure whether your organization has multiple accounts with DocuSign, check the left side on your Home page for your Account ID. This is the number for your account that can be found on the left side of the Home screen and also when you click on your User icon on the top-right corner of the screen, as shown in the screenshot below.
-
If there’s a [Switch to...] button under the Account ID field, you can click on it to check the other accounts you have.

-
Repeat the steps in DocuSign Integration - DocuSign Setup for each account listed in the Switch To pop-up window.